This unit describes:-
How to send IDOC data from SAP to salesforce Using Agent?
Introduction:- #
This document describe how to create an integration between SAP and salesforce using V3 adapter Using Agent .
When talking about inbound interface in this document the direction SAP to Salesforce . Interface will be called from sap to Salesforce. The development of an interface involved steps to be done in Salesforce . This document does not describe the work at SAP-Backend e.g. developing business logic in SAP-Backend with ABAP.
SKYVVA integrations connect Salesforce to your backend systems(SAP), whether by referencing through a call, or replicating the data into Salesforce. While SKYVVA provides a rich suite of pre-built integrations for SAP->Salesforce process integration, the SKYVVA Integration App gives you the ability to quickly and easily create your own integrations. The SAP integrations support S/4HANA in addition to SAP ECC, and we can also integrate with other systems via REST, SOAP, and OData web services.
Prerequisite
- SKYVVA package installed at SAP side
- SKYVVA package installed at Salesforce side
- check the skyvva service active or not in SAP using Tcode SICF (For More Details See in Chapter (4.a))
- Configure standard IDOC.
The development of an interface involved set of steps to be done in SAP and SALESFORCE
- Configuring the IDOC, port and partner Profile in SAP ( For More Details See in Chapter 5)
- Create the Integration
- Create SAP Connection Destination And Create Adapter (For More Details See in Chapter (4.b))
- Create Metadata Provider and Create Repository (For More Details See in Chapter 10)
- Create the message type using Import SAP Metadata ( For More Details See in Chapter 10)
- Creating an inbound interface:
- Configuration SAP IDOC in SALESFORCE (For More Details See in Chapter 7)
- Send IDOC data on create & change
- Configuring the IDOC, port and partner Profile in SAP
Use #
To send the outbound IDocs, you must first define a port and a partner profile. All interfaces can use the same port and the same partner profile.
In partner profile we define the system which are going to communicate between themselves and send data, here we give (SALESFORCE) as logical name which are going to be partners in data communication. We set it using WE20.
Port is a medium through which we send the data it connect one system with the system in other end its unique, depend on the scenario we use diff ports, according to our scenario we will have Port type (ABAP-PI) .we select the ports we set port using WE21. Without defining a port we can’t communicate with other system it’s the linker b/w the 2 system
Procedure #
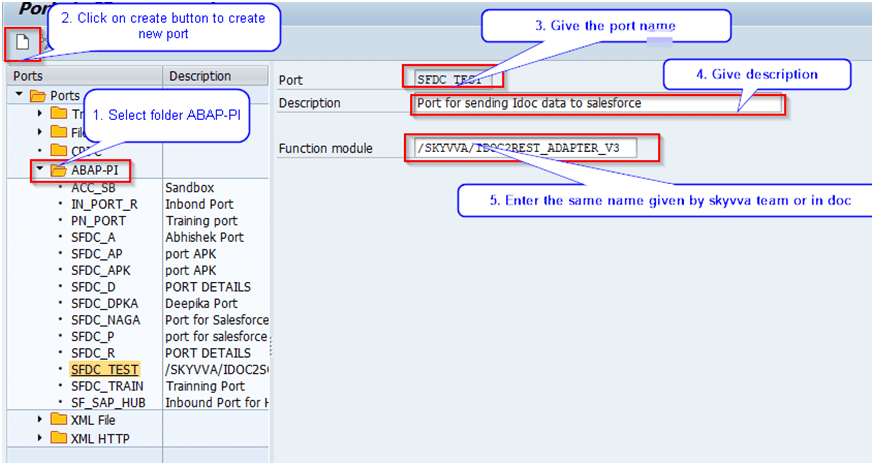
For the port definition use (WE21), you can use the port type (ABAP-PI). processing in the SAP system is started with a synchronous RFC and the Function module Name will be /SKYVVA/IDOC2REST_ADAPTER_V3.
Below is the WE21 screenshots
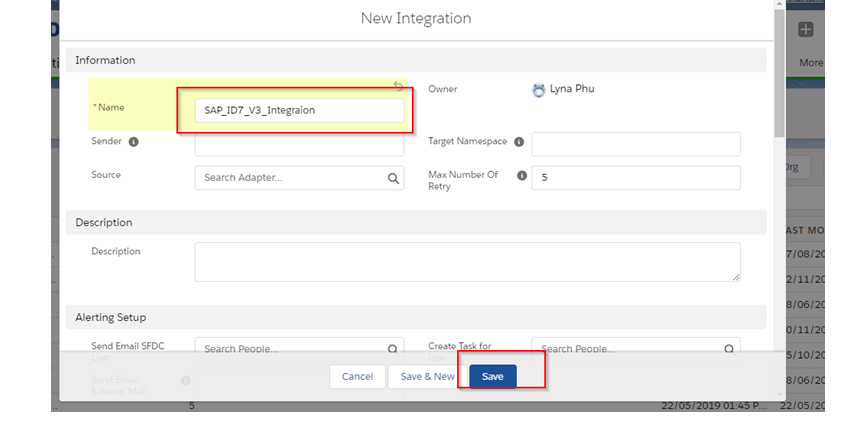
2. Create the Integration
Goto the integration tab and Create the Integration in salesforce as below
3. Create SAP Connection Destination And Create Adapter
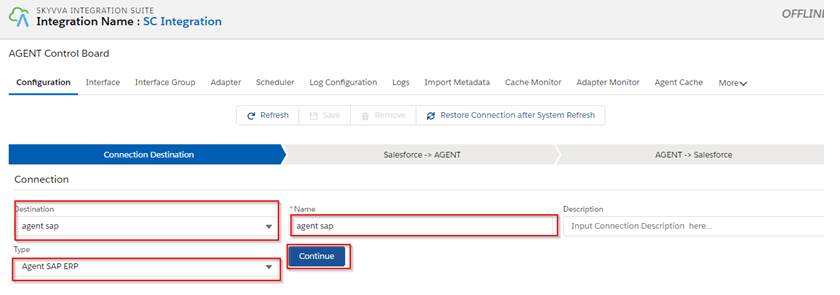
a. Create Connection Destination
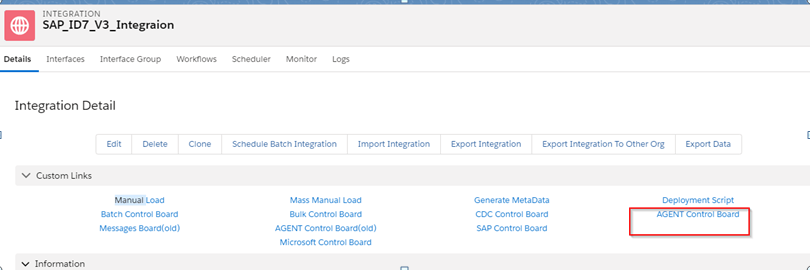
Go to Integration details tab and then select AGENT Control Board
Provide the details for connection details as shown below and click on continue button
Note : Always select Type: “AGENT SAP ERP”
Here we need to provide the agent connection details as below
Host Url: http://xxxx.com
Port: 16xxx
Username: xxxx
Password: ******
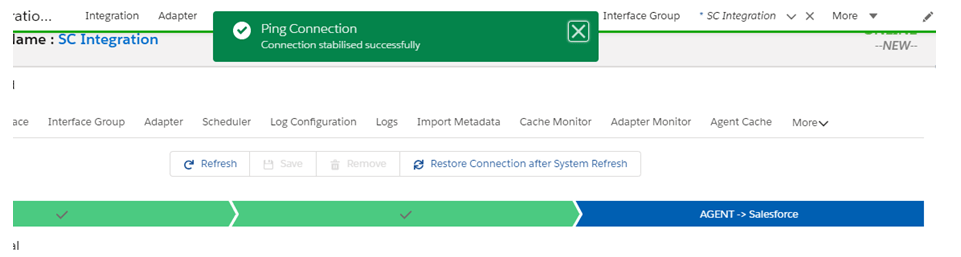
Provide the details of Agent as shown 
Once we provide the details we need to ping the agent Connection. Then we can see the pop-up as below
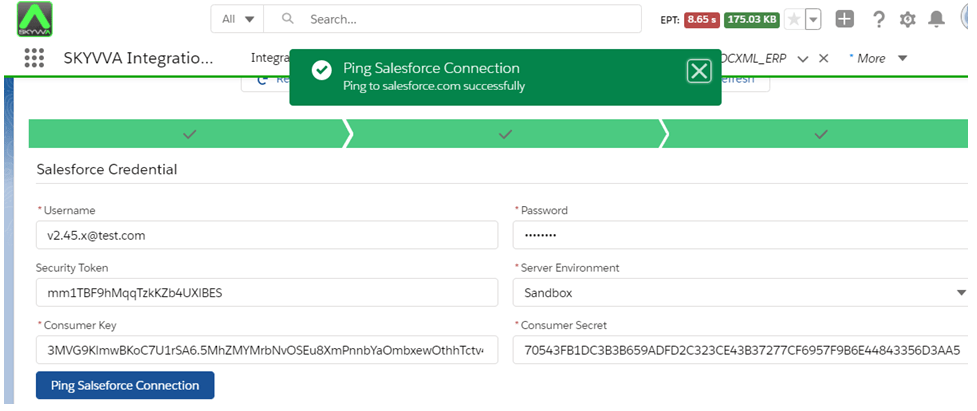
Now we have to provide the salesforce details as shown below.
Consumer Key and Consumer Secret we can get from the connected App.

Click on Ping Connection of Salesforce to check if its connected successfully.
b. Create Adapter
To create adapter goto integration->agent control board then select adapter tab and click on new button and fill the details as
below.
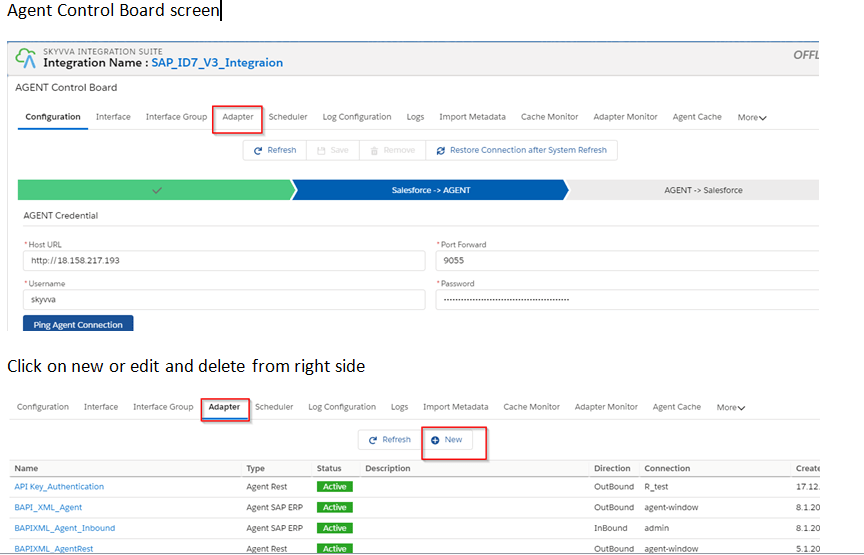
Here we need to provide the sap details as below
Name : Any meaning full name
Type : Always “Agent SAP ERP” for agent
Host Url : http://xxxx.com
Direction : Inbound/outbound
Port : 16xxx (sap port)
Username : xxxx(sap user id)
Password : ******(sap user id pass)
Authentication : always (basic)
SAPID : ID7 (Sap system id )
Client : (sap client )
Is Https : select if using
Object format : Idoc, BAPI, Table
Logical name : any unique name
Connection destination : select one create for agent
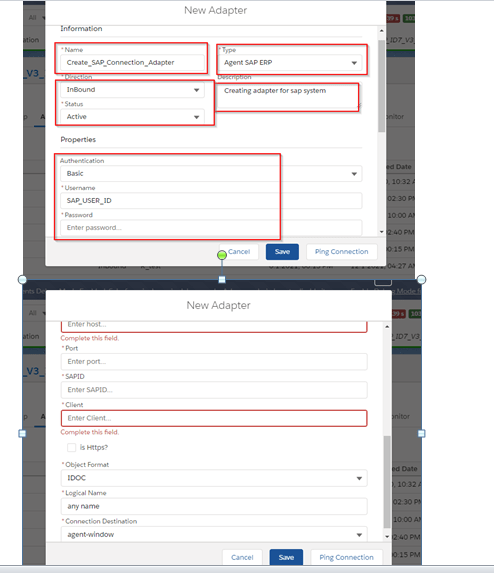
Click on ping connection for test adapter is working or not
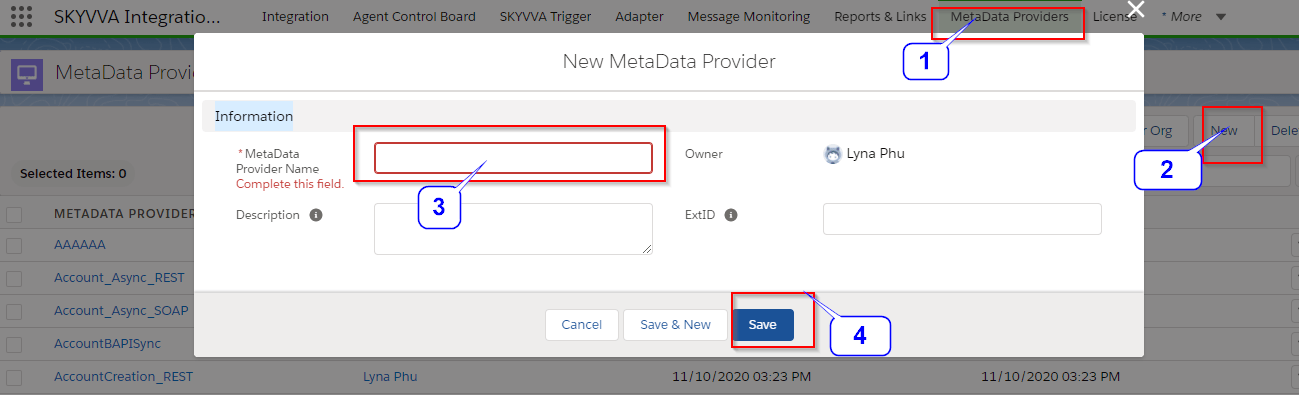
4. Create Metadata Provider and Create Repository
To create metadata provider click on tab metadata provider then click on New button and give the metadata name then Save as shown below screenshot
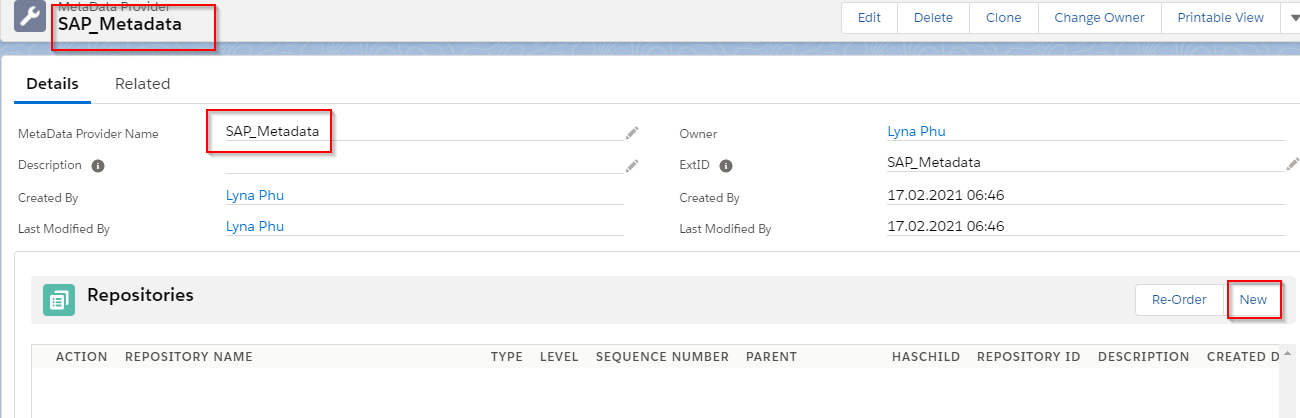
After save metadata below screen will come, Now click on New button to create repositories as shown below
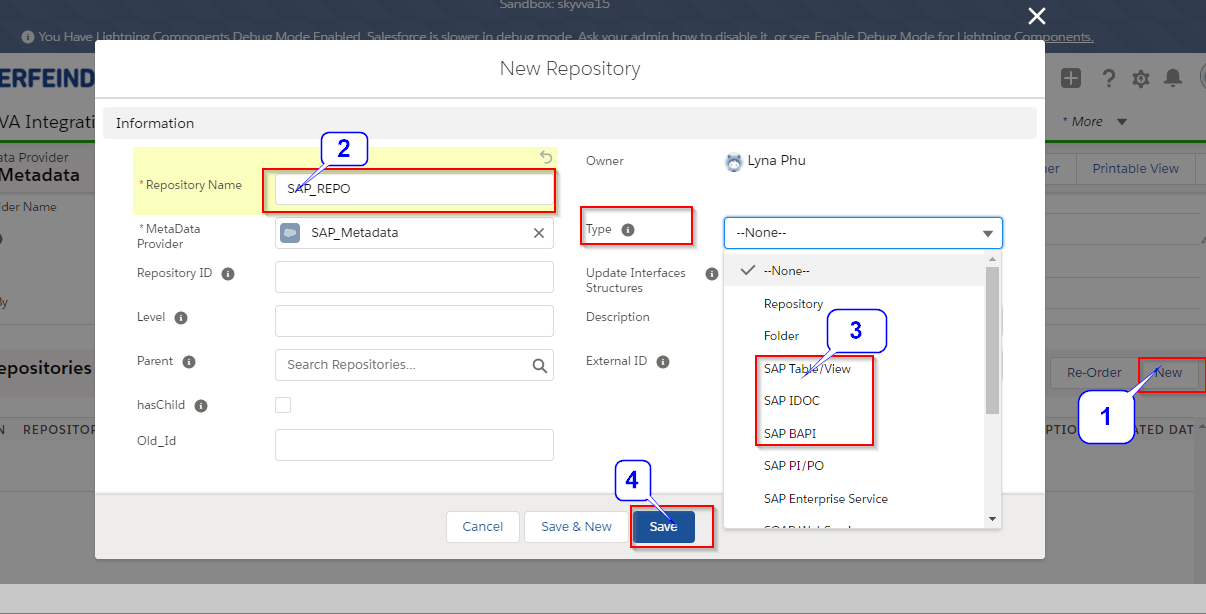
Give the repository name and select object format type :(”SAP IDOC,SAP BAPI, SAP Table/view) and save as shown below
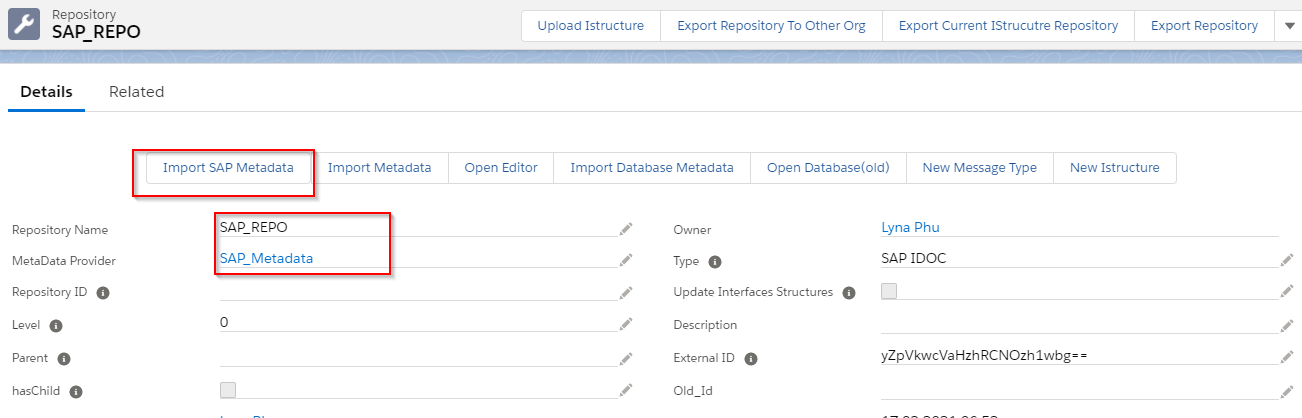
After save the Repository below screen will come , now click on button “Import SAP metadata”
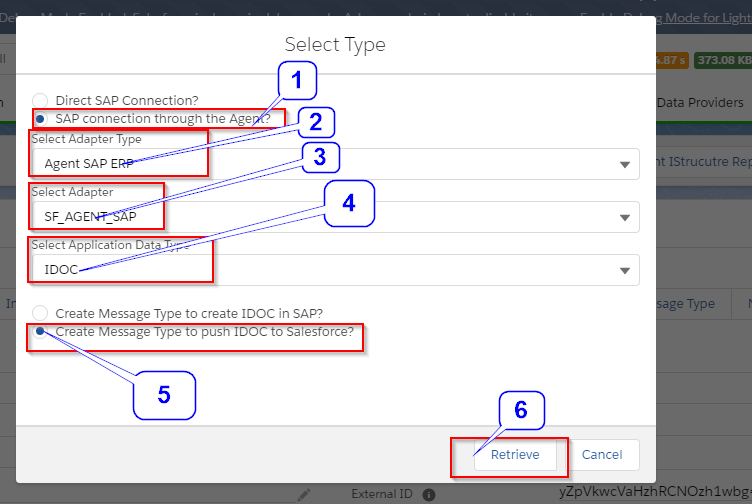
Select the below details from list as per your requirement then click on retrieve button as shown below
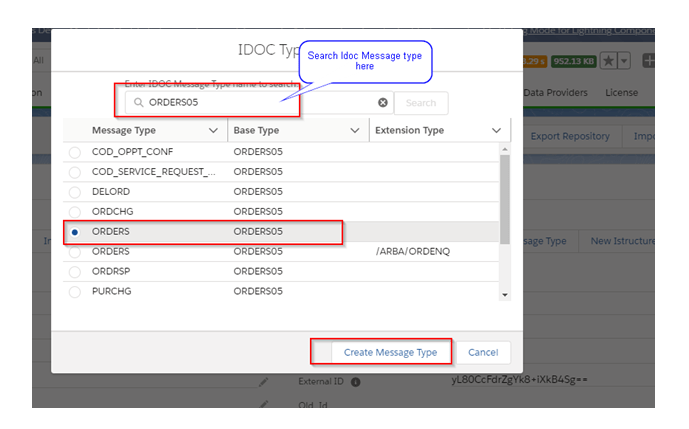
It will display all the object from sap which you have selected above, now you can search you object name here as shown below
5. Create the message type using Import SAP Metadata
Select your object name from list and click on create message type .
Once you click on Create Message Type it will create message type in salesforce as shown below
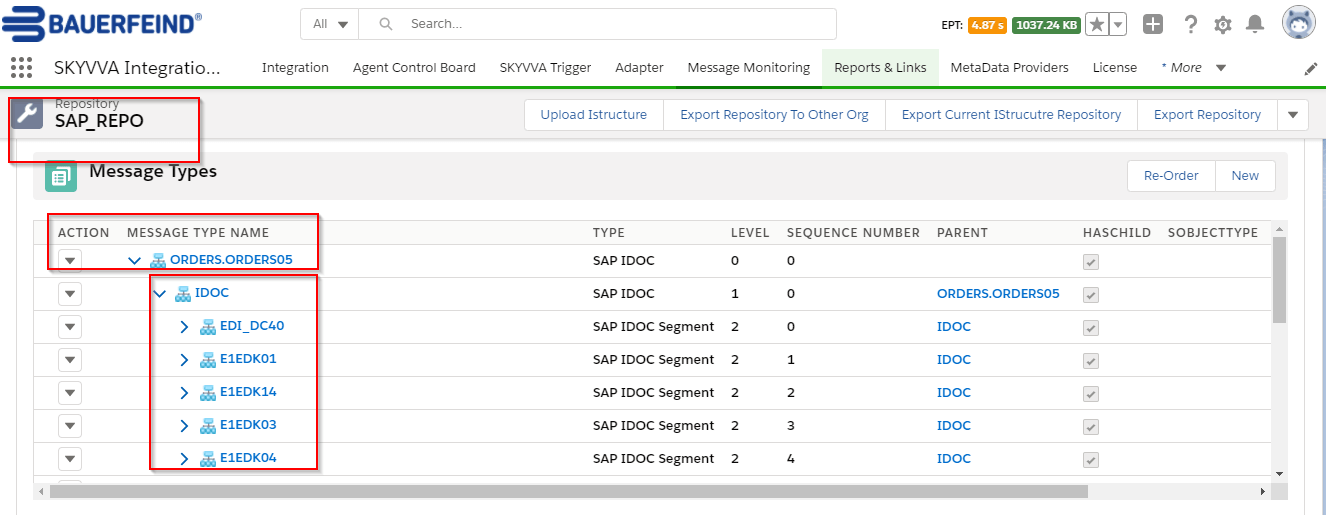
Now use this message type in Interface .
6.Creating an inbound interface:
Provide the Name, sObject type, Description, Processing mode, Status, Metadata provider, Repository, Message type, adapter as shown in the screenshots below
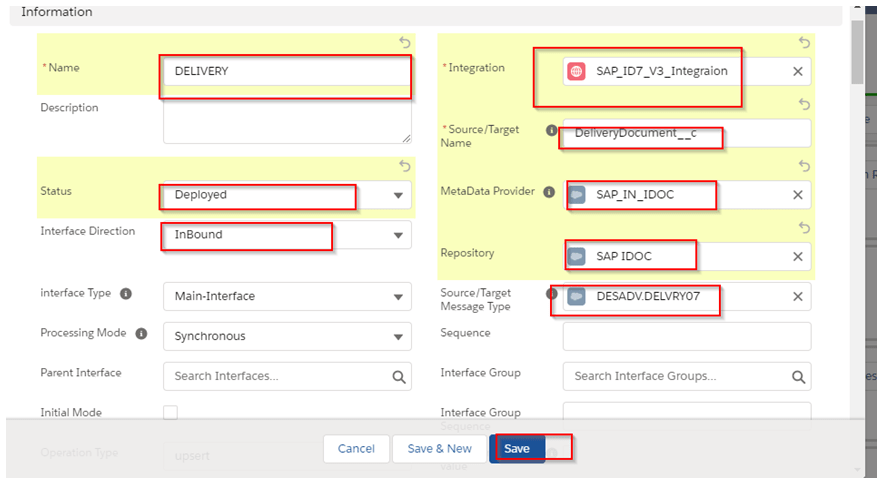
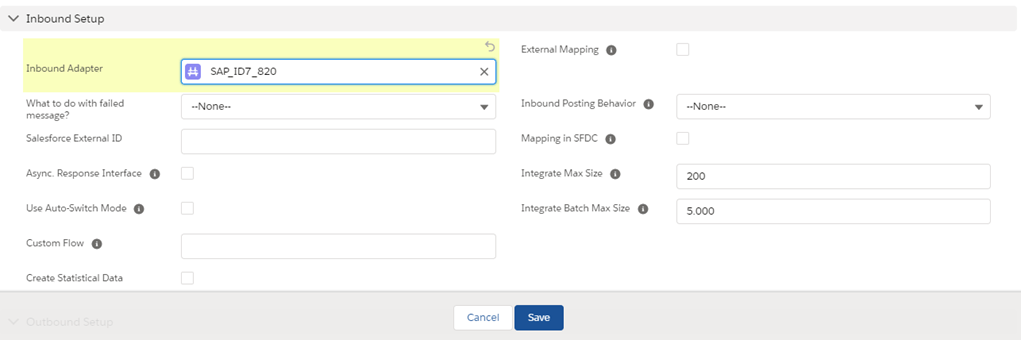
Save the interface once provide all the necessary details. Now again open the interface and assign inbound adapter as below
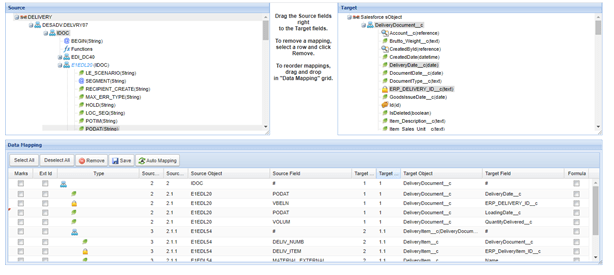
For inbound interface we have to do mapping, click on open mapping in interface and do mapping as shown below
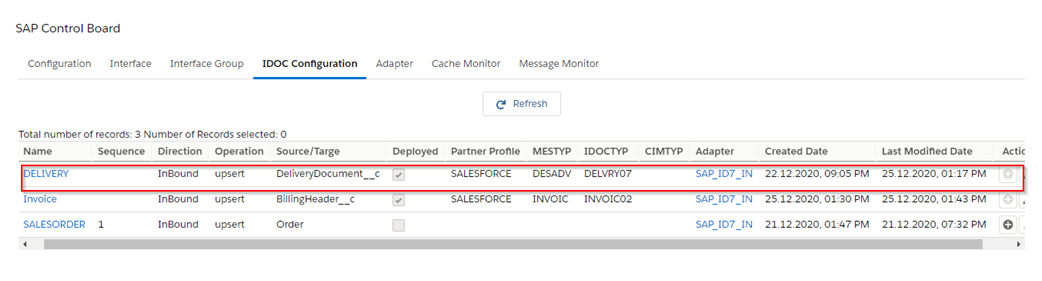
7. Configuration SAP IDOC in SALESFORCE
IDOC Configuration in SALESFORCE using AGENT
Now Go to Integration details tab and then select AGENT Control Board
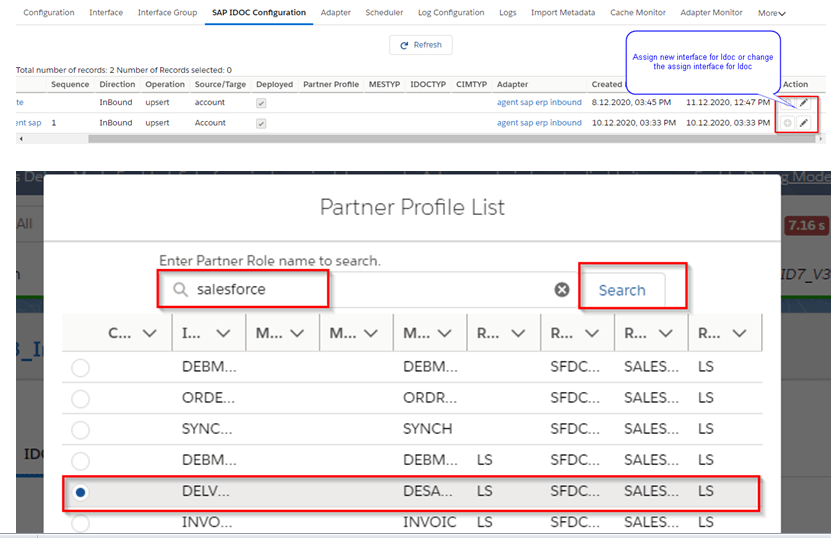
Select “AGENT SAP ERP” Destination created previously then click on SAP IDOC Configuration Tab as shown below.

Now select the interface you have created for IDOC and configure IDOC routing details as shown below

Now you can configure IDOC routing details as shown below
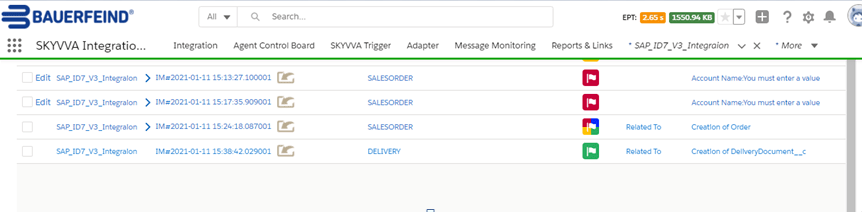
Once the IDOC assignment is done now you can go to sap create idoc and its send to salesforce . we can see message in salesforce massage monitor
8. Send IDOC data on create & change
Once the IDOC assignment is done now you can go to sap create idoc and its send to salesforce . we can see message in salesforce massage monitor