
This document describes how to create an outbound interface with SAP-PO java single stack. When talking about the outbound interface in this document the direction Salesforce to SAP is meant e.g. Salesforce Interface will be called from SAP-PO. The development of an outbound interface involves steps to be done in Salesforce and in PO. This document does not describe the work at SAP-Backend e.g. developing business logic in SAP-Backend with ABAP.
- SKYVVA software landscape and building blocks
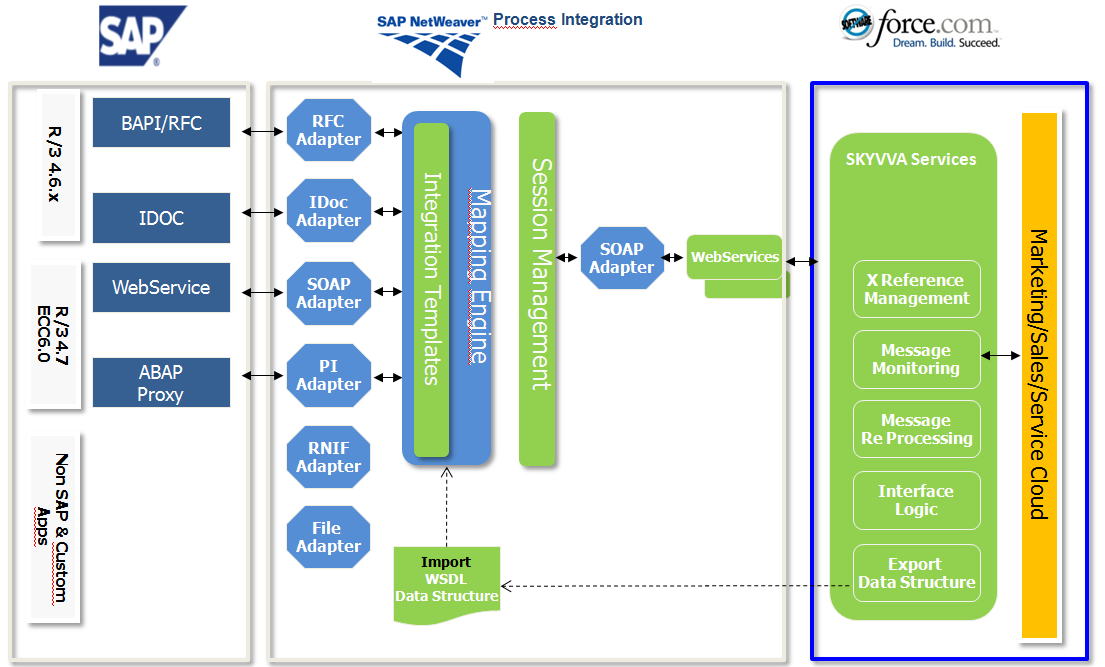
SKYVVA Integration Suite enables the integration between Salesforce and SAP-Backend over SAP-PO with less effort and without programming either in SAP or in Salesforce. It based on the generation and customized the approach to reduce effort and to accelerate the development of interfaces between those systems.
In order to be able to provide such a toolset and framework some component (green) has been developed by Skyvva and has to be deployed on Salesforce and SAP-PO of the customer. On the SAP-Backend e.g. SAP ECC 6.0 there is no software installation needed.
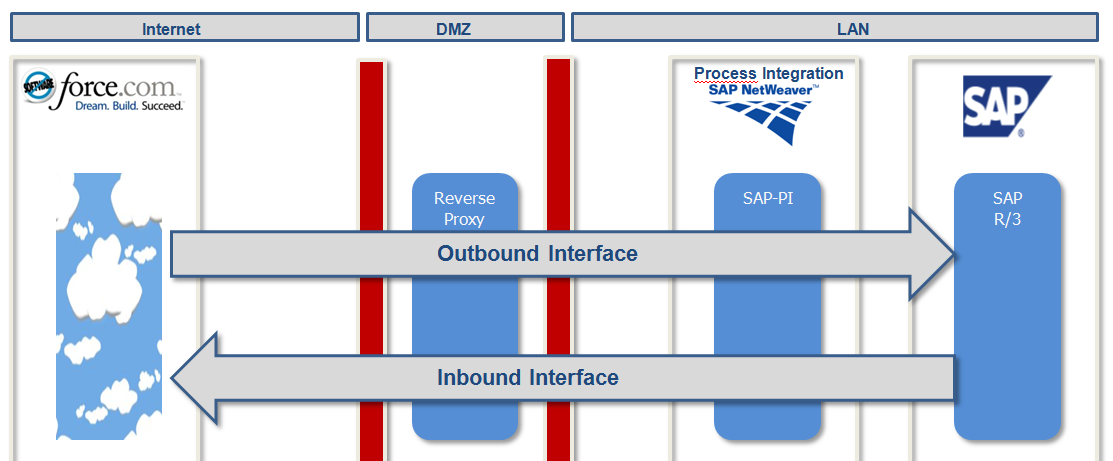
When talking about the direction we have to clearly define the perspective from which platform we are looking for. Since we are coupling two platforms Salesforce and SAP together we have to clearly define from which view we are referencing when talking about direction outbound or inbound.
- Outbound and Inbound Interface
The term outbound is used when data is sent out from Salesforce to SAP. Therefore we call interfaces for sending data out of Salesforce to SAP “Outbound Interface”. For the other direction, we call interfaces as “Inbound Interface” when data is sent from SAP to Salesforce. So the reference point is set to Salesforce.
Prerequisite for creating an inbound interface
- The Skyvva solution framework has to be installed into your Salesforce instance.
- An integration instance has been created
- SAP-PO has been installed and set up correctly
- Your workstation needs an internet browser IE or Firefox of the new release.
You start developing outbound interface when you want to send data from Salesforce over PO to SAP-Backend. Of course, you can send data from Salesforce to anywhere not just to SAP-PO. But the focus of this document is sending data from Salesforce over SAP-PO to SAP-Backend e.g. an SAP ECC 6.0.
- Creating outbound Interface
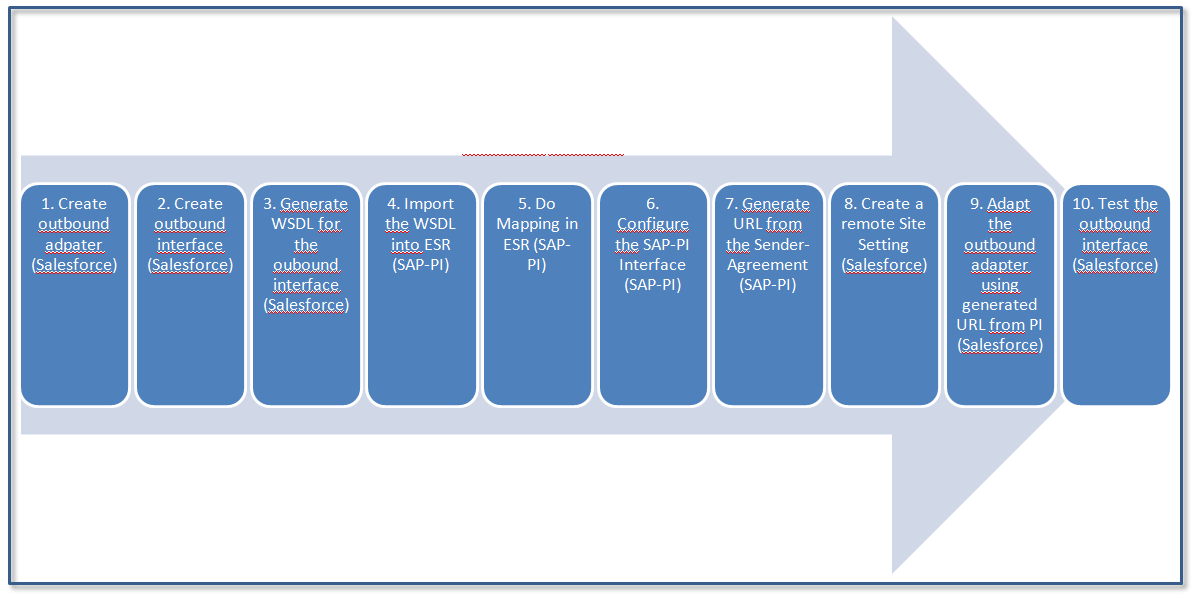
The figure below depicts which steps to be followed to create an outbound interface with SAP PI/PO.
- Creating an outbound adapter in Salesforce.
To Create an Adapter in Salesforce. Go to Adapter tab as shown below.

In the Adapter page. Click on New to create an adapter.

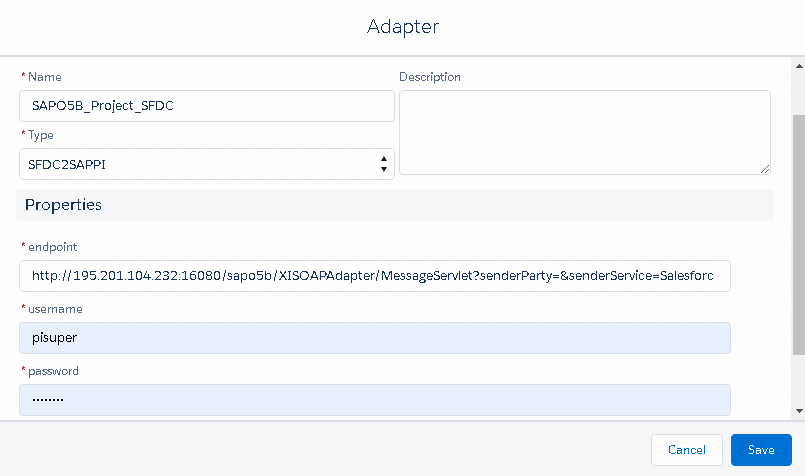
Now specify the Name, description and select the type as SFDC2SAPPI Adapter.
Here in the properties tab specify the endpoint of the receiver system for example here we are sending data to SAP PO. So here we have to specify the endpoint of SAP PO and the username and the password of the PO system as shown below.
Then click on save to create the adapter.
- Creating an Outbound synchronous interface
Here we have to create two interfaces one for Request and other for Response as shown below.
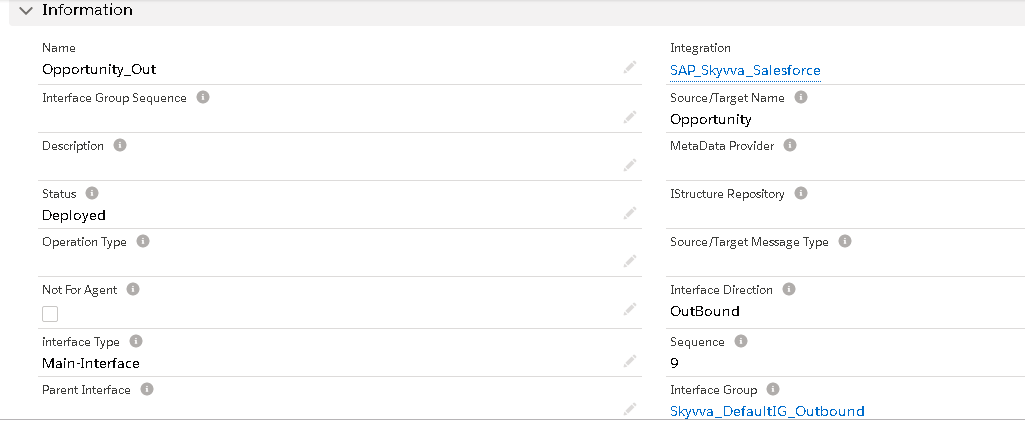
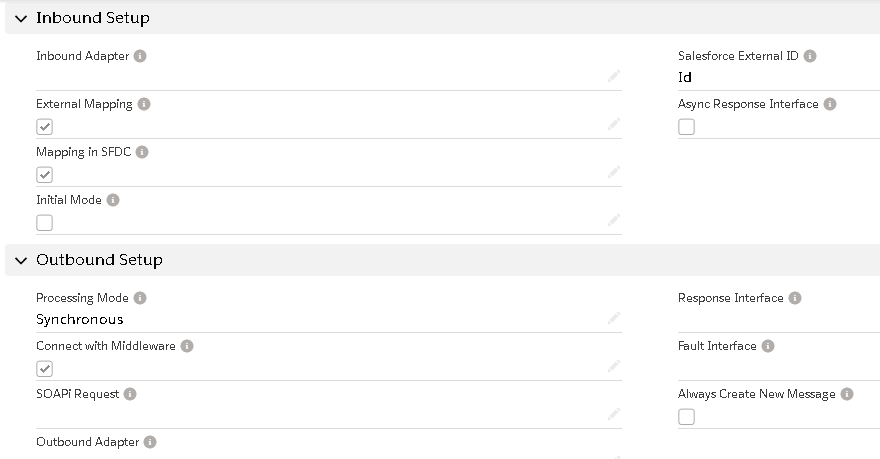
Create Outbound interface as “Opportunity_Out” and provide the necessary details as shown in detail below.
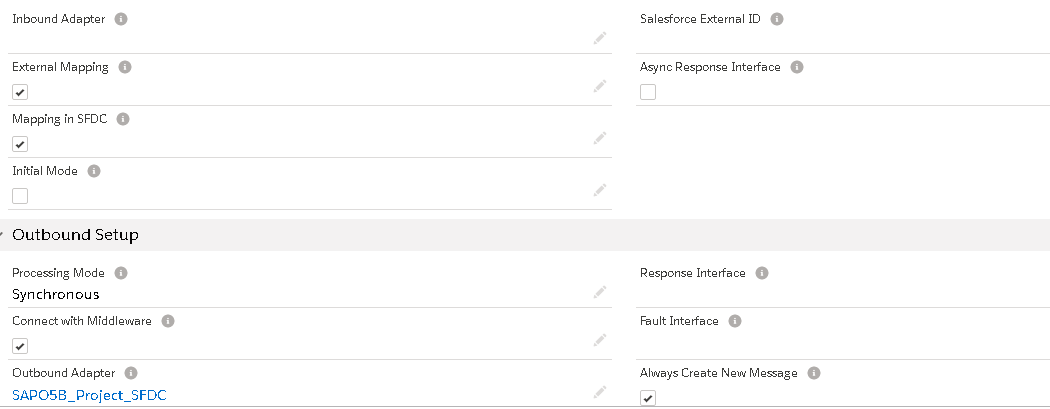
Specify the Invoke Inbound interface as shown below.

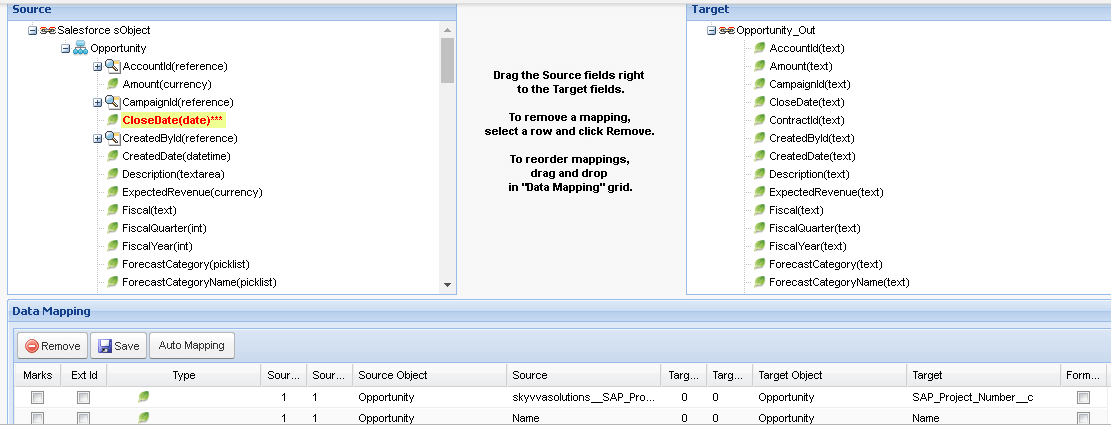
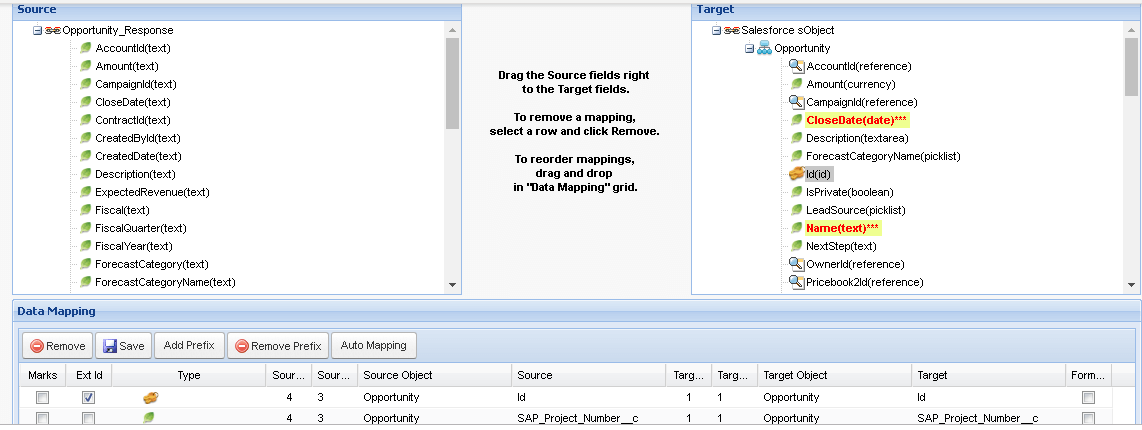
Do the mapping as shown below.
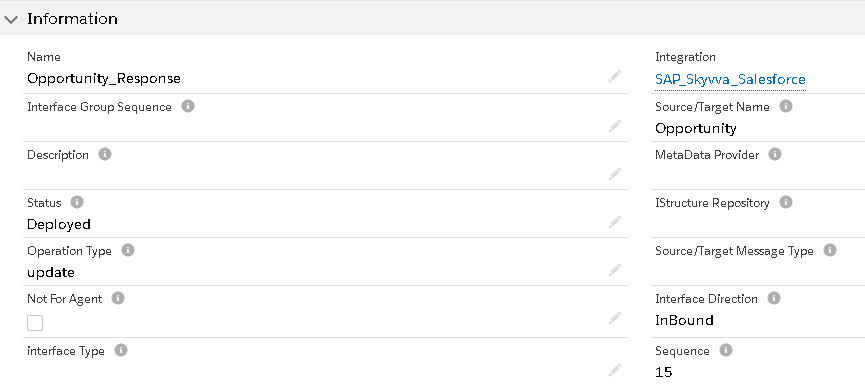
Create inbound interface as “Opportunity_Response” and provide the necessary details as shown in detail below.
Do the mapping as shown in screenshot below.
Download the WSDL’s and import it into SAP PO for mapping.
In the Response WSDL.
We need to add the SKYVVA system fields. These fields will not come automatically in the WSDL. We have to add it manually like below.
After added the field in WSDL. We can see the field in ESR.
In Skyvva we have a feature where we can set the comment and the status of the request message.
- Callout error where there is no application response e.g. internal server error. In this case, we cannot create a response message and thus we cannot put a text to the comment field of the response message.
- Application error where we get a response back. Here we have two subcases e.g.
- application error -> SKYVVA__Response_Code = 500, SKYVVA__Message = ‘This is an application error text’.
- application success -> SKYVVA__Response_Code = 200, SKYVVA__Message = ‘This is an application success text’.
We have to check the new field SKYVVA__Response_Code of the message payload and decide what to do. If the value of the field SKYVVA__Response_Code = 500 then it means an application error and we write the content of the field SKYVVA__Message to the comment field and set the status of the response message to ‘Failed’. If the value of the field SKYVVA__Response_Code = 200 then it means an application success and we write the content of the field SKYVVA__Message to the comment field and set the status of the response message to ‘Completed’. When the response message status is set to ‘Failed’ then, of course, the status of the request message is set to ‘Failed’ too. The comment of the request message doesn’t need to set or changed. Accordingly, the status of the request message is set to ‘Completed’ in case the response is successful. Both messages e.g. the request and response are linked together as a couple.
So, for this case, we need a new field ‘SKYVVA__Response_Code’ and can use in combination with the existing field ‘SKYVVA__Message’. These fields have to be generated into the WSDL and open API file. The client will fill in these two fields in its response to the synchronous callout. Here is an example of the response body:
- Designing the objects in ESR
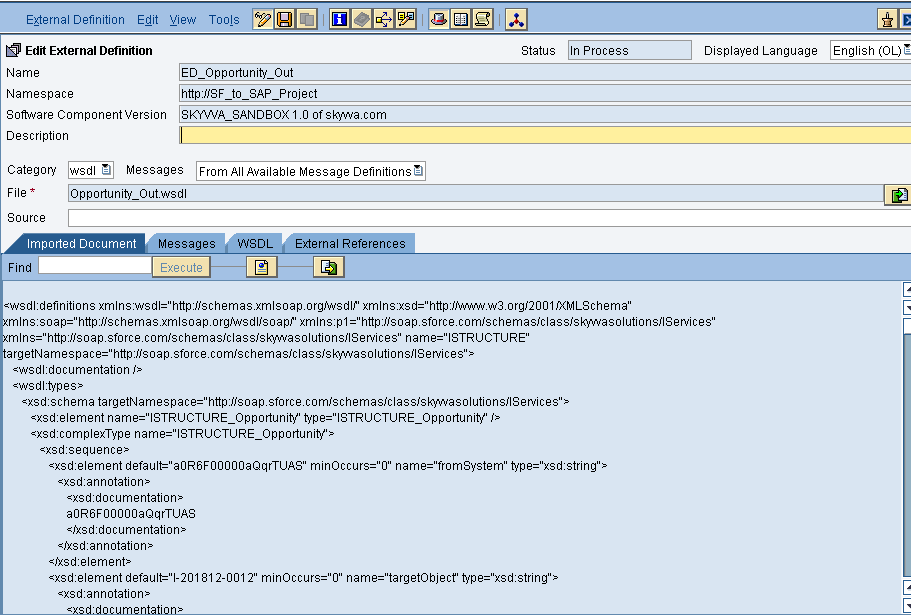
Import the Request WSDL as external definition into ESR and save activate it
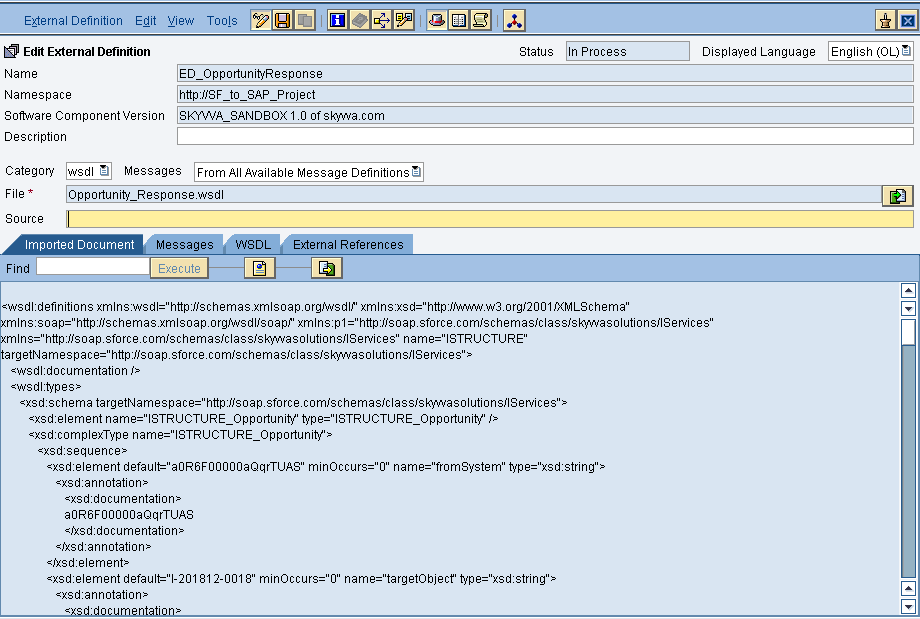
Import the response interface WSDL as external definition, save and activate it
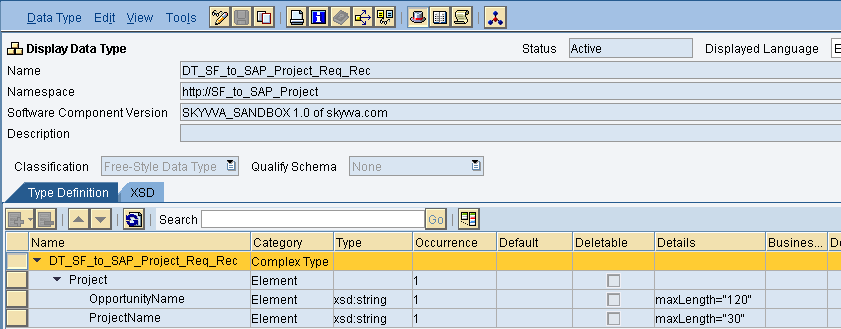
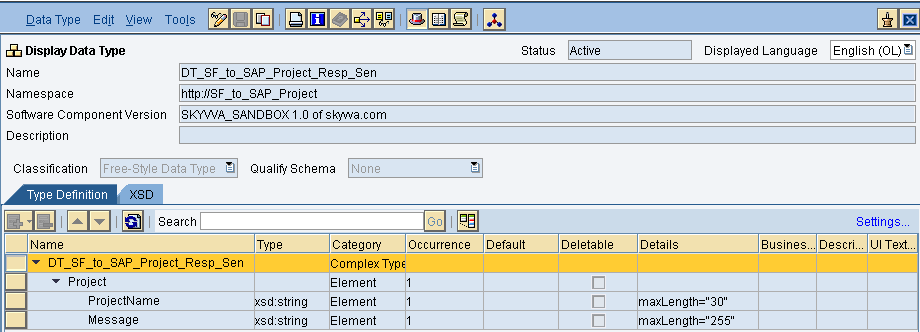
Create the request and response data types as shown below.
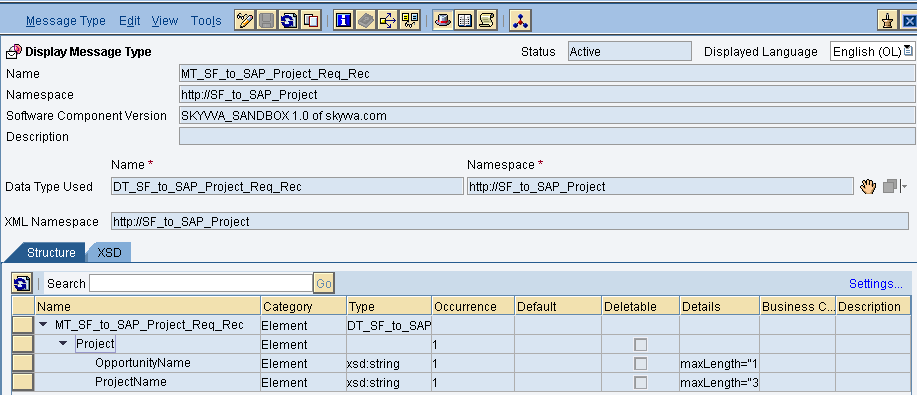
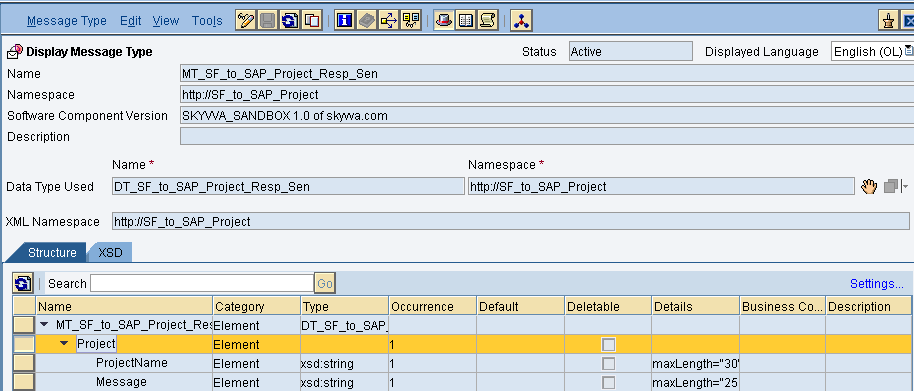
Create request and response message types as shown below
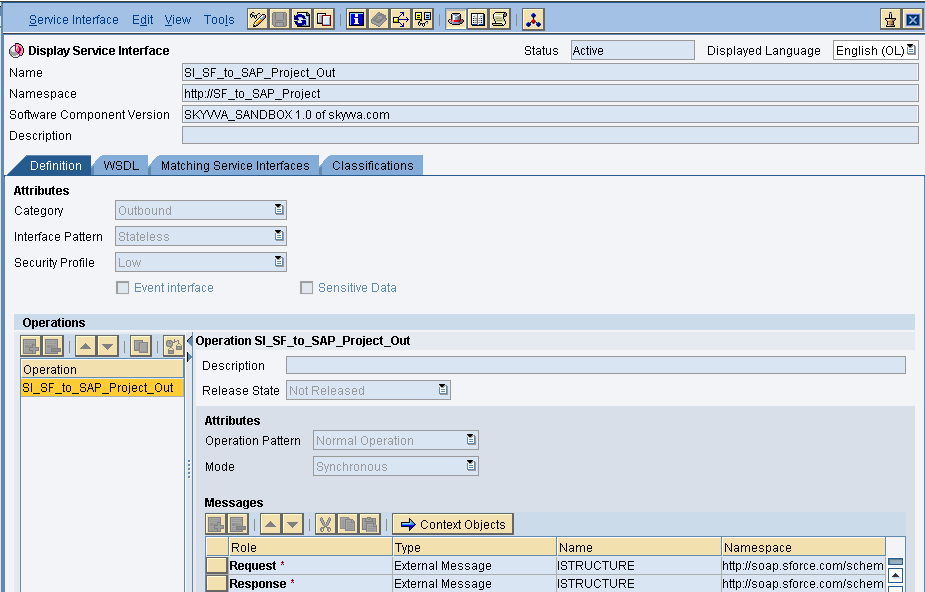
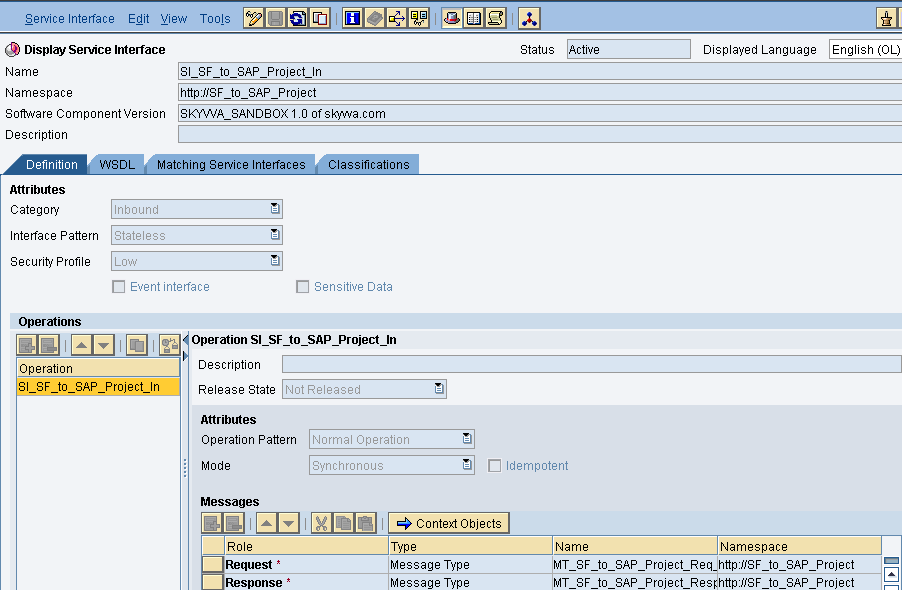
Create inbound and outbound service interfaces as shown below.
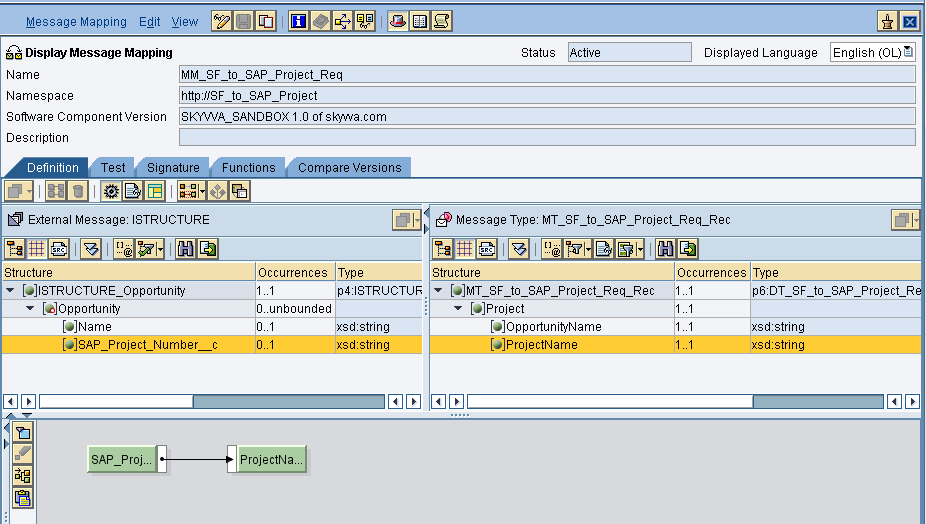
Create request and response message mapping as shown below
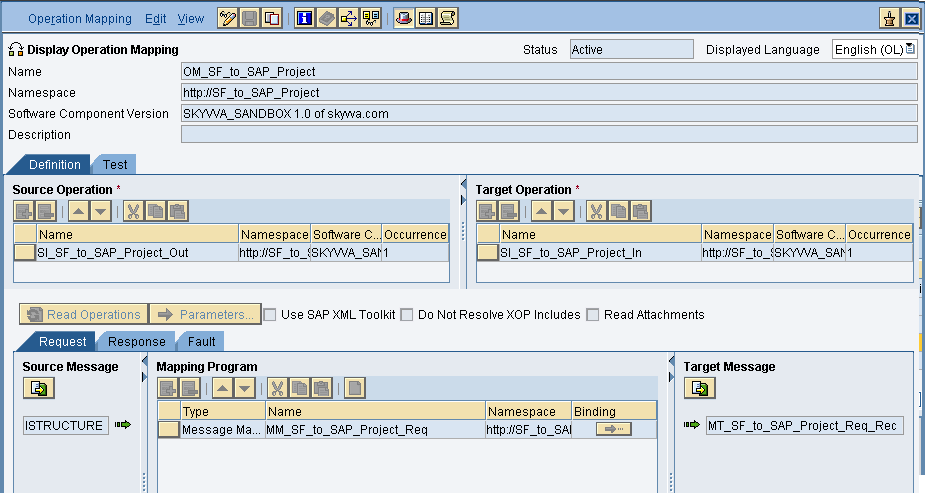
Create Operation mapping as shown below
Creation of Integrated Configuration Objects
After creating the objects in ESR. We have to configure these objects in the integration directory.
First, we have to create Configuration Scenario.
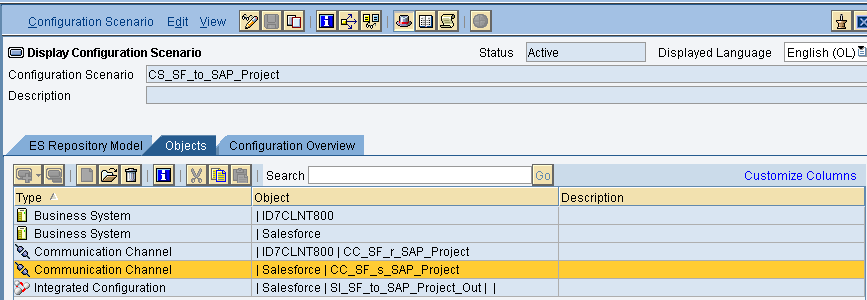
An Integration scenario has the following objects.
- Business System for Sender and Receiver
- Sender and Receiver Communication channel
- Integrated Configuration
These are the objects we should create.
We have to define our business system e.g. for the SAP-Backend. For Salesforce you can use our proposal “Salesforce” as the business system. We have to import these business systems from SLD.
Configuring the Sender SOAP communication channel
Create sender communication channel as shown below.
Since we are using Salesforce as a source. So, here we are using SOAP in the sender channel.
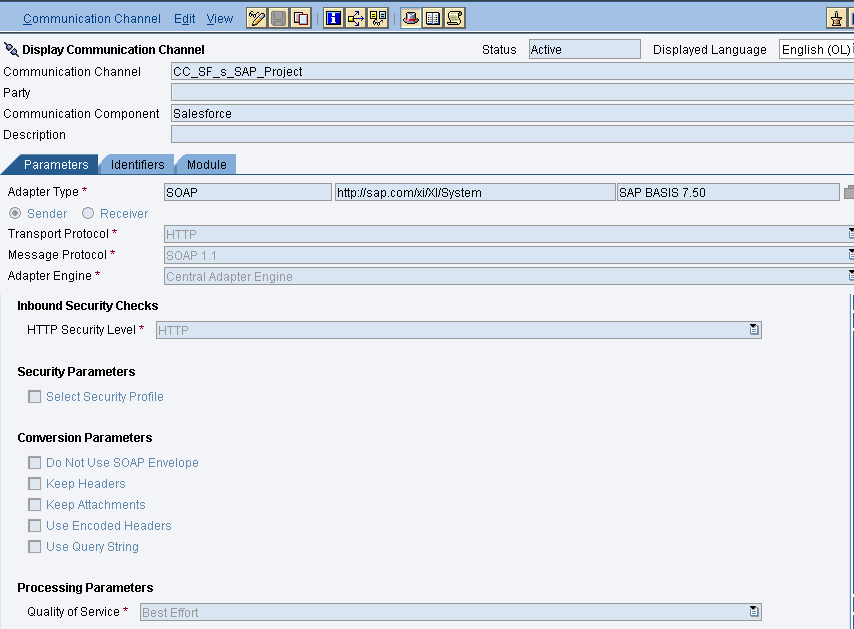
Provide the necessary details as shown and then save and activate the channel.
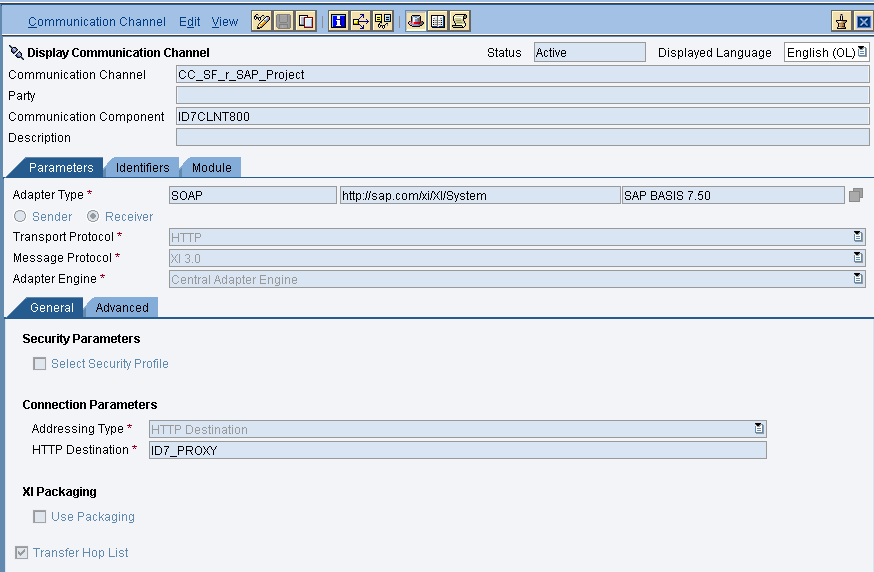
- Configuring the SOAP receiver channel
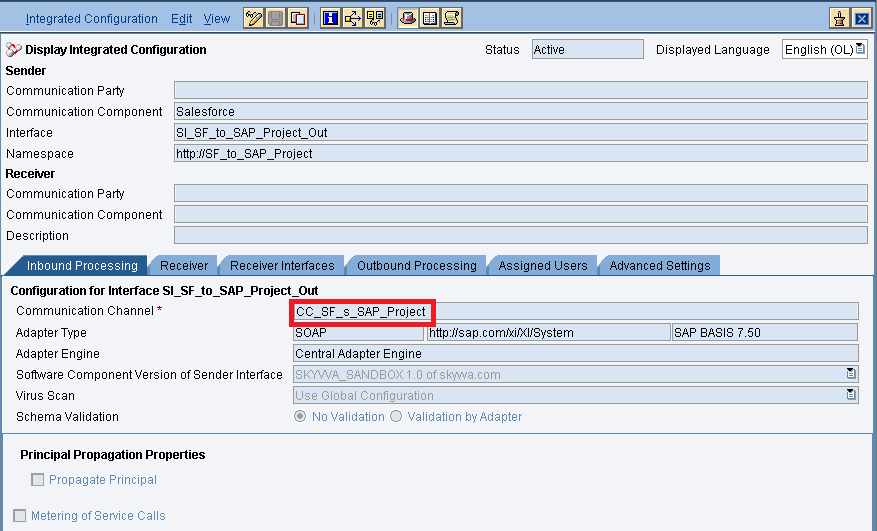
Integrated Configuration
Create integrated configuration objects as shown below.
Enter the required data e.g. the Communication Component, Interface and Namespace and then click on create button to create an ICO.
Now go through the tabs from left to right to configure the relevant objects. In this first tab “Inbound Processing” here we have to specify the sender communication channel.
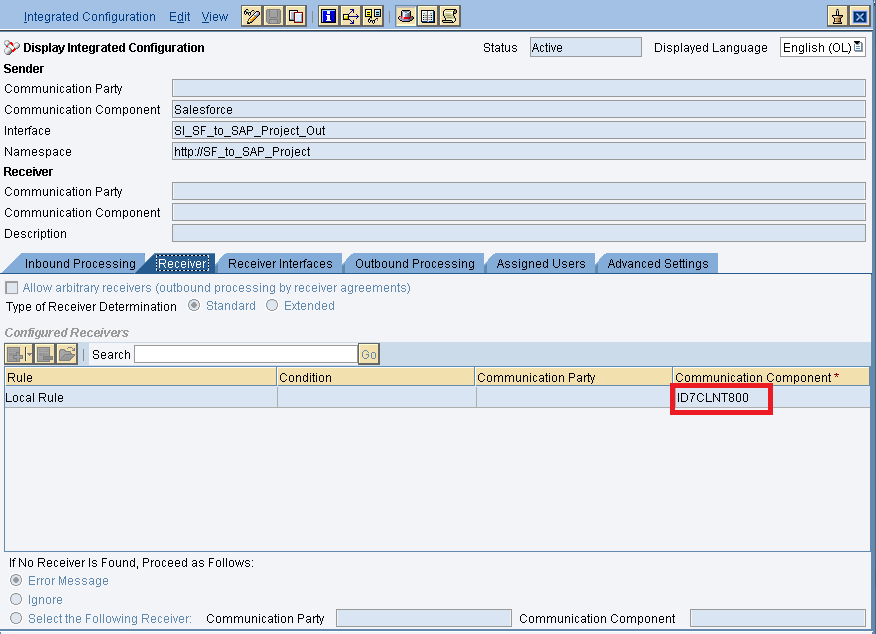
Here in the “Receiver” tab, we have to specify the receiver business system.
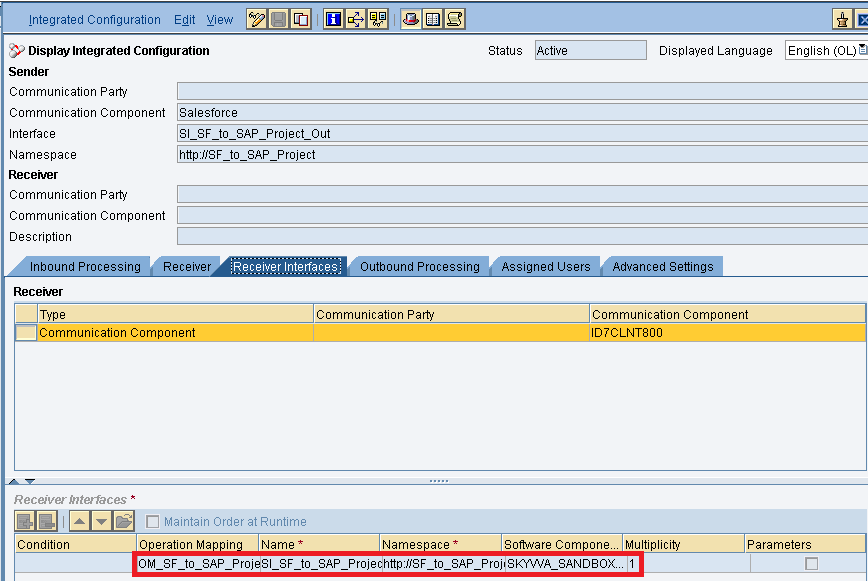
In Receiver interfaces tab specify the operation mapping.
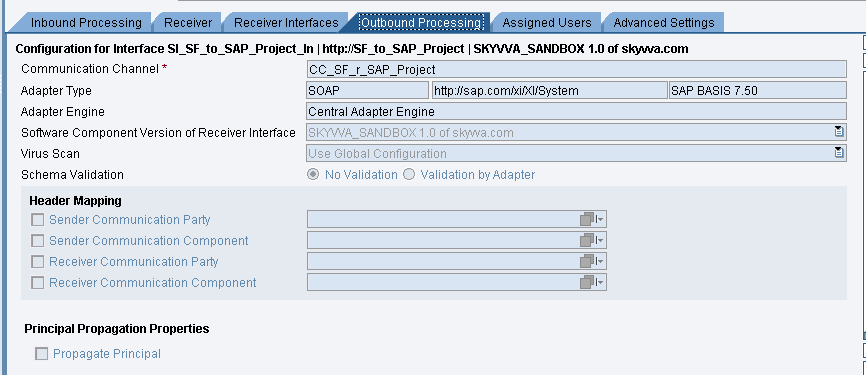
In the “outbound processing” tab, we have to specify the receiver channel.
Test the Outbound Interface.
Triggering the data from the Source system using the following Apex Code.
skyvvasolutions.CallOutControl c=new skyvvasolutions.CallOutControl();
c.returnXml=true;
c.returnListRecord=true;
c.isCreateMessage=true;
c.actionDoIntegrate=true;
String[] ids=new String[]{‘0066F000010hsgNQAQ’};
skyvvasolutions.CallOutResponse r=skyvvasolutions.Iservices.invokeCallout2(‘Skyvva_SAP_Salesforce’,’Opportunity_Out’,ids,’SYNC’, c);
System.debug(‘>>>XML: ‘+r.payloadXML);
Check the message on the message board. Message sent successfully to SAP PO.


