There are two types of interface group which are the Business related logical group and the Technical group. This section will be explained in detail what these interface group types are.
Business-related logical group #
This group is business-related since the contact can only be posted after the account has been posted ( when you put the interface account and contact with one group). It’s all about an order of business process. To keep this order you can define the group and set the property to “EOIO”. When you set this way the account will be posted before the contact interface.
Technical group #
The technical group is to increase the performance for the posting of data. You need to create this group to group the interfaces which are not related to business and these interfaces are quite small. Without wasting time and resources, you can send these interfaces once at the same time by setting this group to “EO”.
Creating the interface group #
To create a new interface group, let us look at some steps to follow:
- Open “Integration Admin” and “Interface Group” tabs
- Click on “New Interface Group” to create a new one
- Enter a name for an interface group and then select the integration where the interface group belongs to.
- Choose the type of the interface group
- Select the priority for the interface group then click Save
- Click on “Add Interfaces” to add an interface to the group

- Select the interface you want to add to this new interface group
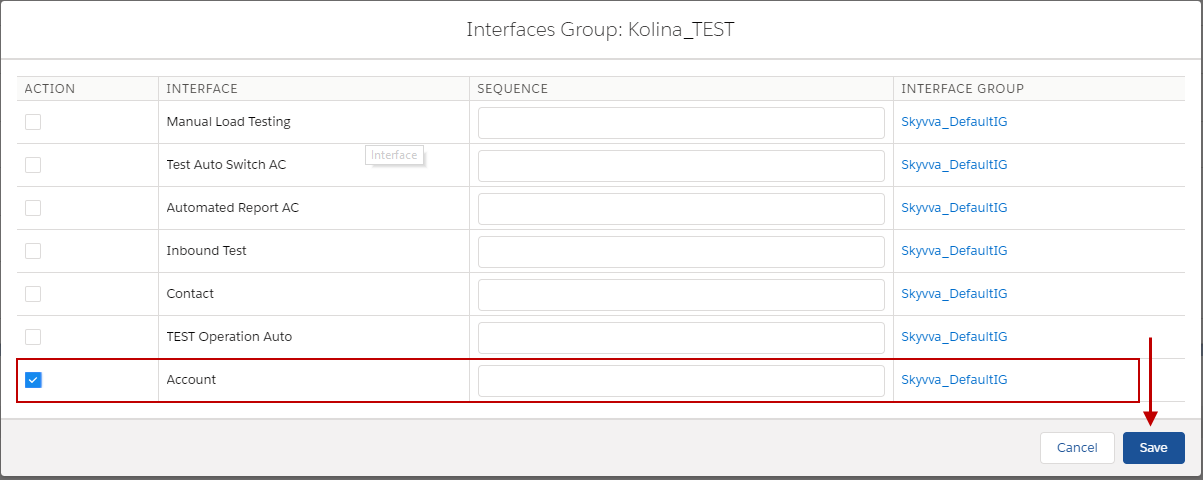
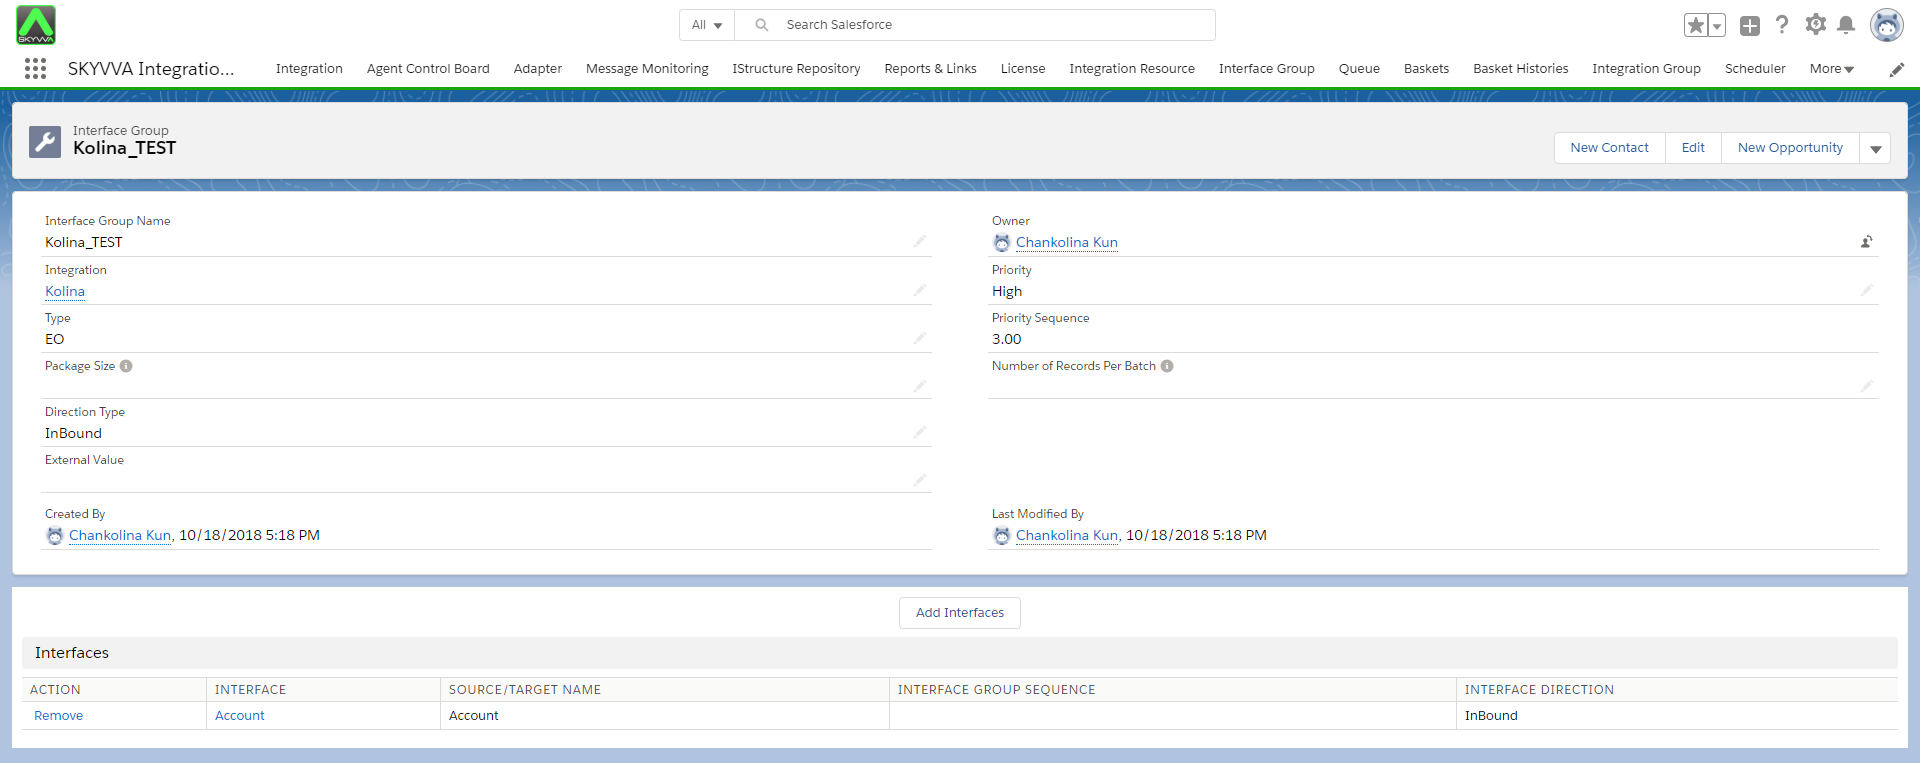
- Here is the result of creating an interface group.