
Introduction #
Base 64 String is a group of binary-to-text encoding schemes representing binary data in an ASCII string format by translating into a radix-64 representation. The term Base64 originates from a specific MIME content transfer encoding.
To help customers who want to import SObject and attach a file (base64), we have methods that can solve the problem. Now I would like to show you how to push binary data and SObject in the same XML file, but it will store the attachment in Attachment Object. The binary data is the data that has encoded with base64 string.
How to import business and Attachments that are embedded Account #
Pre-require #
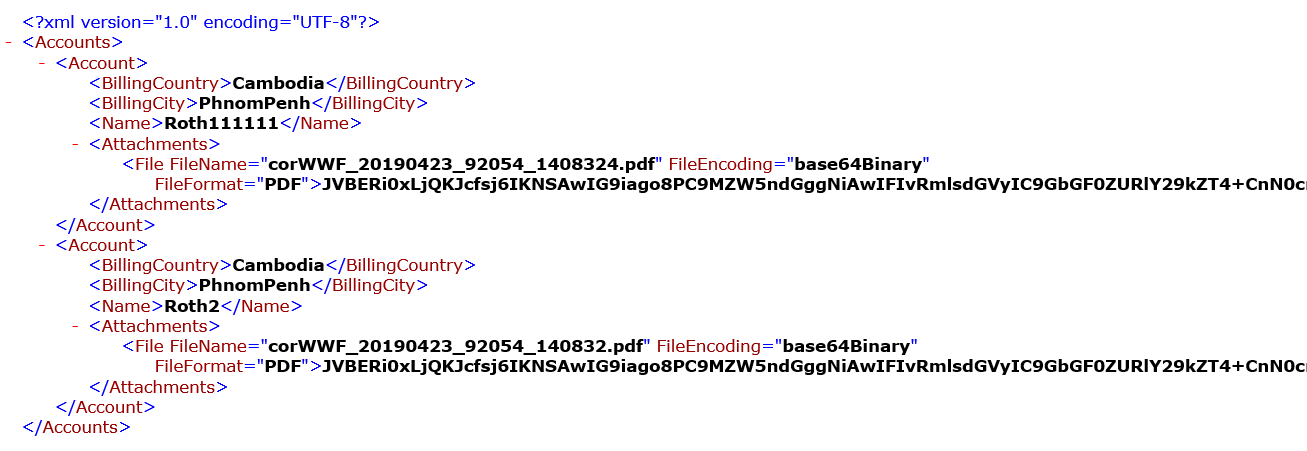
To import SObject and attach a file (base64) to it. The SObject and the file are embedded in the same XML file. See in the picture below.
So to be able to integrate hierarchical data like that, we need to use IntegrateV3 inbound processing. We have to push a file to Attachment and pushing the file to Attachment SObject.
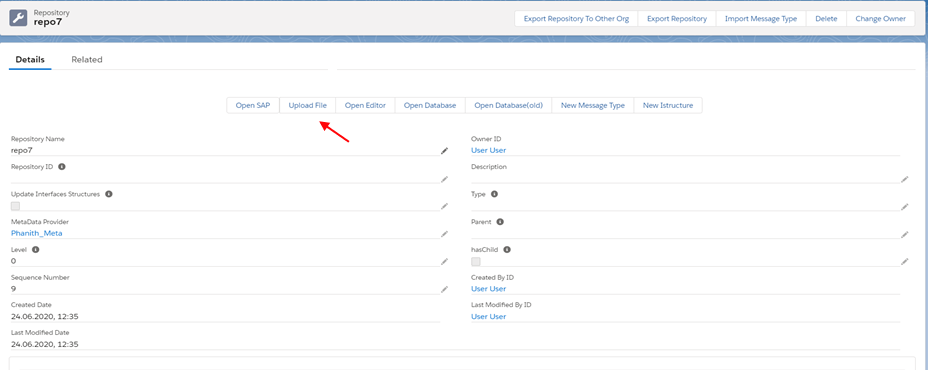
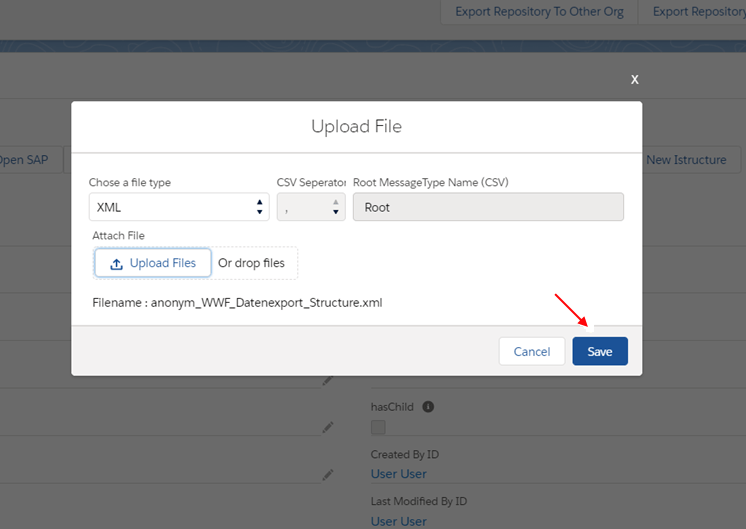
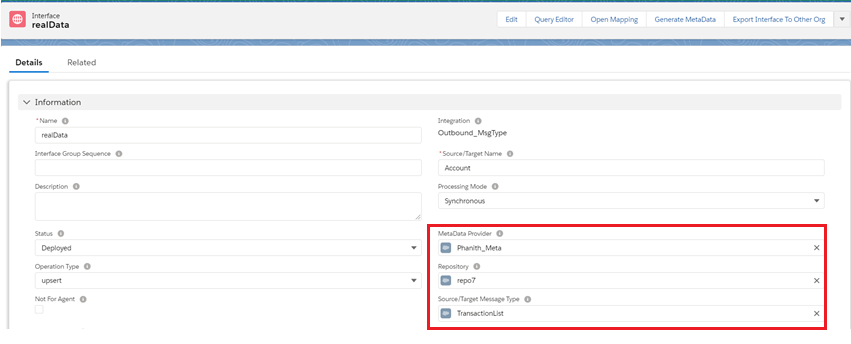
- Create a Metadata provider and repository for the upload message type
- Connection destination and create an adapter
- Create Integration and Inbound Interface
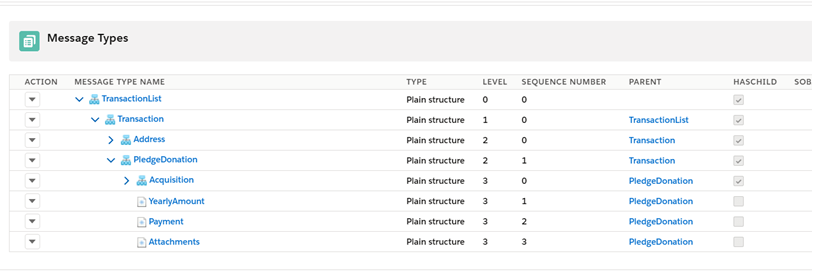
- Now we have a Message Type for mapping. Next, create an Integration and Interface
- Assign MetaData Provider, Repository, and MessageType (assign the root node) which we have uploaded to the interface
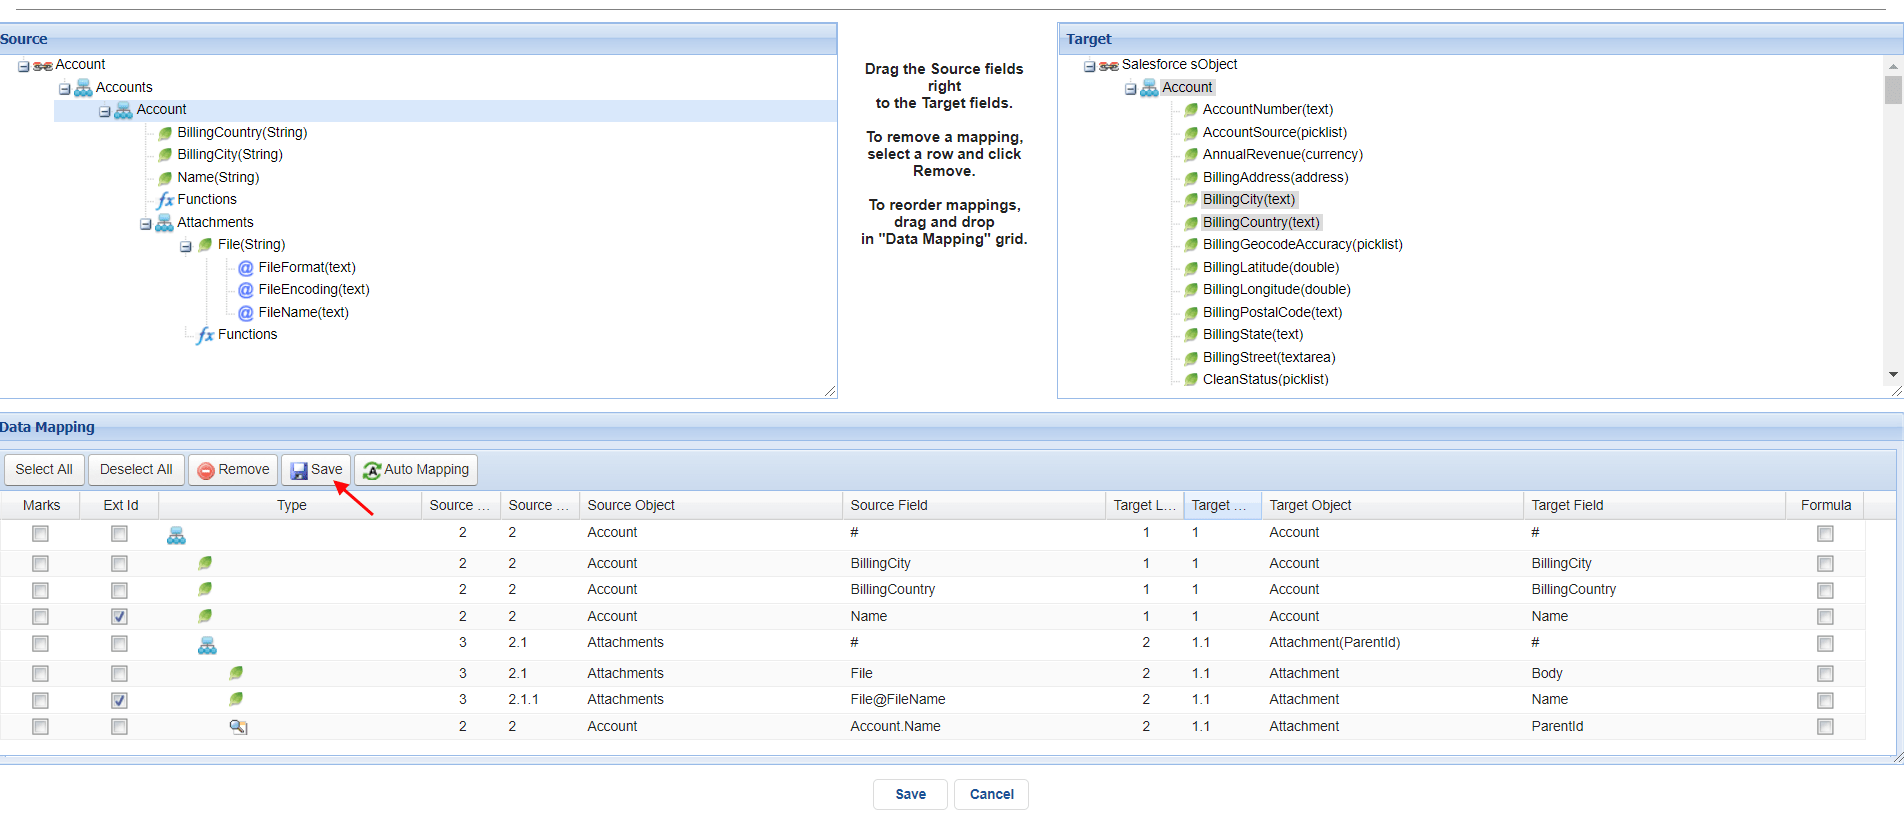
Now we need to choose the Target SObject to push the file to Attachment SObject based on the mapping. Let’s open the Mapping tool and see how we map in the picture below.
Pushing file to Attachment
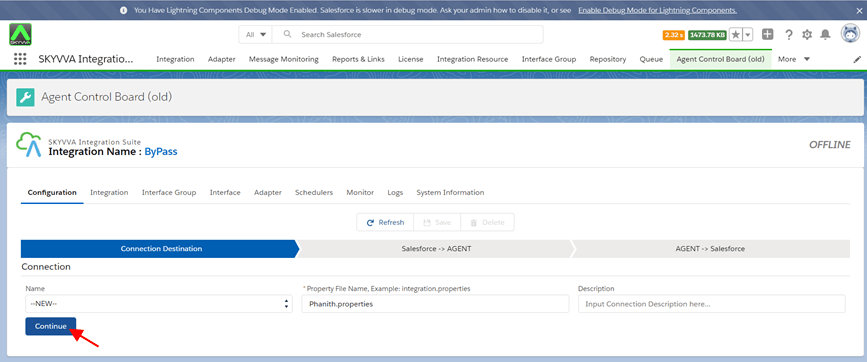
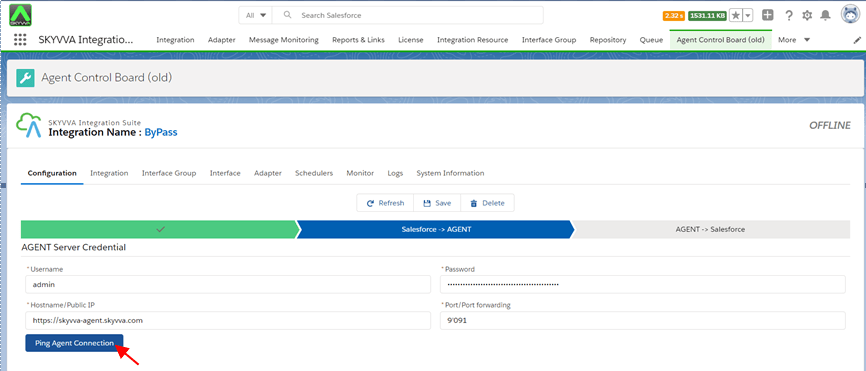
- Now we use Agent Control Board (old) to push the data to Salesforce. So first, you need to install the Agent application on your external system. And then use Agent Control Board to connect and work with it.
- Next step let’s create an Agent property by go to Agent Control Board and fill in your information and then click on the Continue button. See in the picture.
- In-Next Step fills in the information for connecting from Salesforce to the Agent server. For example, my server’ configuration for running the Agent are:
- Hostname: https://skyvva-agent.skyvva.com
- Agent’s port: 9091
- Agent’s username: admin
- Agent’s password: 12345
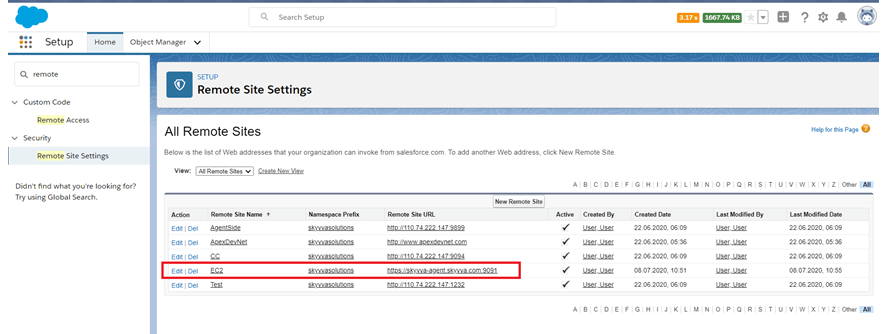
Before you are able to connect to the Agent side you need to set up the remote site on Salesforce by going to Setup and search for remote site setting and then create a remote site.
Now let’s configure the Agent server and click Ping Agent Connection. See in the picture.
- Next step, configure the connection to connect from the Agent to the Salesforce side and then click Ping Salesforce Connection and then click on the Save button.

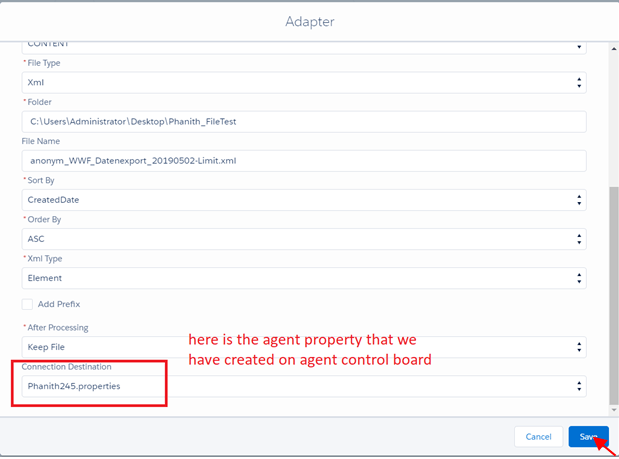
- Now we can connect to the Agent. Next step, we need to create an adapter. By go to the Adapter tab and then click on the New button and fill in your information to connect to your XML file and then click Save. See in the picture.
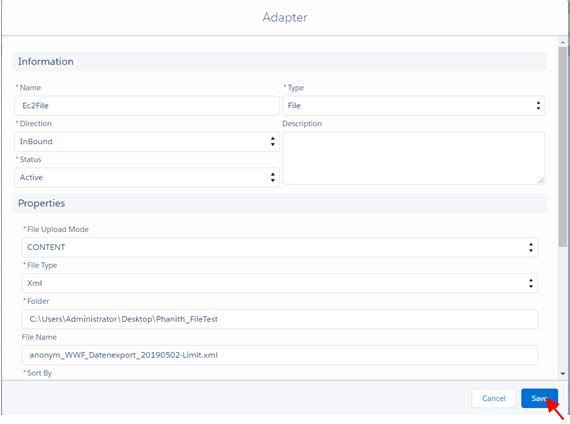
- The next step, assign the adapter to the interface.
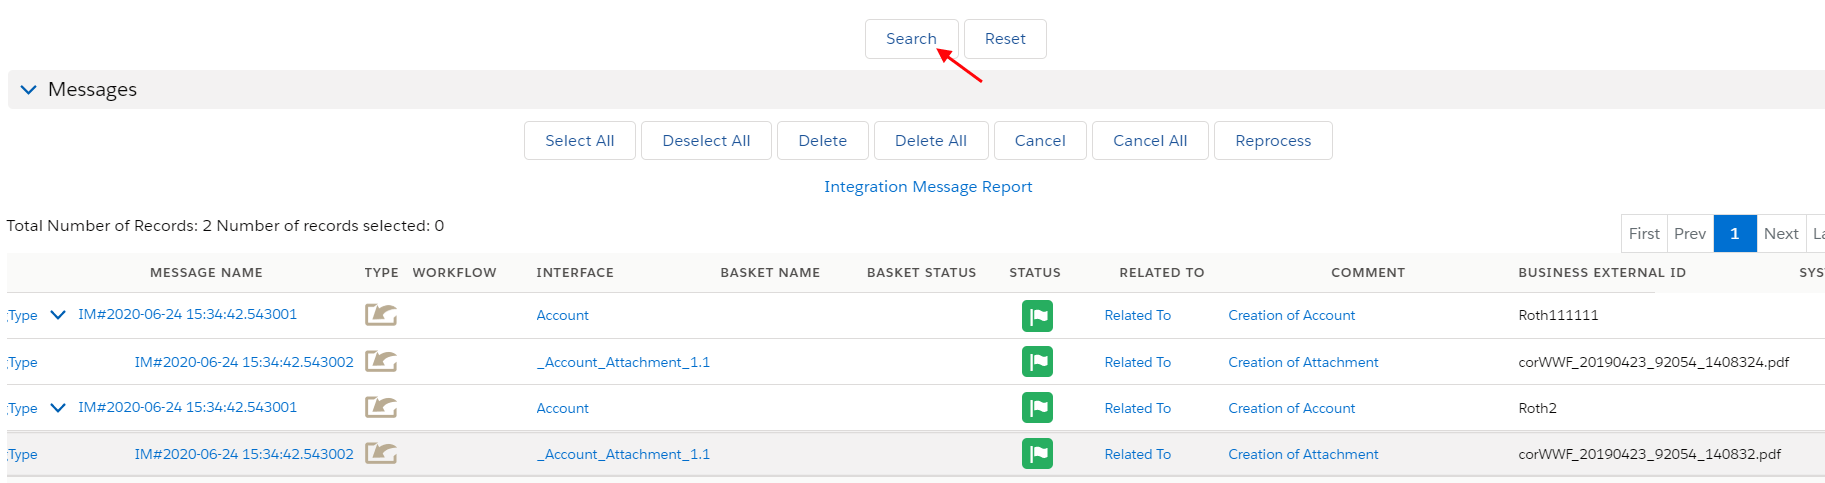
- Next step, on Agent Control Board, go to the Integration tab and choose your integration and then go to the interface tab and select your interface and click on the Process Interface button and then check the result on Monitor.
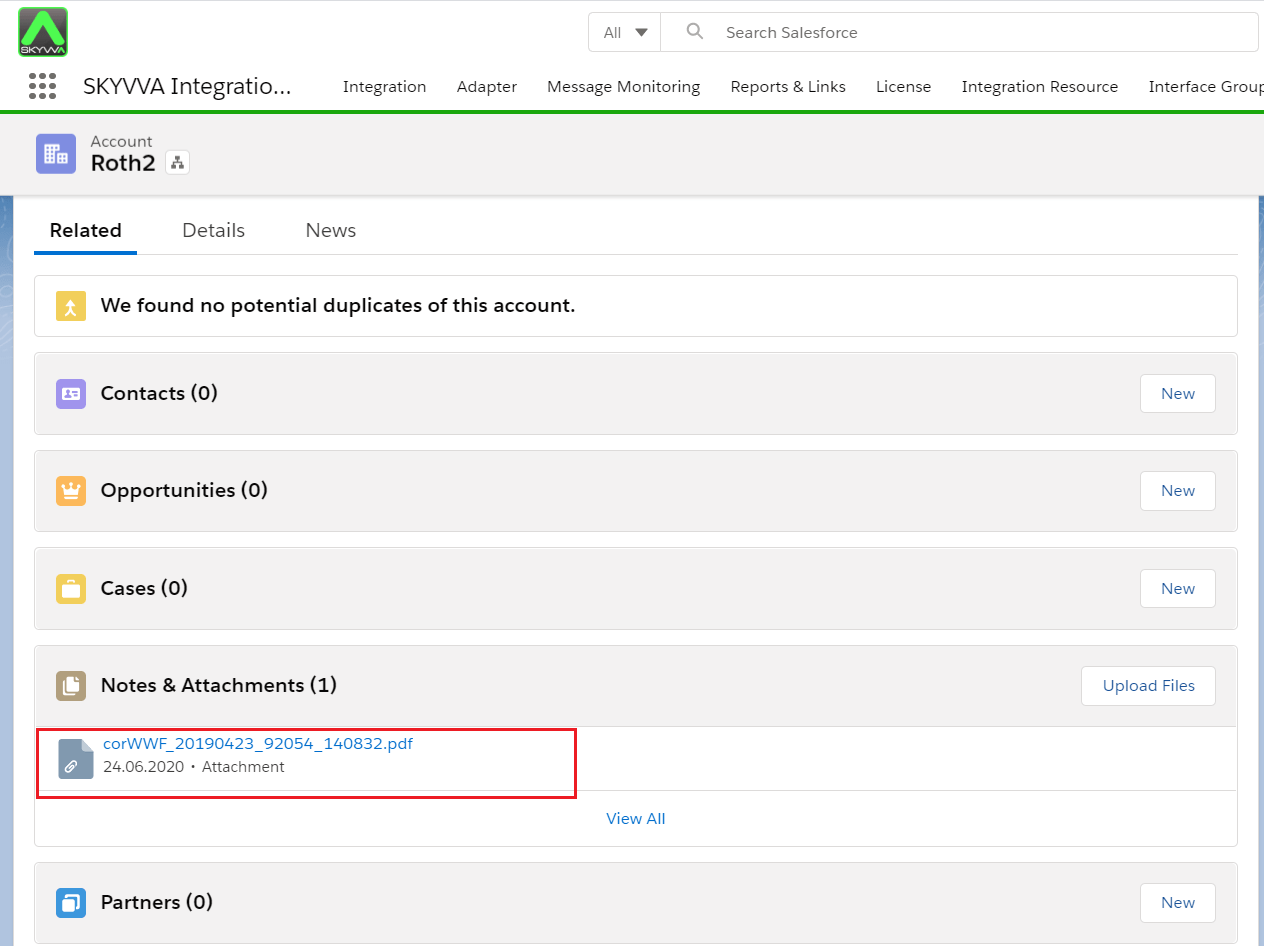
- Please Find the attachment
Summary In this tutorial user learns how to import business and attachments that are embedded in one file (Account).


