Introduction #
This tutorial will explain to you how to do manual and run scheduler outbound processing.
Manual outbound processing is a manual process button on the interface tab in an Agent control board. We can use it instead of executing the InvokecalloutV3 apex code. For example, when the user selects fives interfaces, we are executing the interfaces in random order. There is no sequence to follow.
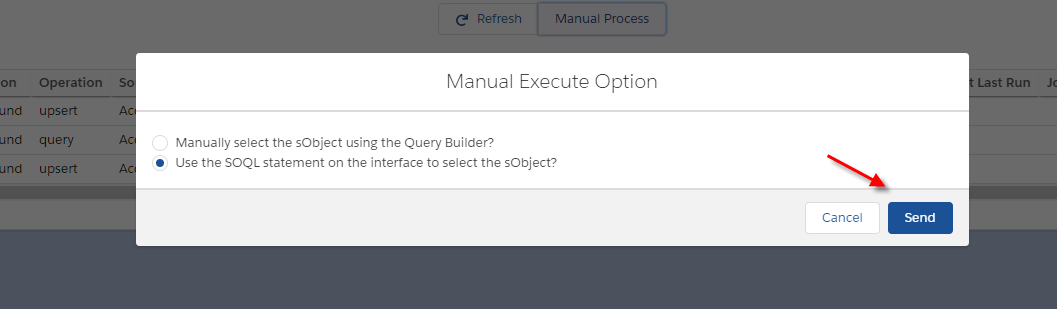
You can do the manual processing on the outbound interface of the new agent. To use this function, you need to select the “Manually select the sObject using the Query Builder or Use the SOQL statement interface to select the sObject” option.
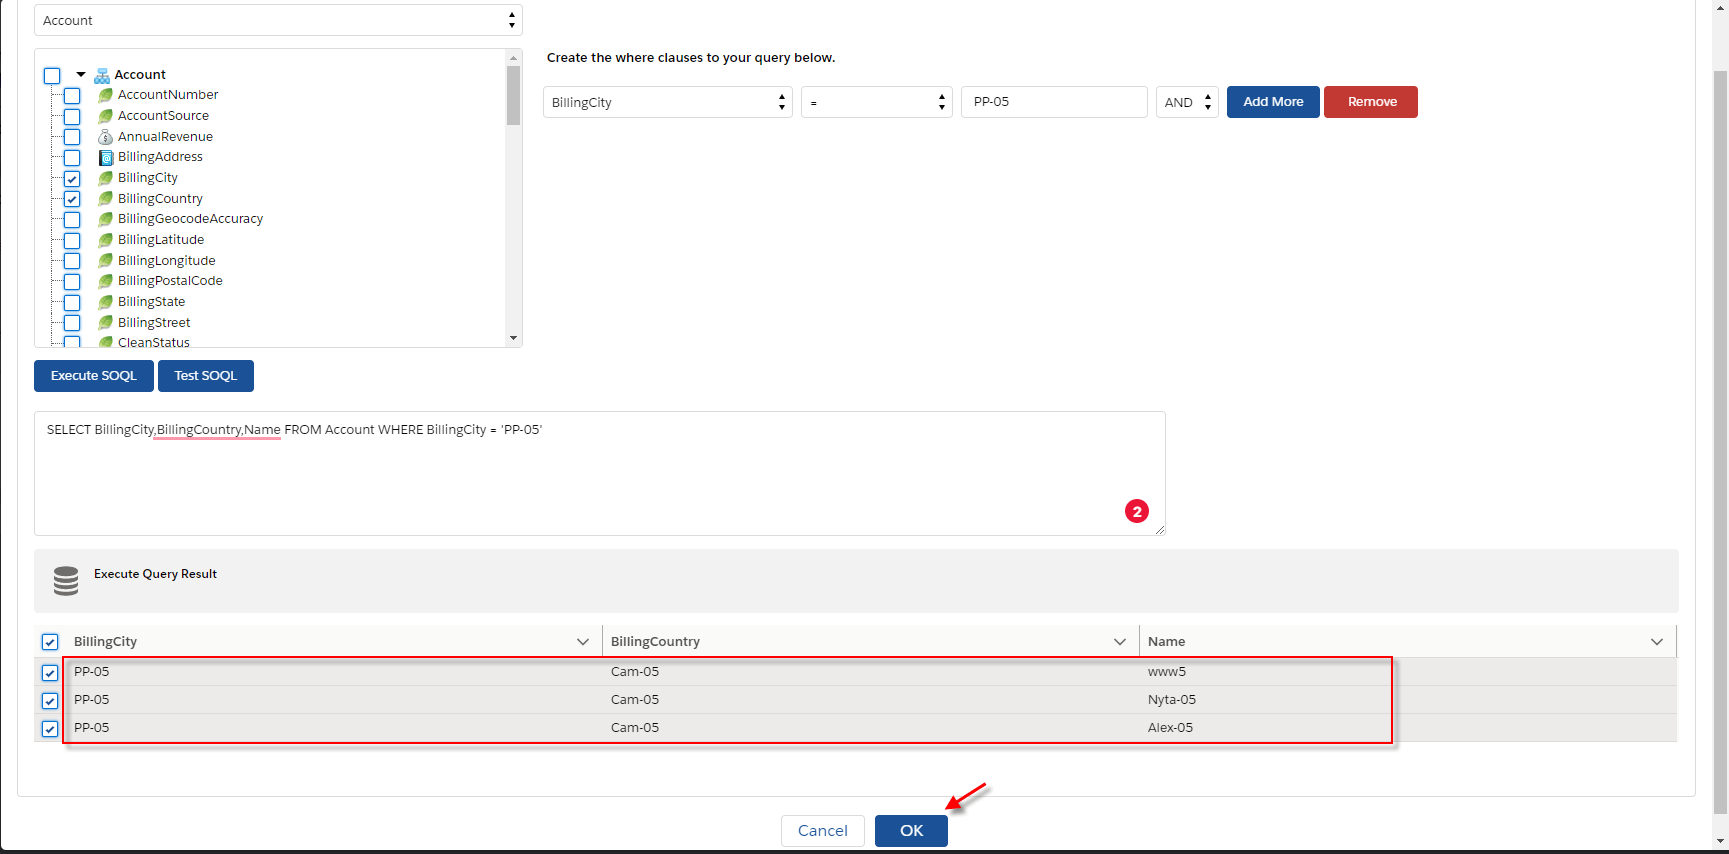
For example, you use the “Manually select the sObject the Query Builder” option, you will able to query record base on the query builder. You will able to select the records from the execute query result to processing the callout.
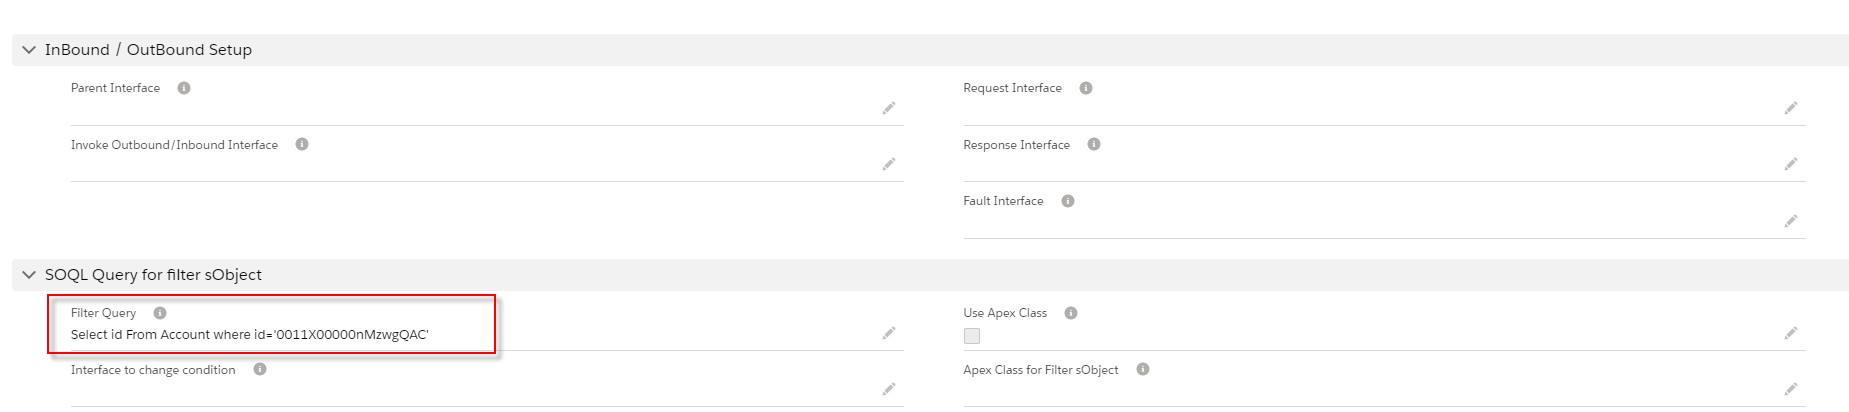
If, you use the “SOQL statement on the interface to selects the sObject” option. You can select the record from the SOQL Query for the filter sObject base on record id.
Pre-require:
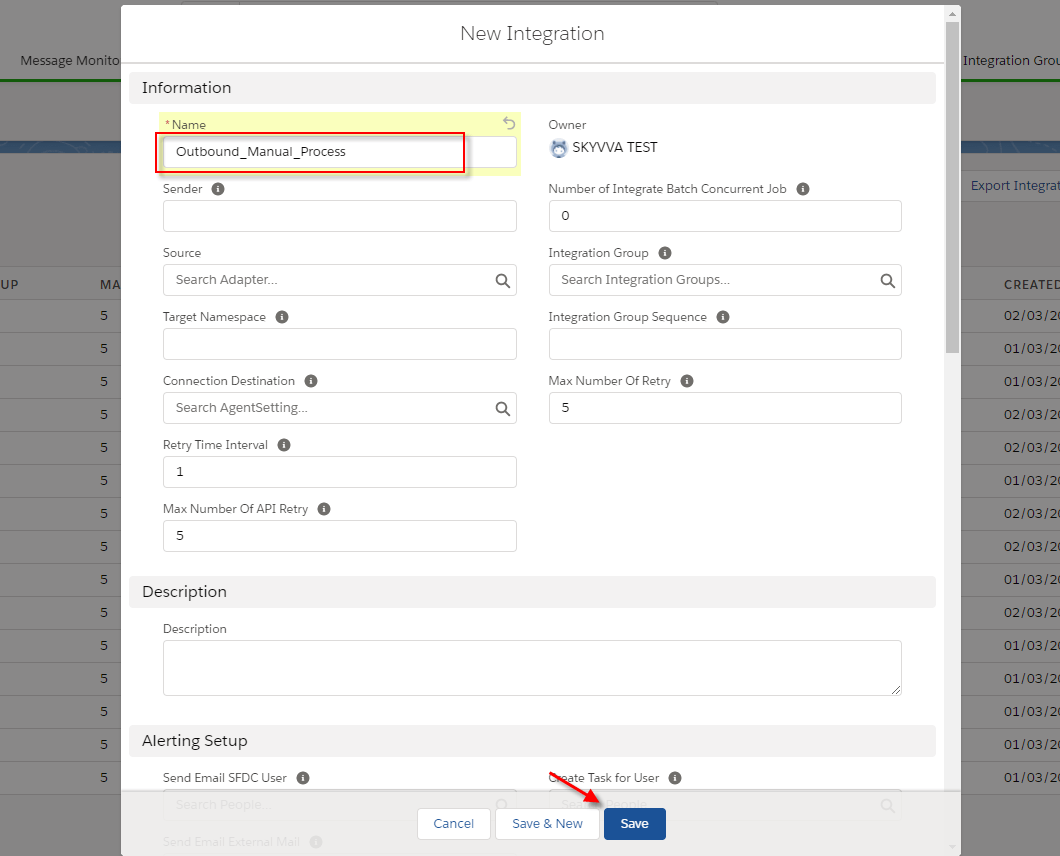
- Create Integration
- Configuration Agent control board
- Create adapter agent rest
- Create inbound interface
Step1: Integration and connection destination
- Create Integration
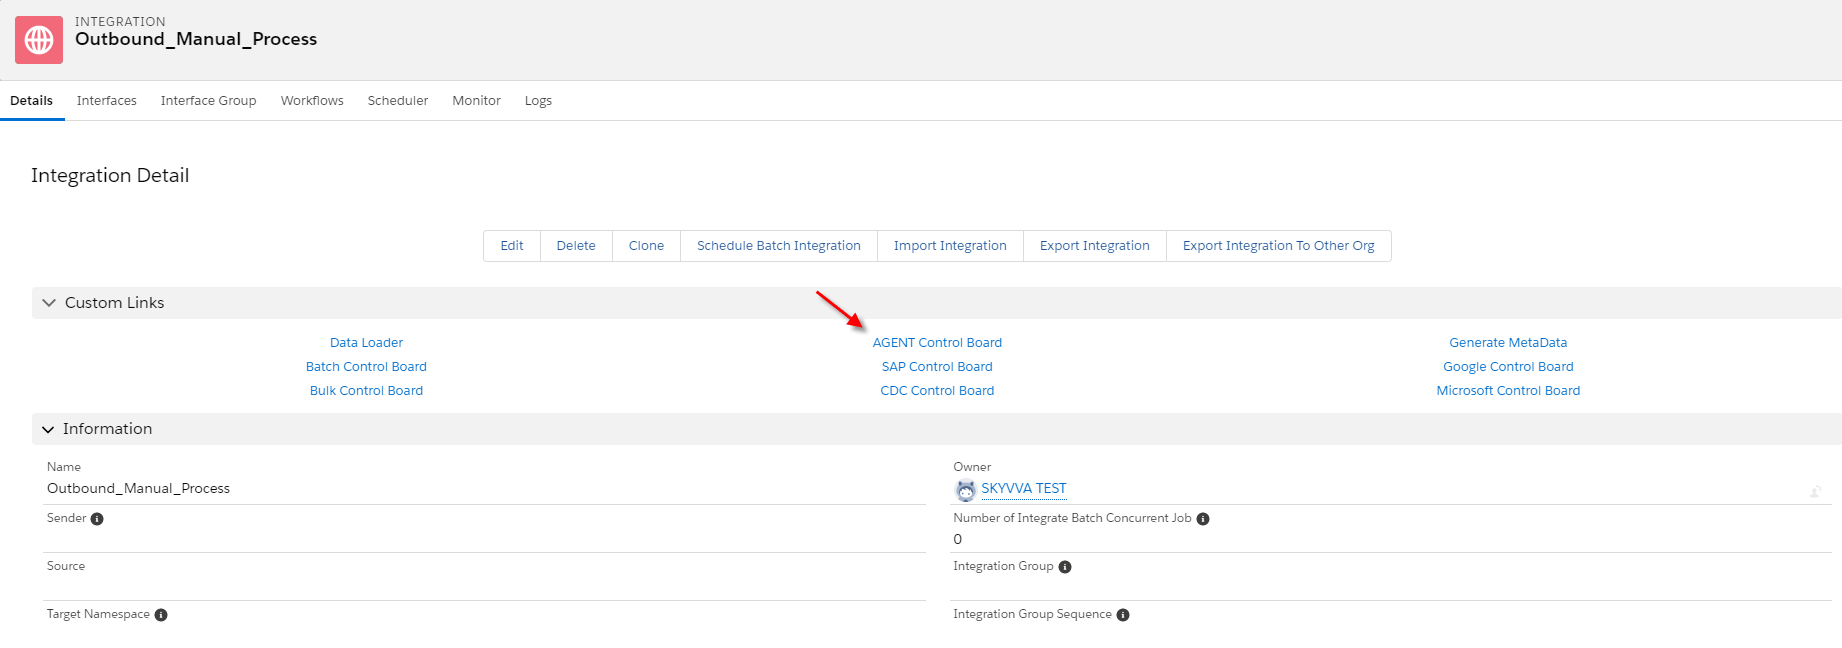
- Go to the integration detail page and click on Agent Control Board
- Create agent connection
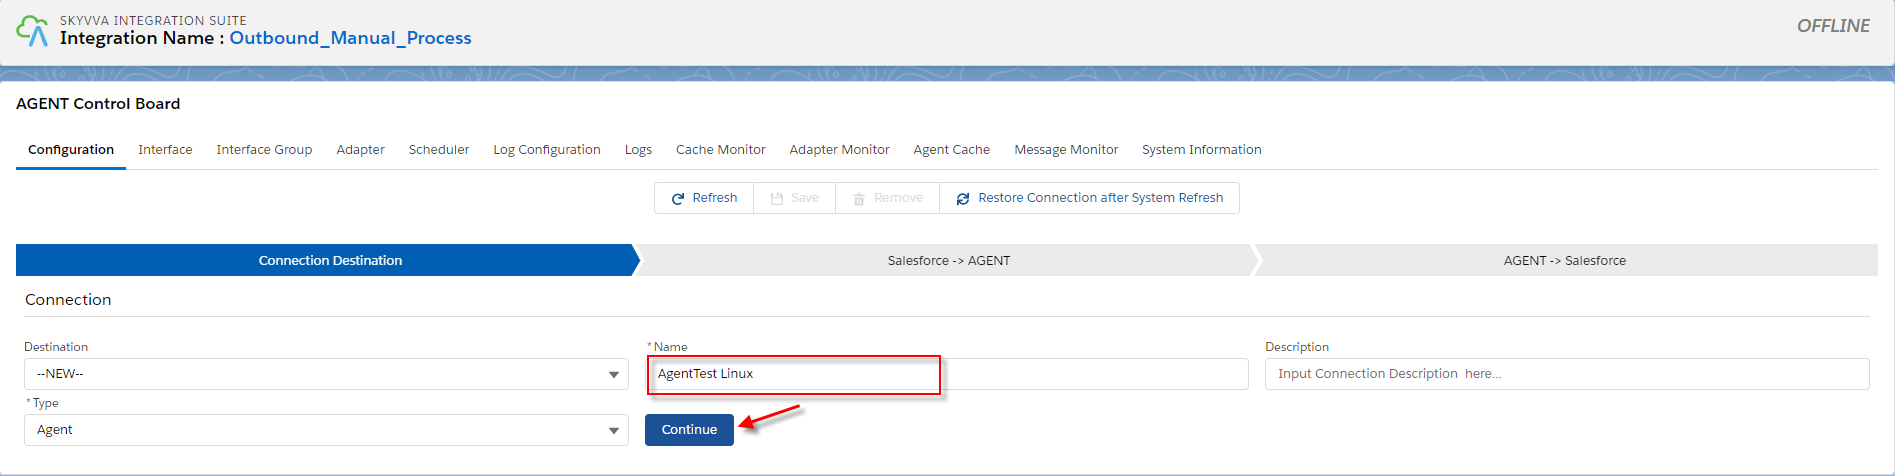
- Fill the agent credential
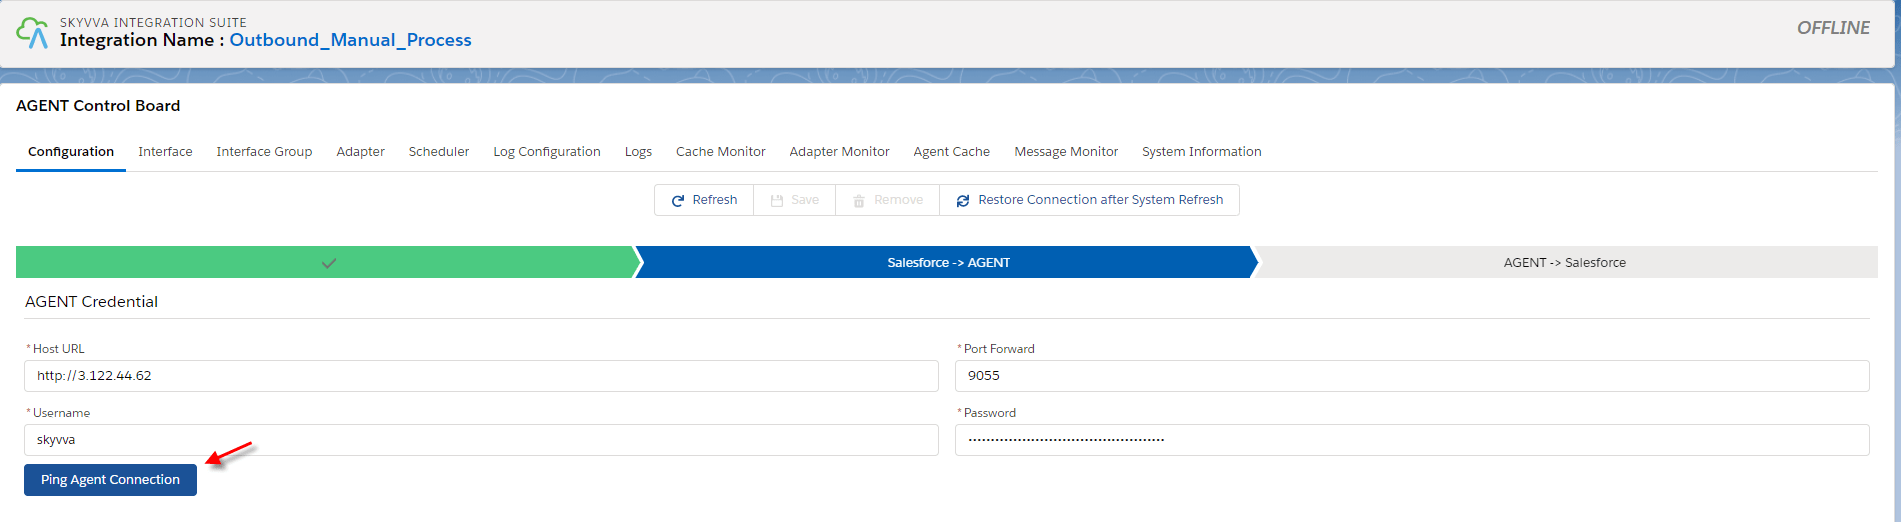
- Fill the salesforce credential
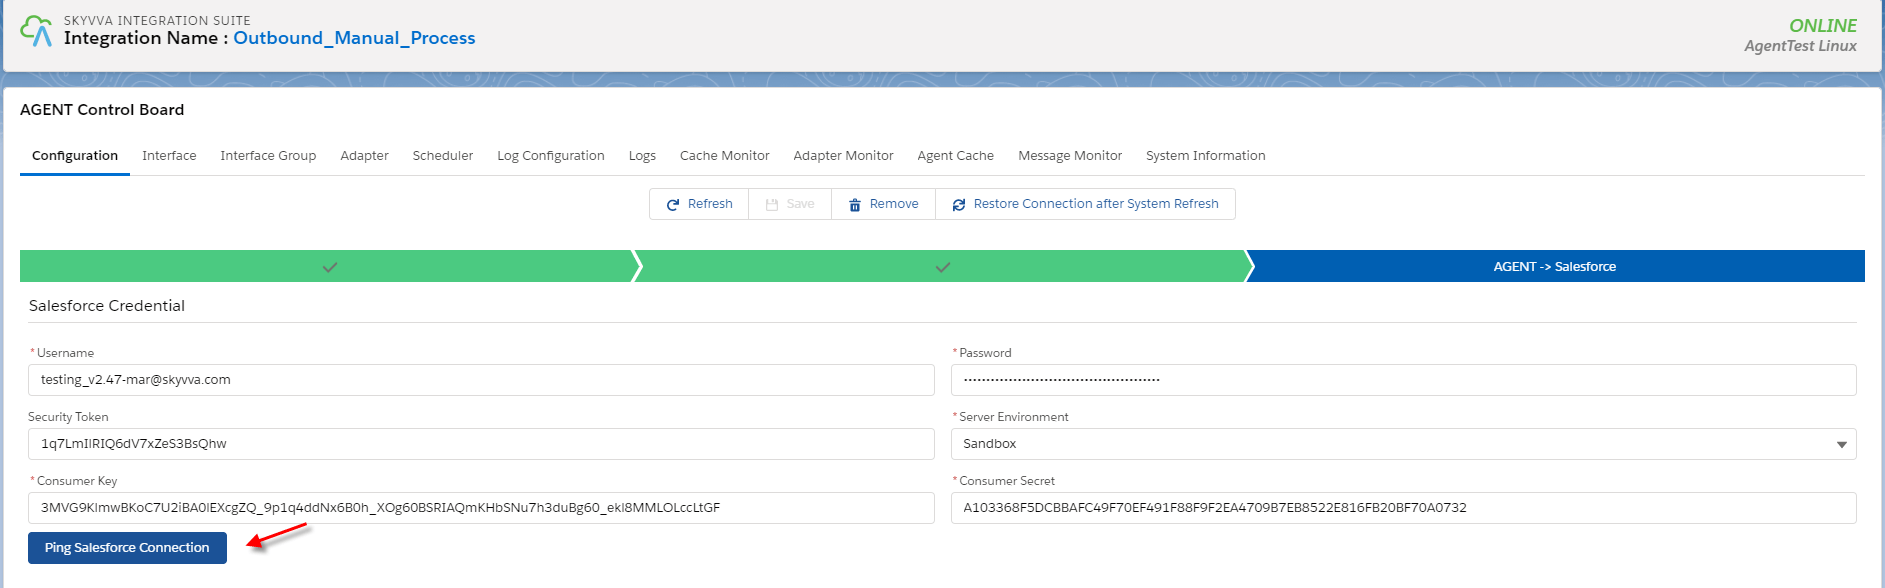
- Save connection
 Step2: Create an adapter in the agent control board
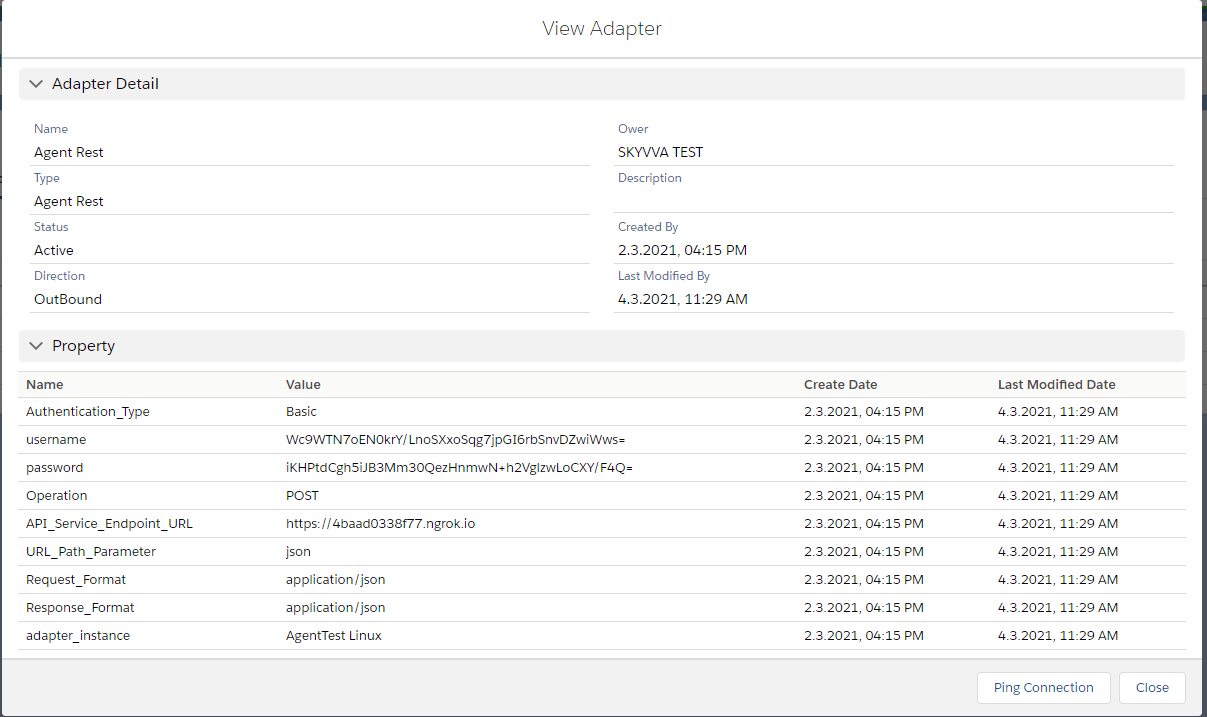
- Navigate to the adapter tab after that click the new button.
 Fill all required field
- Name: any name
- Type: Agent Rest
- Direction: Outbound
- Status: Active
- Authentication: Basic
- Username: your API username
- Password: your API password
- Operation: POST
- API Service EndPoint URL:
- URL Path Parameter: json
- Request Format: application.json
- Response Format: application/json
- Connection Destination: your connection
 Step2: Create or upload message type
- Go to the Metadata Provider tab
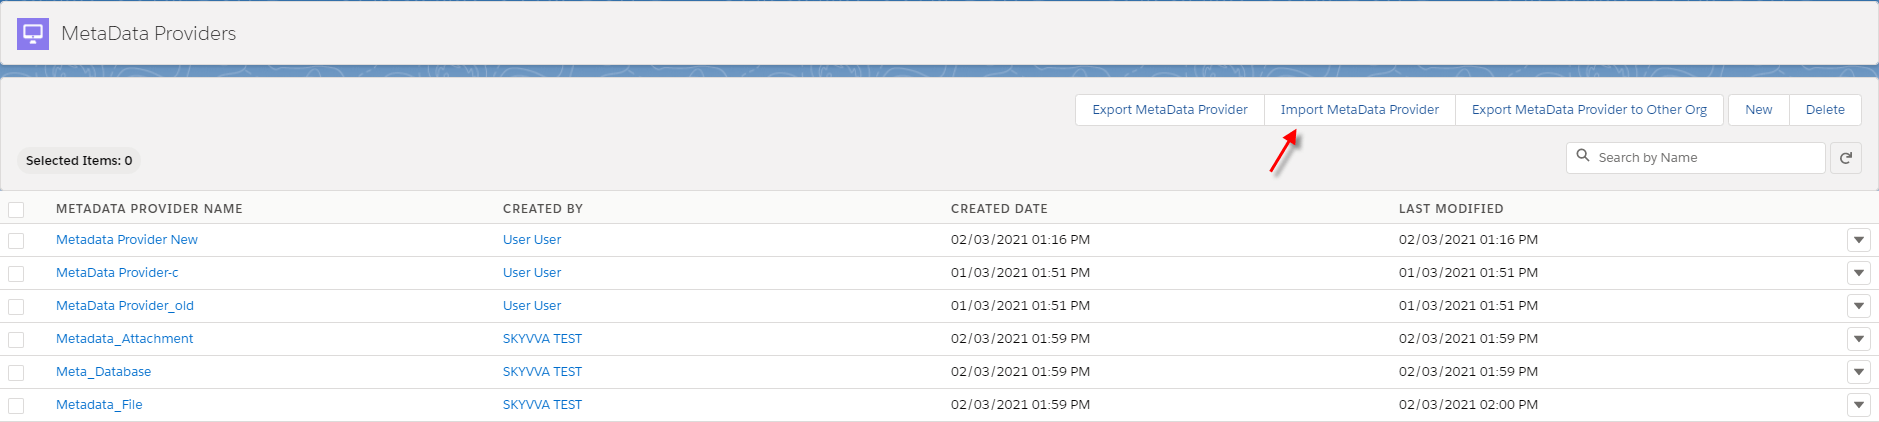
- Click Import Metadata Provider
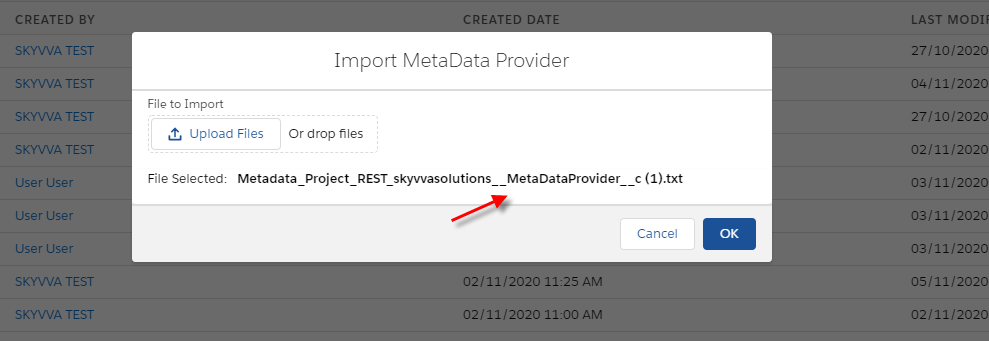
- Here is the message type after importing

This case Use the SOQL statement on the interface to select the sObject
Step1: Go to Integration detail
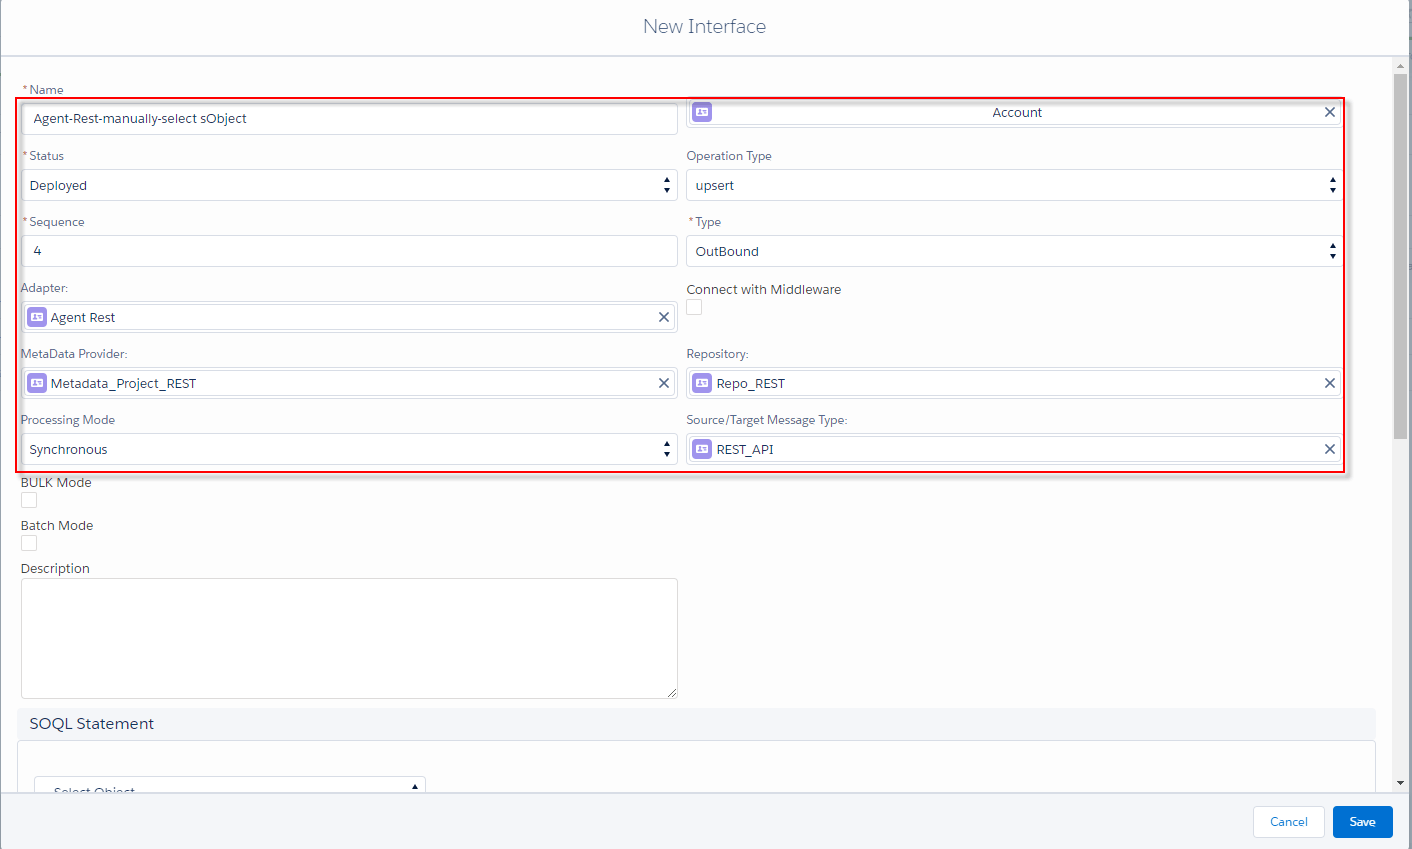
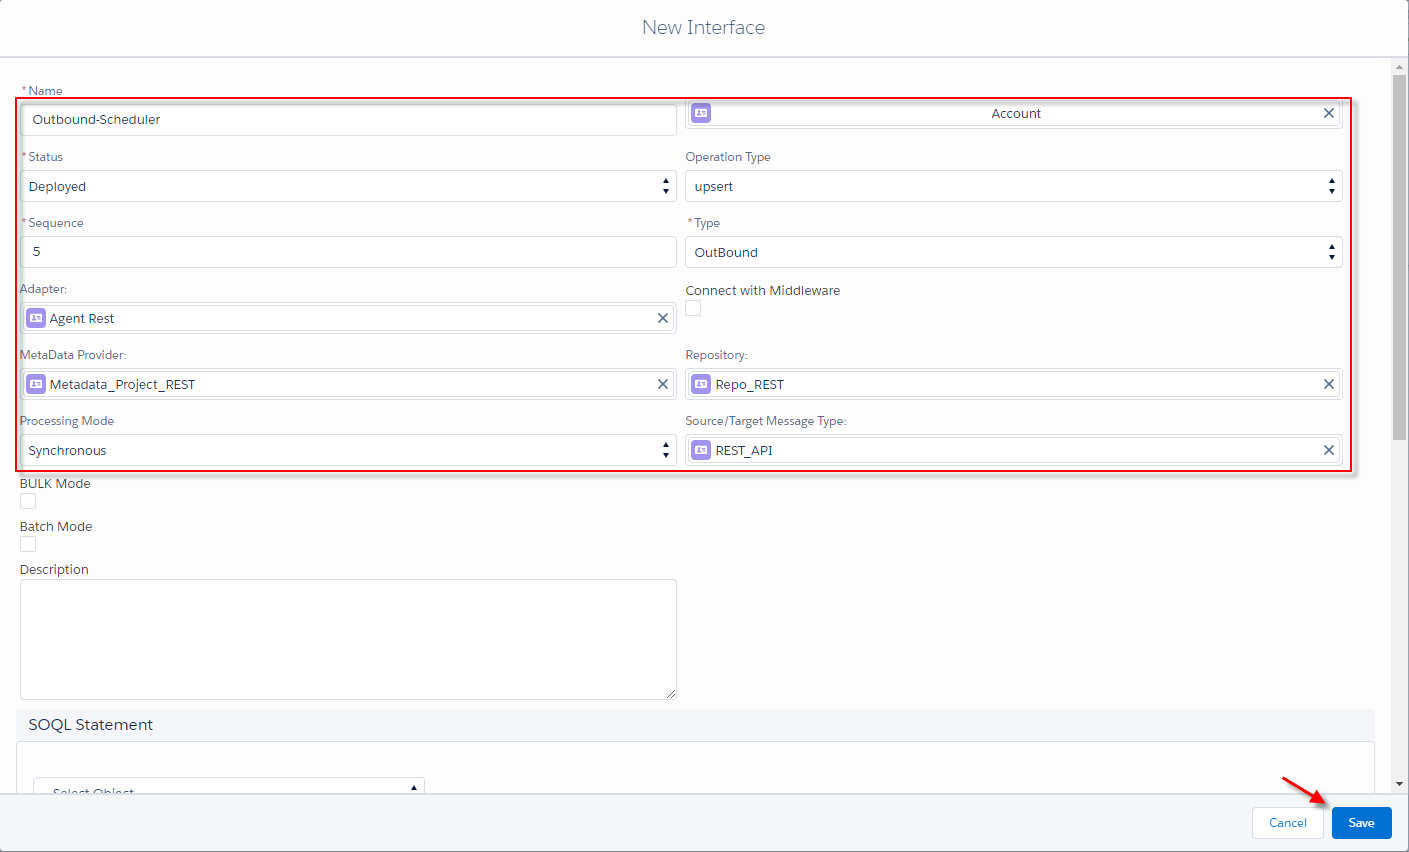
- Create Outbound interface
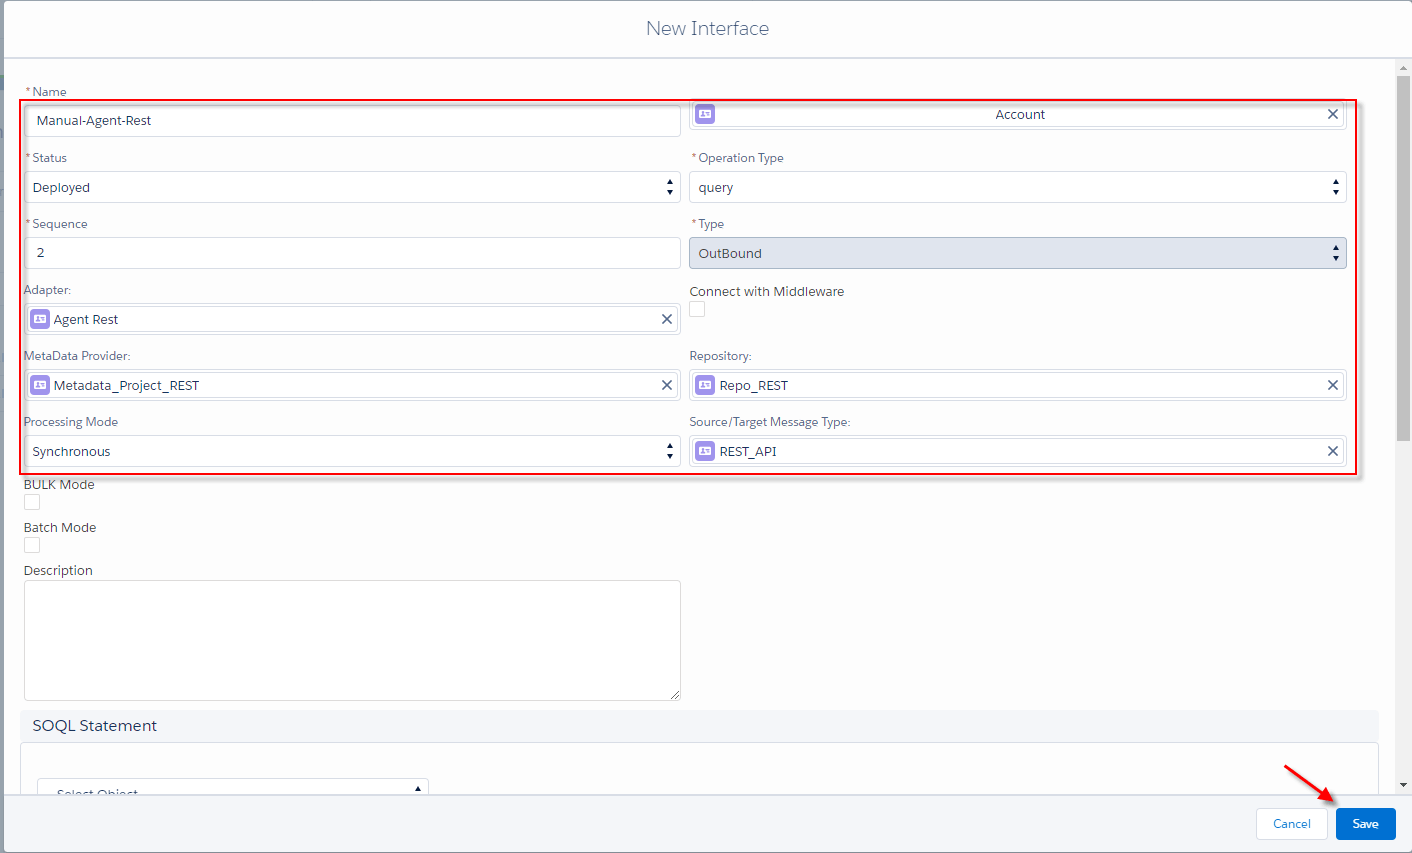
- Go to interface detail
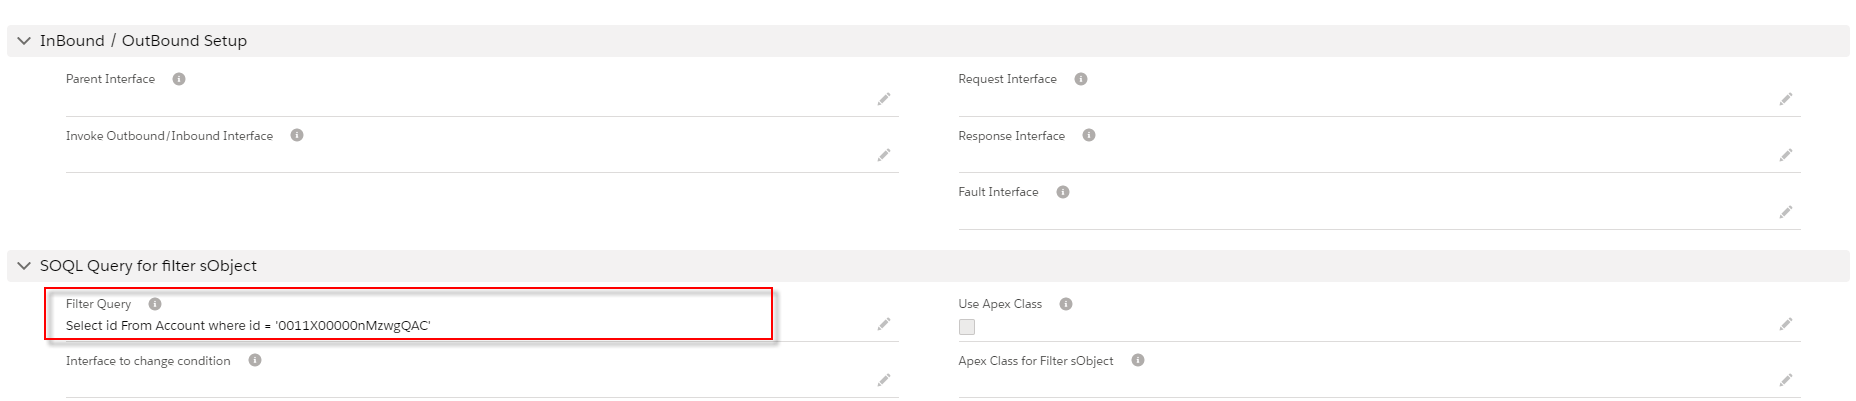
Input select statement into Filter Query’s field.
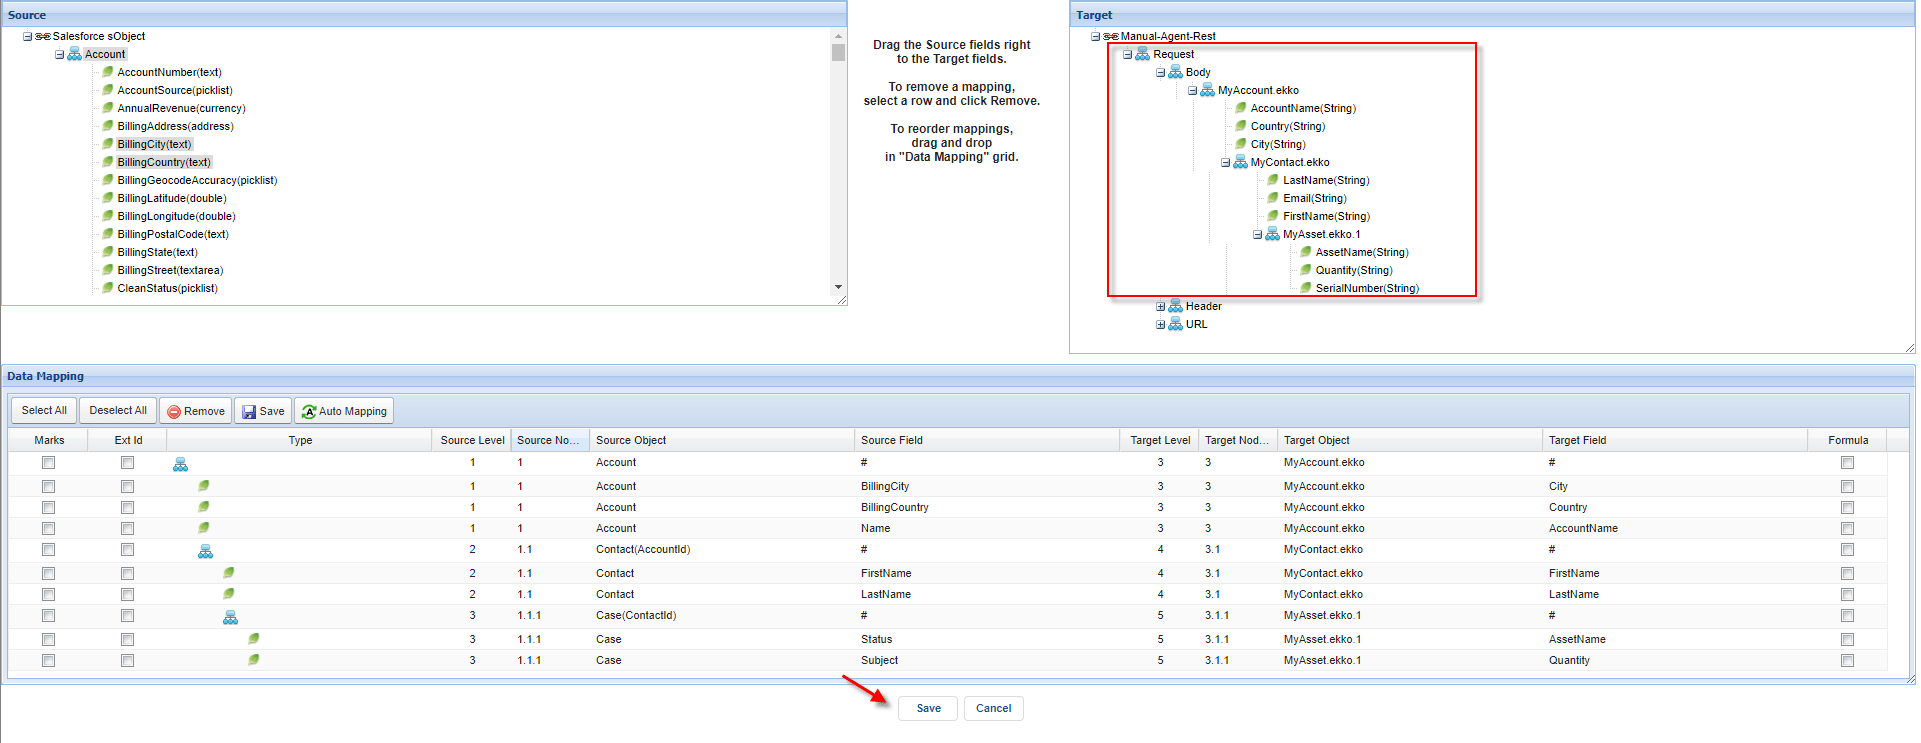
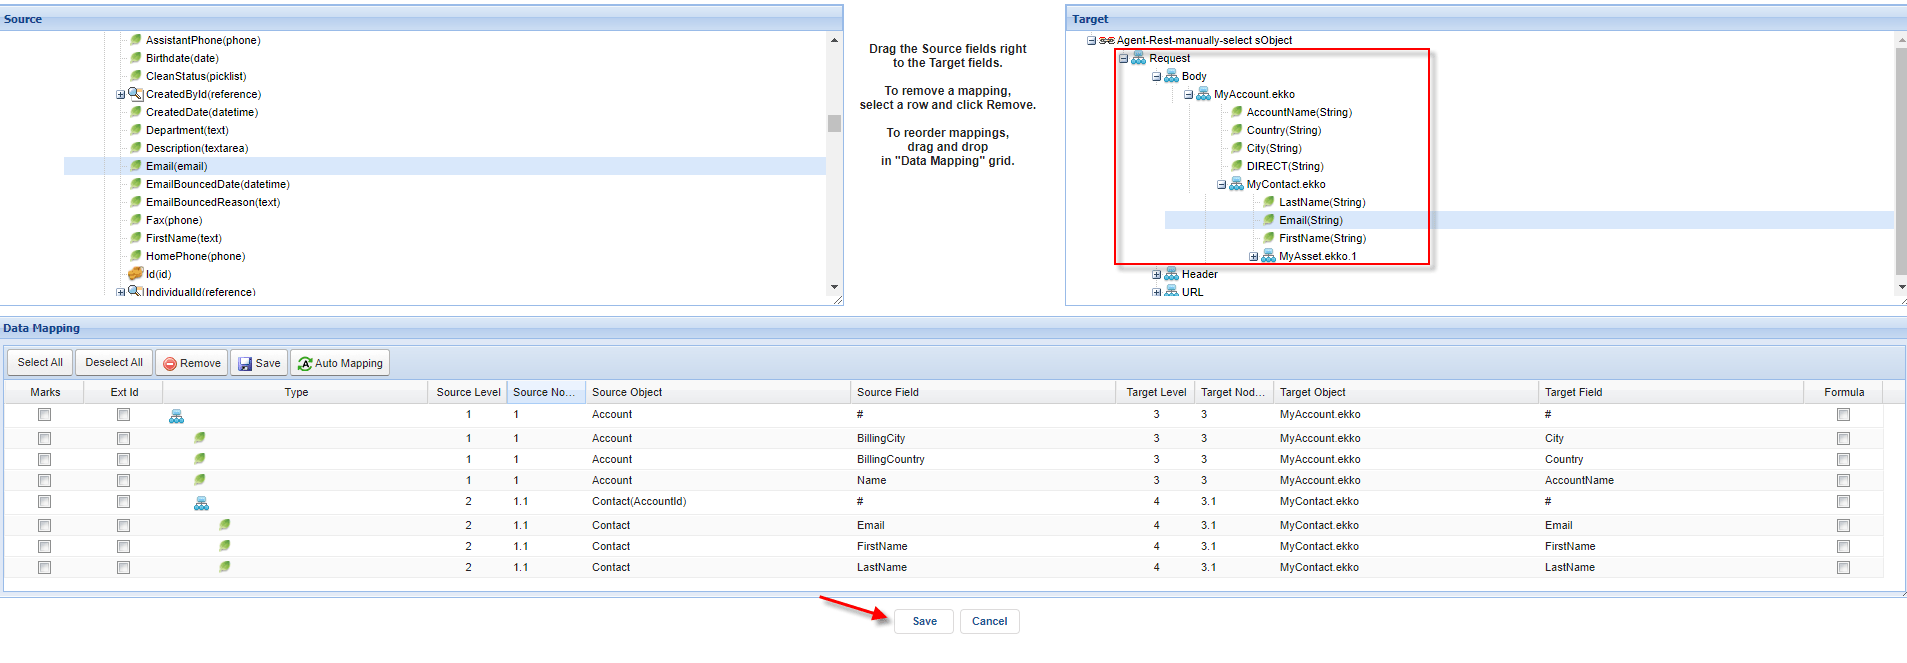
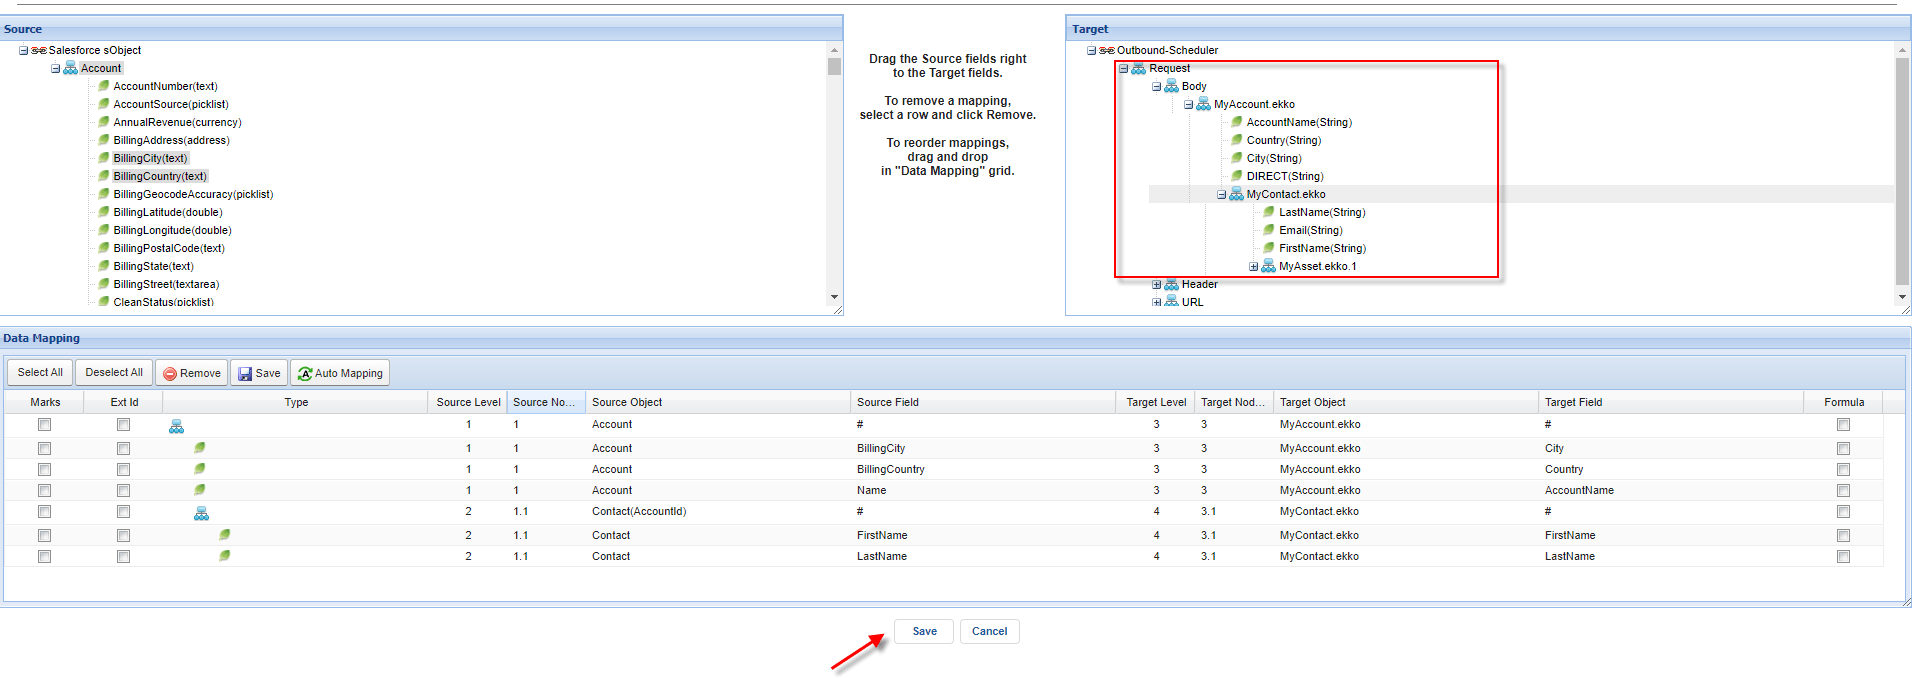
- Do mapping
 Step2: Agent Control Board
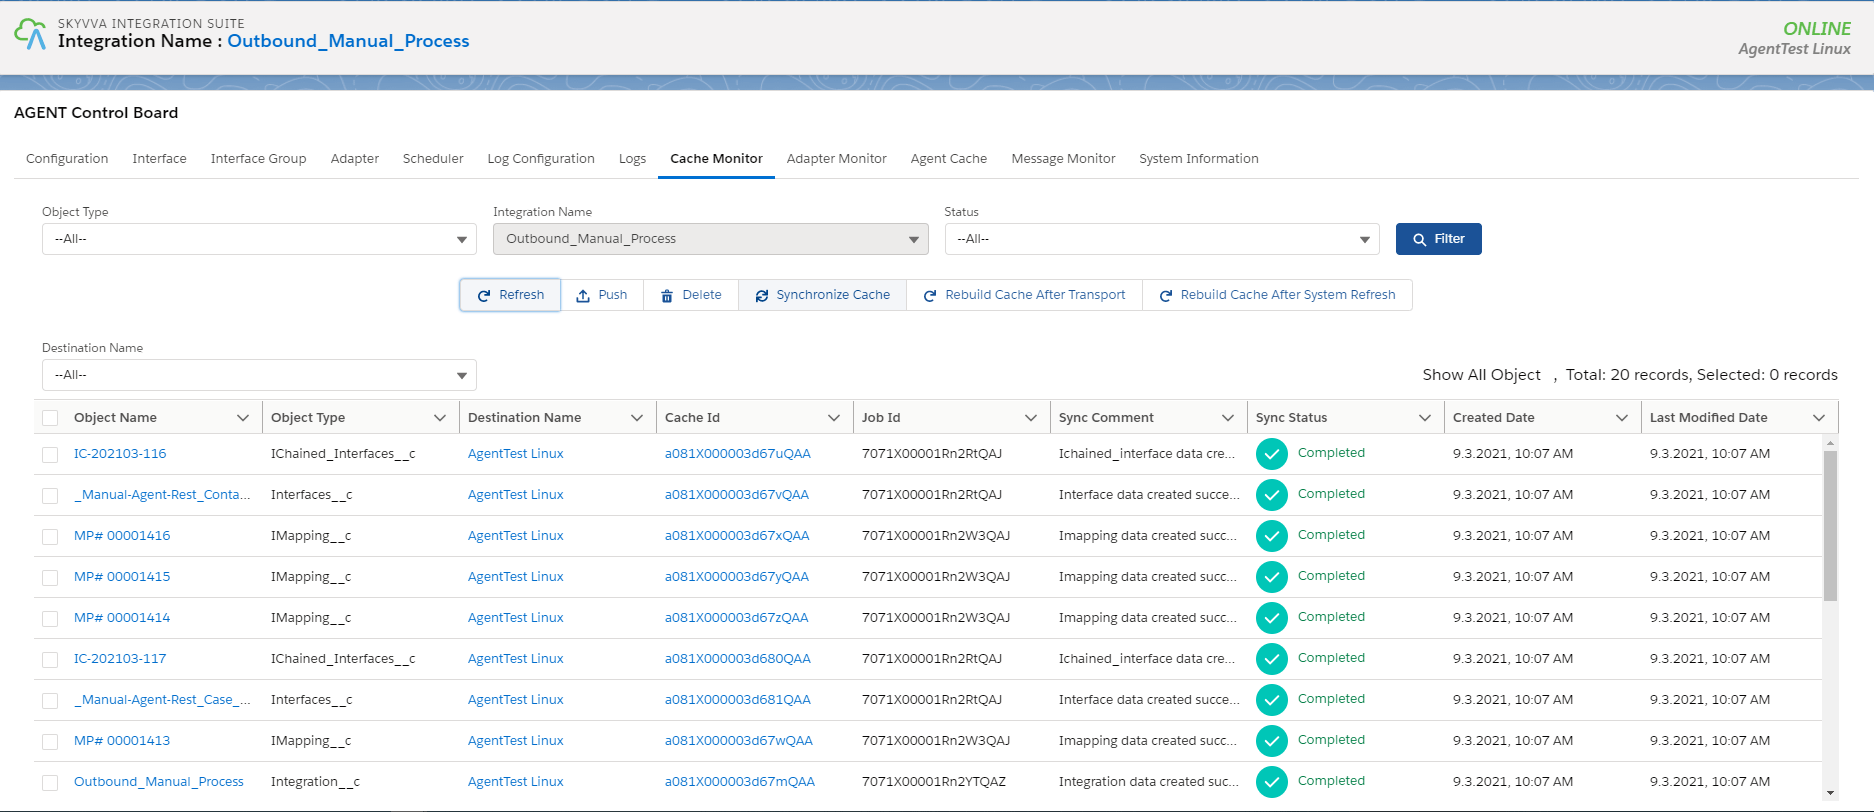
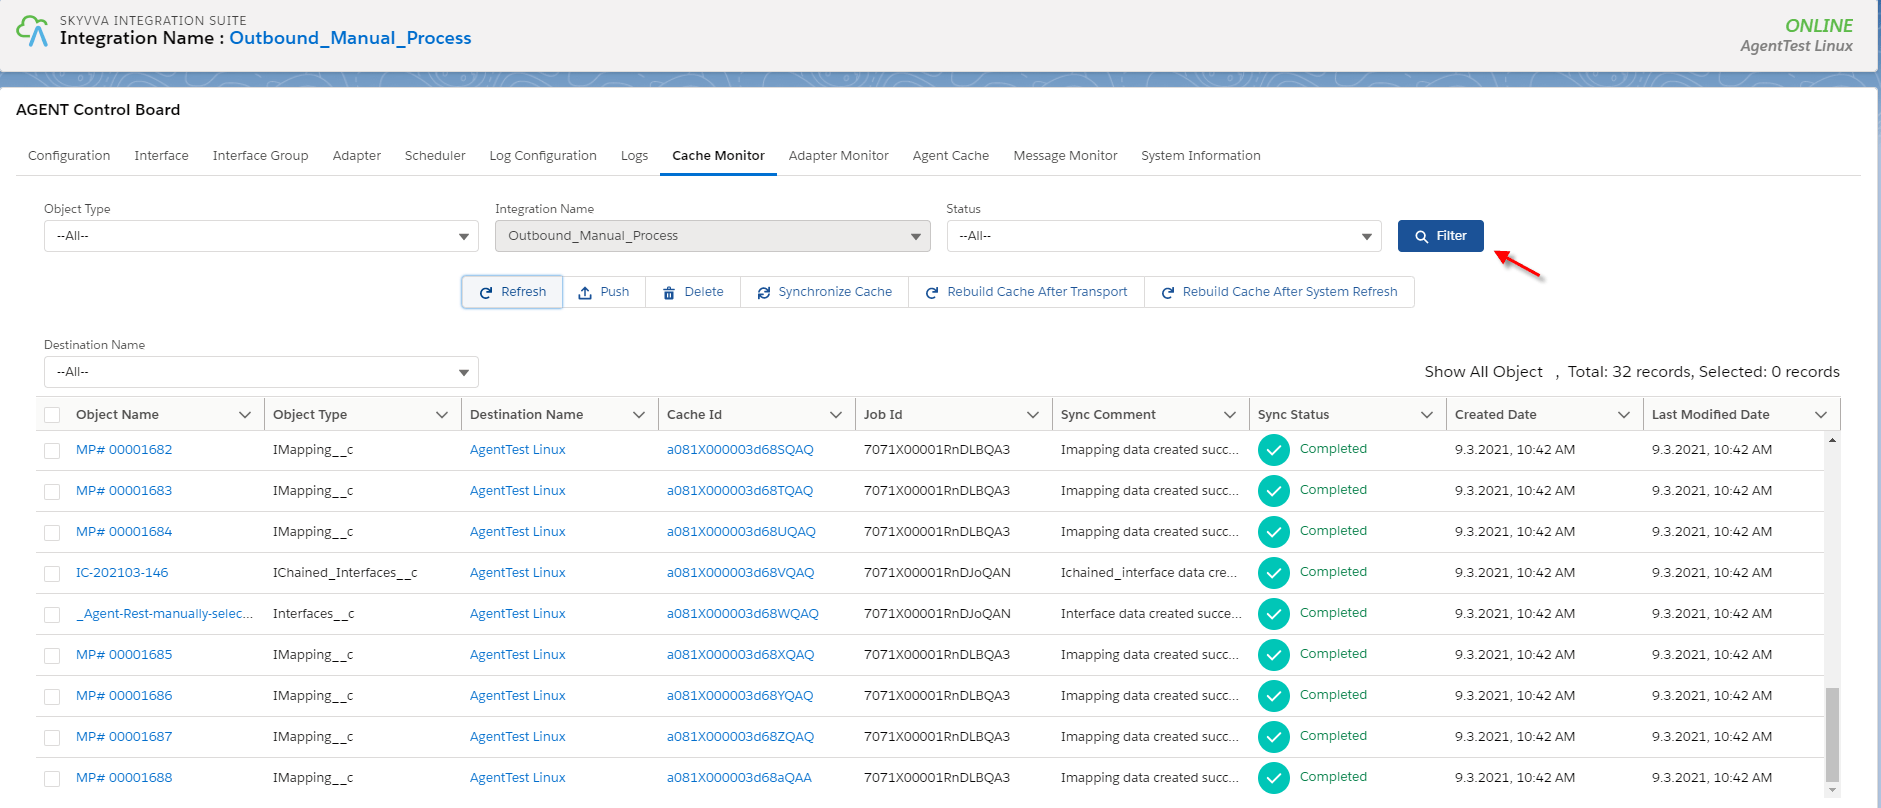
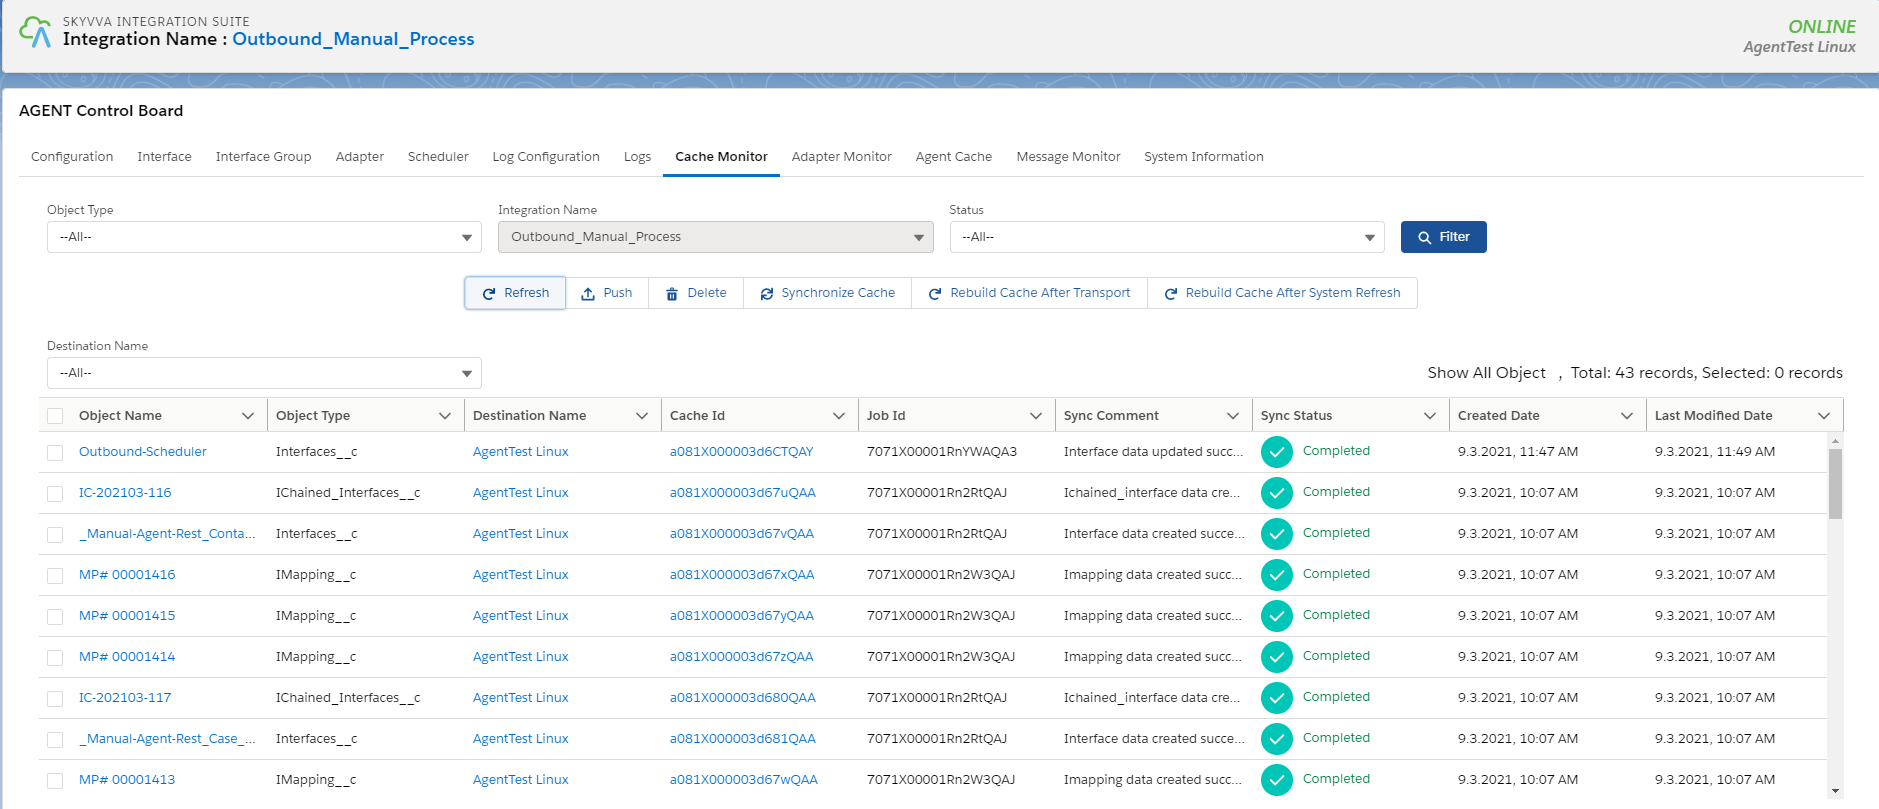
- Before you do the manual process you need to check the cache to make sure that interface group, Adapter, Integration, interface, IChain, Mapping, or workflow that we set on an interface is cache retrived.
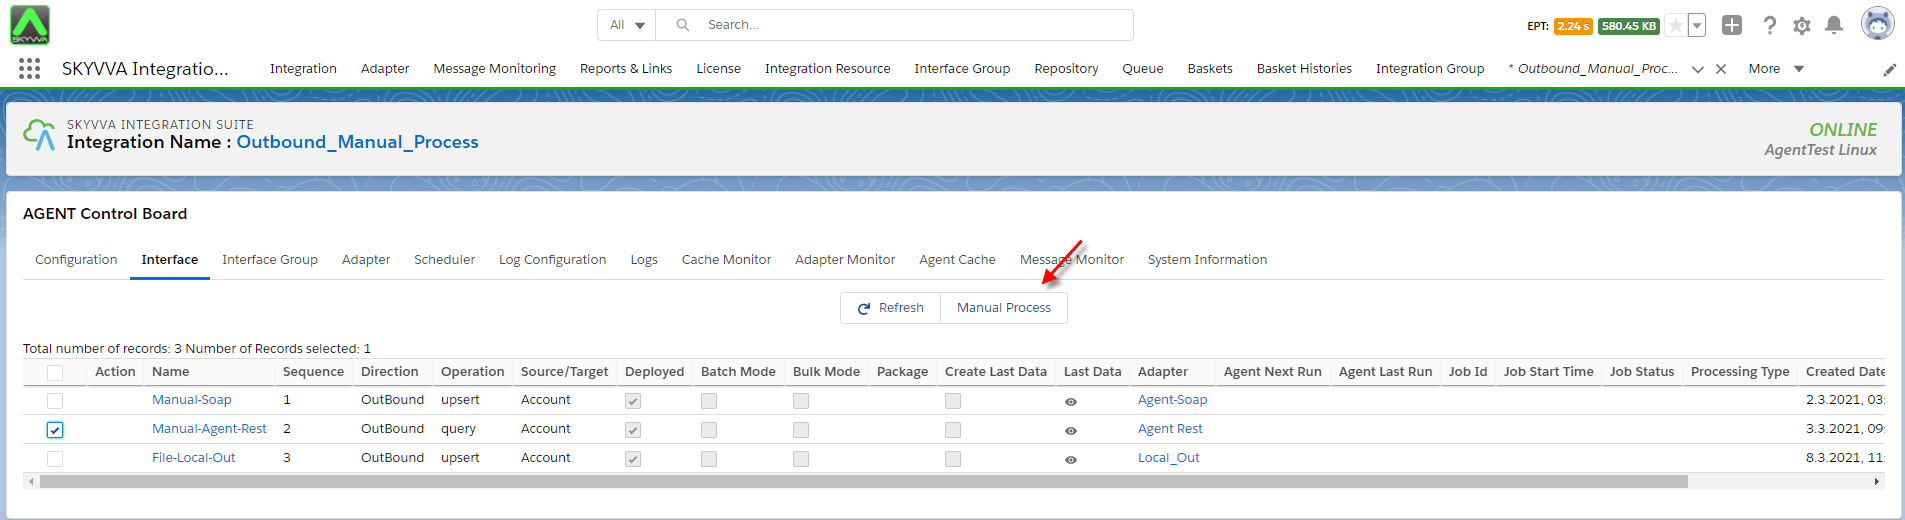
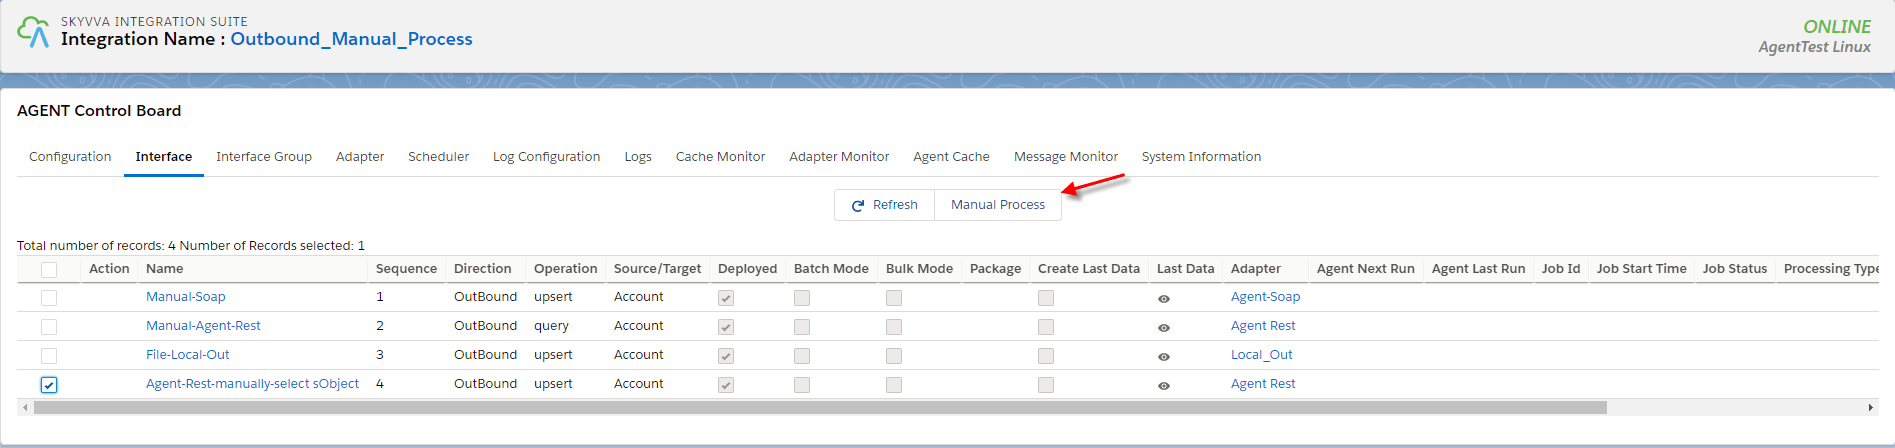
- Go to interface tab on Agent Control Board
choose one interface and click the manual process button.
- Choose to Use the SOQL statement on the interface to select the sObject
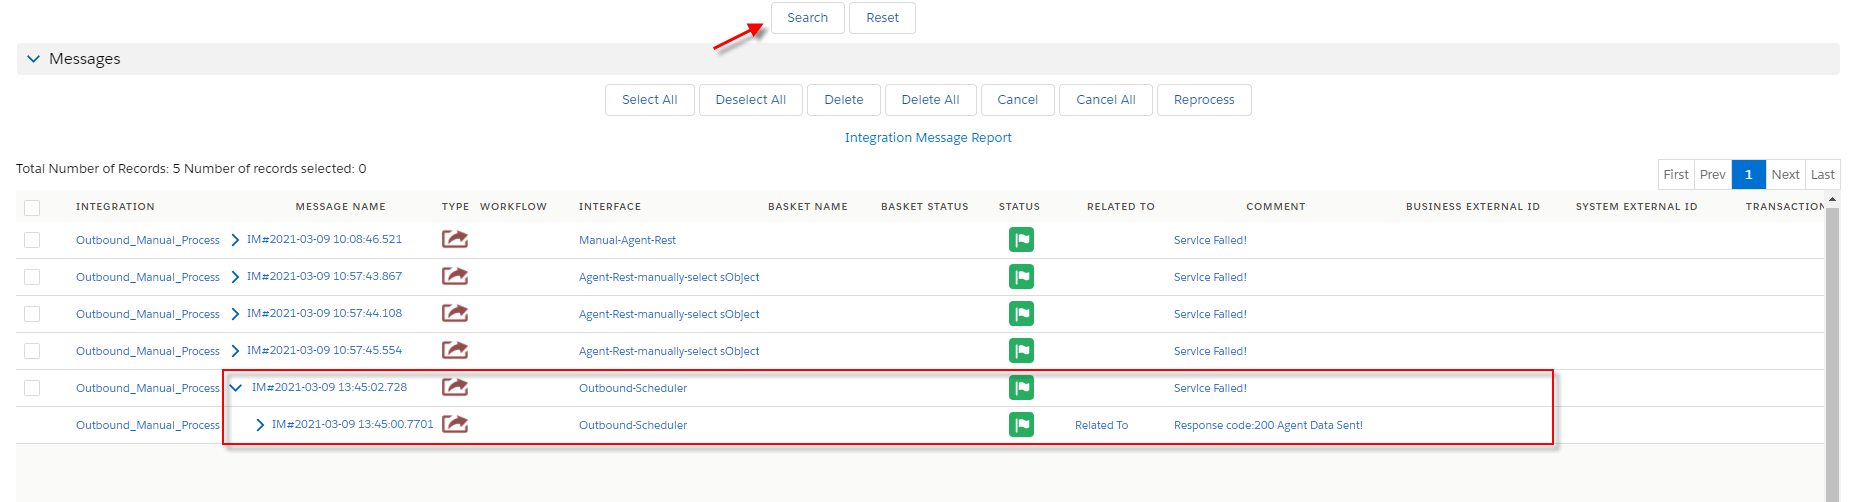
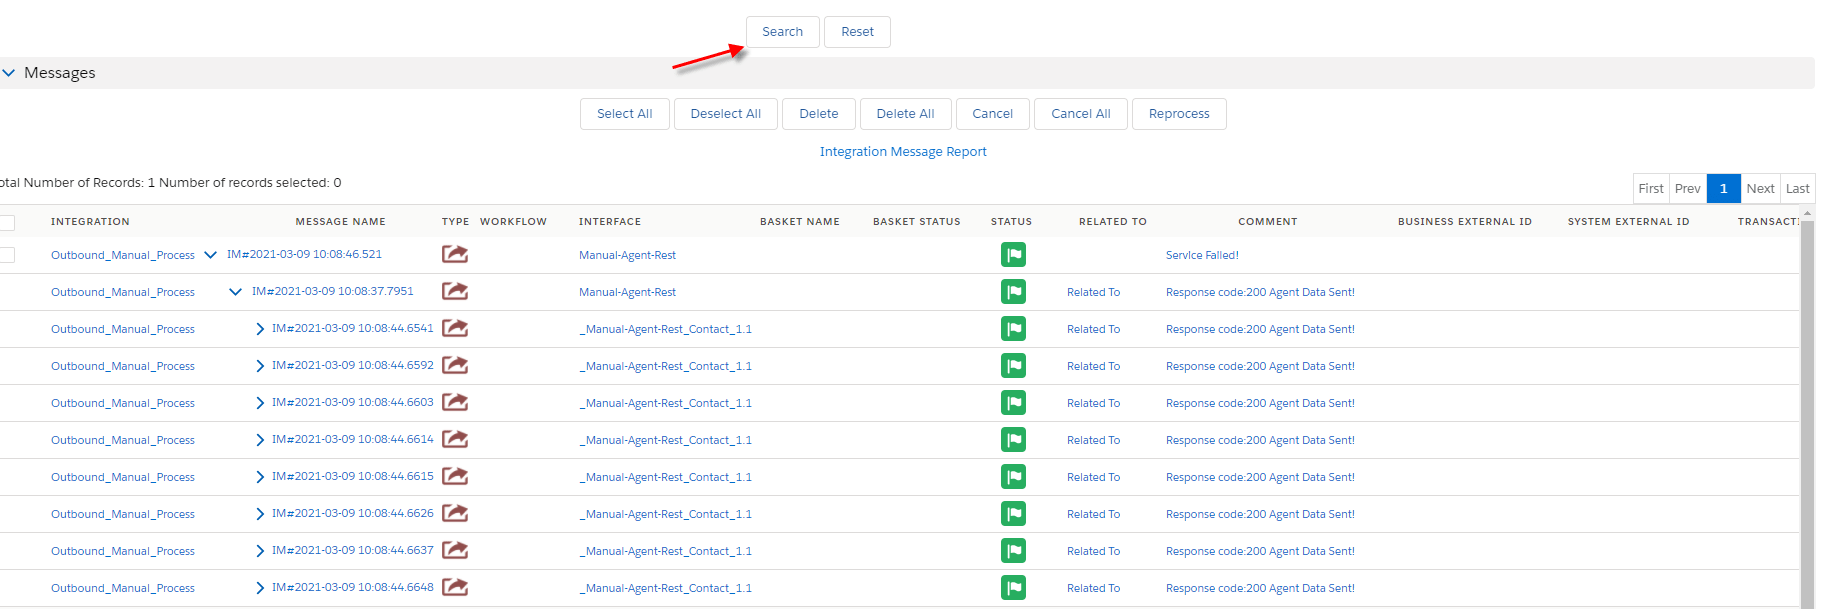
- Go to message monitor to check the result
This case do Manually select the sObject using the query builder
Step1: Go to integration detail
- Create an outbound interface link adapter and Metadata provider into the interface.
- Do mapping
 Step2: Agent Control board
- Go to cache monitor to ensure the properties that you set in the interface are cache retrieved.
- Choose one interface and click the Manual button
- Choose Manually select the sObject using the Query Builder option
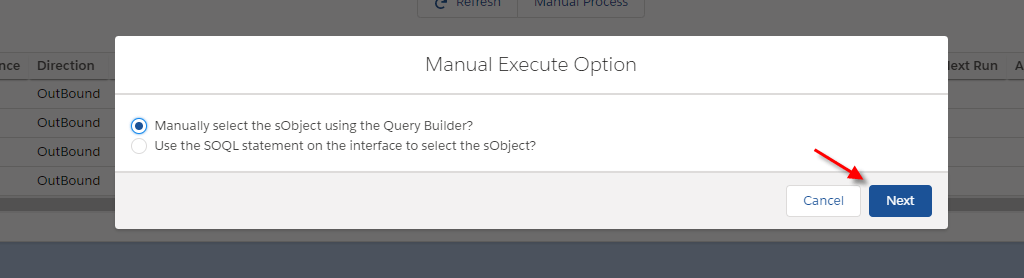
- After you click the Next button

- You can choose all records or some of the records that you want to callout and click the OK button.
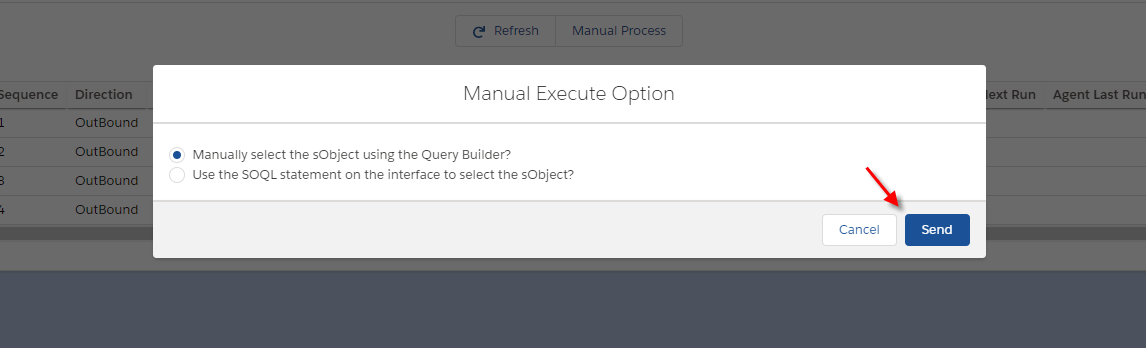
- After clicking the OK button it will be previous to the first page and then click Send button.
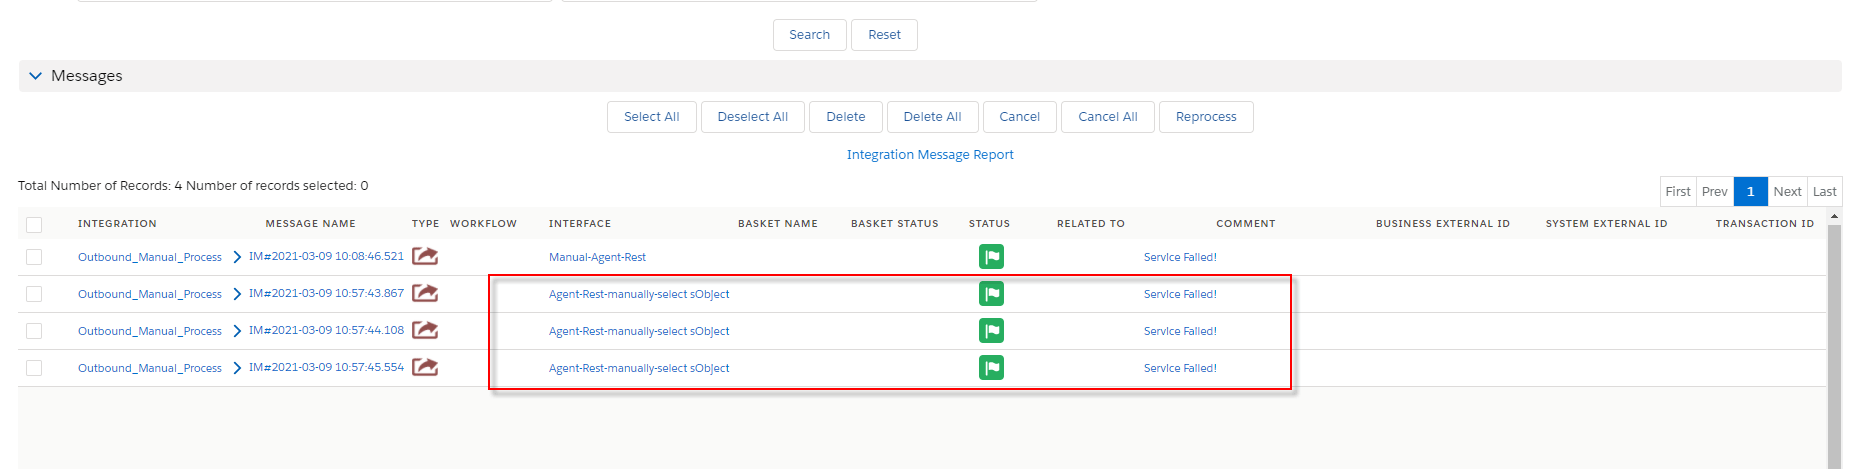
- Go to message monitor to check the result
How to run an outbound interface using the scheduler? #
In this case, We need the scheduler to callout data from salesforce to the external system.
Create integration as the first case
Step1: Create an outbound interface and link message type into the interface
- Input select statement into Filter Query’s field.
- Do mapping and click the save button.
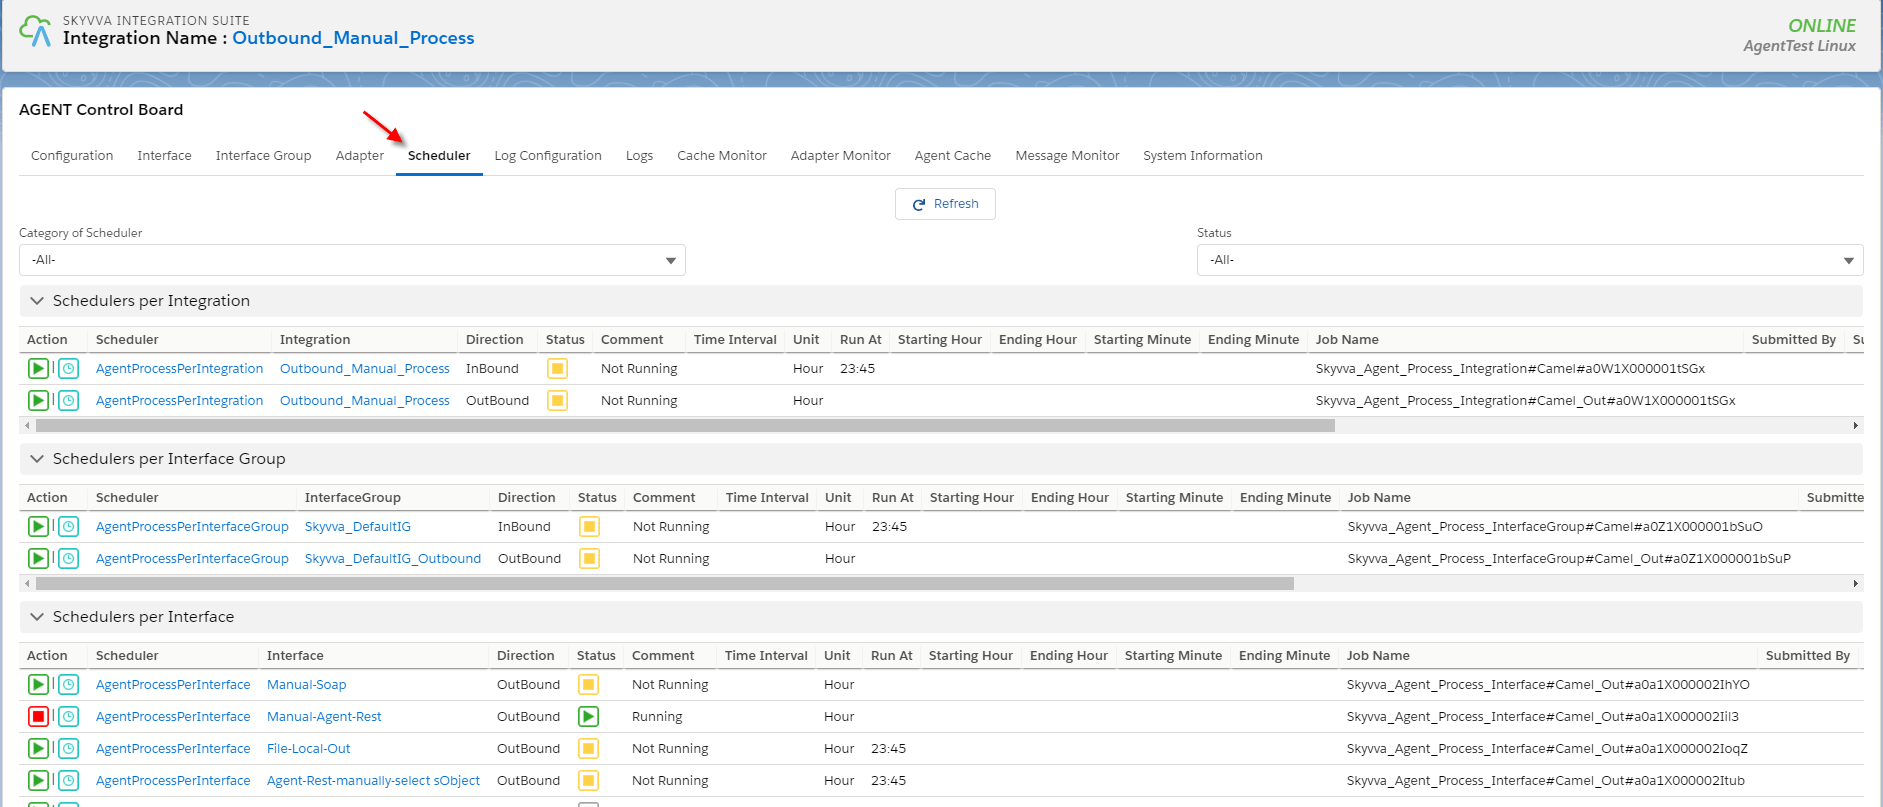
Step2: Run scheduler
- You need to check the cache to make sure that adapter, Integration, Interface group, Interface, Ichain, Mapping, or workflow that we set on an interface is cache retrieved correctly.
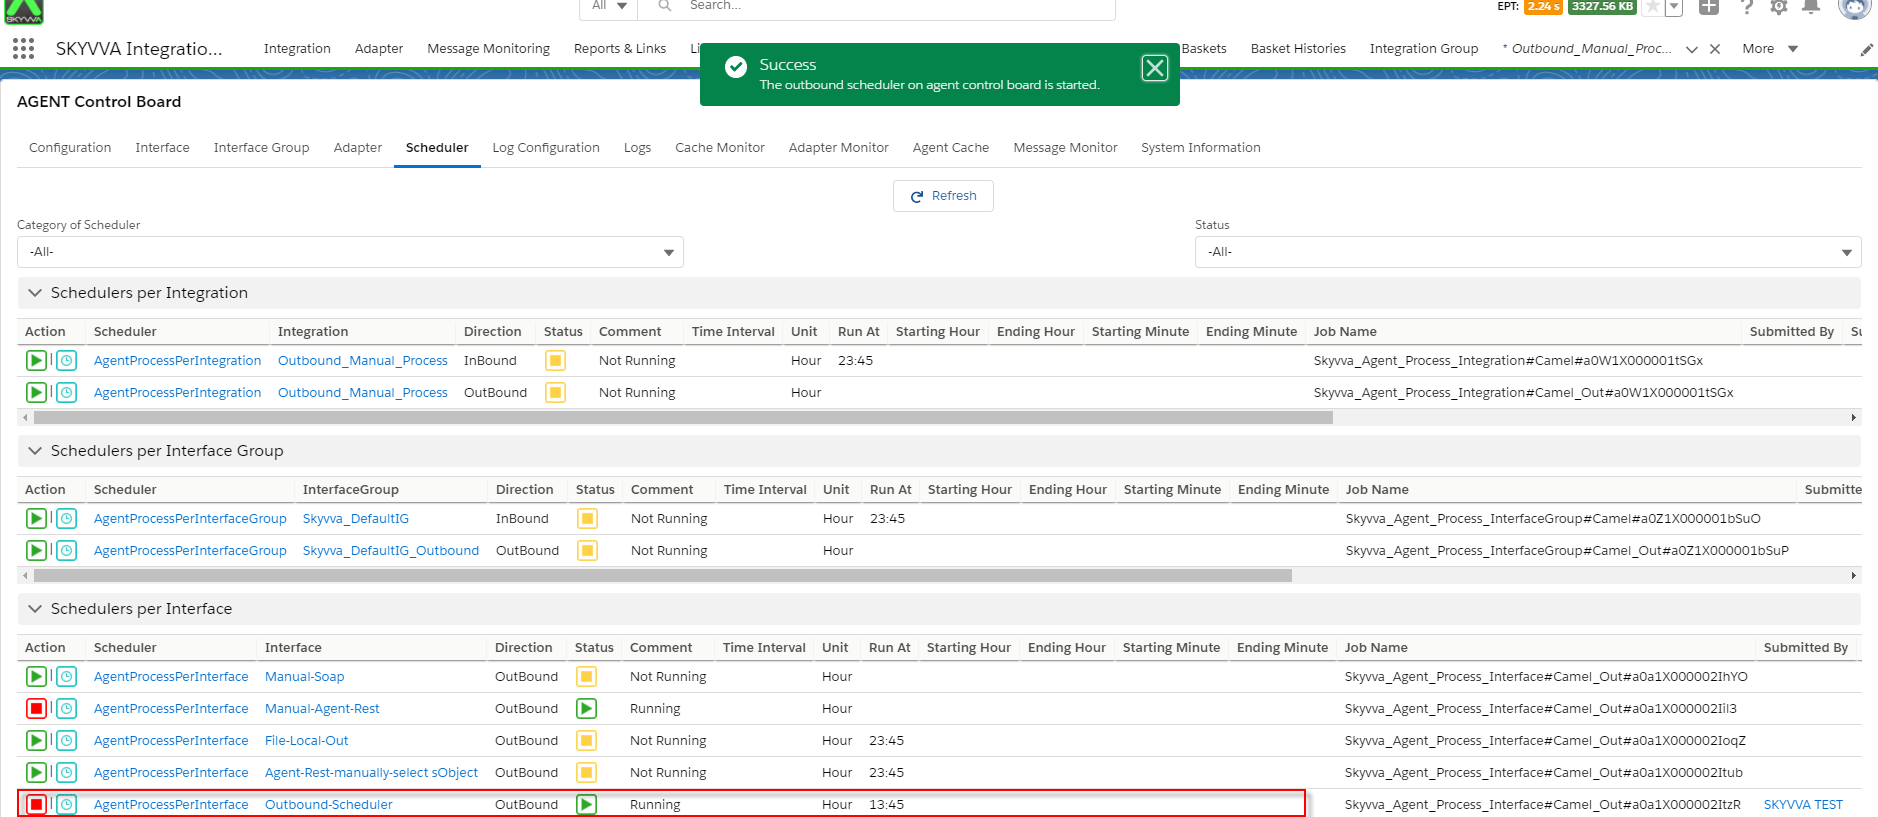
- Agent scheduler will be generated after the user clicks the scheduler tab.
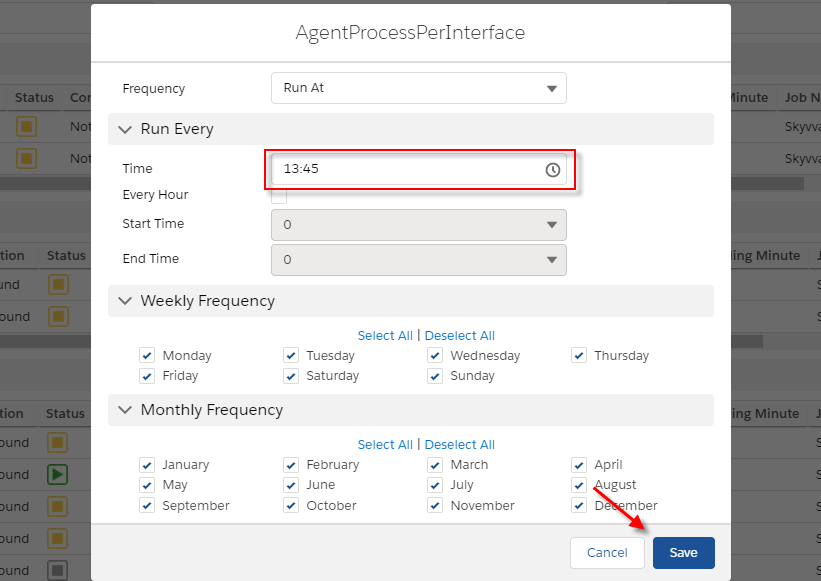
- Set the time to Run At
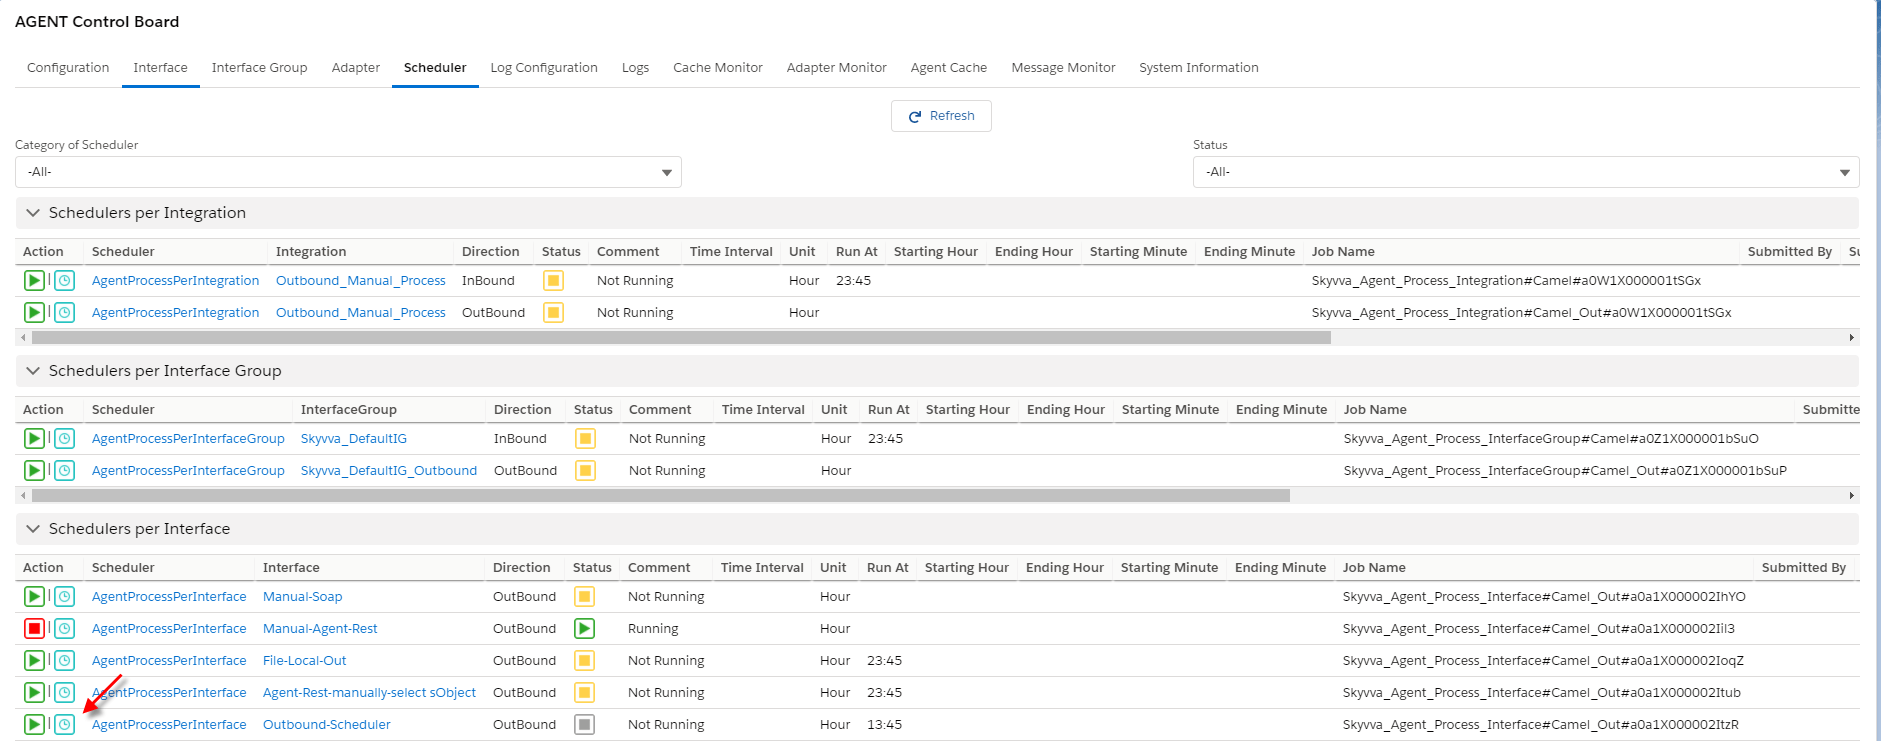
- Click on the Action button to start scheduler

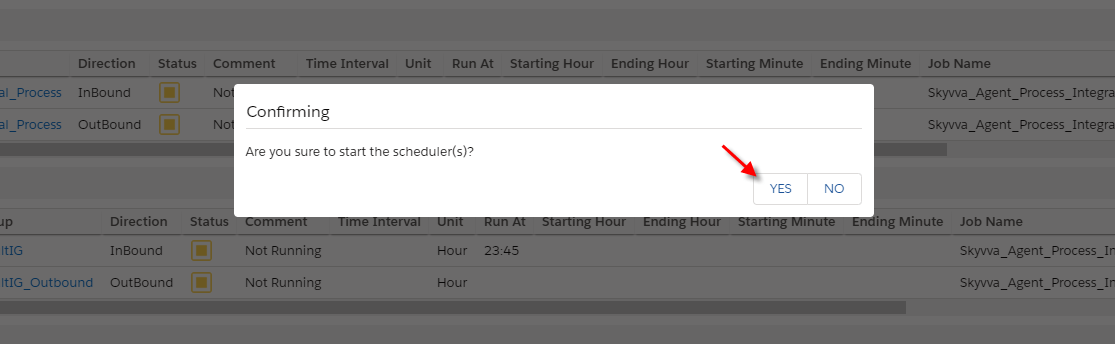
- The scheduler is starting
- Go to check the result on monitor tab.