
Introduction:
Here you can now use the apex trigger to send only fields that are changed through the outbound interface. You need to do this from Salesforce. Here also describes how to work with CDC Trigger and CDC control board.
Objectives:
This document describes us administrative work which is required to send only change field with Apex trigger and with CDC.
What is Change Data Control (CDC)
With CDC we provide an ability to record all data changes you create on any business object. It will be automatically push to your external system at any time you scheduled. In comparison to the streaming API, you can overcome the limit of sending changes record by record. Here we can bulk and collect changes to be callout in packages meaning that you leverage the best usage of your Salesforce resources. Don’t disturb your online business user while operation hours.
For configuration please hit this link ↓
– What is CDC and how to configure it?
In the above link all basic things about CDC are mention.
Pre-require:
- Upload Message Type
- Create Integration
- Outbound Interface
- Create SOPA Adapter
- Create Trigger and put in Object Account.
Below are the steps how it’s Work:
Step 1: Upload SOAP Message Type
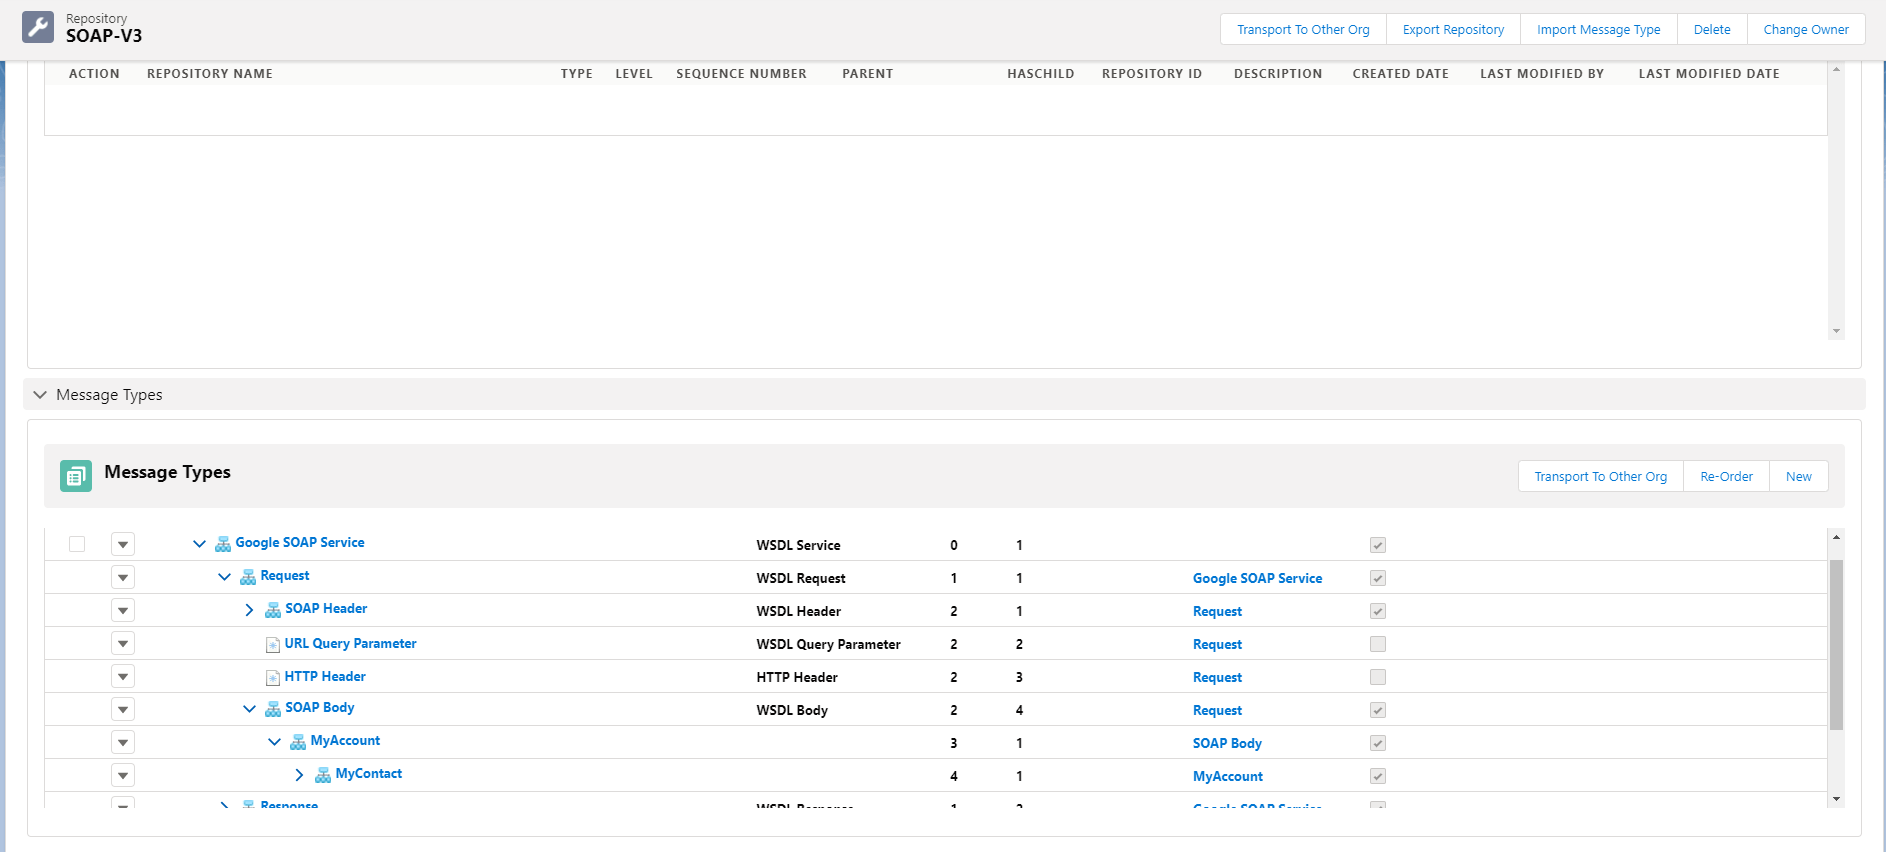
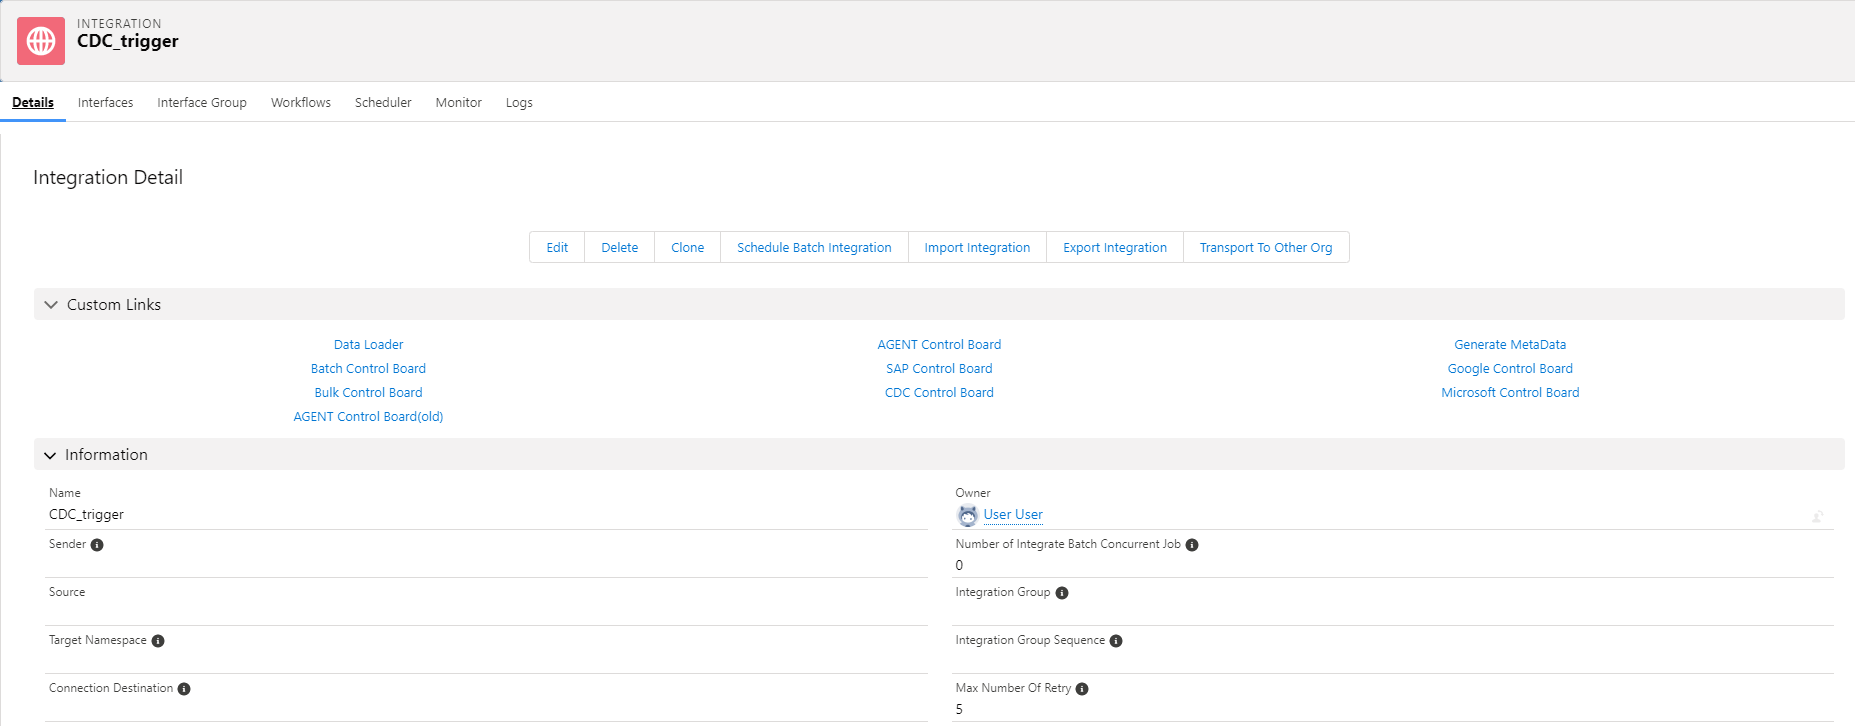
Step 2: Create Integration
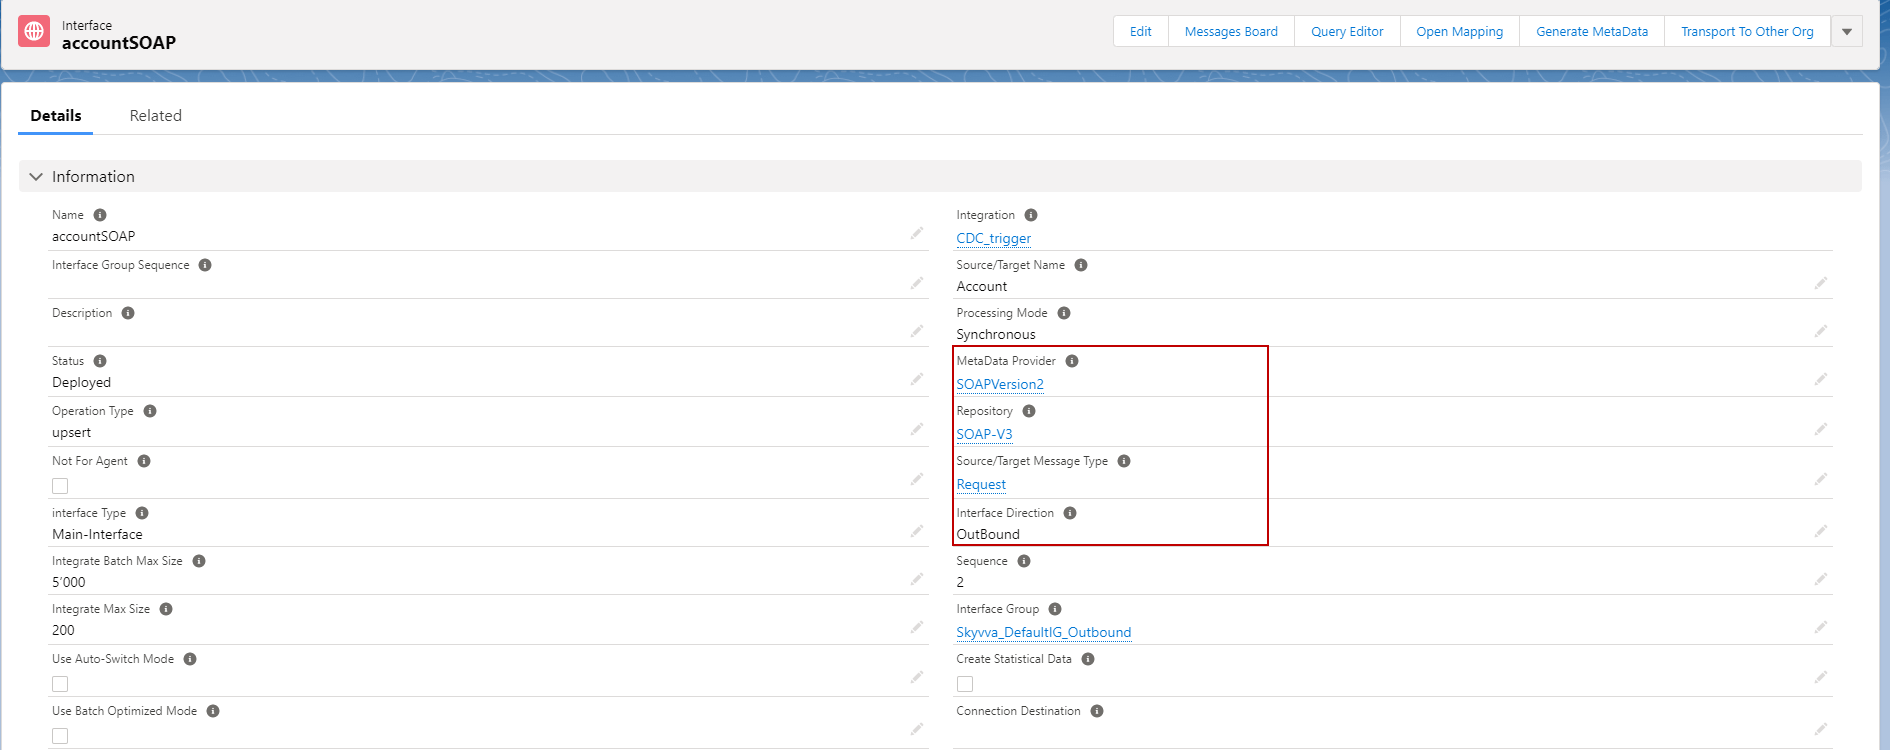
Step3: Create Outbound Interface and linked with Message Type
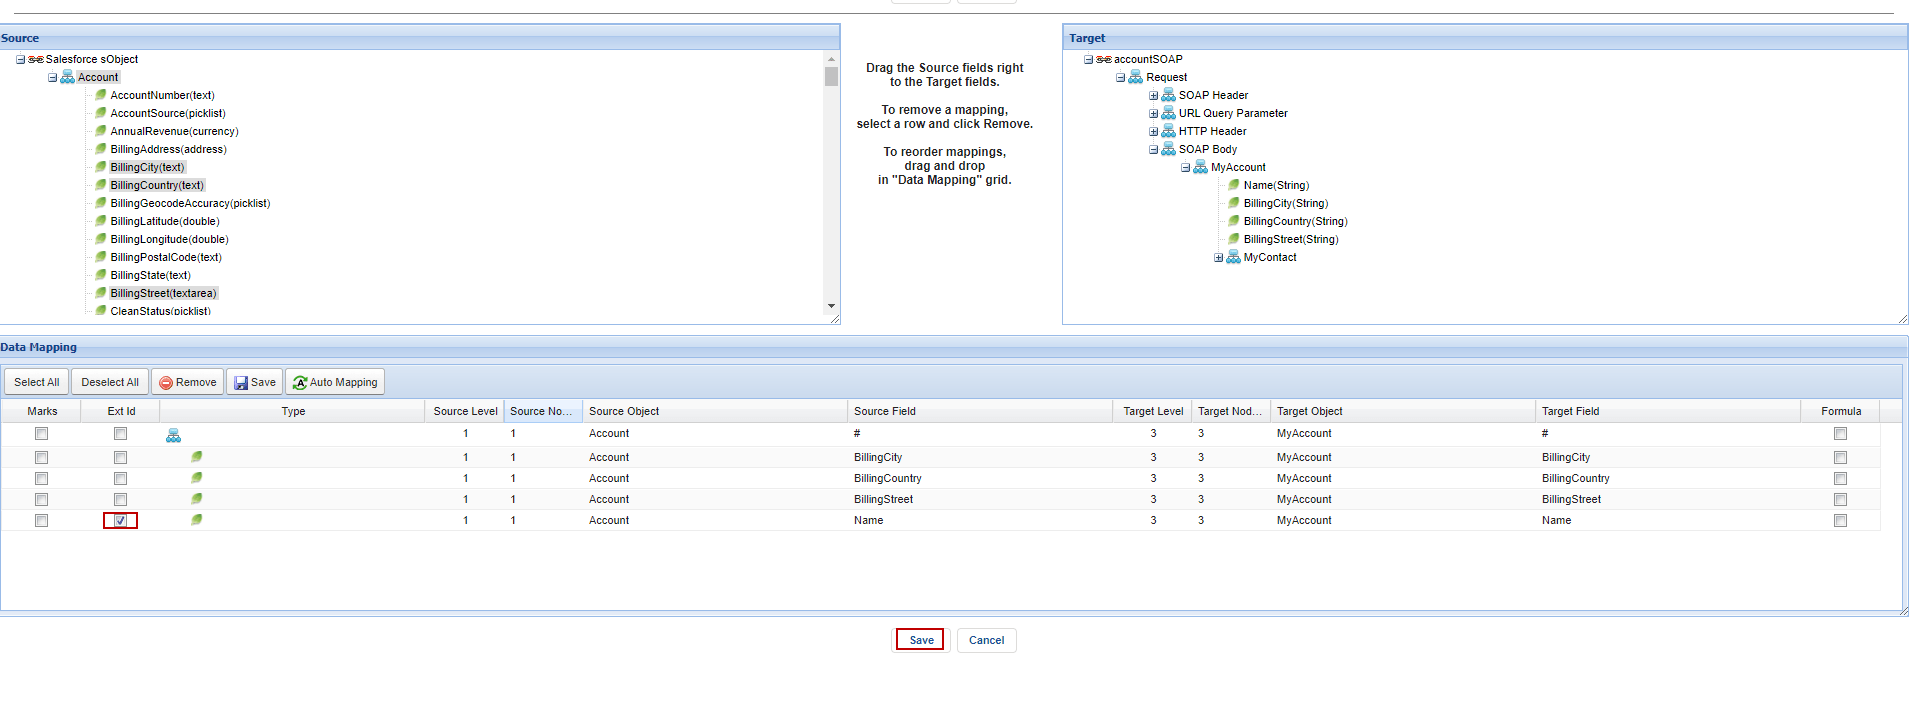
After this Need to Do Mapping
To use trigger, we need to have external Id. Here’s example below.
 Step 4: Create SOAP Adapter
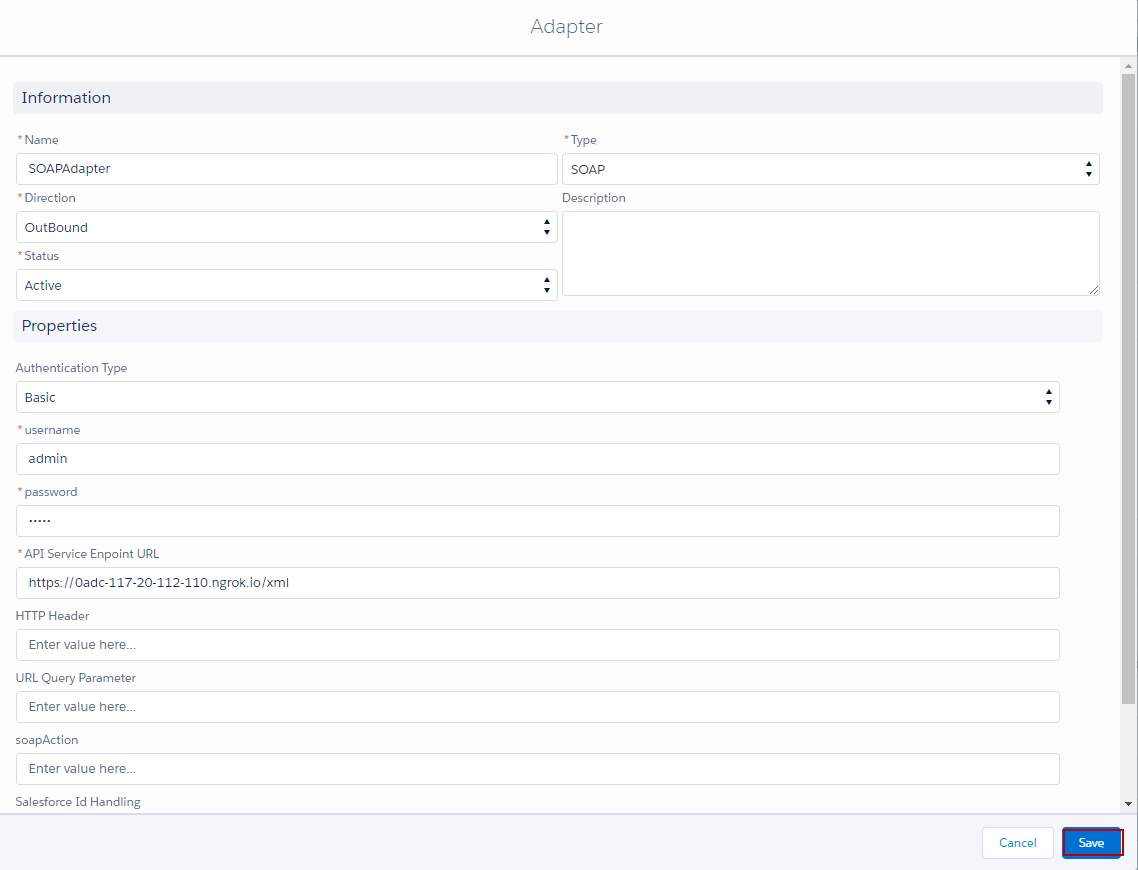
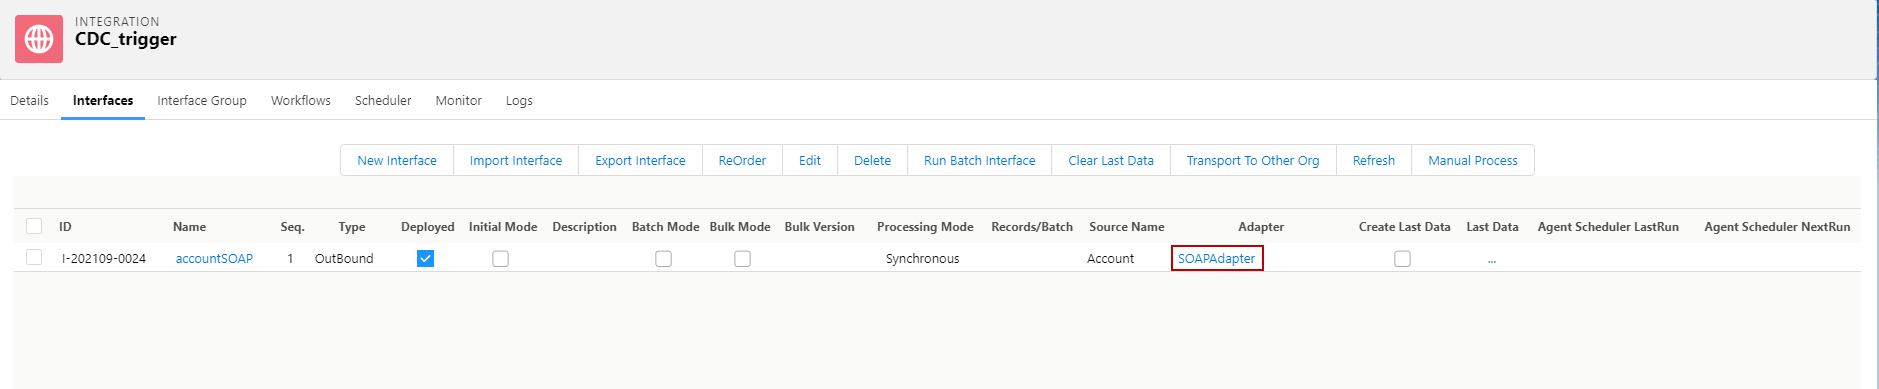
Step 5: Linked this Adapter with Outbound Interface.
Step 6: Create trigger and put in Object that’s we using.
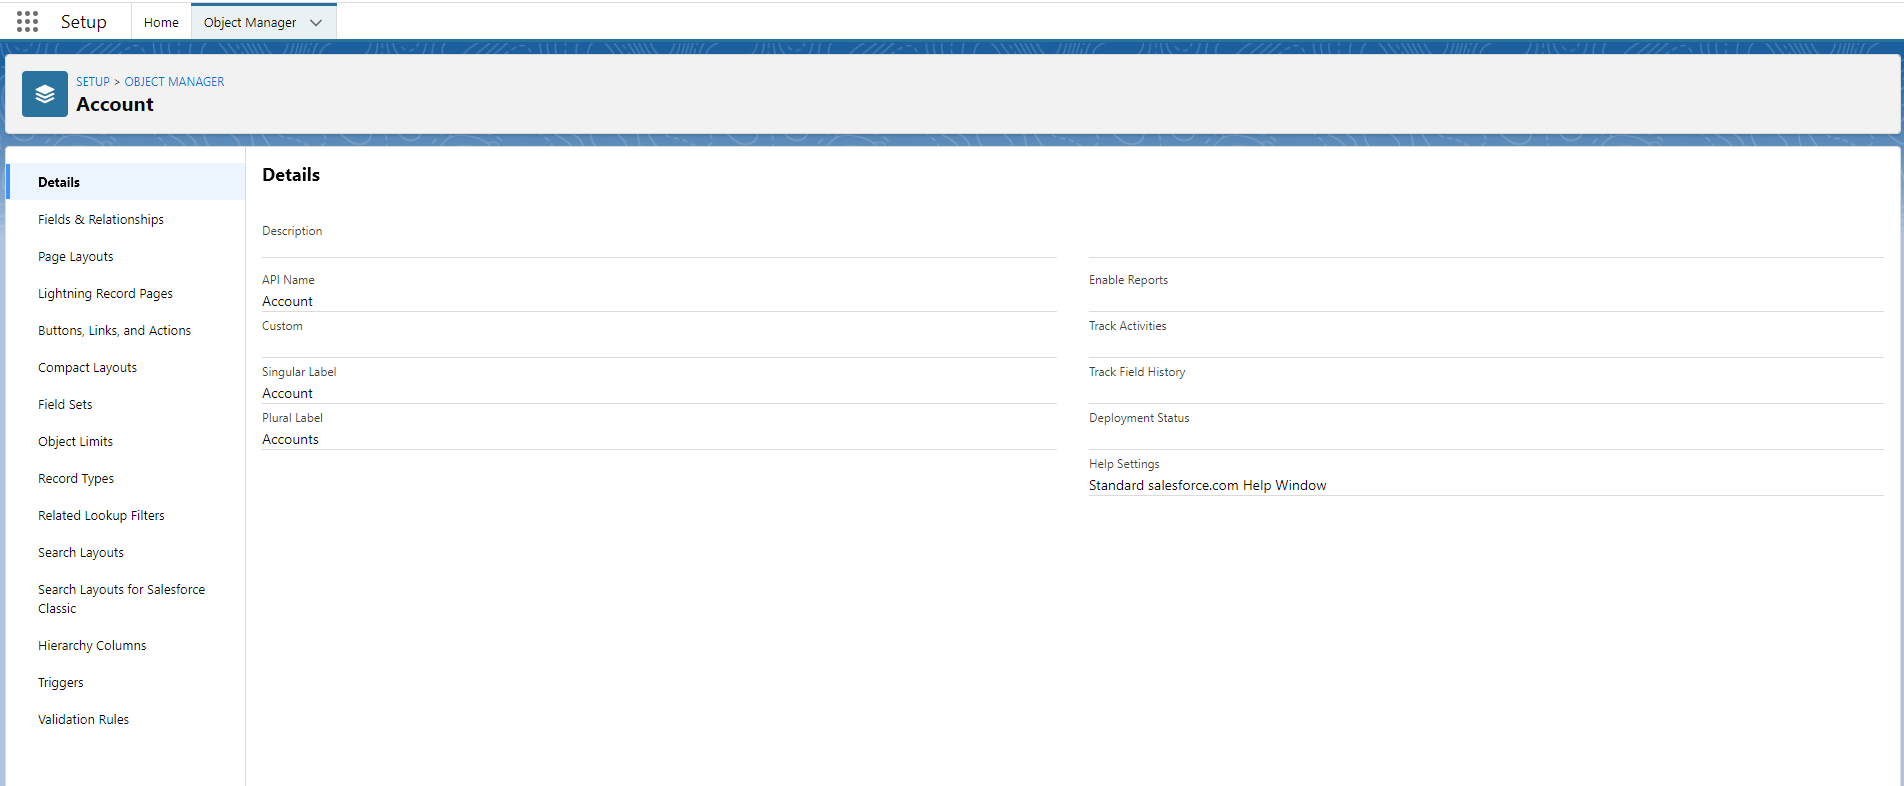
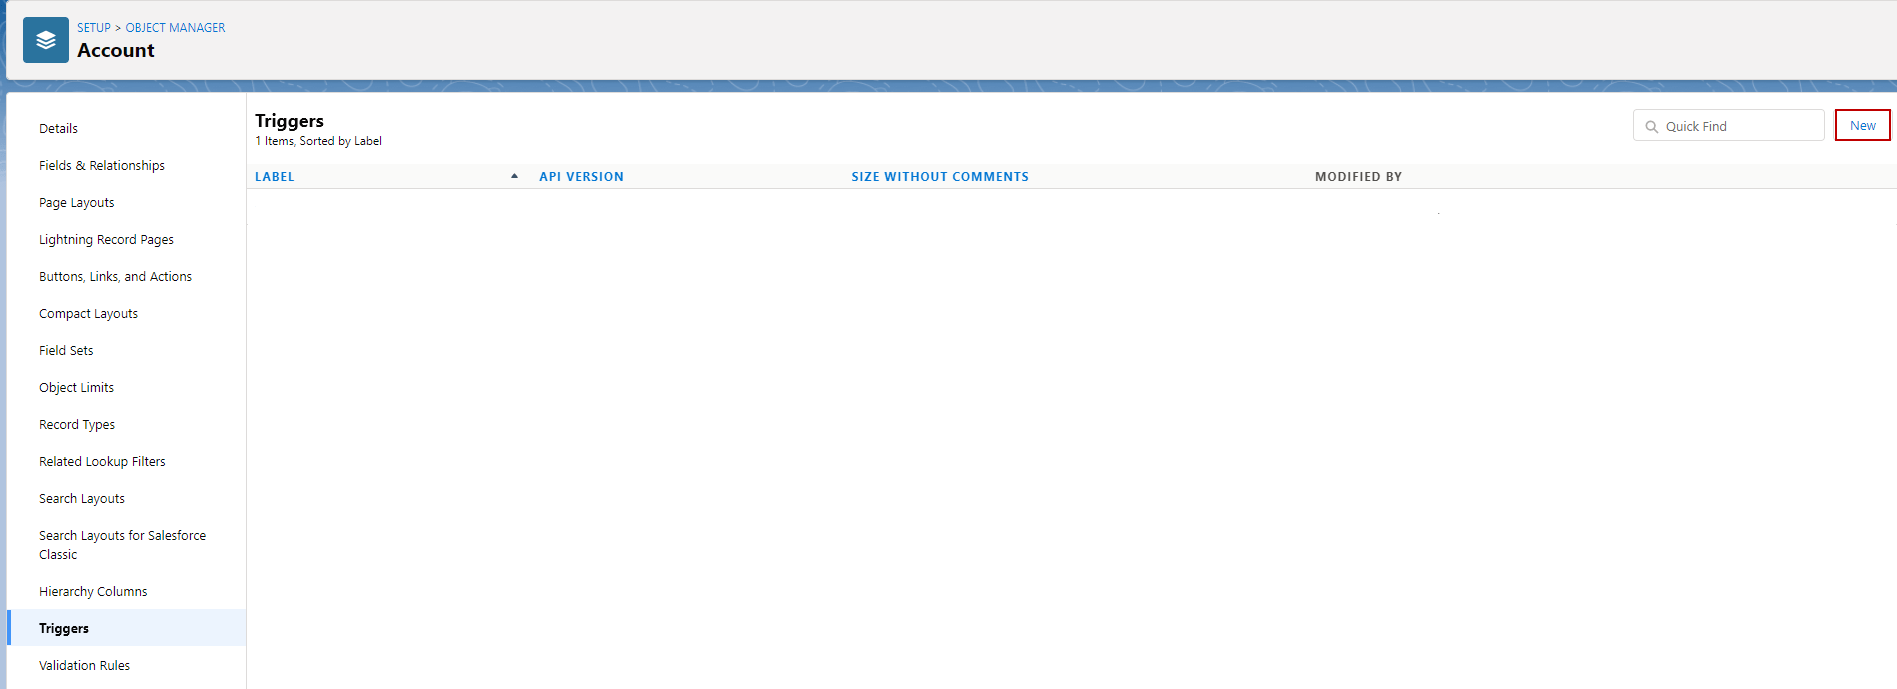
- Go to Setup and click Object manager. Check example below.

Using Account Object, we need to go Account.
Click Account.
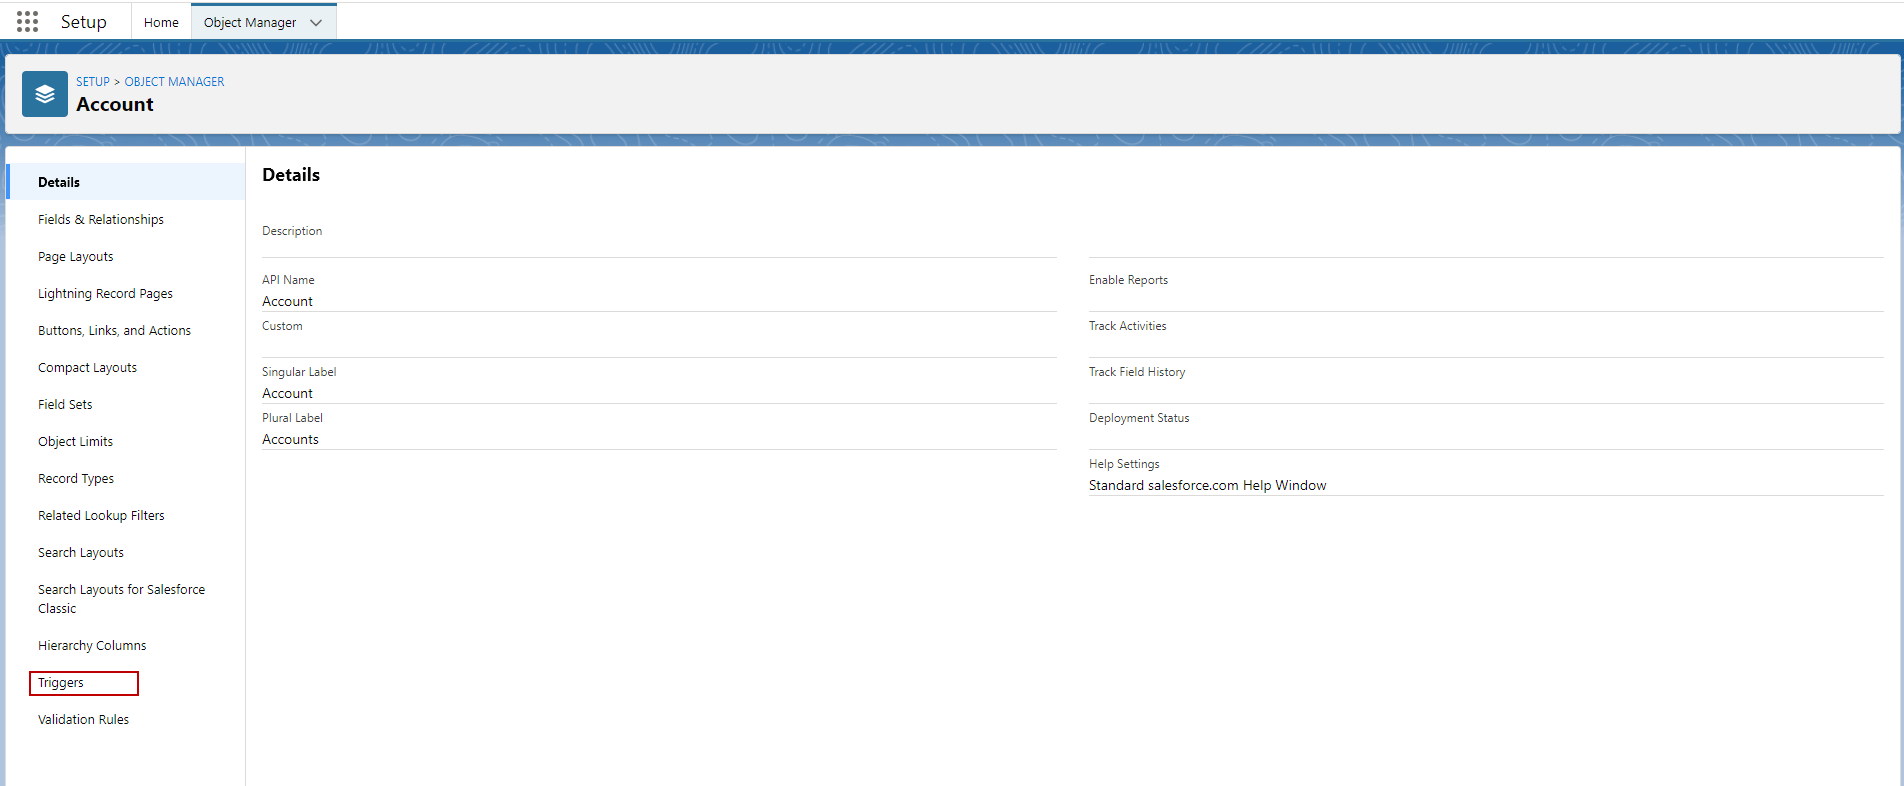
Go to Triggers.
Here’s example
- Click new button.
- Here’s the trigger for change records to send all fields and send only fields change with External ID.
if (Trigger.isAfter && Trigger.isUpdate) {
skyvvasolutions.CDCChangeData.createCPandCData(Trigger.oldMap,
Trigger.newMap,’CPI Integrate’,’Interface_Trigger’);
}
}
[/aux_code]
- Copy the trigger above and past it.
- Click Save button
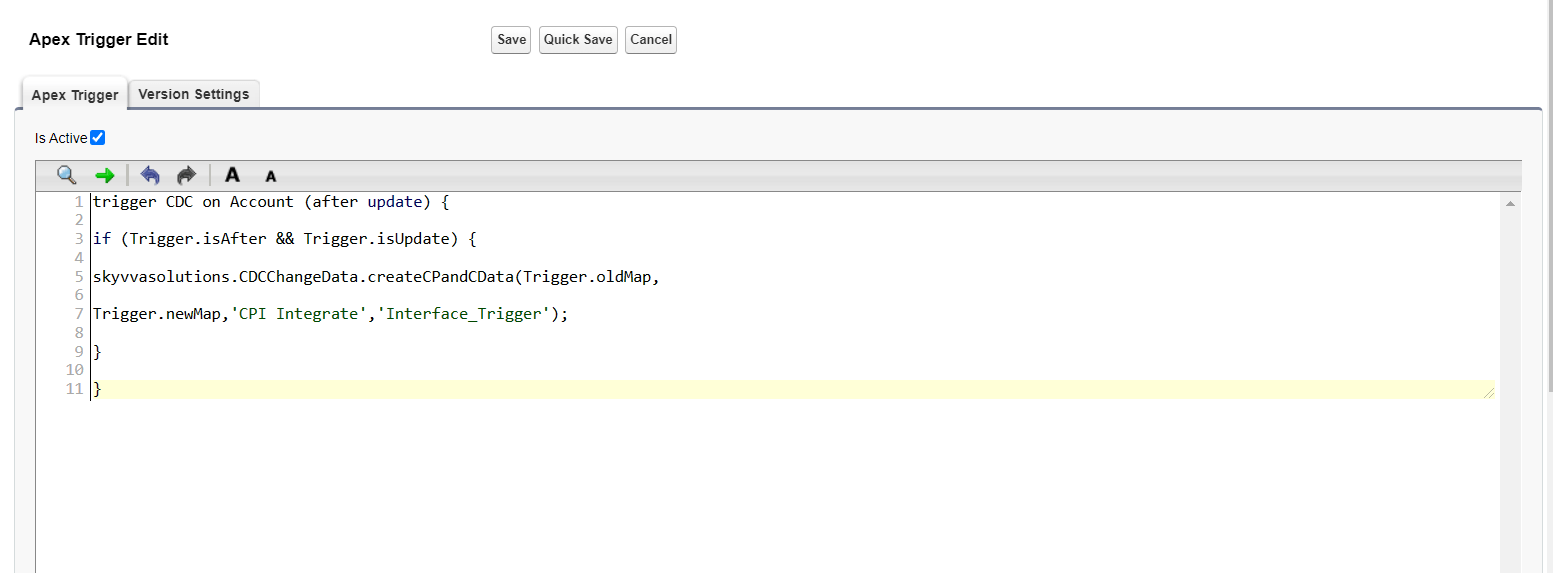
- Here’s the trigger cdc for using options send all fields from mapping and send only fields changed. that we created in Account objects.

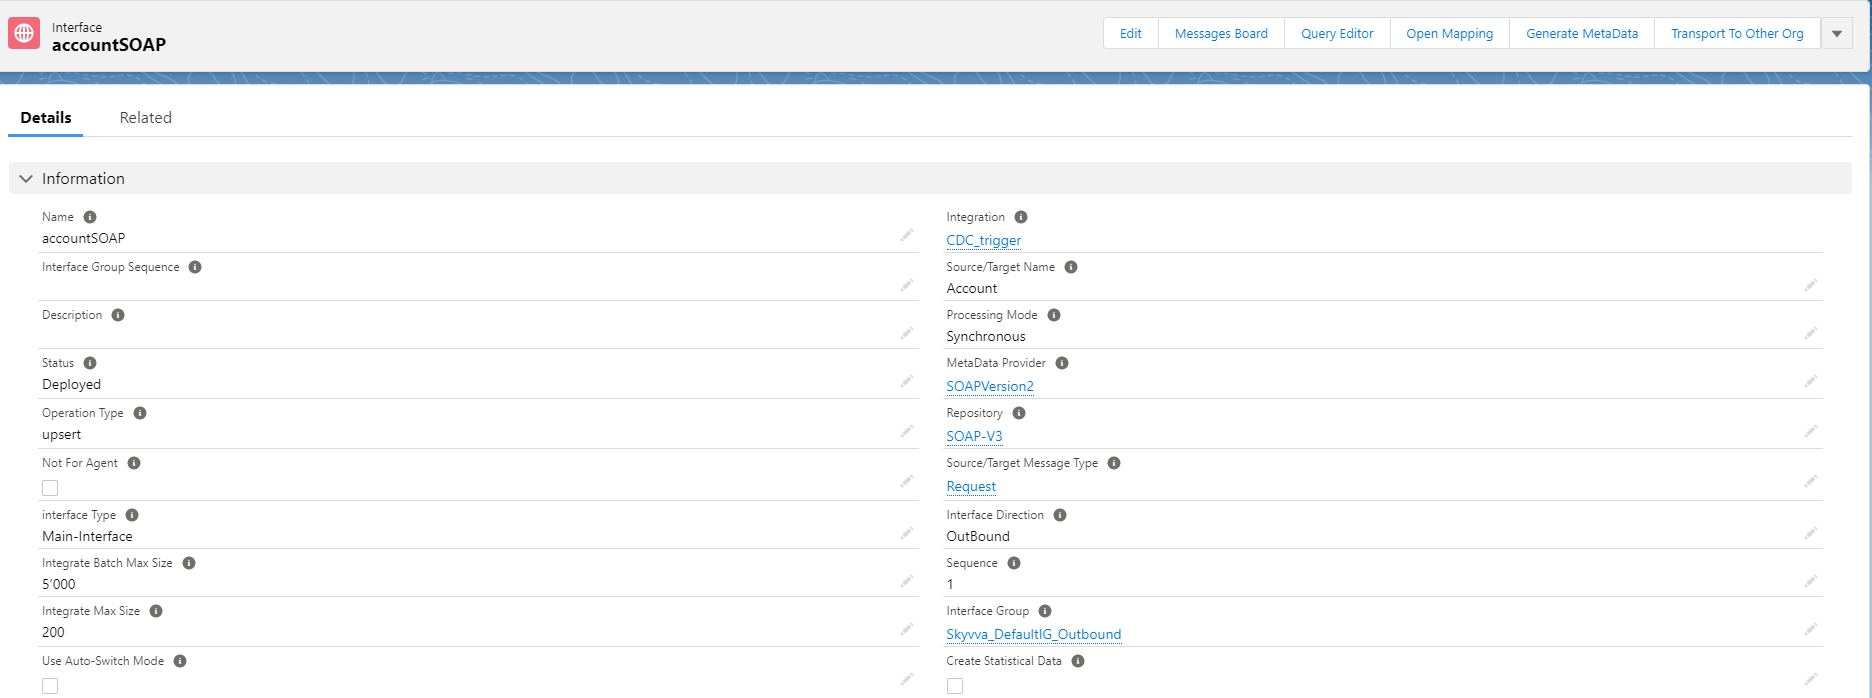
Step 7: Go to Outbound Interface and check flag use Skyvva outbound Scheduler.
- Go to Outbound Interface.
- Scroll down to see CDC and check flag use Skyvva outbound Scheduler.
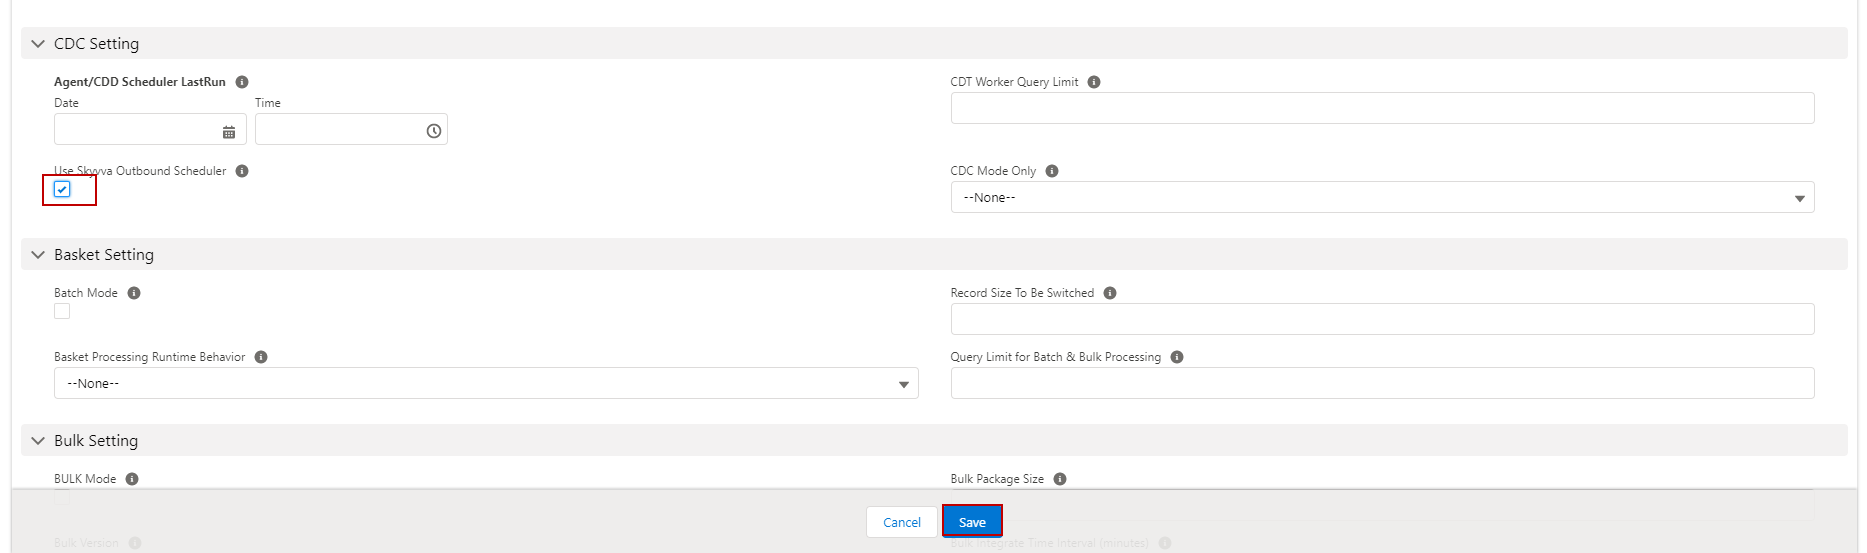
Now we have configuration trigger for CDC that has two options Send all fields that we mapped and send only fields that we changed with external Id. There are two options for CDC first for manually and second is scheduler.
- For processing Manually.
Changed fields Account and send all fields.
- So, this record will send to Change pointer.
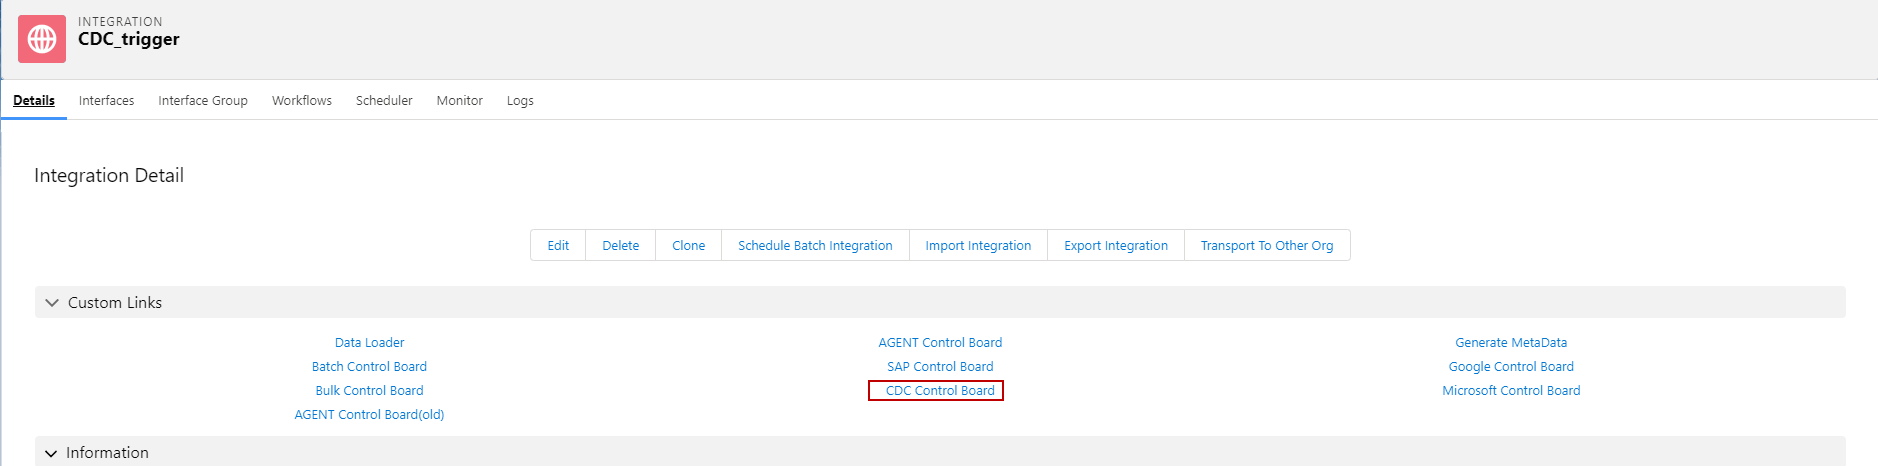
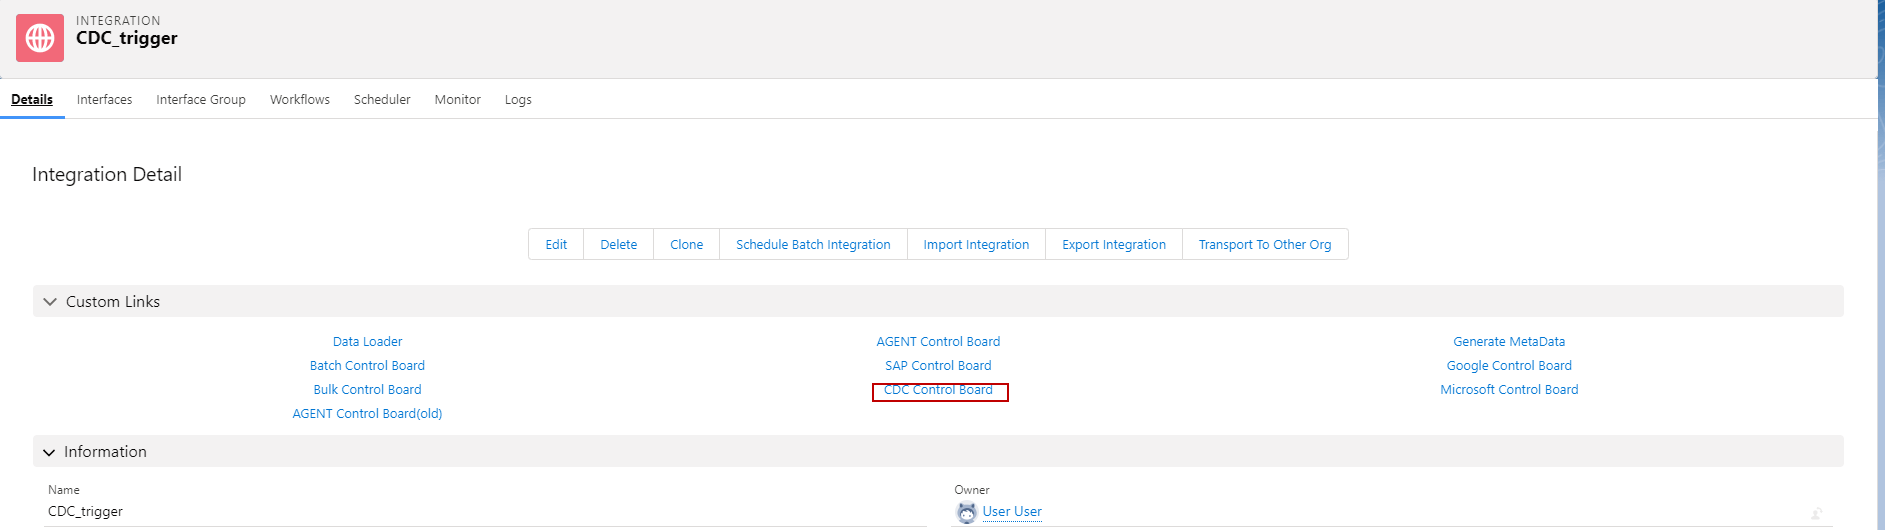
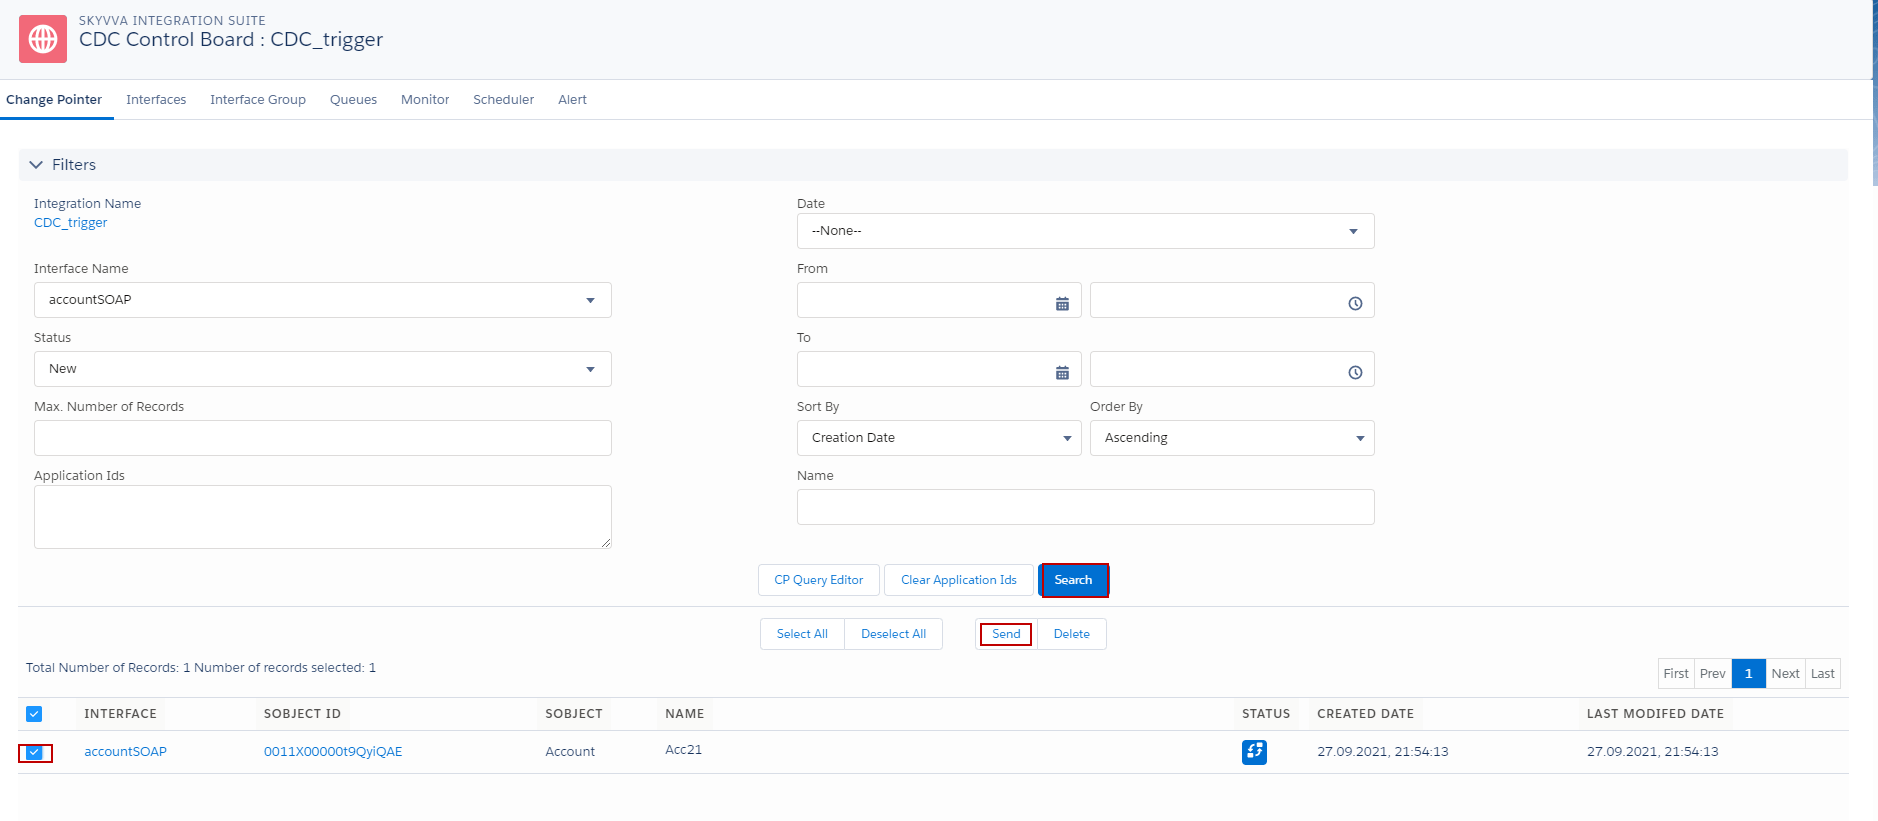
- Go to CDC Control board.
- Click search button to see the record changed.
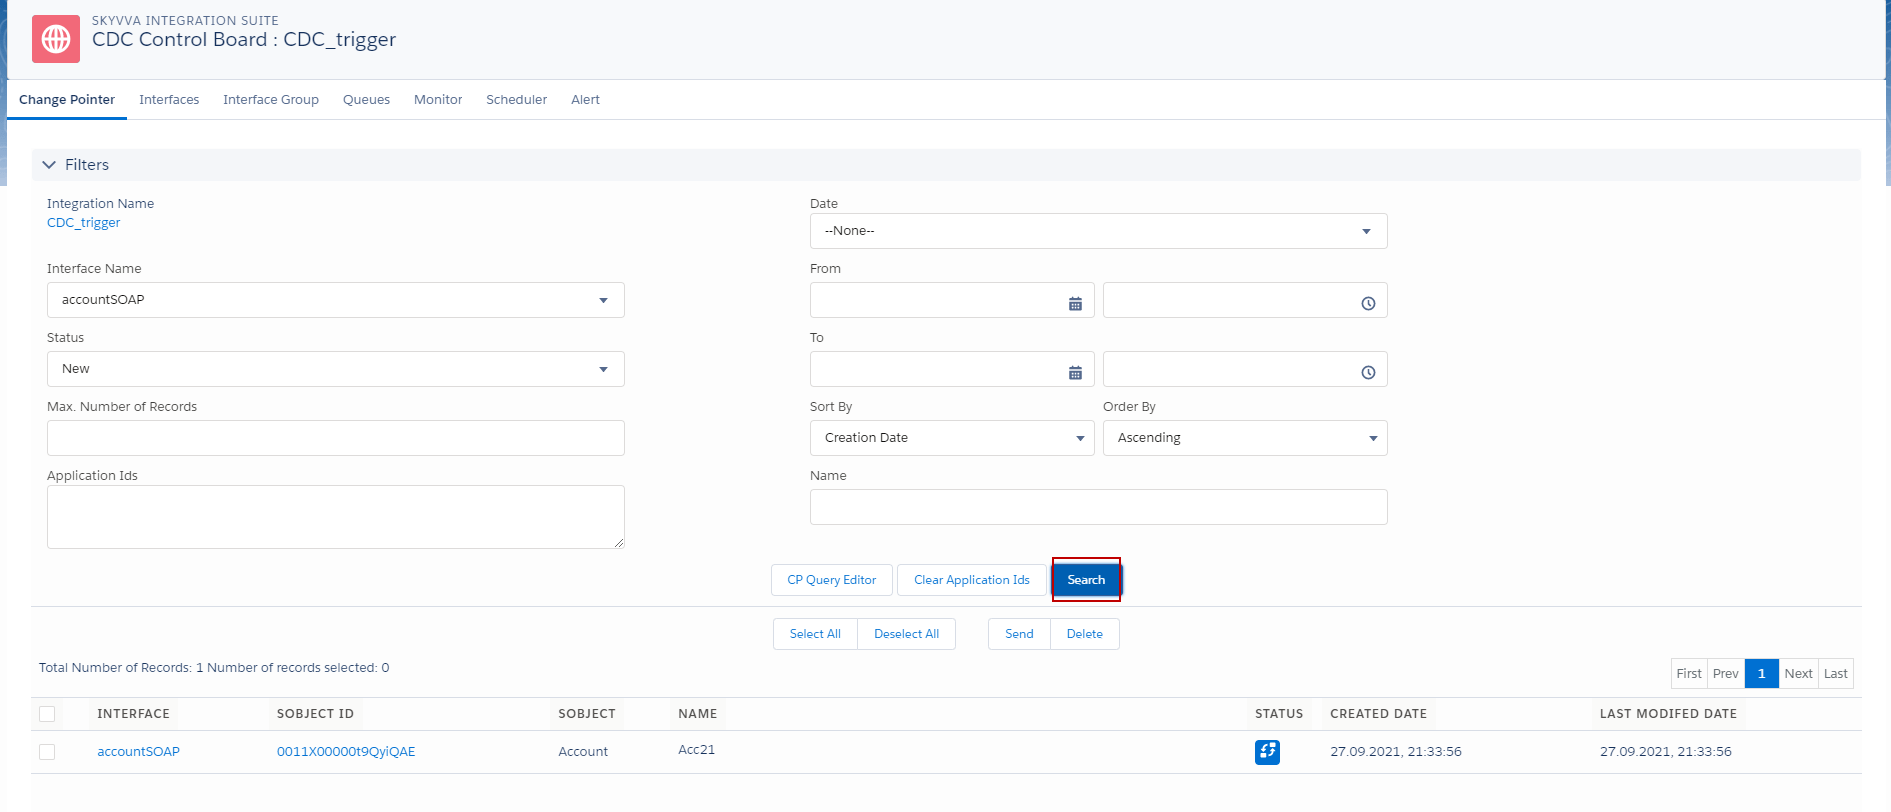
- Check Interface and click send button.
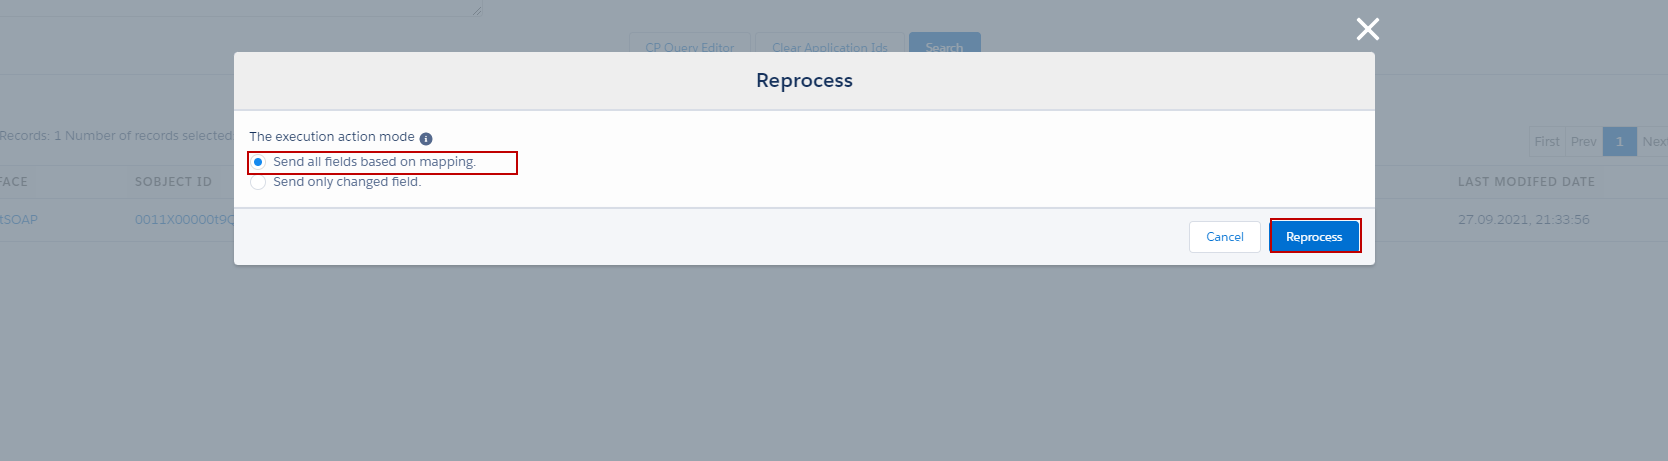
- There are two options such as send all fields based on mapping and send only changed fields.
In this case we send all fields based on mapping.
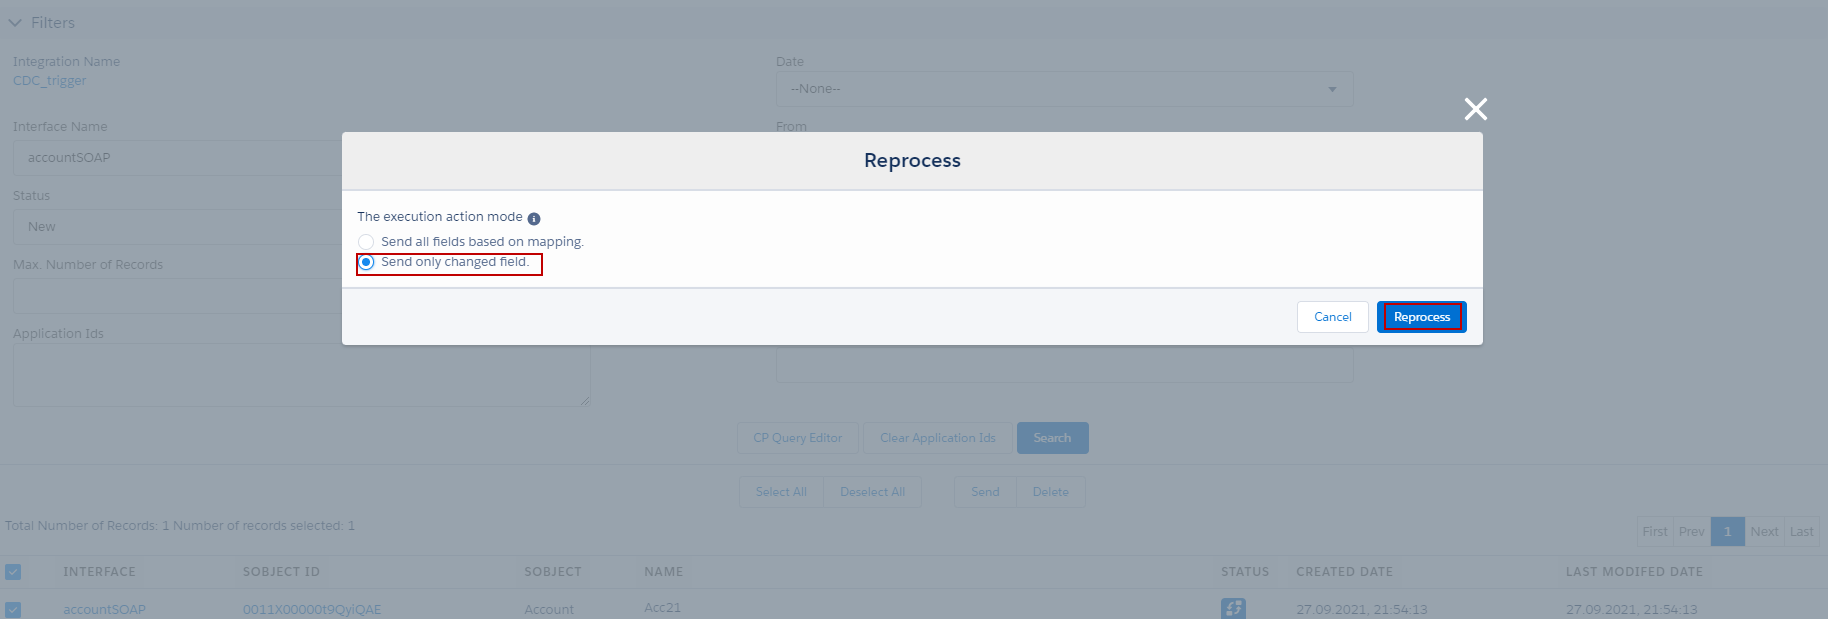
- Choose send all fields based on mapping and click Reprocess.
- Go to monitor to see the result.
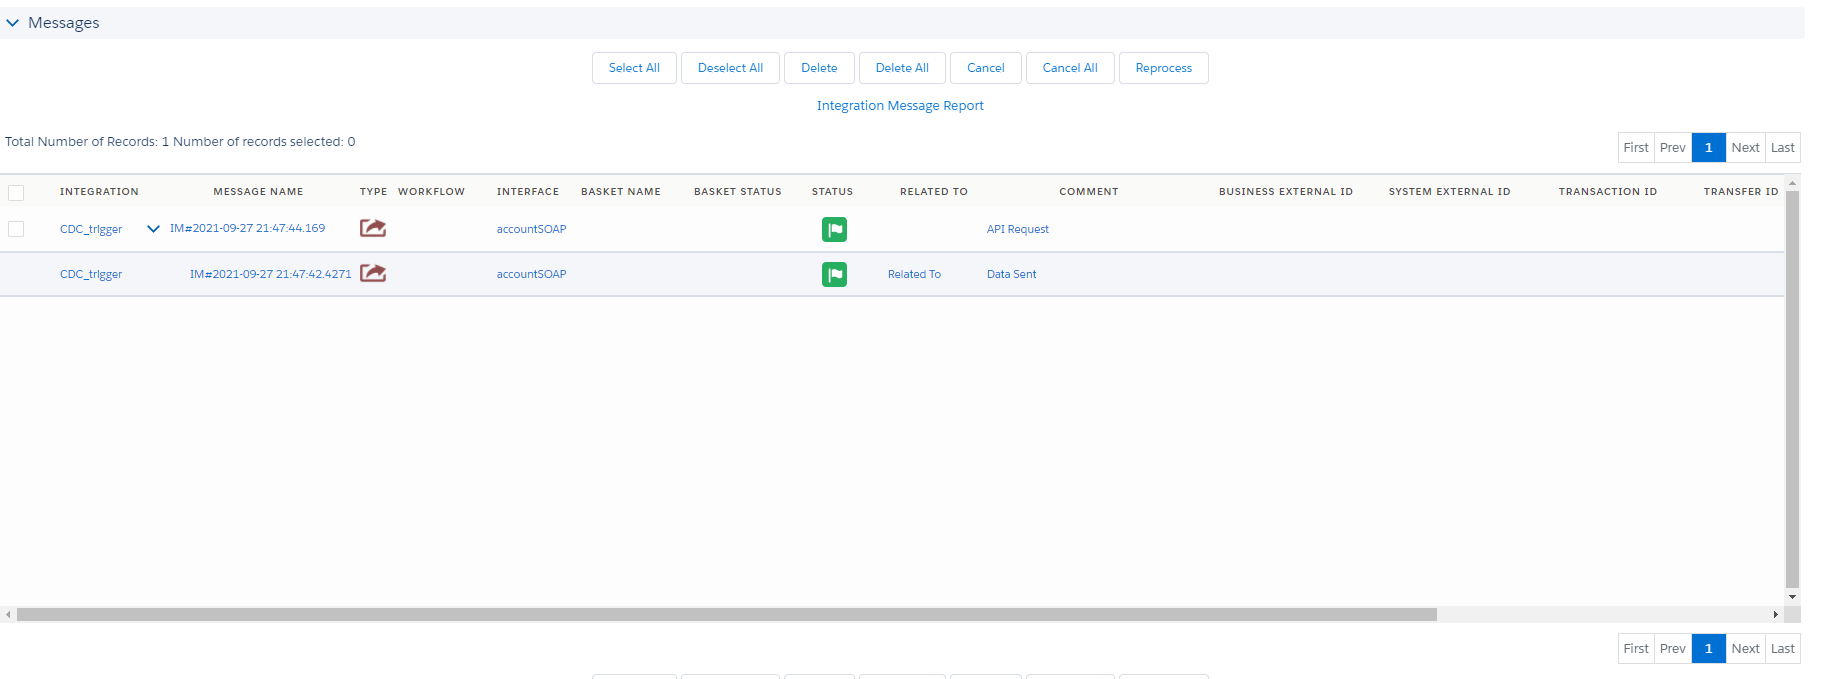
- Here’s the result show all fields.
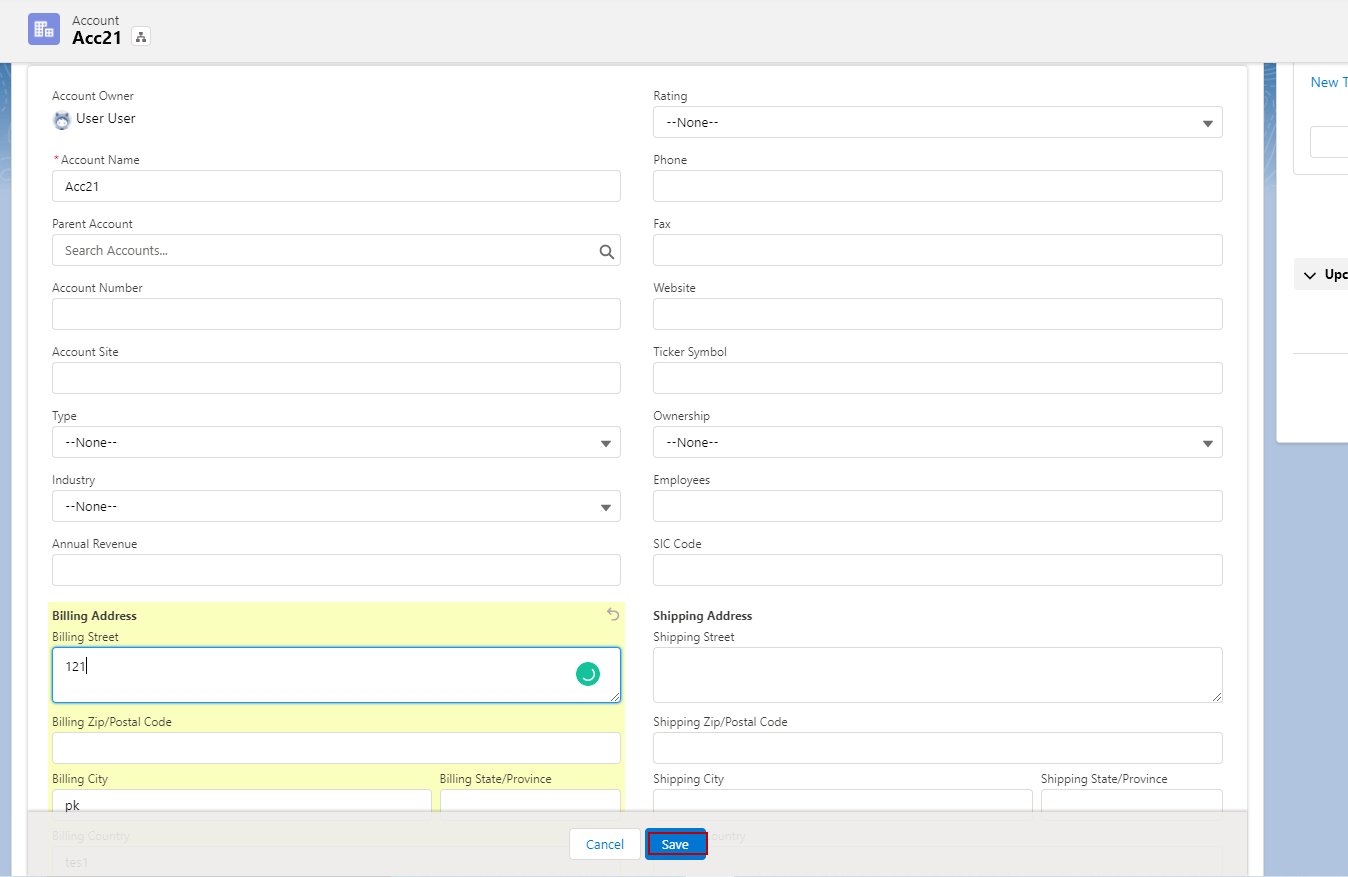
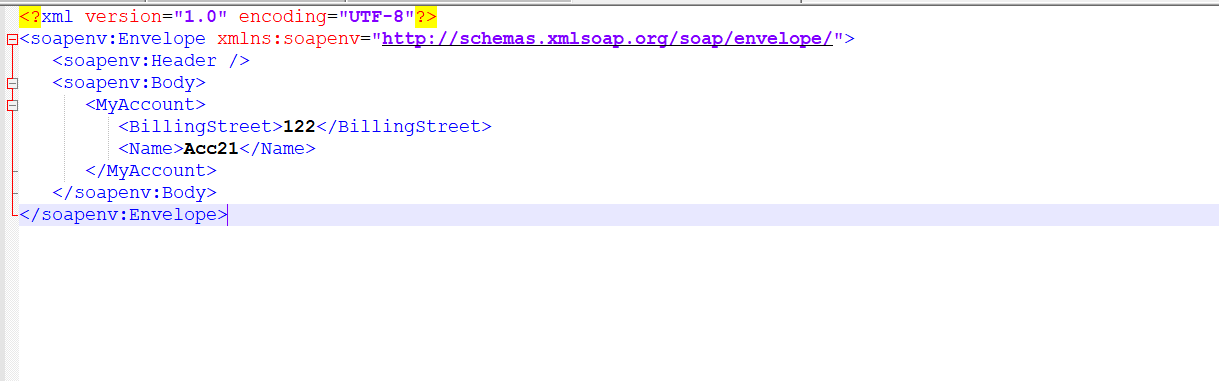
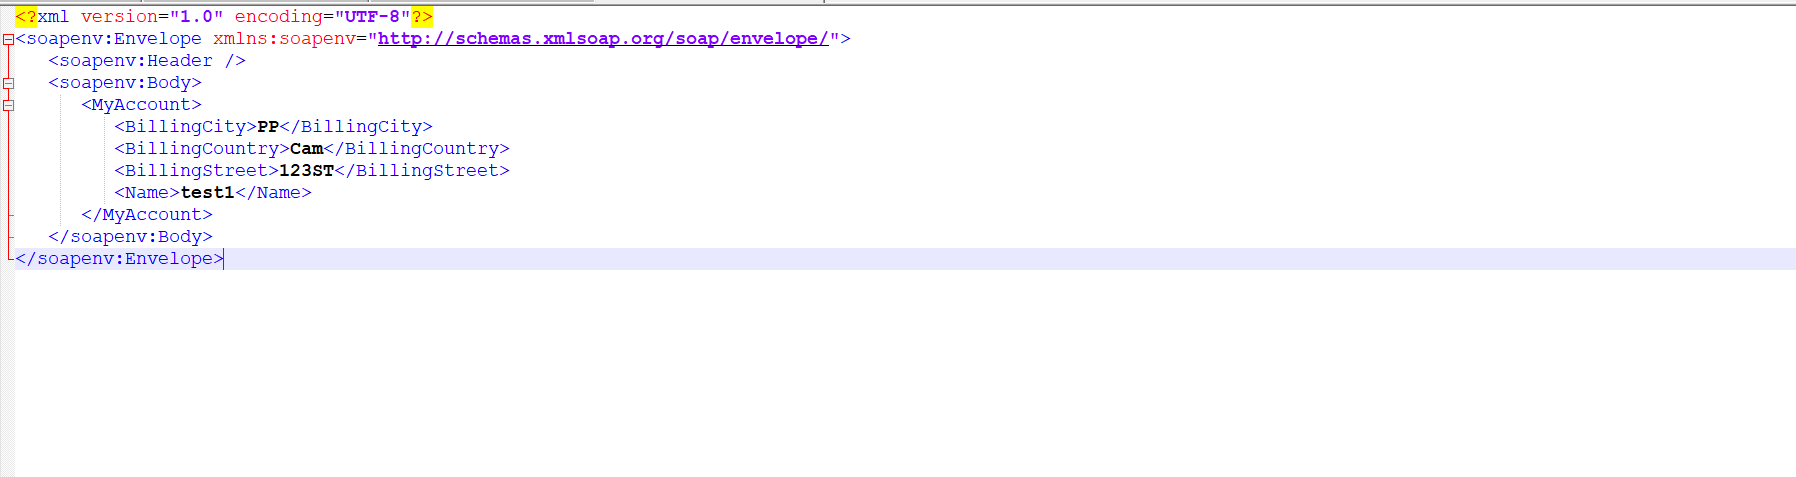
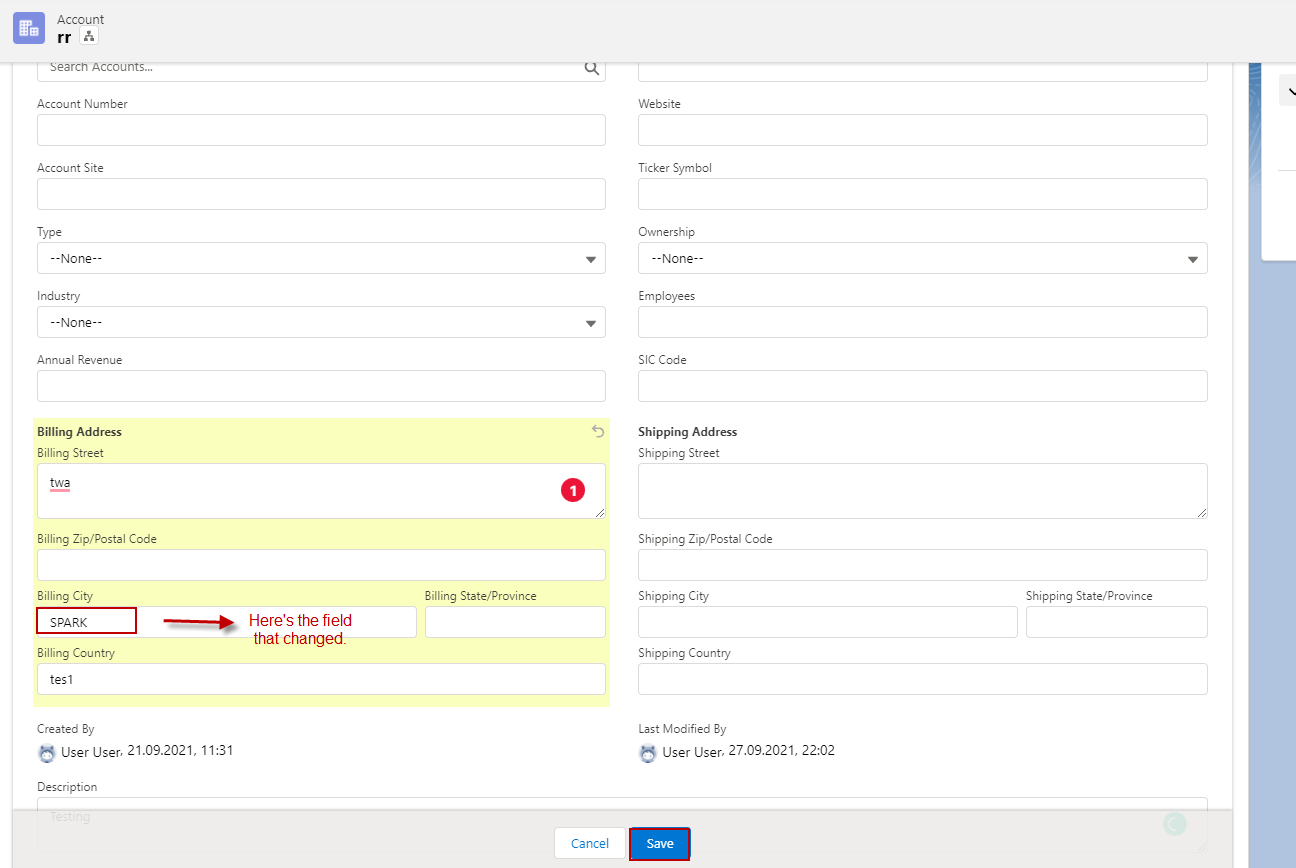
In this case we send field changed.
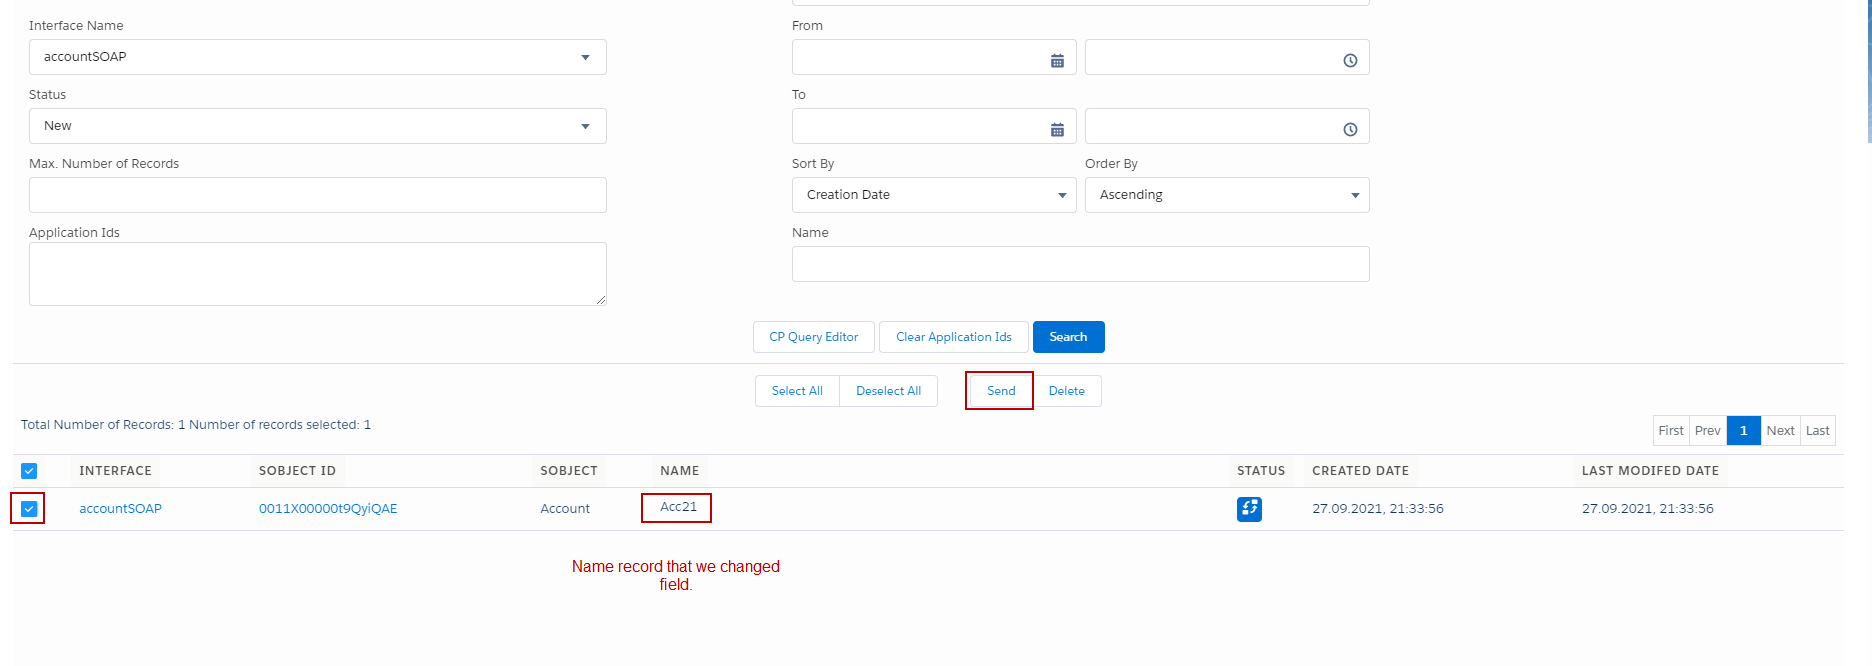
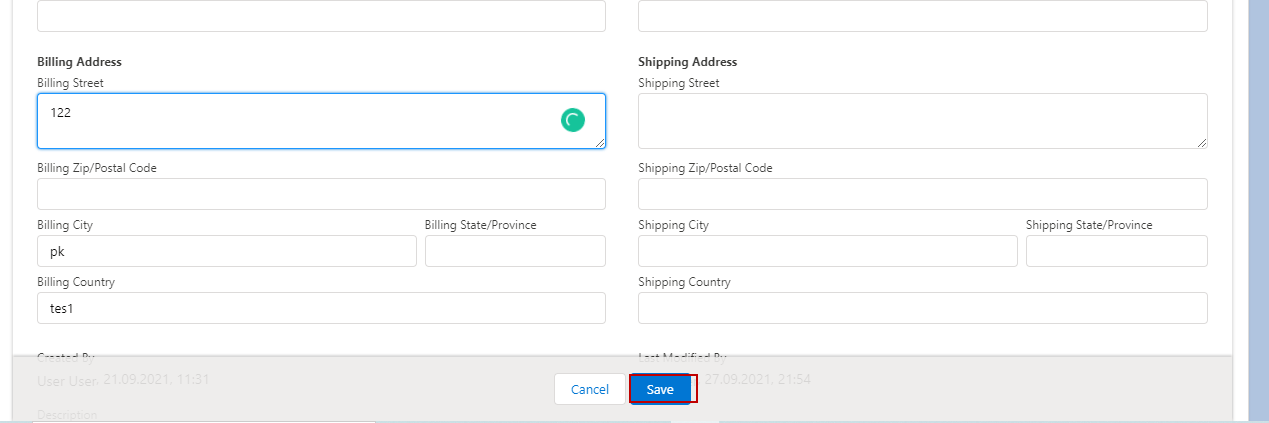
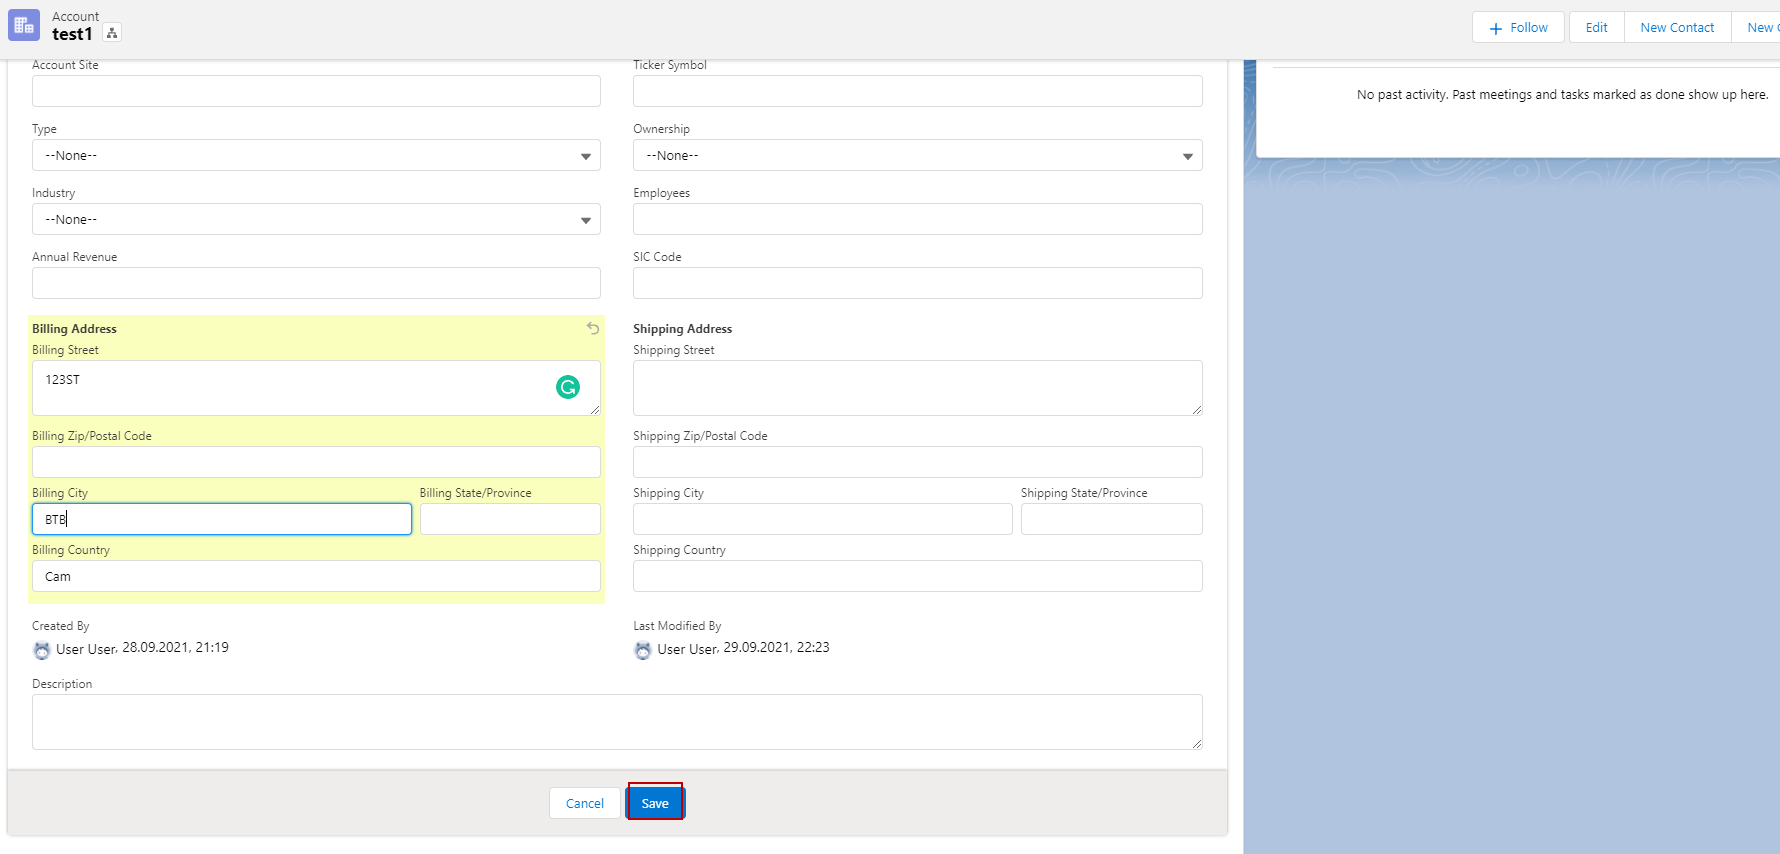
- Here’s we change Billing Street.
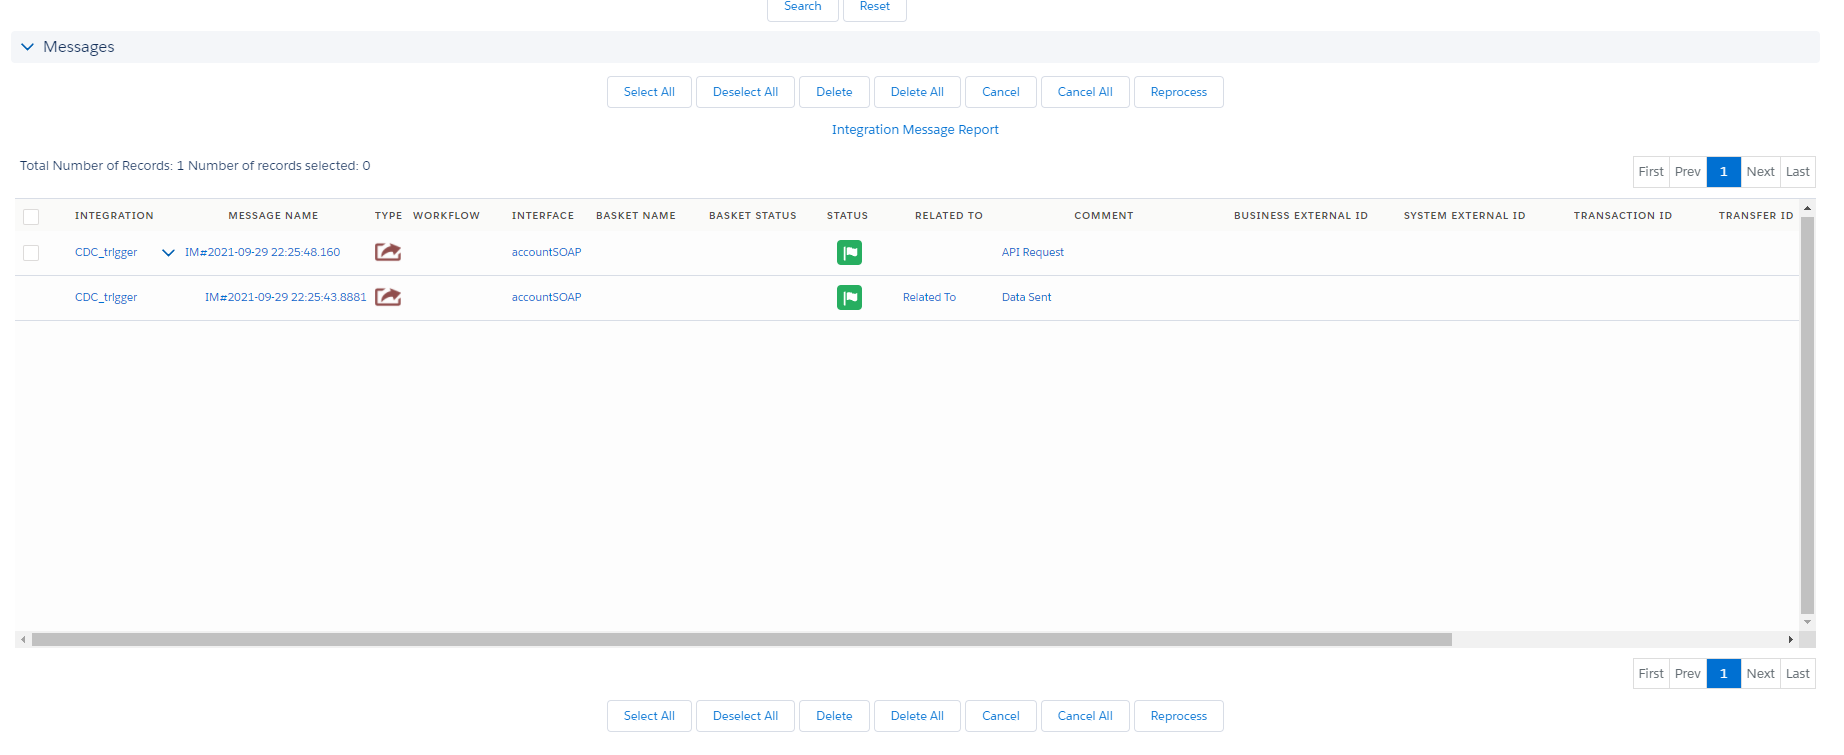
- Go to CDC control board.
- Click search button, select interface and click send button.
choosing send only changed field and click reprocess.
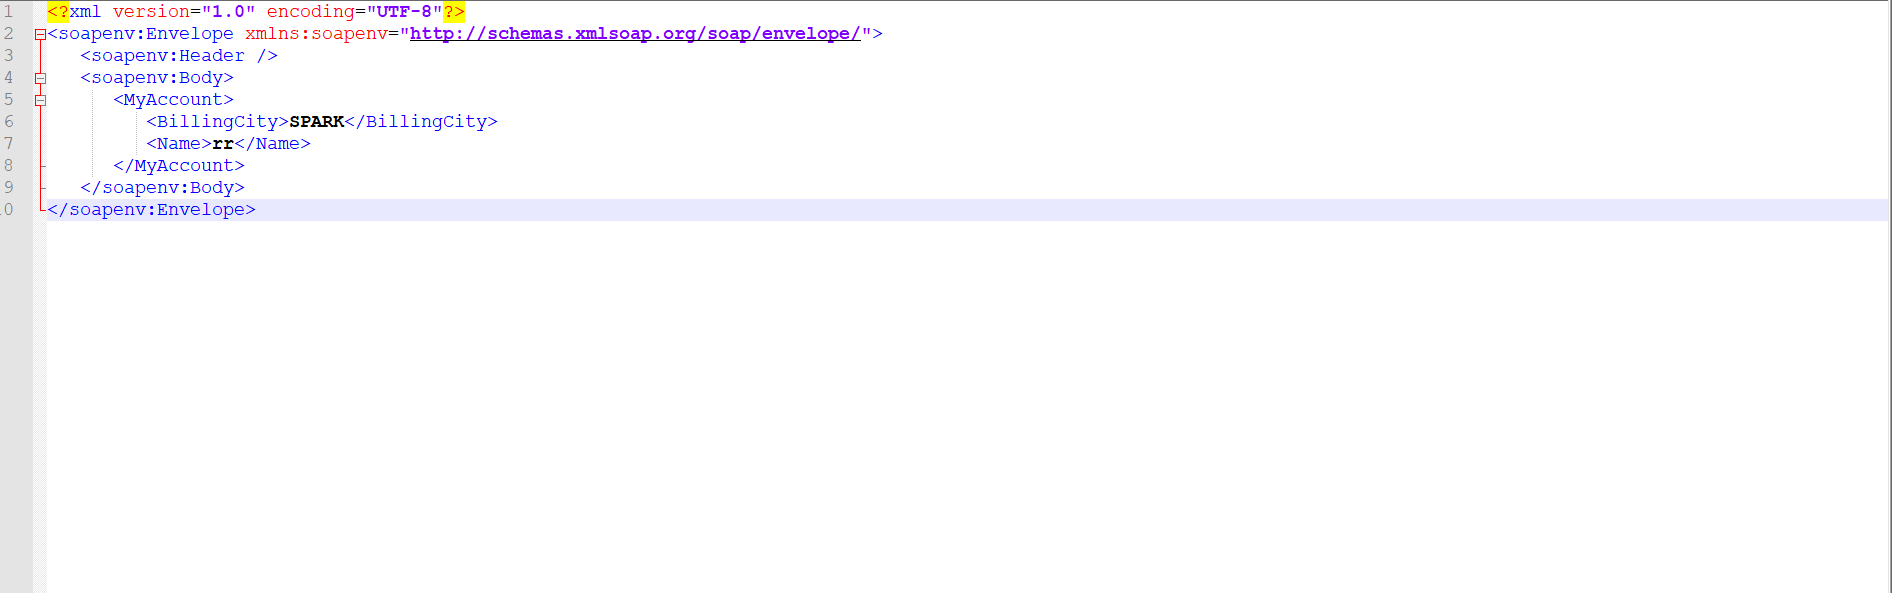
- Go to message monitor to see the result.

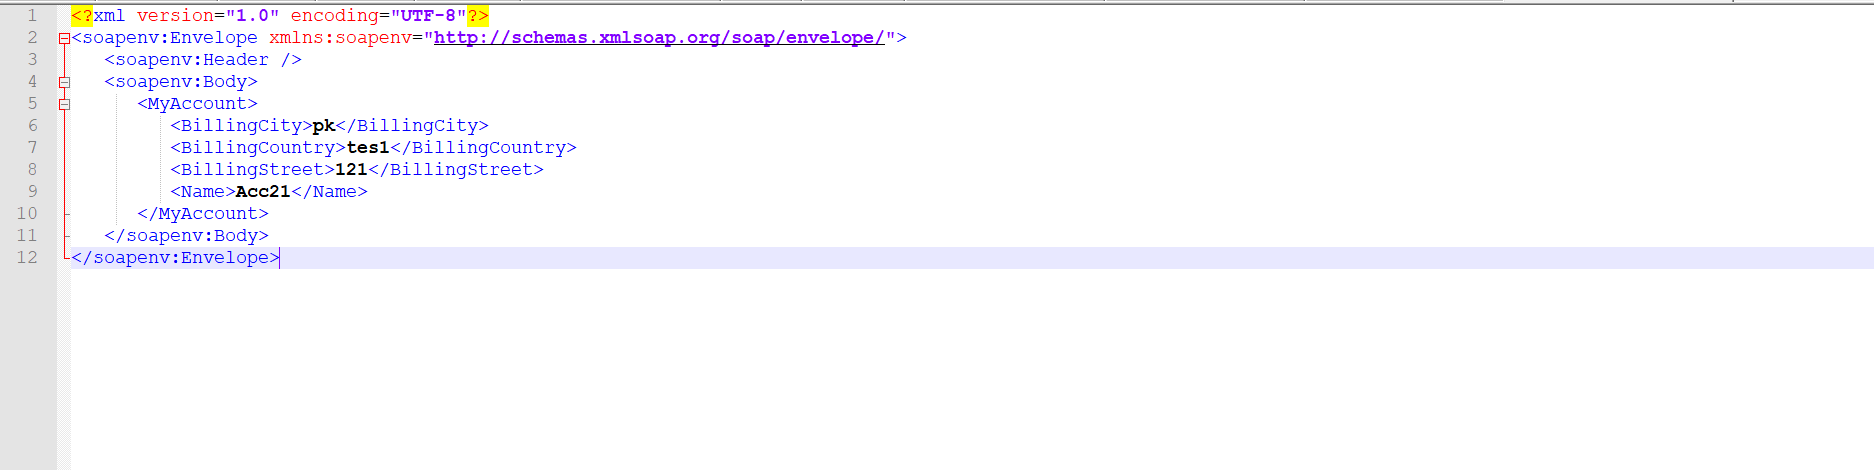
- Here’s the result send only field changed and external Id.
We can send data with Scheduler after we changed fields and there are two options in Scheduler first send all fields base on mapping and second is send only field changed
In this case we send data base mapping with scheduler when record changed.
We have configuration already in case one so now we just do with scheduler.
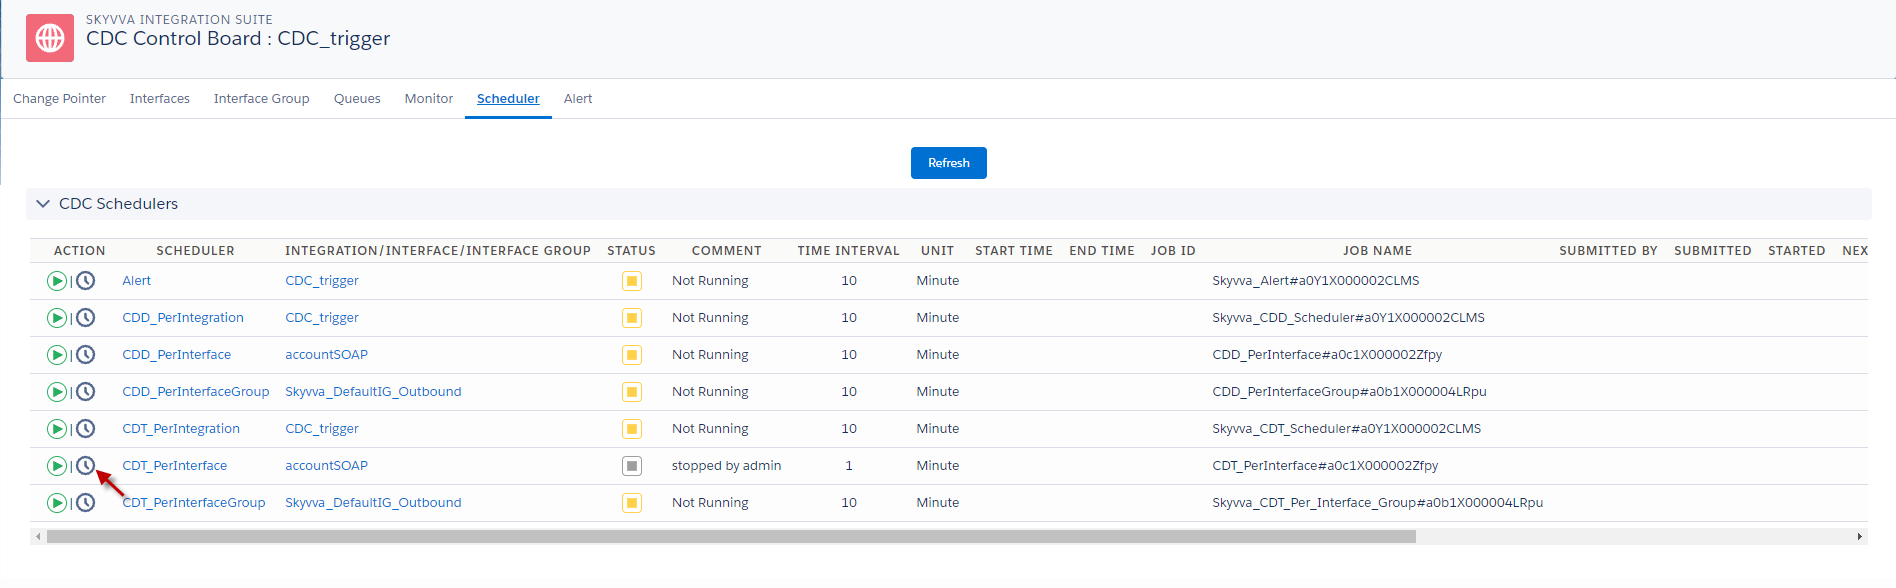
- Go to CDC control board.

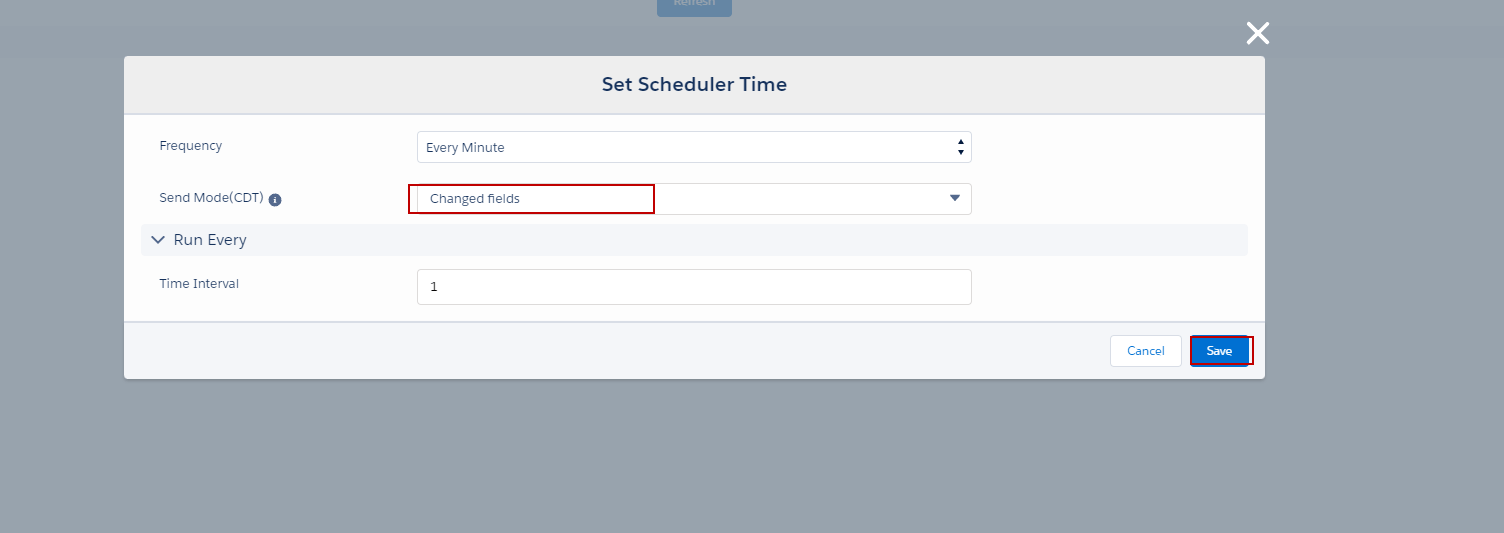
- Go to scheduler and set time with scheduler CDT per Interface.
In this case if we want to send all field based on mapping by using scheduler, we need to choose send all fields. See the picture below.
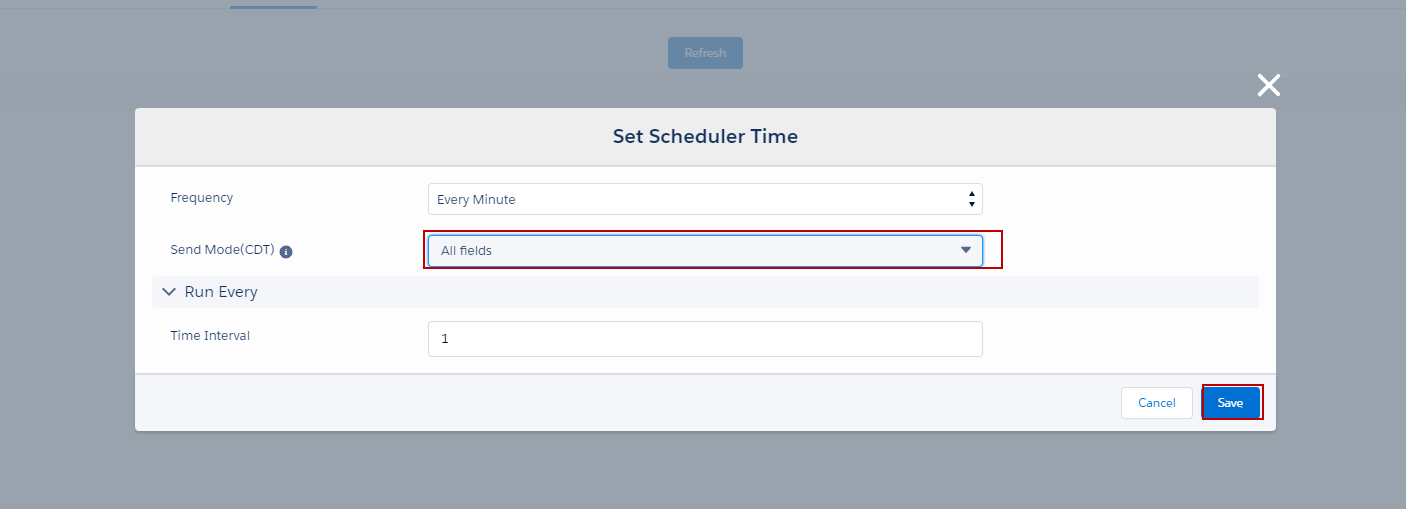
- After we config already we need to click save button.
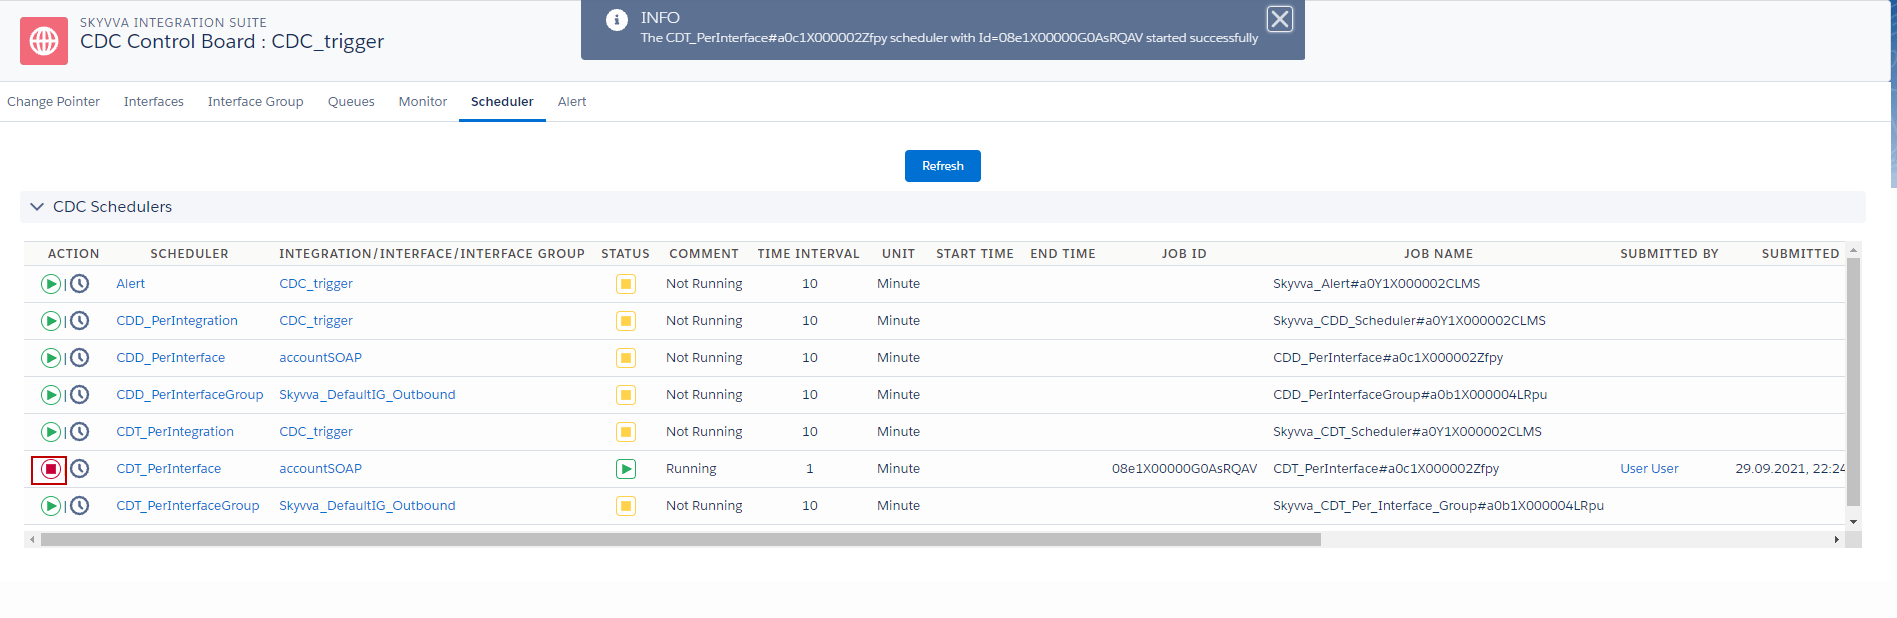
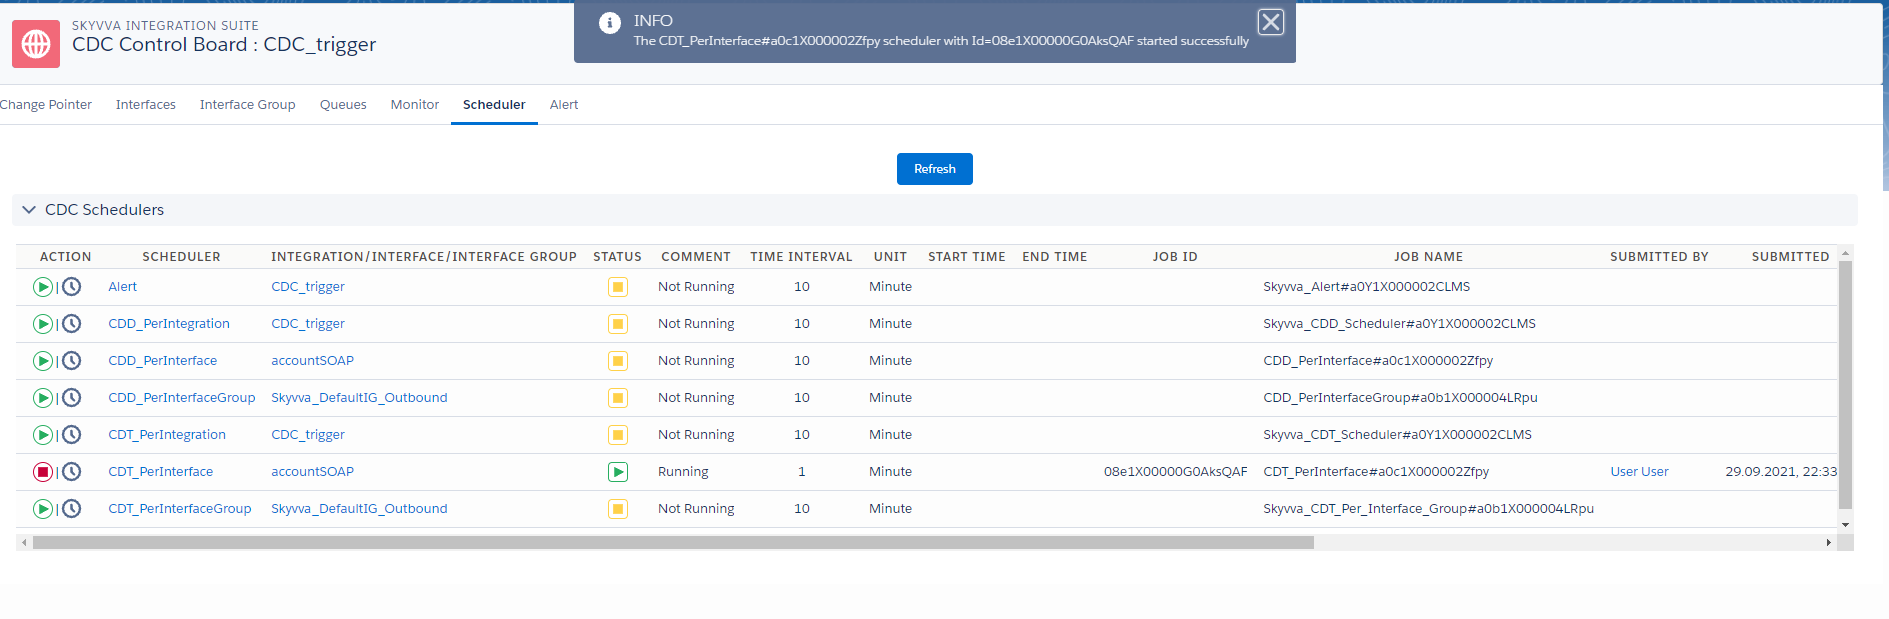
- Then go to click Start button scheduler.
- Go to change Account Records.
- Go to message monitor to see the result
- Here’s the result.
In this case we send changed fields and external ID with scheduler.
- After we config already we need to click save button.
- Then go to click Start button scheduler.
- Go to change Account Records.
- Go to message monitor to see the result.

- Here’s the result.
Summary:
Finally here we able to understand the process how to send change fields only callout? We support only with this CDC Apex Trigger.User can use with any adapter as per his/her understanding also We can send data with scheduler after we changed fields and there are two options in scheduler first send all fields base on mapping and second is send only field changed as shown in our above case.


