Learning Objective:
After completing this unit, you’ll be able to:
- Describe custom apex class.
- Comfortably use the apex class to implement the custom processing integration.
Introduction #
To obtain more potential to enable the user to execute the business process by practicing an apex class through which SKYVVA pass data & message to the user after the user performs its own business logic already with data that SKYVVA passed, later user must update message status and return it to SKYVVA. The operation is at block 4 and here we add new operation types like Apex Class.
What is Operation type – Apex class? #
In Apex, users can define top-level classes (also called outer classes) as well as inner classes, that is, a class defined within another class. You can only have inner classes one level deep.
public class myOuterClass {

// Additional myOuterClass code here

class myInnerClass {

// myInnerClass code here

}

}
Basic Processing Steps: #
Message -> Workflow -> Mapping -> Operation
There are two ways to use the Operation Apex Class: Interface V2 and Interface V3 designs.
1. Interface V2 design
How to use the Apex Class, the process is given below:- #
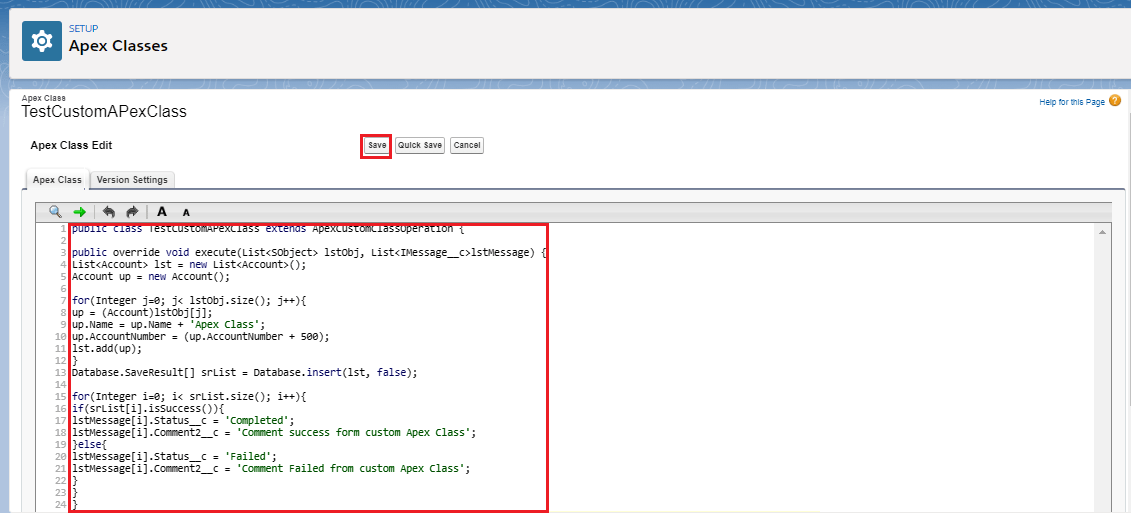
- Click on Setup, and in Quick Find box, write Apex Class.
- In the Apex class setup page, select “New”, as shown in the picture given below.

- Paste the given code in Apex class Body. The code for example for interface v2 design is given below.
global class TestApexOperation extends skyvvasolutions.ApexCustomClassOperation{

global override void execute(List<SObject> lstObj, List<skyvvasolutions__IMessage__c>lstMessage){

List<Account> lst = new List<Account>();

Account up = new Account();

for(Integer j=0; j< lstObj.size(); j++){

up = (Account)lstObj[j];

up.Name = up.Name ;

up.AccountNumber = (up.AccountNumber + 500);

lst.add(up);

}

Database.SaveResult[] srList = Database.insert(lst, false);

for(Integer i=0; i< srList.size(); i++){

if(srList[i].isSuccess()){

lstMessage[i].skyvvasolutions__Status__c = 'Completed';

lstMessage[i].skyvvasolutions__Comment2__c = 'Comment success form custom Apex Class';

}else{

lstMessage[i].skyvvasolutions__Status__c = 'Failed';

lstMessage[i].skyvvasolutions__Comment2__c = 'Comment Failed from custom Apex Class';

}

}

}

}
- Click Save, As shown in the picture given below.
The configuration on the interface
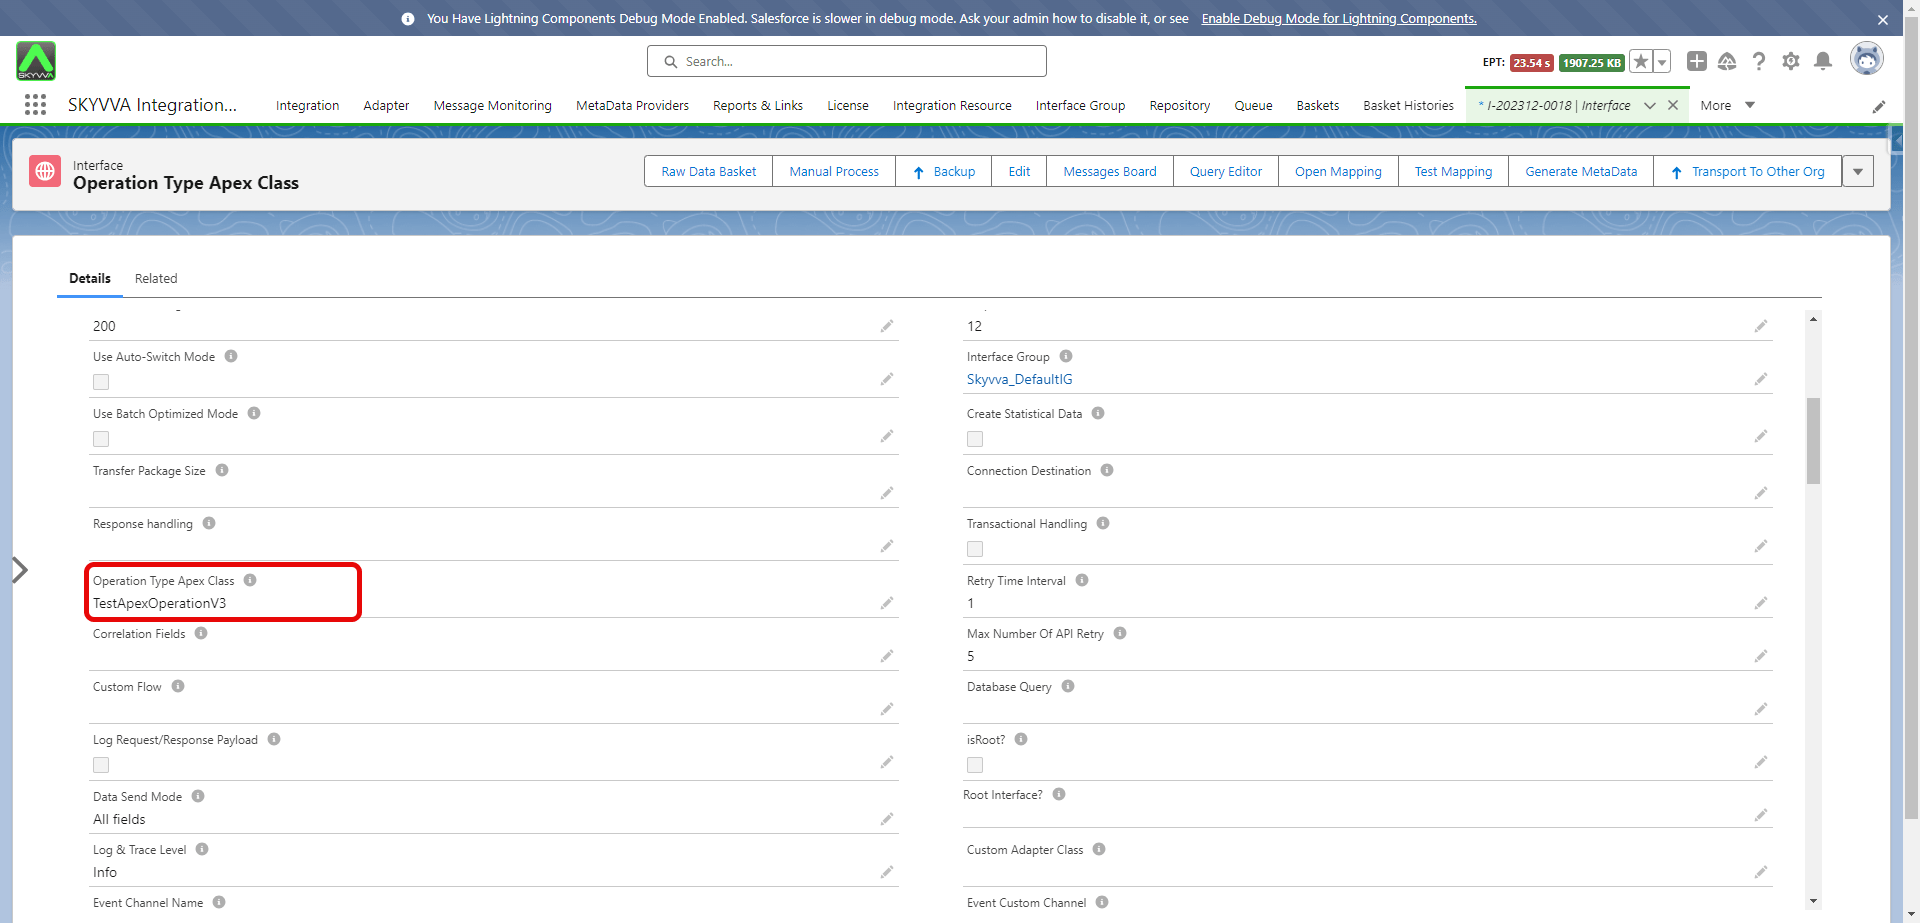
- Create an interface and choose an operation “Apex Class”.

- In the interface detail page, Enter your Apex class name in Operation Type Apex Class.

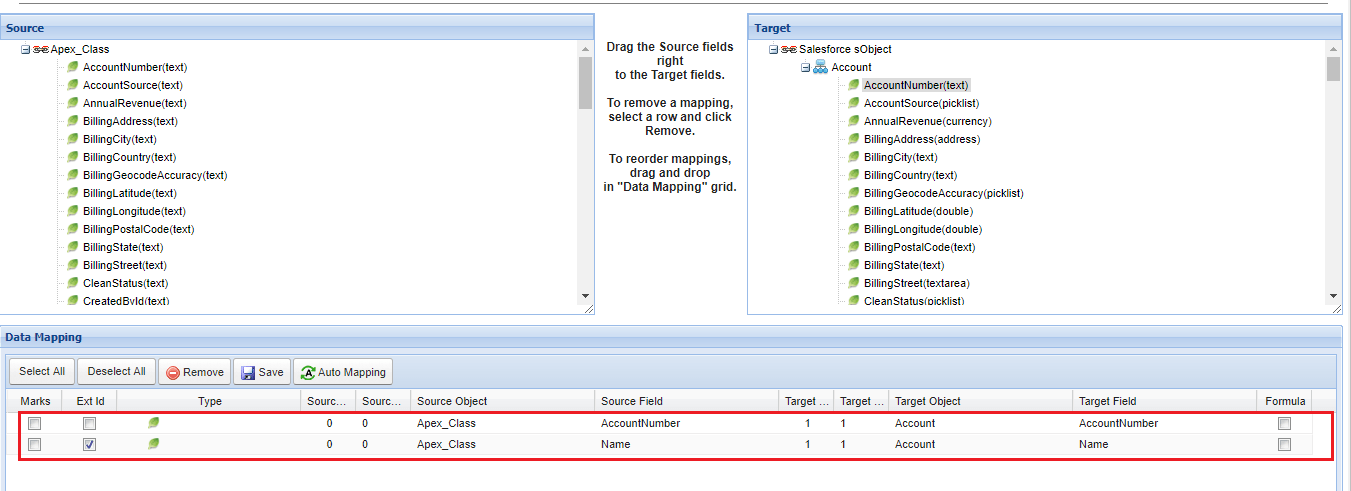
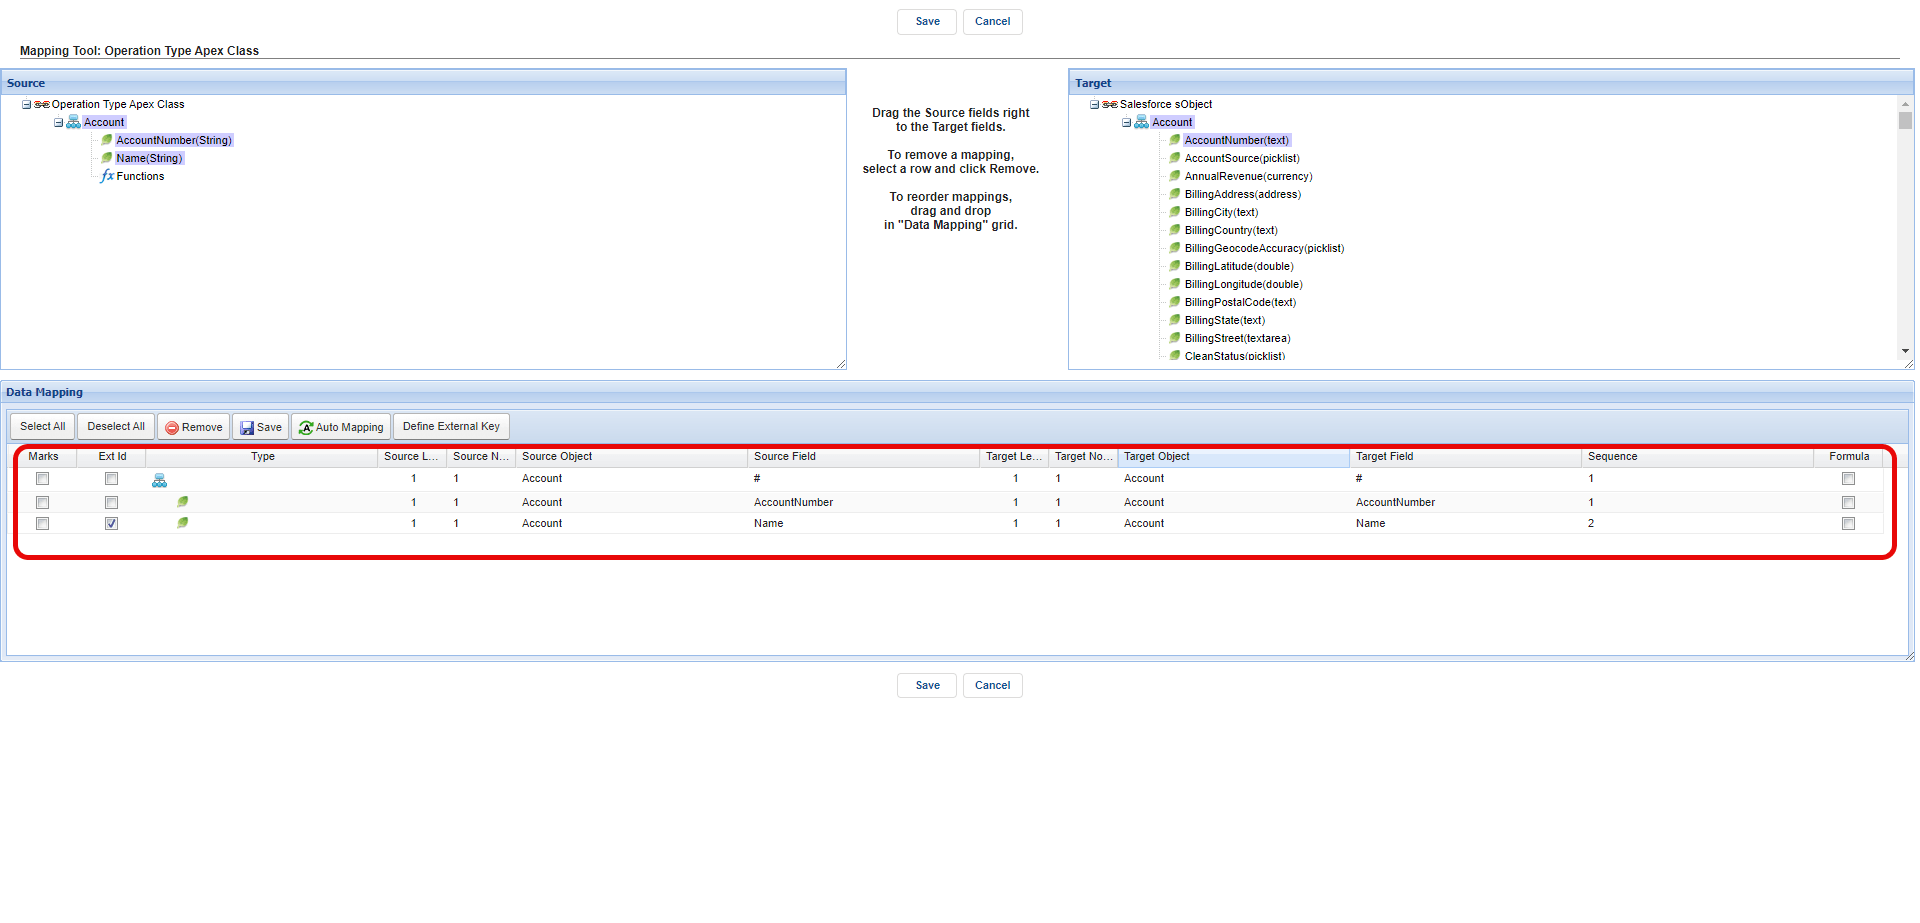
- Do mapping
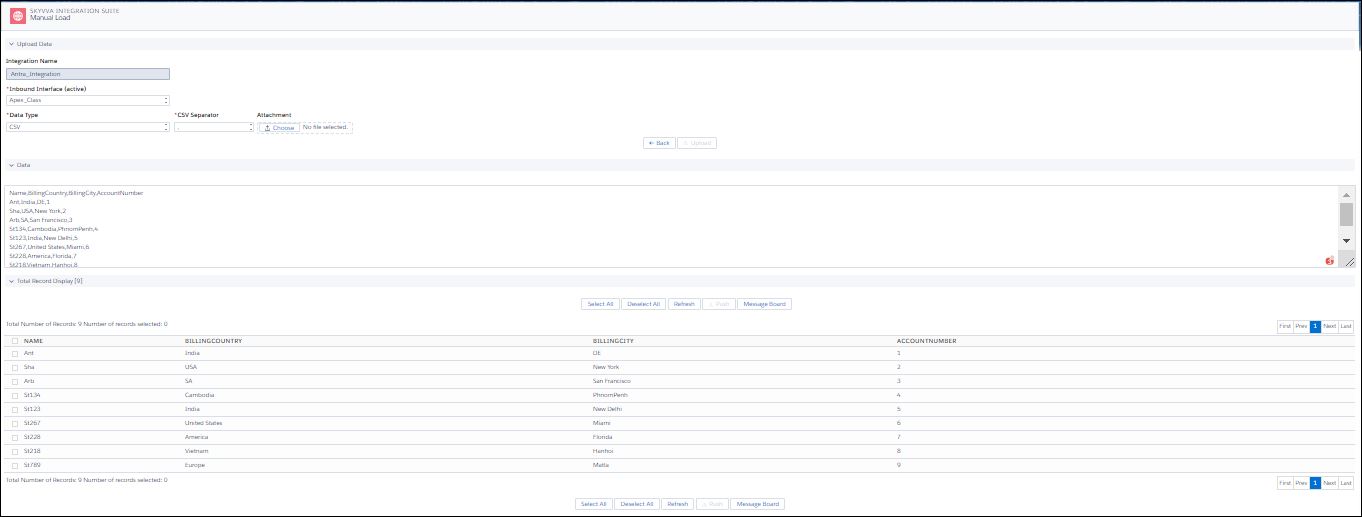
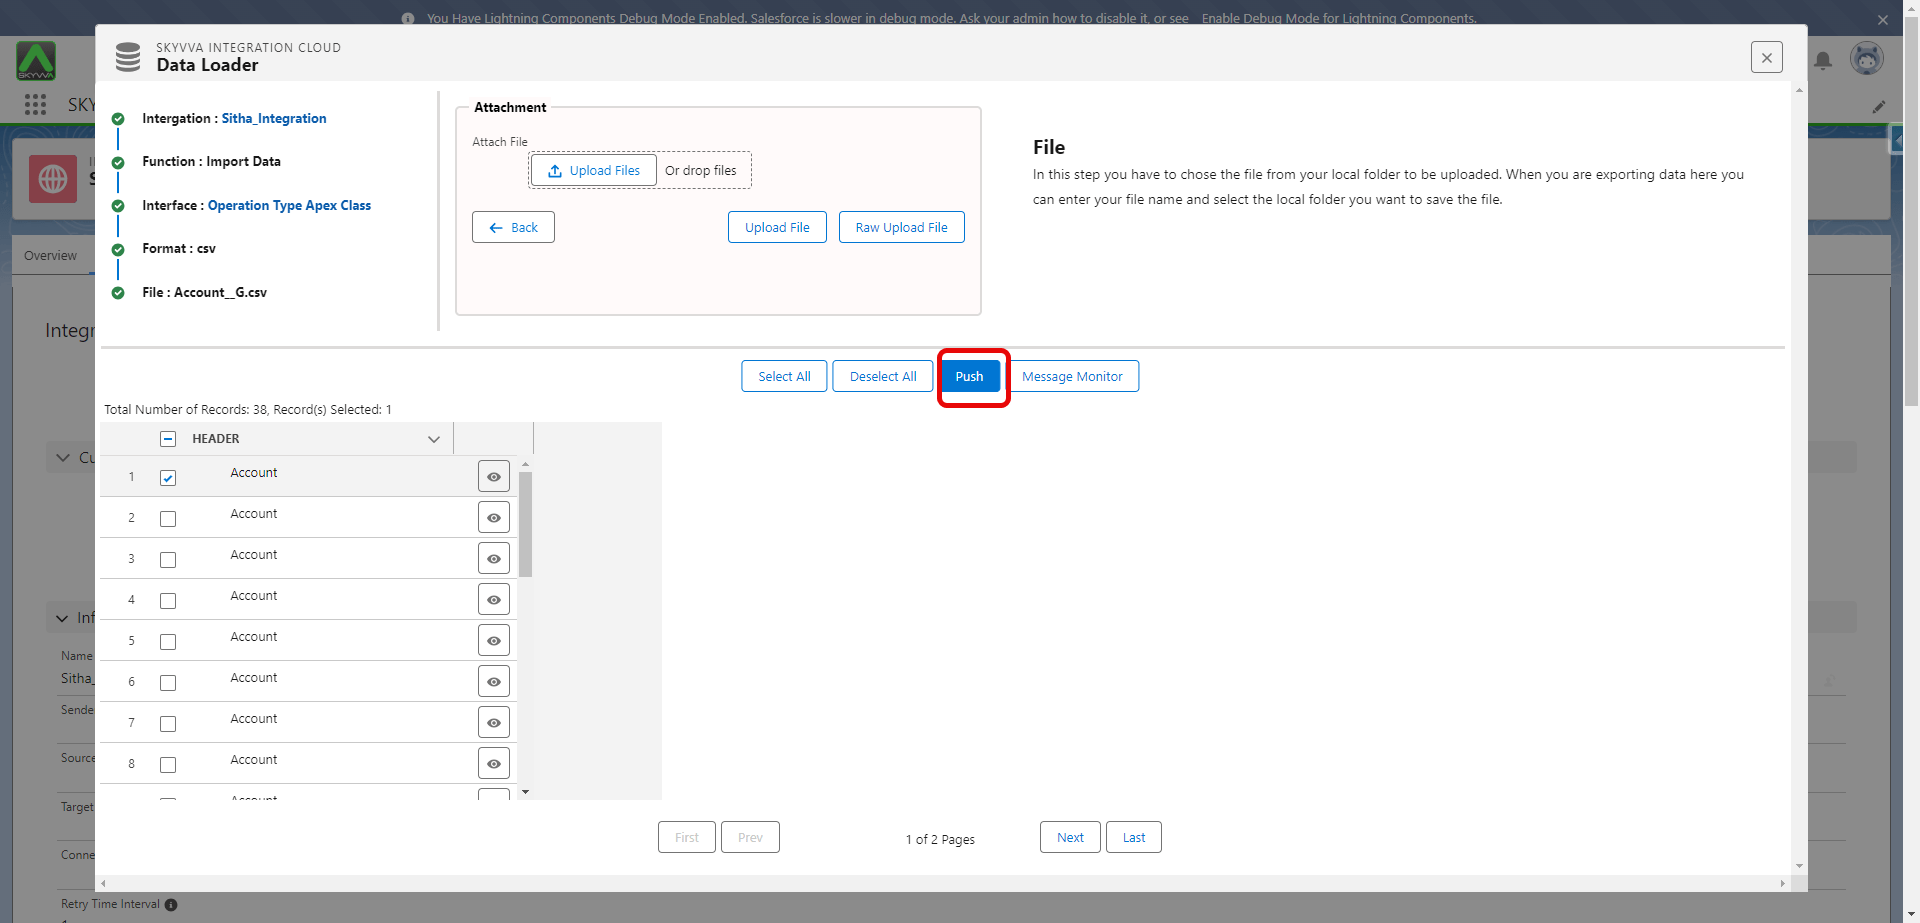
- Push data Using Manual load
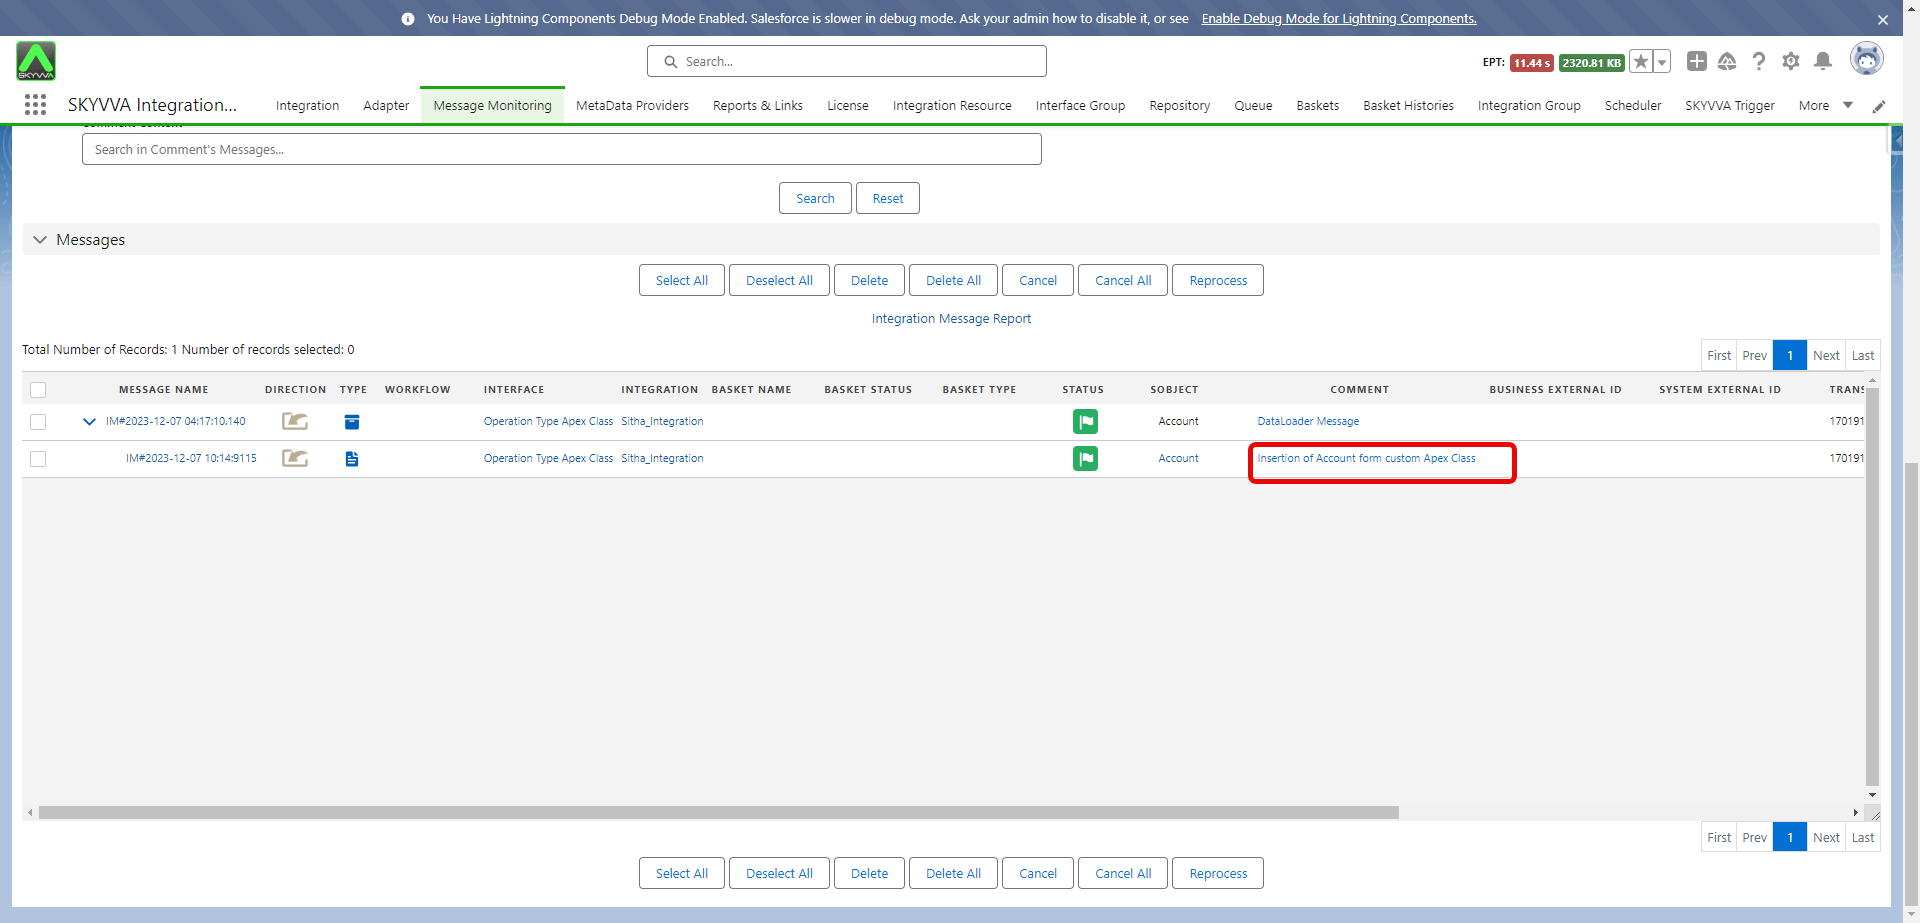
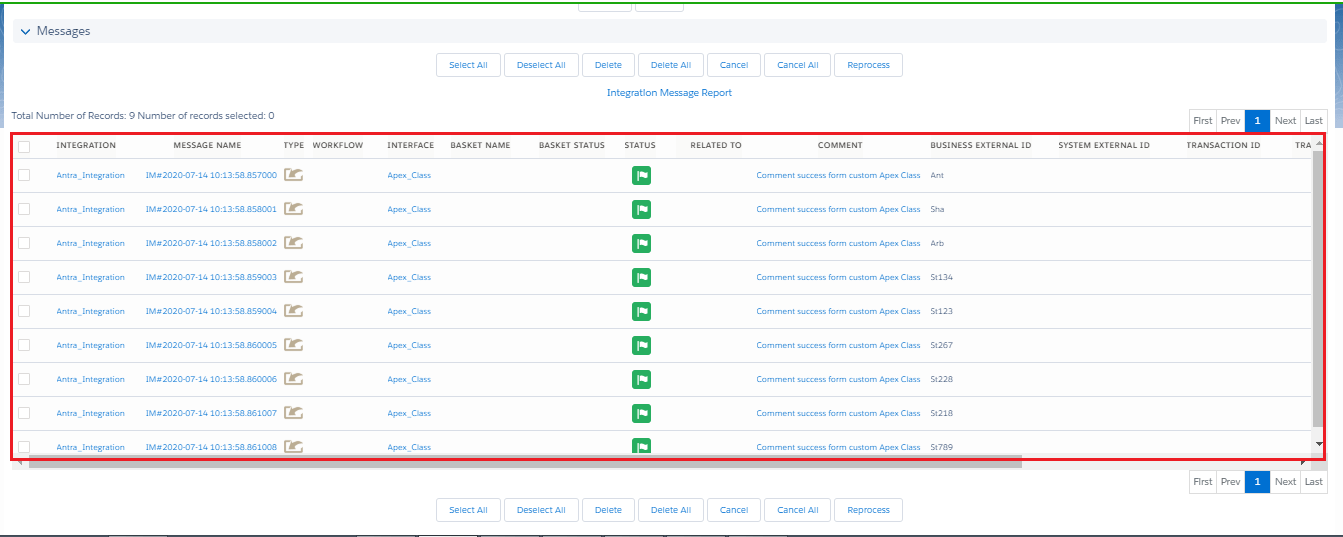
- Check message in message monitoring
2. Interface V3 design
How to use the Apex Class, the process is given below:- #
- Click on Setup, and in Quick Find box, write Apex Class.
- In the Apex class setup page, select “New”, as shown in the picture given below.
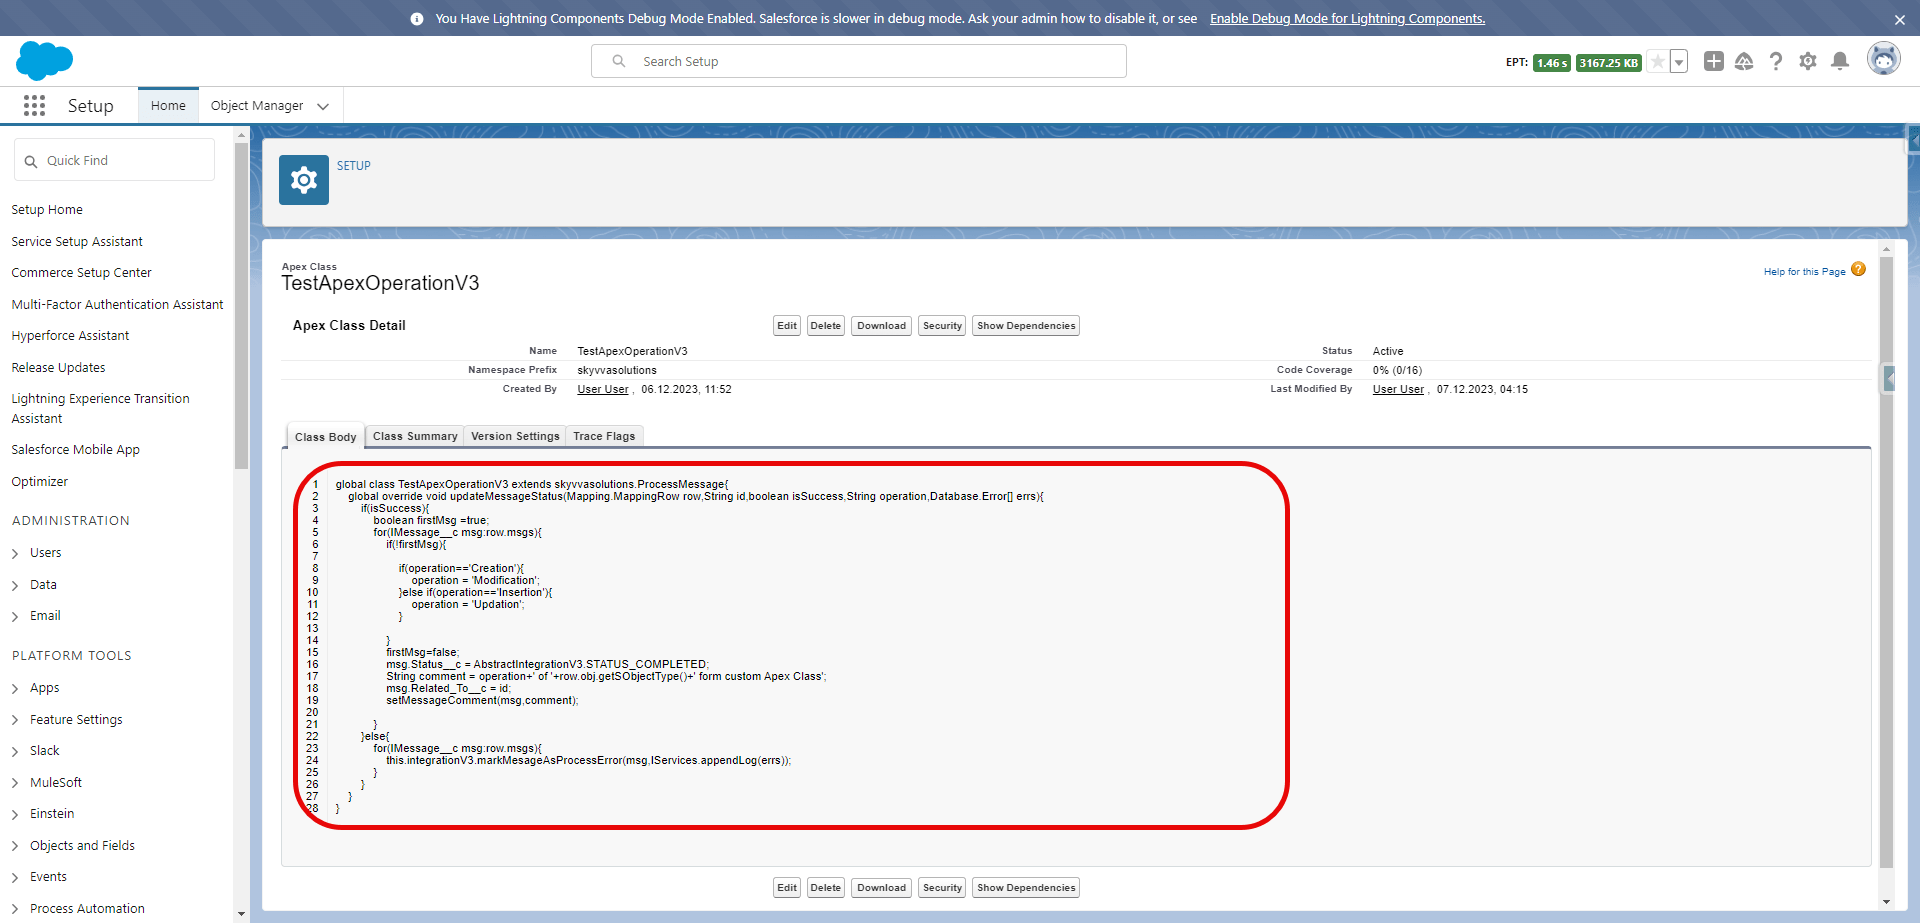
- Paste the given code in Apex class Body. The code for example for interface v3 design is given below.
global class TestApexOperationV3 extends skyvvasolutions.ProcessMessage{

global override void updateMessageStatus(Mapping.MappingRow row,String id,boolean isSuccess,String operation,Database.Error[] errs){

if(isSuccess){

boolean firstMsg =true;

for(IMessage__c msg:row.msgs){

if(!firstMsg){

if(operation=='Creation'){

operation = 'Modification';

}else if(operation=='Insertion'){

operation = 'Updation';

}

}

firstMsg=false;

msg.Status__c = AbstractIntegrationV3.STATUS_COMPLETED;

String comment = operation+' of '+row.obj.getSObjectType()+' form custom Apex Class';

msg.Related_To__c = id;

setMessageComment(msg,comment);

}

}else{

for(IMessage__c msg:row.msgs){

this.integrationV3.markMesageAsProcessError(msg,IServices.appendLog(errs));

}

}

}

}
- Click Save, As shown in the picture given below.
The configuration on the interface
- Create an interface and choose an operation “Apex Class”.
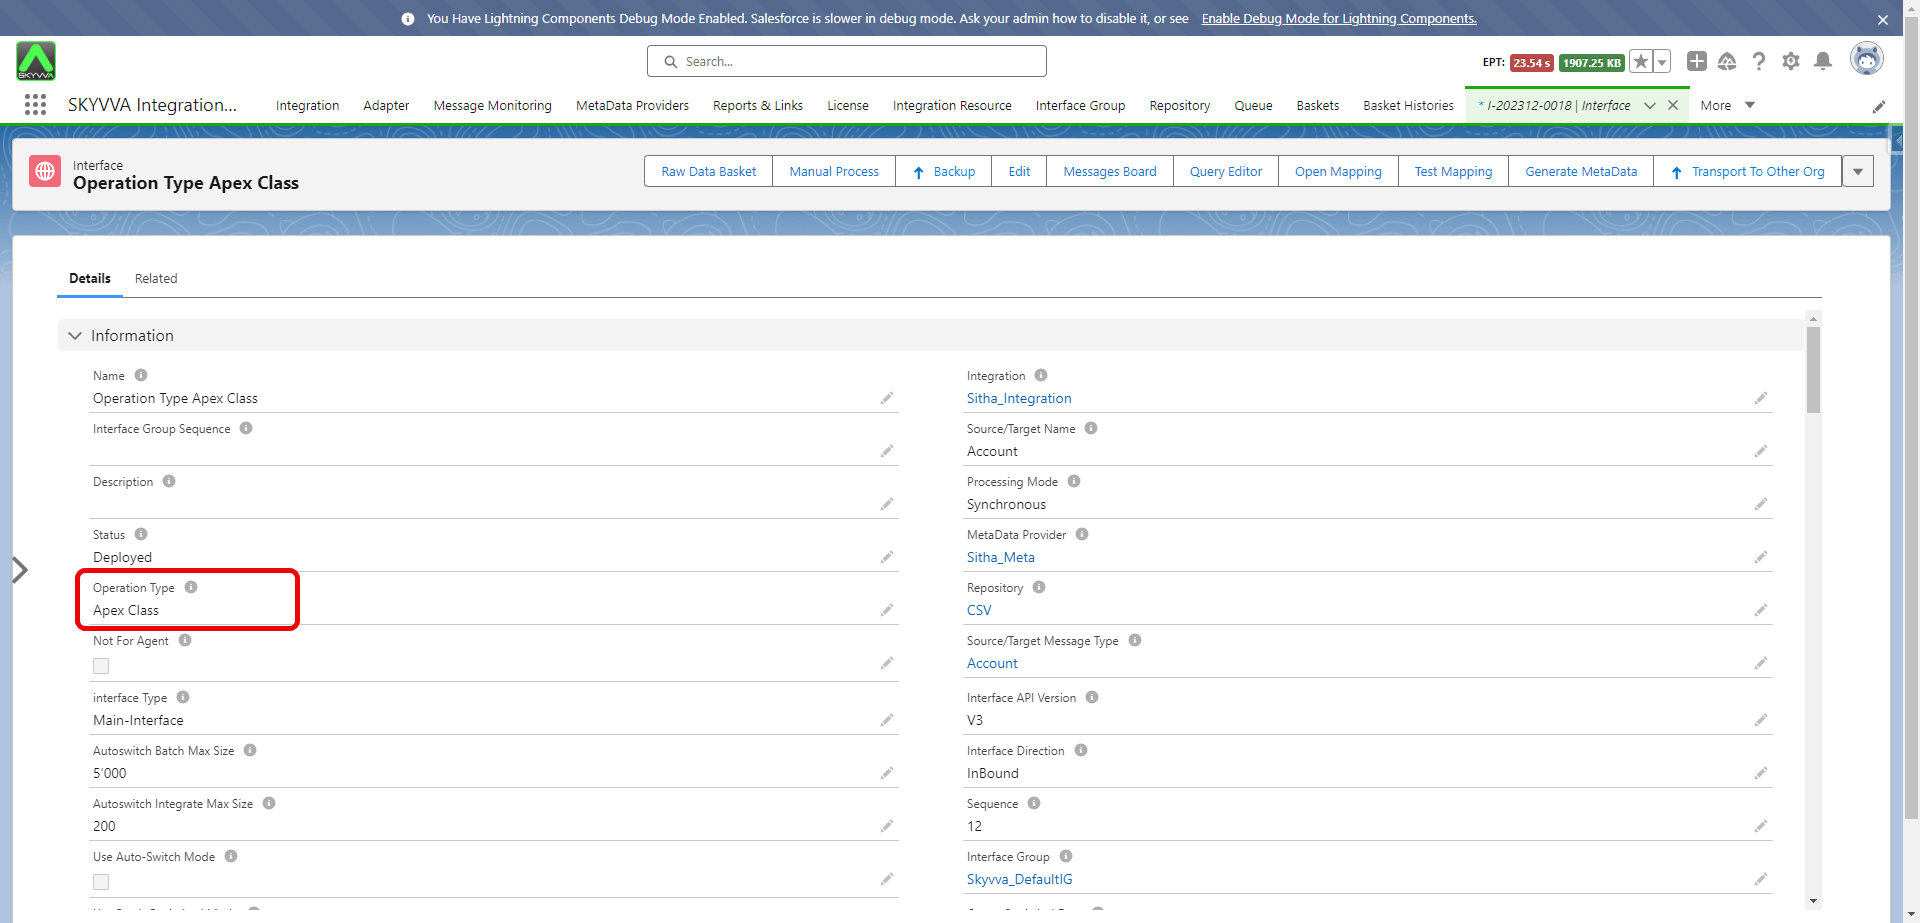
- In the interface detail page, Enter your Apex class name in Operation Type Apex Class.
- Do mapping
- Push data
- Check message in message monitoring