Learning Objectives
After completing this unit, you’ll be able to:
- Describe what Custom field is .
- Also Can describe foreign key, Tree mapping
- Comfortably use how to link parent interface to its child interface using foreign key and tree mapping.
Introduction
We can link two different objects with each other using the foreign key or tree mapping.
What Are Hierarchical Interfaces?
- To arrange interfaces in order means hierarchical interface. It is structure in which interfaces are ranked according to levels of importance.
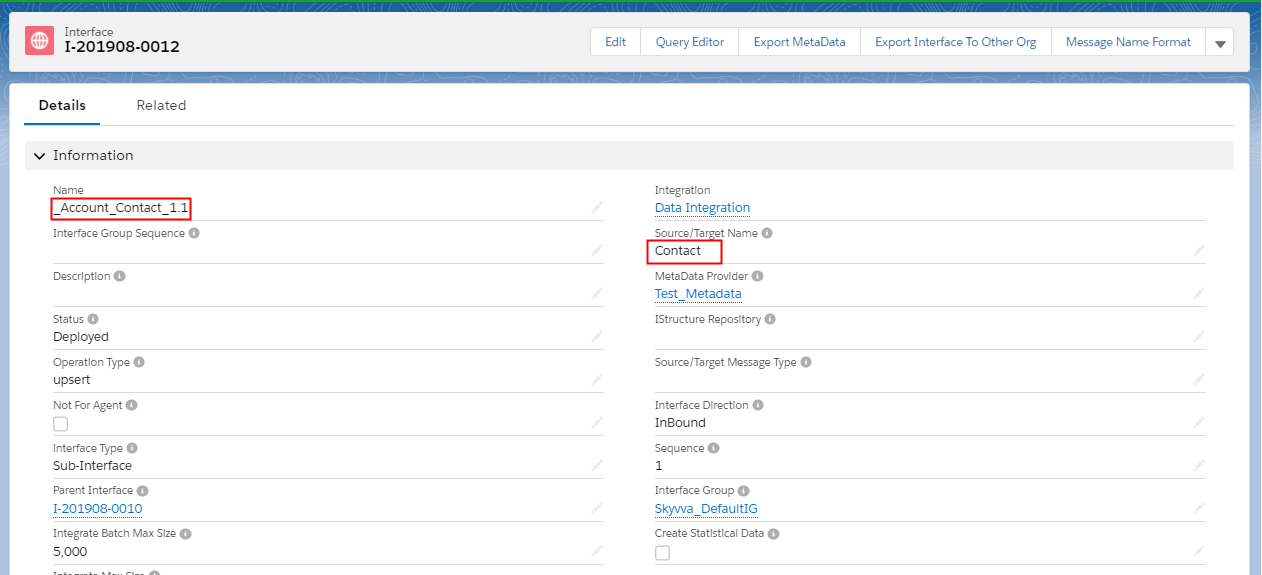
- In hierarchical Interfaces, one interface is a parent’s of other interface. It means that child interface inherited External ID from its parent’s interface. For example, Account interface is parent’s contact interface because of Contact inherited External ID from Account.
- Also One parent interface can have many child account but child interface has only single parent interface. eg. one Account can store many Contacts, but one Contact can’t store many Accounts.
What is the foreign key?
A FOREIGN KEY is a field (custom fields) in one Interface that refers to the PRIMARY KEY . The Interface containing the foreign key is called the child Interface, and the Interface containing the candidate key is called the parent Interface.
How to create Foreign key?
This is also called as object field in account object. Follow the given steps to create object field:
- Go to Set up->Object Manager->Account-> Fields & Relationships->Click New Button.
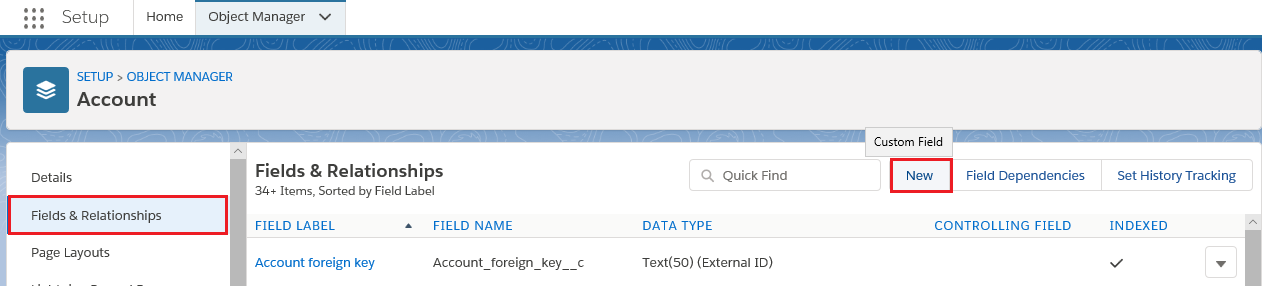
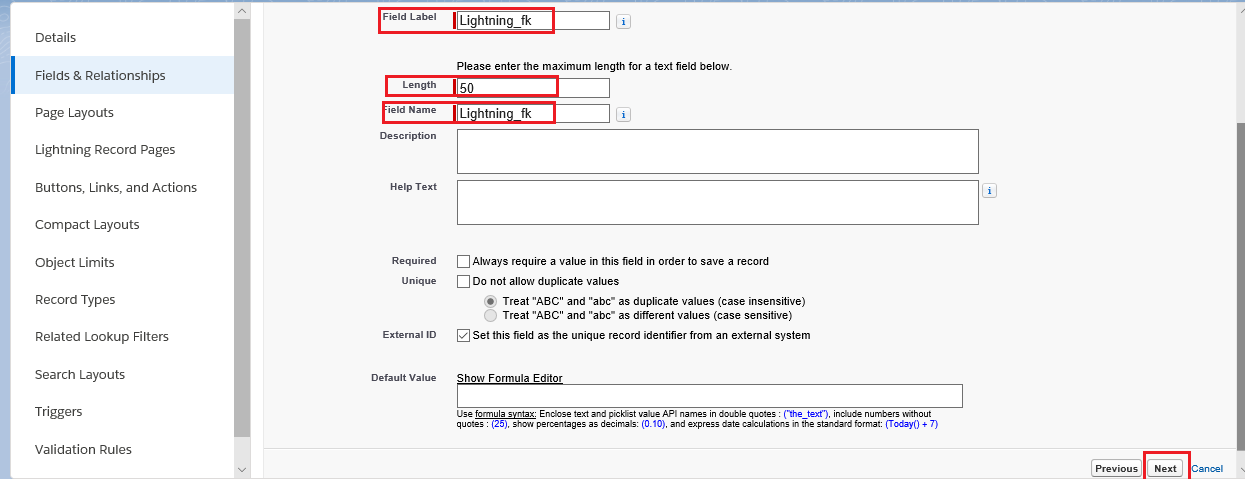
- Choose the field type: Please tick Text data type and click Next

- Enter the details: Please Field Label: AccountId->Fill Length: 50->Field Name gets Auto->tick External ID->Click Save.
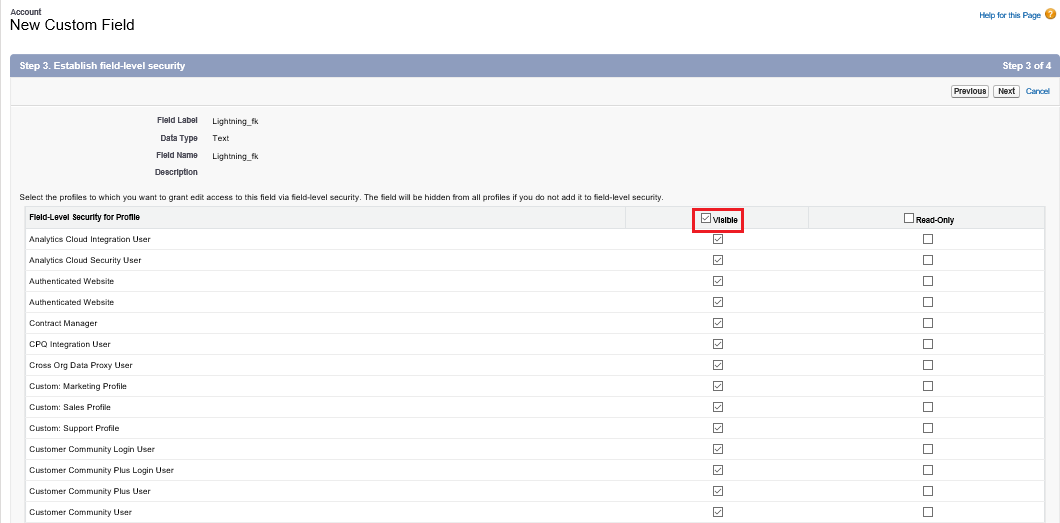
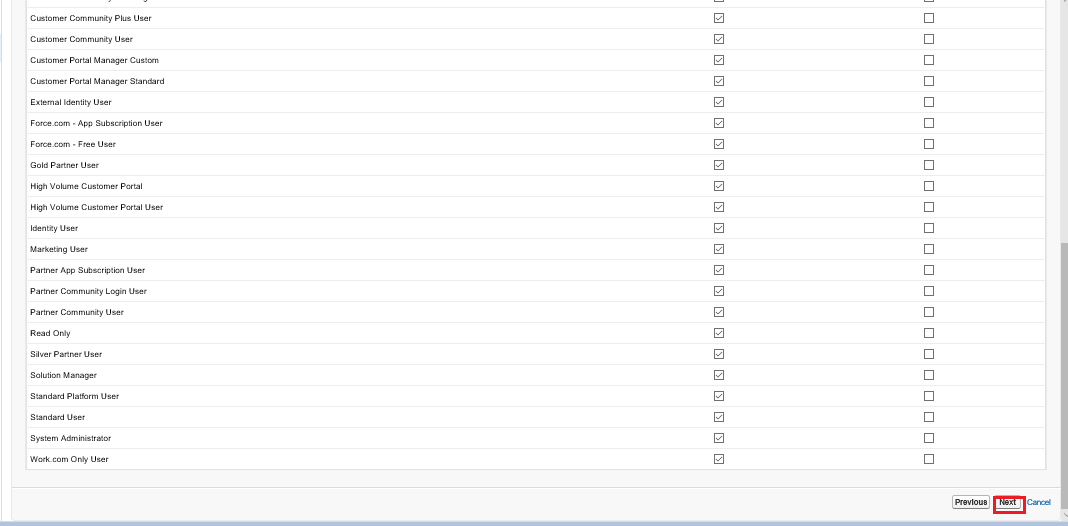
- Establish field-level Security: Please tick visible and click next button.
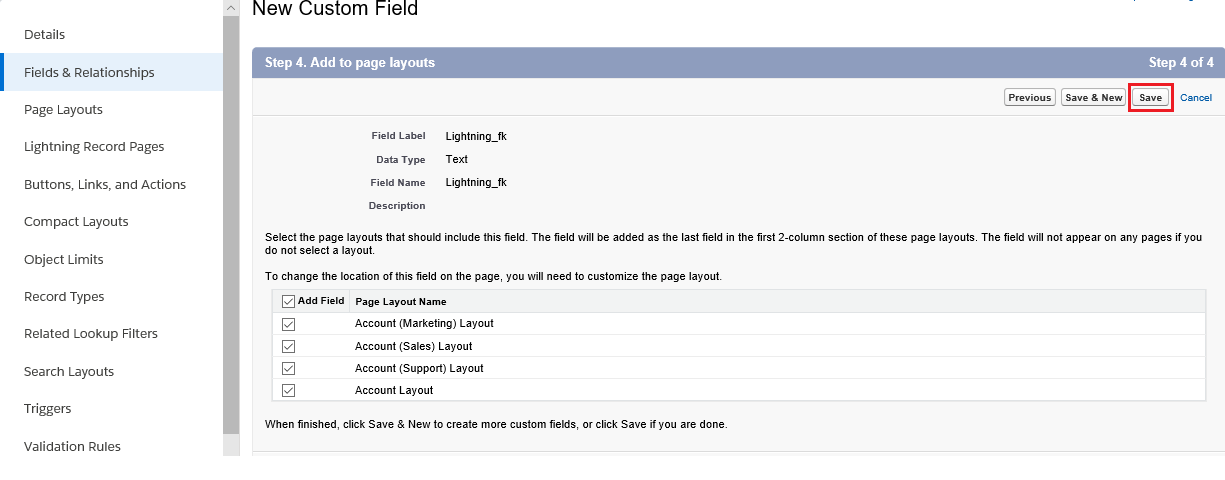
- Add to page layouts: Click only Save button.
here we get object field on Target Account Salesforce object.
Create hierarchical Interface using Tree Mapping : #
What is Skyvva tree mapping?
- Enhancement of Skyvva mapping tool to hierarchical tree view and map data of parent/child in one shut.
- A Skyvva tree mapping is a visual method for displaying hierarchical data related to parent interface and child interface.
- Skyvva tree mapping feature is built to reduce the complexity of manual work.
- When we use tree mapping, It automatically generated all setting e.g.
– chained interface
– Foreign Key
– Mapping the fidle Id to special field SKYVVA__PARENTID
Objective:
Create parent child relationship using tree mapping
Pre-requisite:
- Create Integration -> Go to integration tab -> fill name field -> Save it.
- Create one inbound interface. I,e Account.(Create account interface only, child interface will be automatically created in it )
How to create Hierarchical Interfaces?
Follow the given steps to create hierarchical interface using VLOOK UP.
Note: We have to create message type for Istructure. We can easily get hierarchical Istructure using message type. Also It is reusable in another interface.
To learn detail about message type feature we can follow this tutorial -> How to create message type with different file format?
Step 1: We have to click on metadata provider tab and click on New button. In Skyvva, when we create metadata, Name filed is only mandatory field. On MetaData the Name cannot be duplicate.
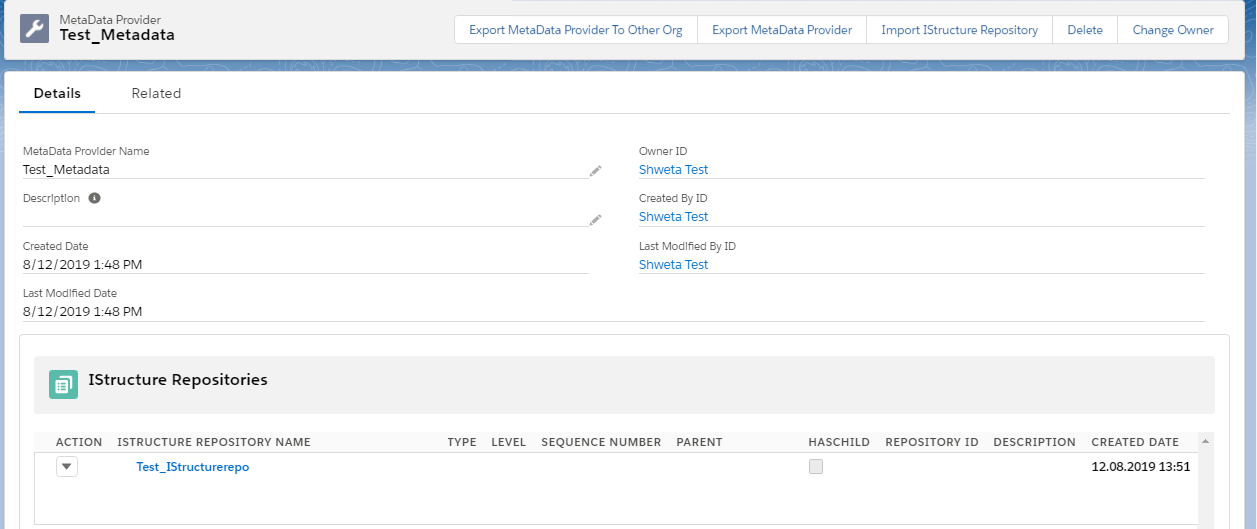
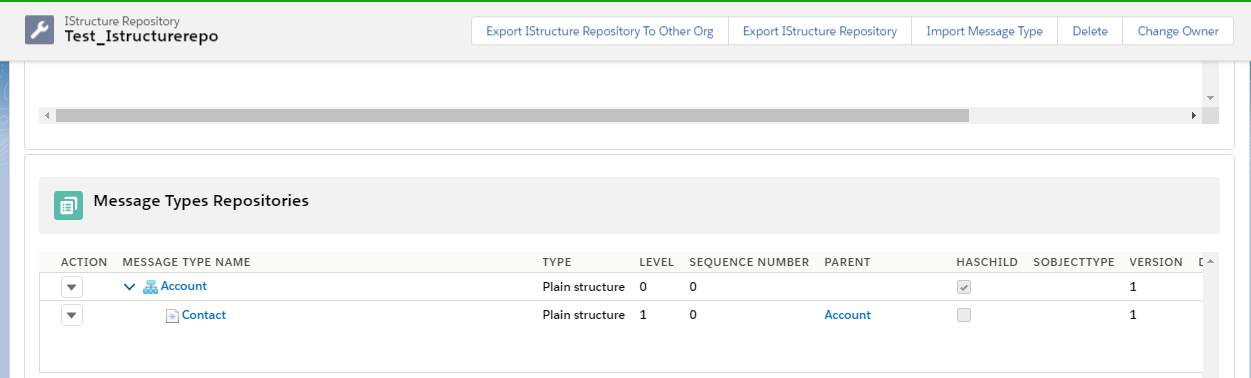
Step2: Create Istructure Repository in created metadata. The purpose of Istructure is An Interface for a structure that contains the metadata of a structure.
– We have click on related tab then click on new button to create Istrutcure repository.
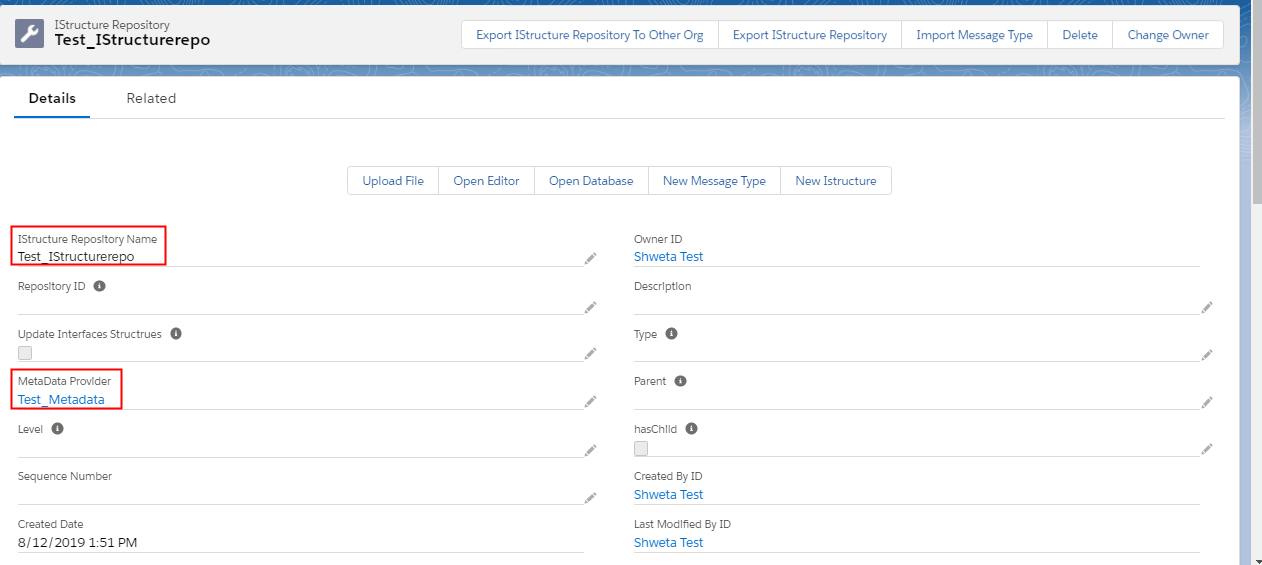
– We have to open our created Istructure repository.
Step 3: We have to create message type.
– click on upload file button. Pop up window should open.
– Select file format which you want to upload. Here we used xml file to create message type.
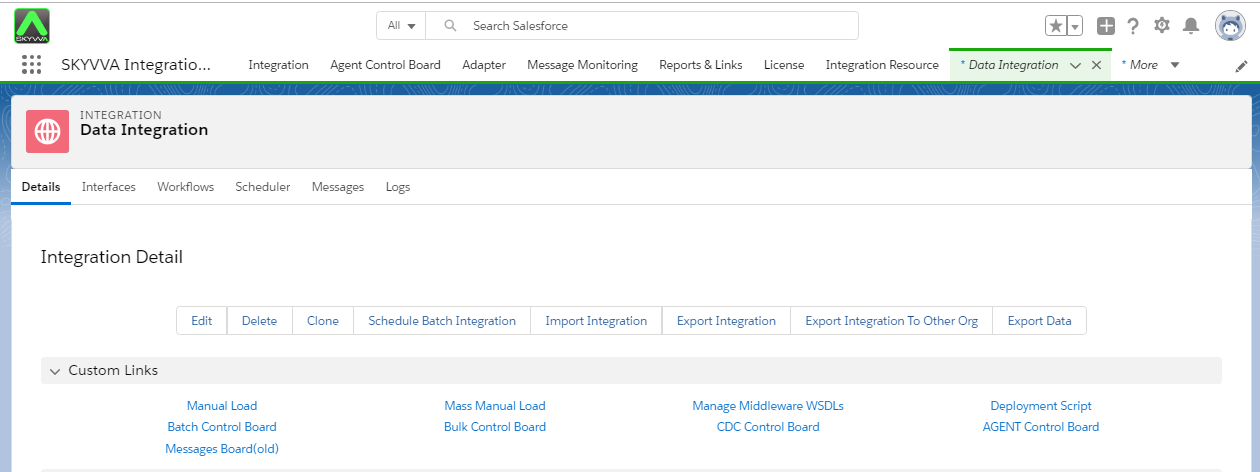
Step4: Create Integration. (click on Integration tab then fill in the Name Field and Save.)
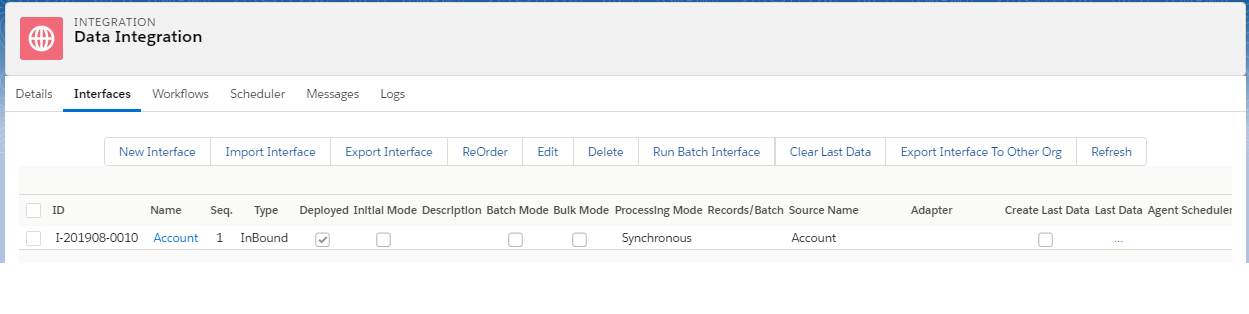
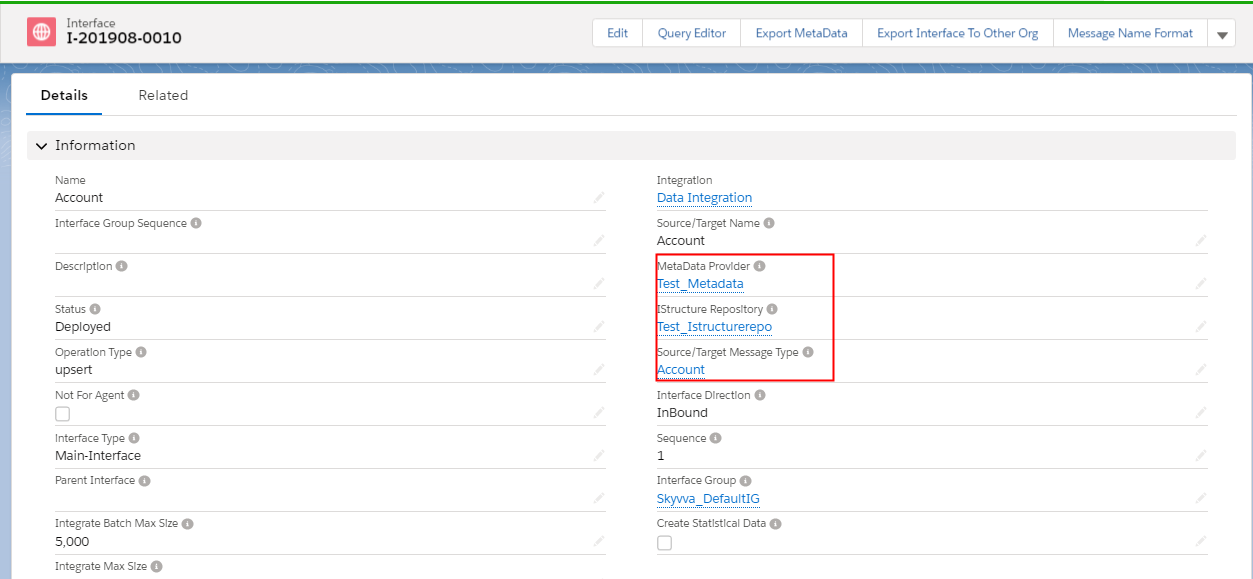
Step5: Create Account Interface where:
- Metadata: Test_metadata
- IstructureRepository: Test_Istructurerepo
- Message Type: Account
– Open the interface it should navigate to:
- Go to mapping section -> map all account related Istructure with target account.
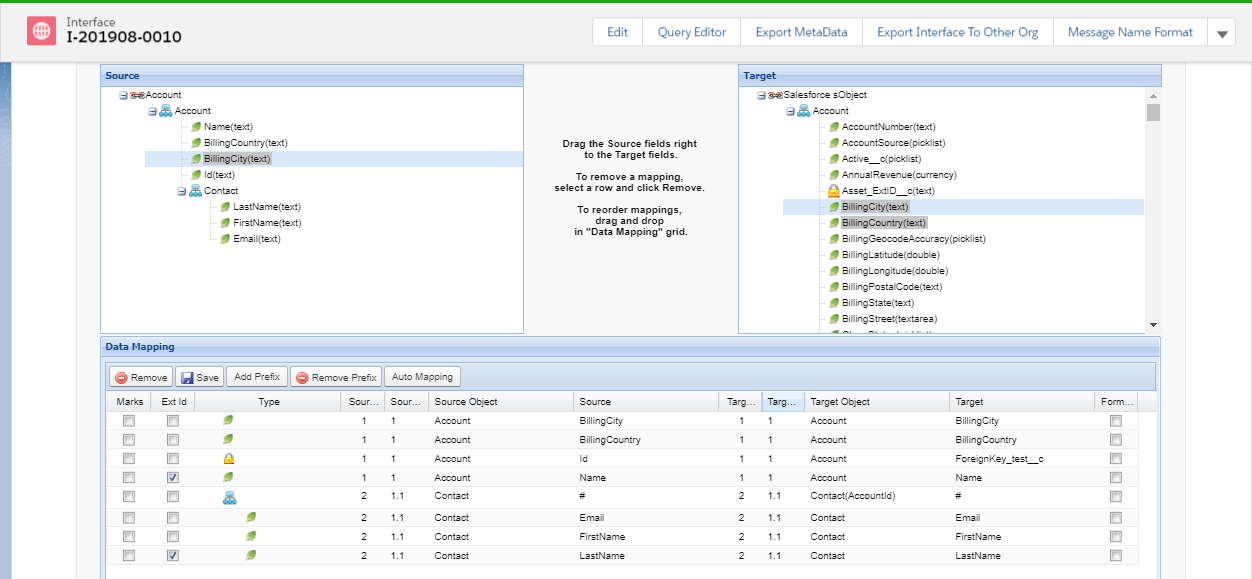
- Scroll down the target object to contact -> map the Contact related Istructure
Mapping:
- Select external Id for parent interface -> Name
- Select external Id for child Interface -> LastName
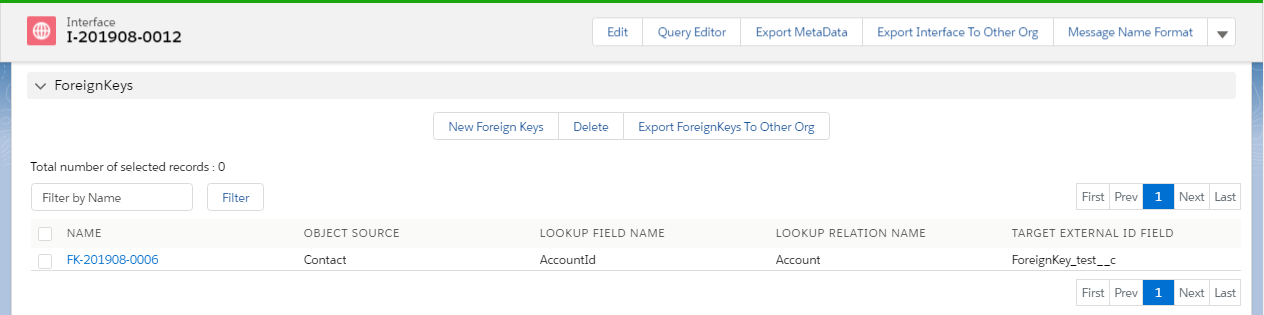
- Mapping with all field that include Account and Contact with sObject tree and then create foreign key account with Contact.
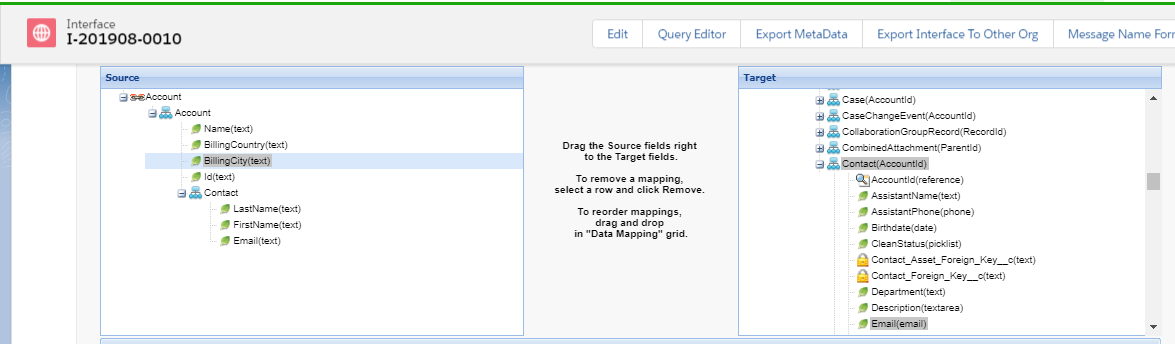
Note: We should create foreign key If there are multiple foreign keys (custom field) in your org. The user need to choose one key because the system doesn’t know which one you want to use as the reference or the key to search for the Account SF Id.
- Click on the row where account and contact link (#). It should navigate to following window:
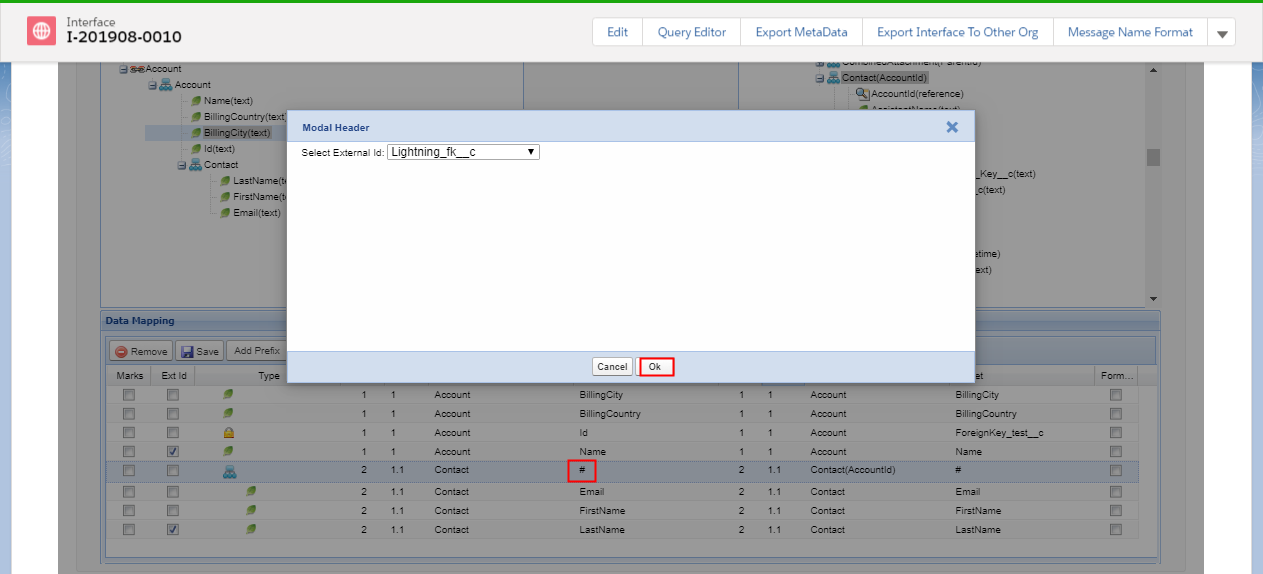
- Click on Ok button. Here your foreign key is created in child interface I,e contact interface.
- Now save this. (If you doesn’t save it, you will lost your all mapping and foreign key creation on contact interface)
– We can check that Ichained Interface is automatically created in account interface(parent interface).
- Go to Related tab
- Scroll page to IChained Interface.

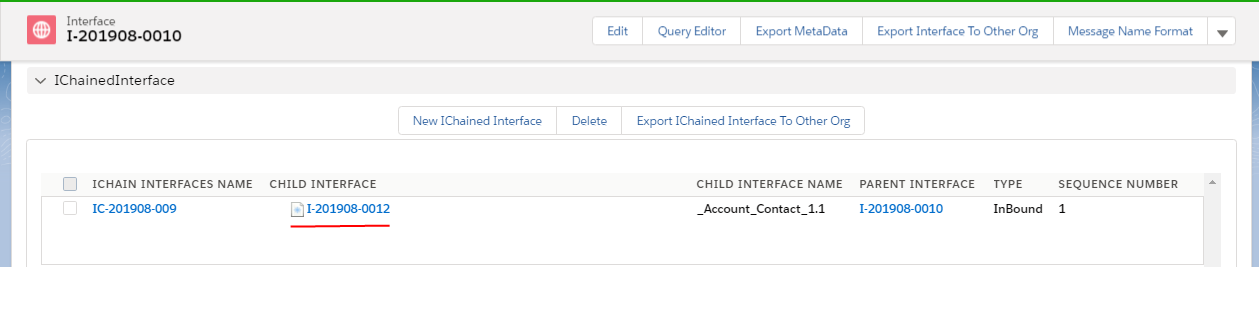
- Foreign key automatically created in child interface I,e contact interface.
- To open contact interface click on Id as shown in picture. It should navigate to:
(Note: Child interface is not display in integration).
Click on related tab -> scroll down page to foreign key section
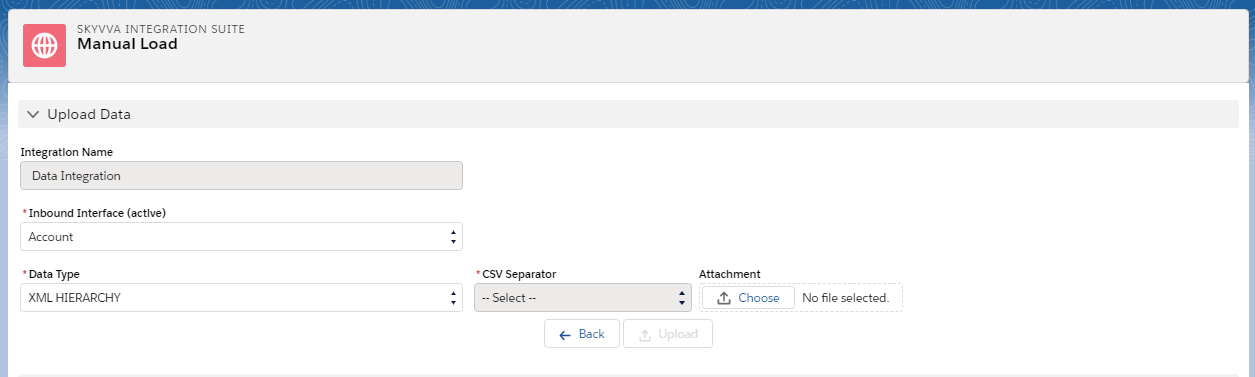
Step 6: manually load data
- Go to integration detail
- click on Manual load custom link
- Select Data Type as XML_Hierarchy
- Click Choose File Button and Browse to choose file->Click Open Button->Click Upload Button.
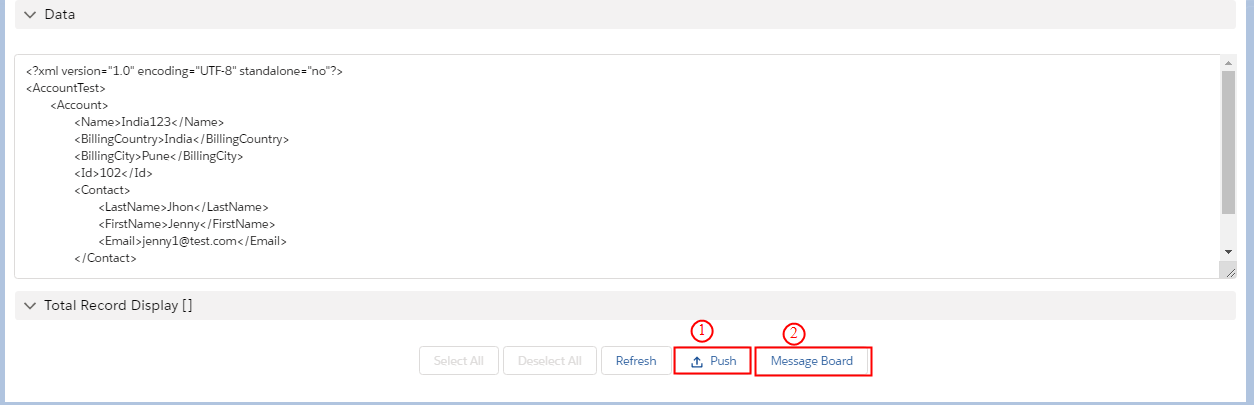
Push Record on message Board:
Click on ‘Push’ Button to upload the data into Salesforce and you get the message that the upload process started. We click on the ‘Message Board’ Button and come to the Message Board.
Step7: Search On message board:-
Below in the ‘Filters’ area you can search for different criteria e.g. Integration Name, Interface Name, Message Status or by Date.
Filters:
– Integration Name: You can choose which Integration you prefer to see the result
– Interface Name: You can chose which Interface you prefer to see the result
– Message Status:
There are many types of Status, but there are 3 common using types:
– Green Flag = The upload was successful and is Completed
– Red Flag = Failed
– Yellow Flag = Pending
– Yellow Flag = Pending
Note: You can select None if you prefer to see all types of message flags.
Then click on Search.
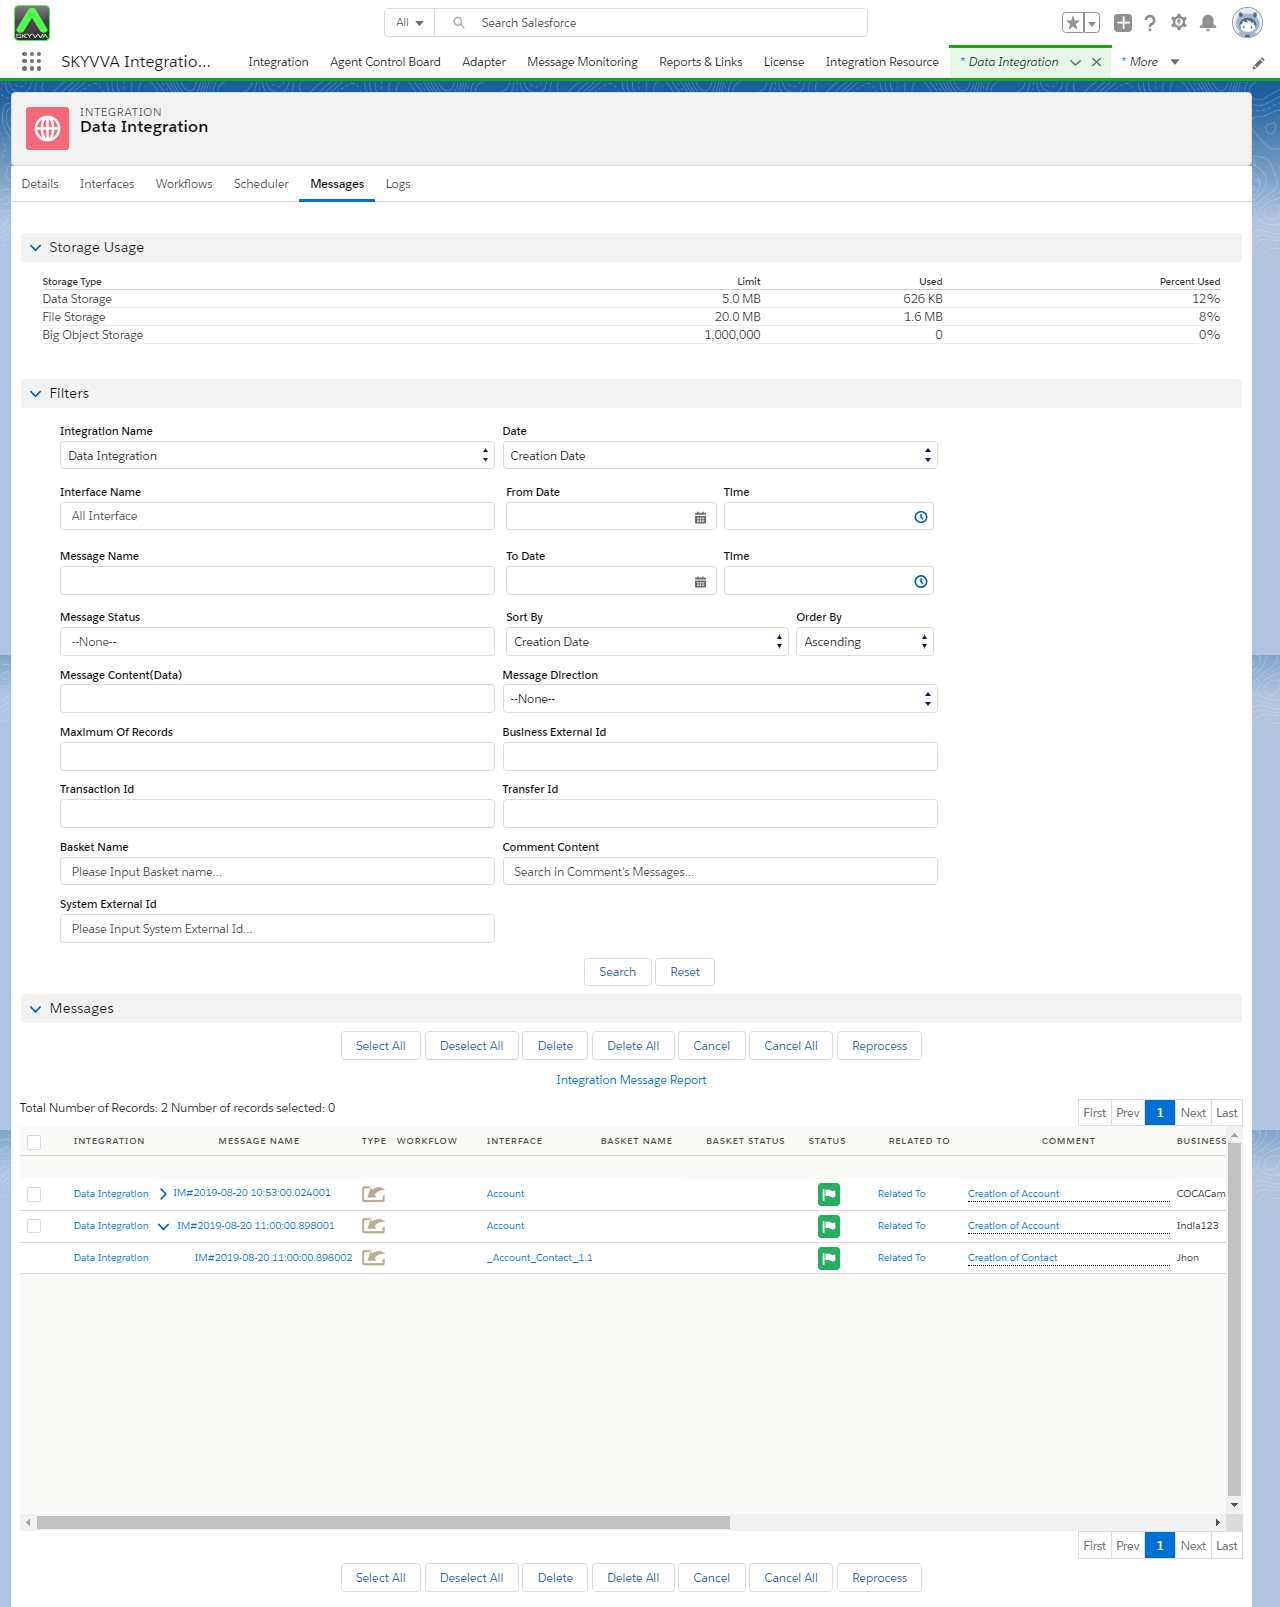
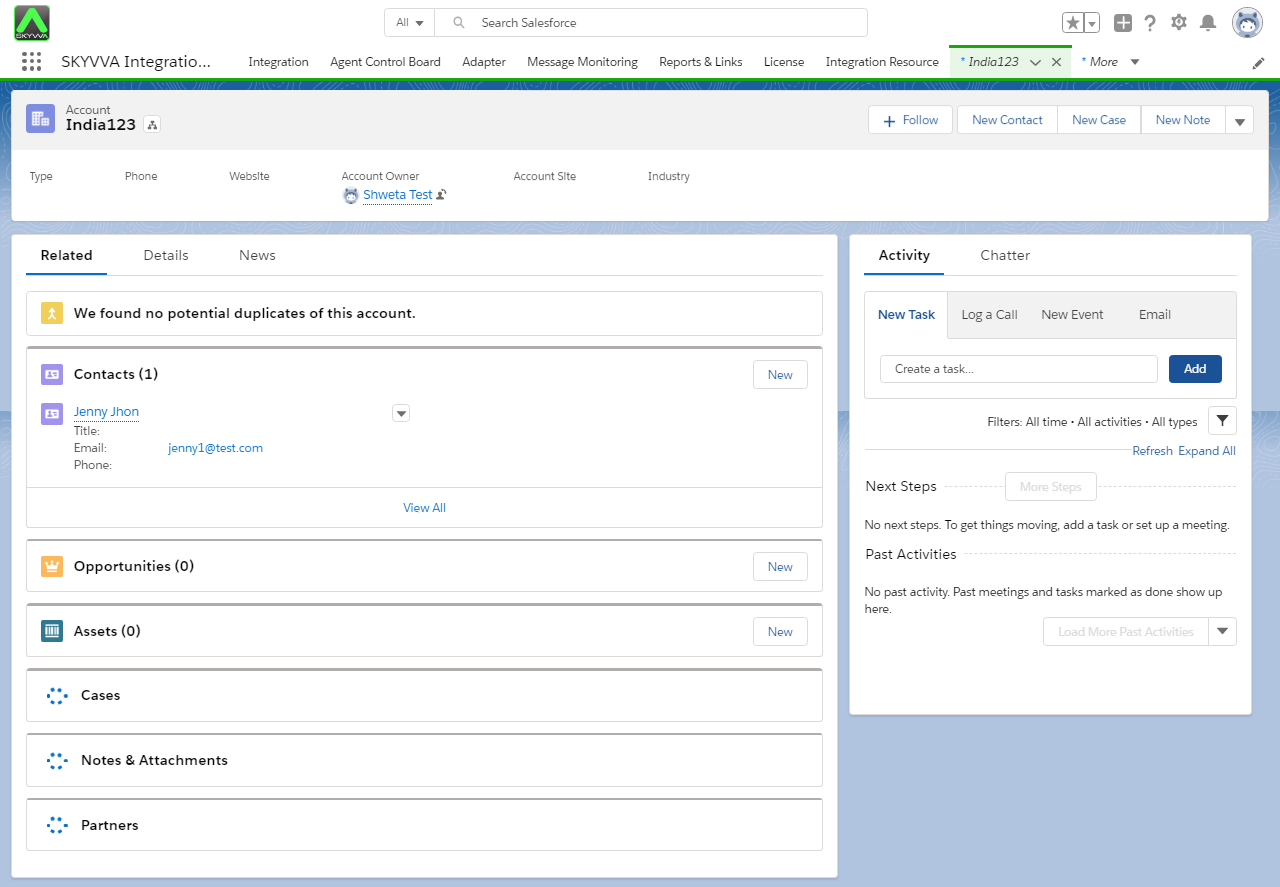
Finally, you can get Account has relationship with contact like screen shot below. Account Name is India123 link with contact Jenny John.