SKYVVA´s Free Dataloader is part of the SKYVVA´s Integration Cloud App and is a native force.com App. As a true Cloud Service – data can be uploaded over the Web without the need to install any software or hardware. SKYVVA´s Free Dataloader is perfectly suited for business analyst and administrator to manage the import of critical business information such as accounts, contacts, assets products, leads or orders in a timely manner without being reliant on limited IT
resources.
Based on an intuitive (Salesforce Look & Feel) Web interface – SKYVVA´s Free Dataloader is very easy to configure (No Coding) and maintain. The Free Dataloader is installed as a tab ‘Integration’ directly in the Salesforce menu bar. Fields are mapped by a visual editor, data are transformed using a formula editor. All operations are executed in the familiar Salesforce Look & Feel. Business analysts or administrator get alerted about failure in the service and
are enabled to resolute data transforming or process logic without IT help via a message board.
Complex Use Case: User wants to Import Account, Contact and Asset data at the same time into Salesforce Account, Contact and Asset object.
Solution: We use our IChained Interface functionality. Since Account Object is parent and Contact and Asset is child and data of Account, Contact and Asset are sent at the same time. In this use case we need to create a integration and three
interfaces -Account, Contact and Asset – with different data mappings and use two Chained Interfaces to bind between Account Interface, Contact Interface and Asset Interface. Where Account is the parent interface and Contact and Asset are
the child interfaces.
Here is how it works and let´s get started.
Pre-requisite: #
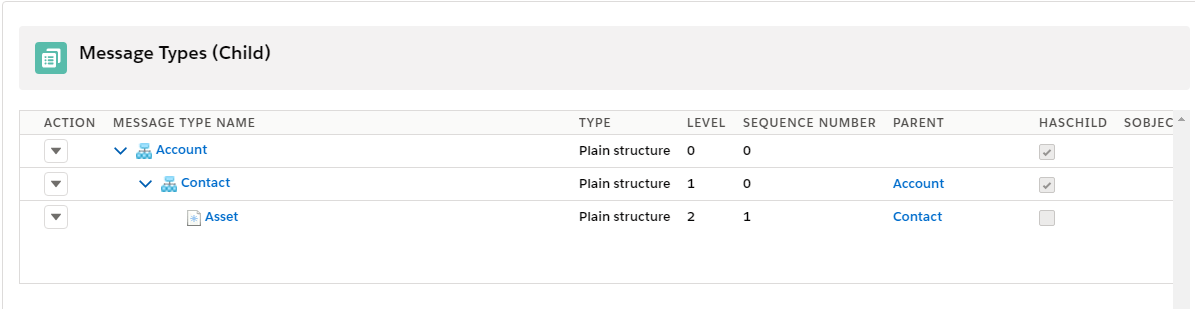
We have to create message type to get hierarchical Istructure in mapping tool. follow the given steps:
Step 1: We have to click on metadata provider tab and click on New button. In Skyvva, when we create metadata, Name filed is only mandatory field. On MetaData the Name cannot be duplicate.
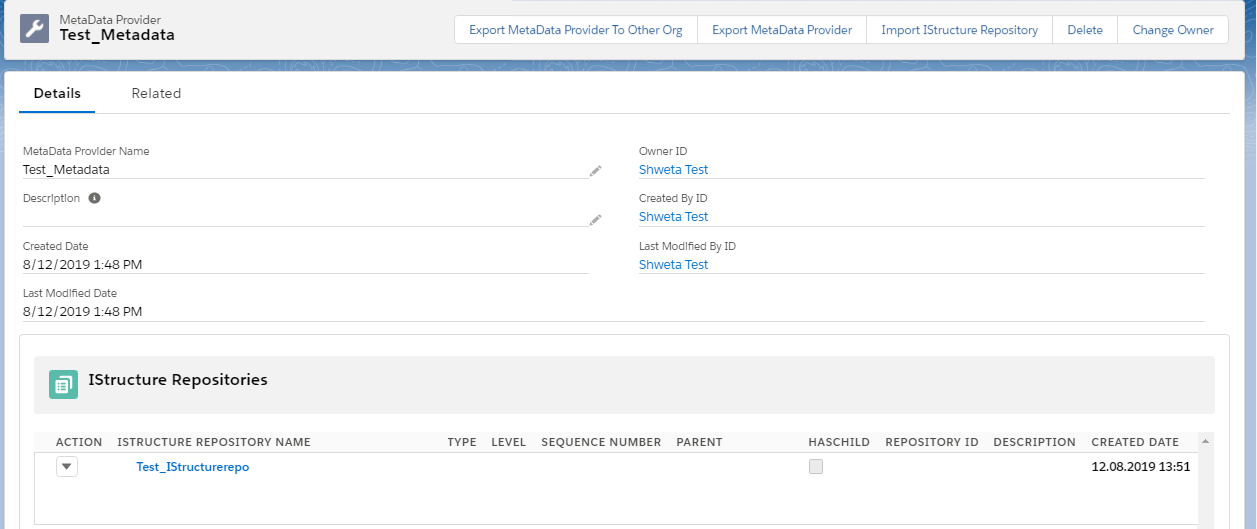
Step2: Create Istructure Repository in created metadata. The purpose of Istructure is An Interface for a structure that contains the metadata of a structure.
– We have click on related tab then click on new button to create Istrutcure repository.
– We have to open our created Istructure repository.
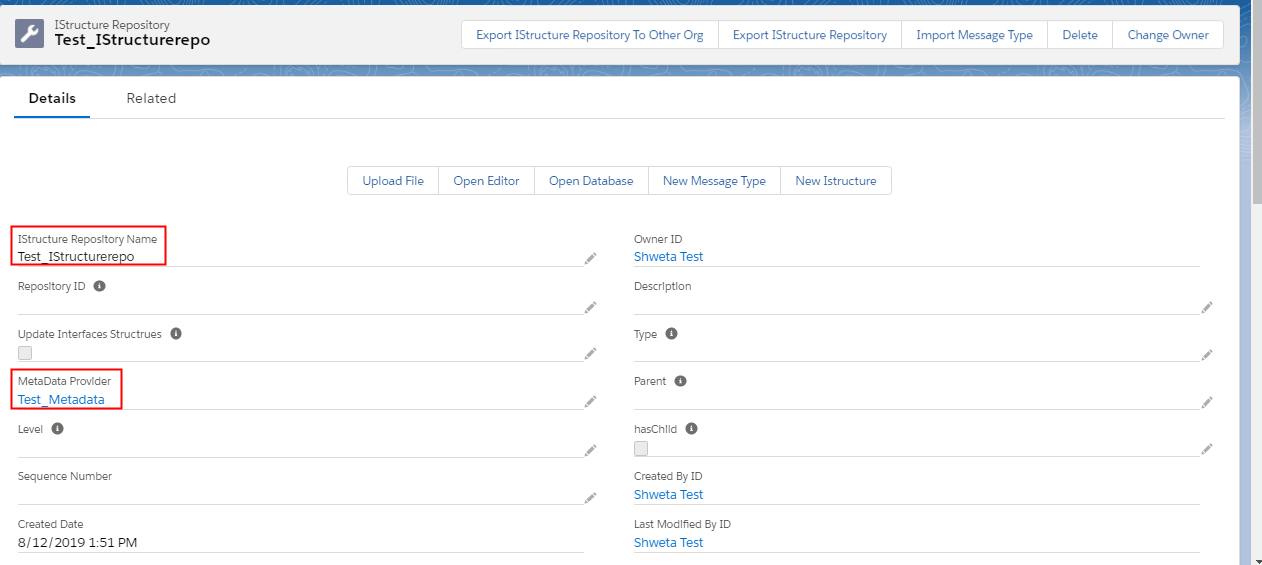
Step 3: We have to create message type.
– click on upload file button. Pop up window should open.
– Select file format which you want to upload. Here we used xml file to create message type.
Configuration of SKYVVA Data Loader for parent-child interfaces #
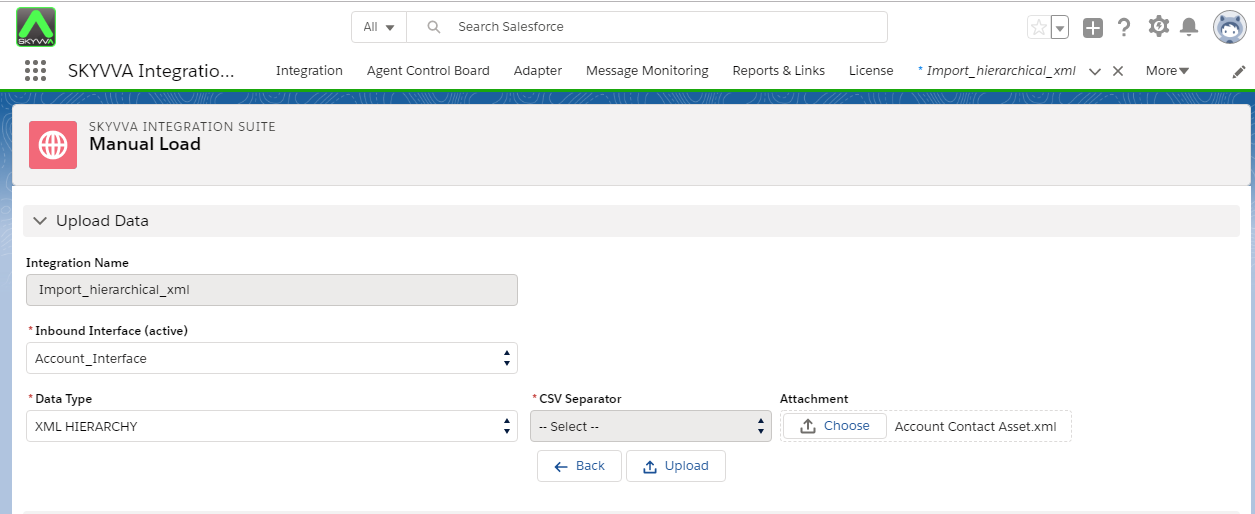
Here our manual load function is used in conjunction with IChained Interface. Please follow the given steps to upload account, contact and asset data in an XML file in a step according to Salesforce.
Step 1. The first step is to create a new Integration to import our xml file.
- On the Menu Bar, you see the Integration tab -> clicks on the tap Integration.
- Click On New button.
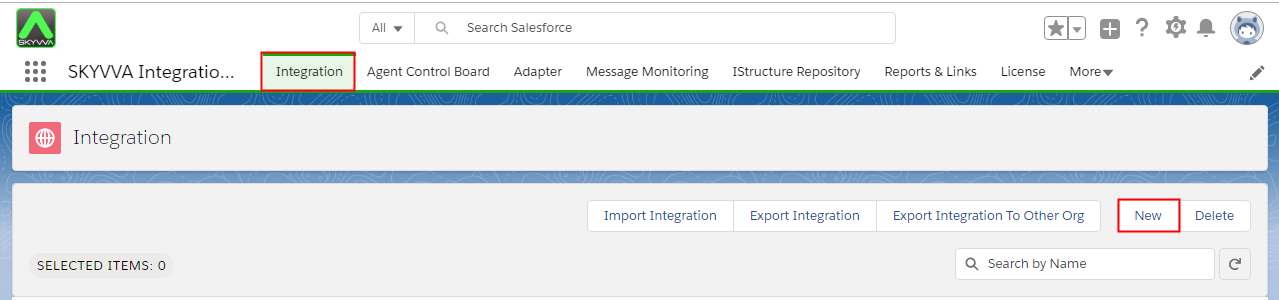
- Fill in the Name Field (Give a meaningful name that identify your integration.) We give our Integration a name and a short description of the use case for this integration.
- All other fields can remain as default…
- Click on Save button and we have created an Integration to upload our xml file.
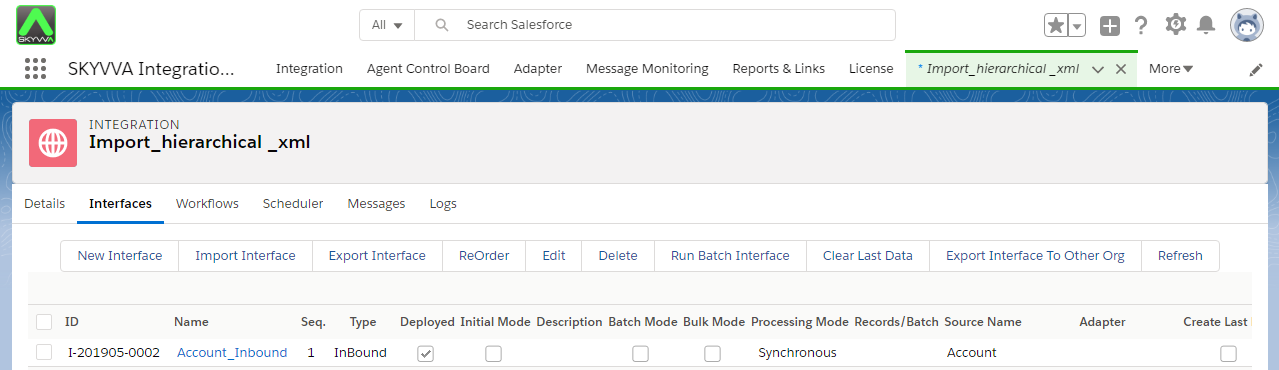
Step 2. The next step is to create the Interface for the Account Object.
To upload account, contact and asset data in an XML file according to Salesforce we have to create three-level hierarchical interfaces. We can create it using vlookup but this case is not fast and good enough because when an object has master/detail relationship or has parent/child relationship which can be identified by an external Id then it is not good to use vlookup but better to use the built-in foreign key and chain interface concept. Each vlookup consume 1 soql query and in one transaction you have only 100 free. Therefore it is not good technique. And foreign key technique consumes no query limit.
Here we are using Skyvva tree mapping concept to create three-level hierarchical interfaces. Skyvva tree mapping feature is built to reduce the complexity of manual work. When we use tree mapping, It automatically generated all set:
– chained interface
– Foreign Key
– Mapping the fieldId to special field SKYVVA__PARENTID
In this, we have to create only one interface which is parent interface I,e Account. Child interface created automatically Contact Interface and Asset Interface. follow the given steps to create the Account interface:
- Go to your Integration page.
- Click on Interface tab (near to detail tab).
- Click On New Interface button.

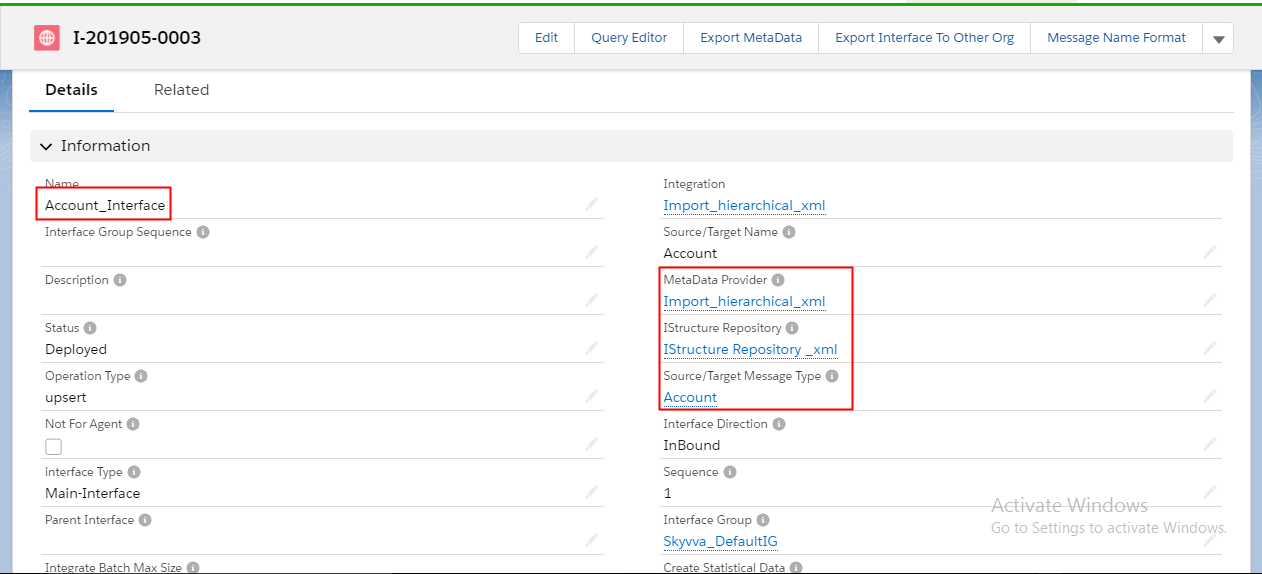
Create Account Interface:
We give our Interface a Name as Account and change the Status to Deploy and choose in Source Name the proper SObject -> Account
All other fields can remain as default…
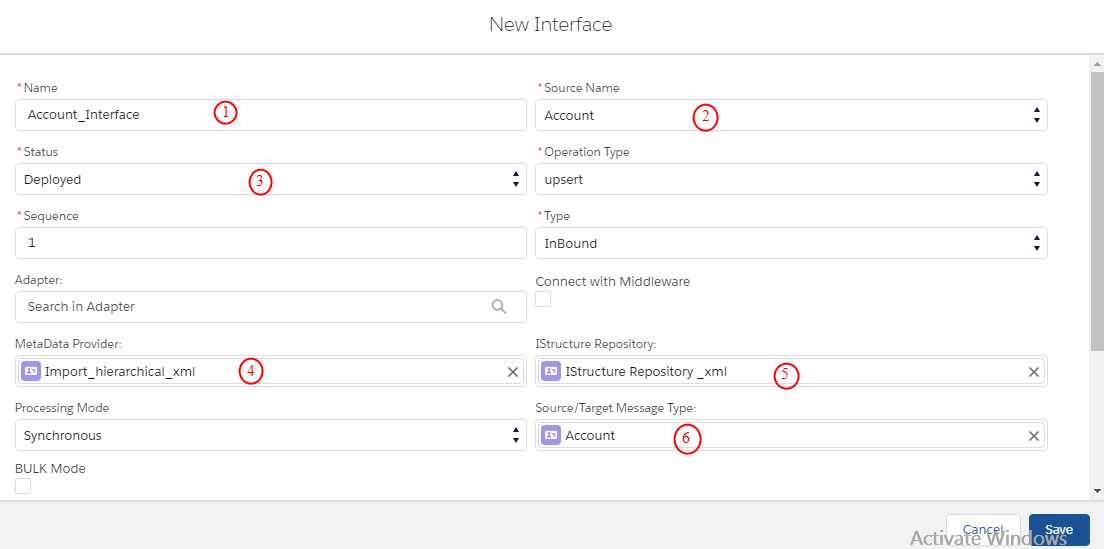
We click on ‘Save’ and created our Account Interface.
The page is navigate to:
We start with the account interface and click on the account interface link.
In the reloaded Mapping area we see now our source structure with all fields.
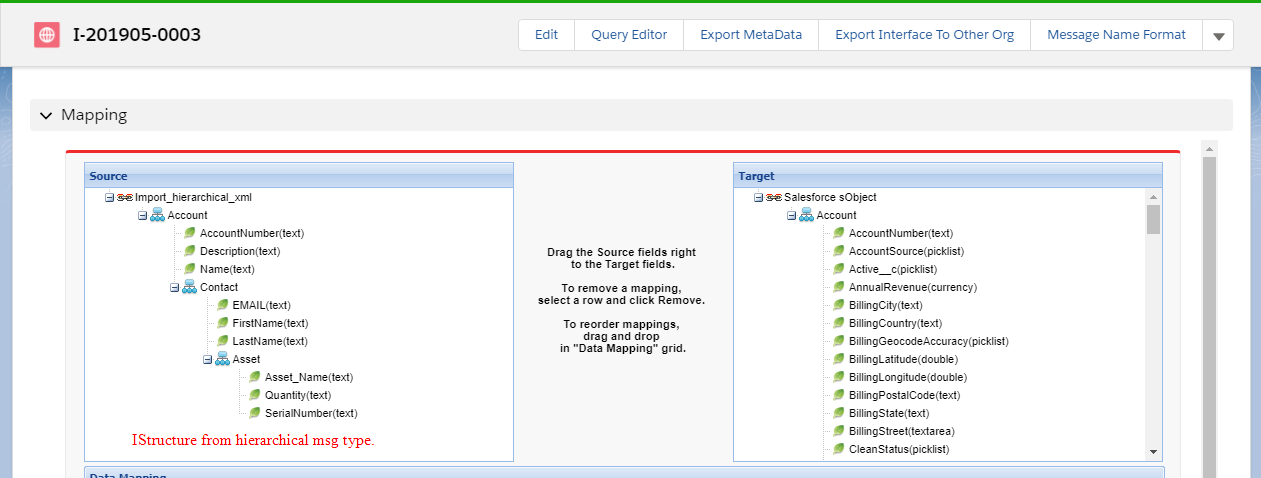
We choose the Source Object and target Object as Account and start with the data mapping. This simply goes with drag and drop and we start with the AccountNumber field.
First we need to map parent node with each other. i,e sobject

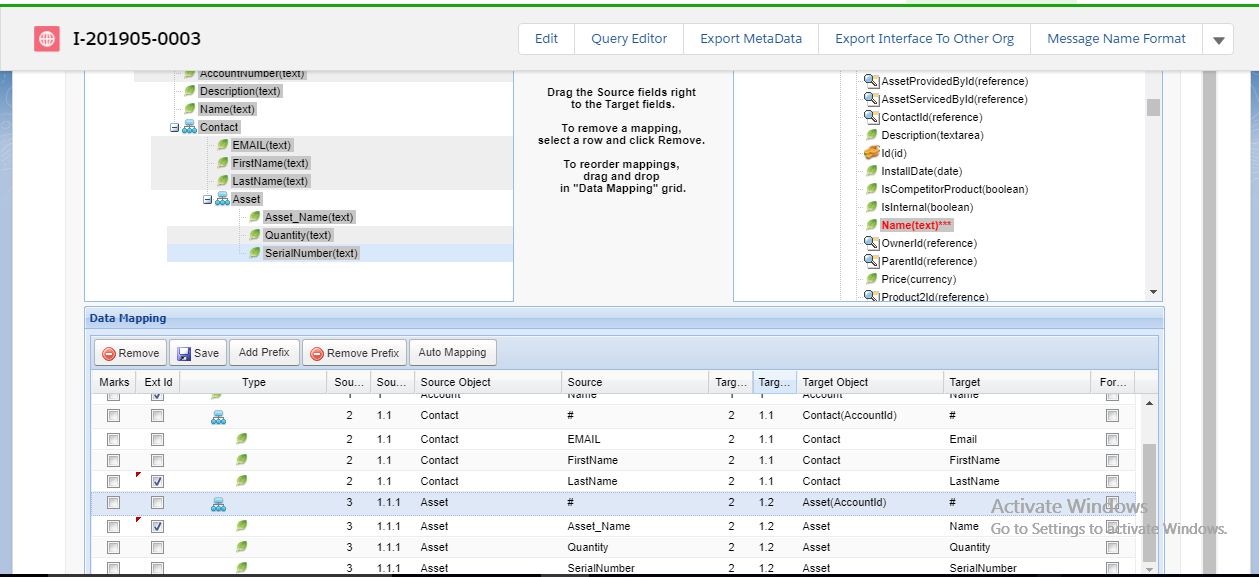
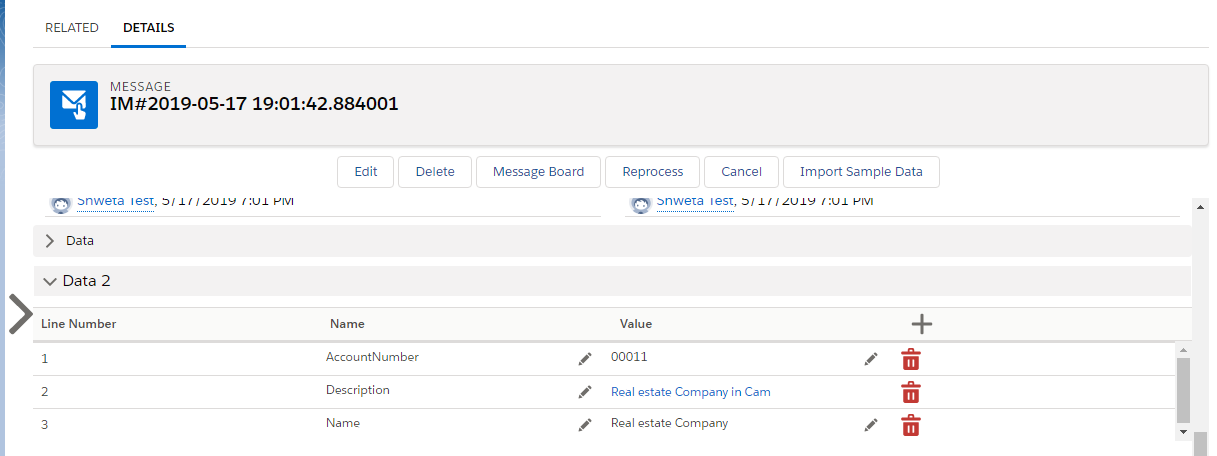
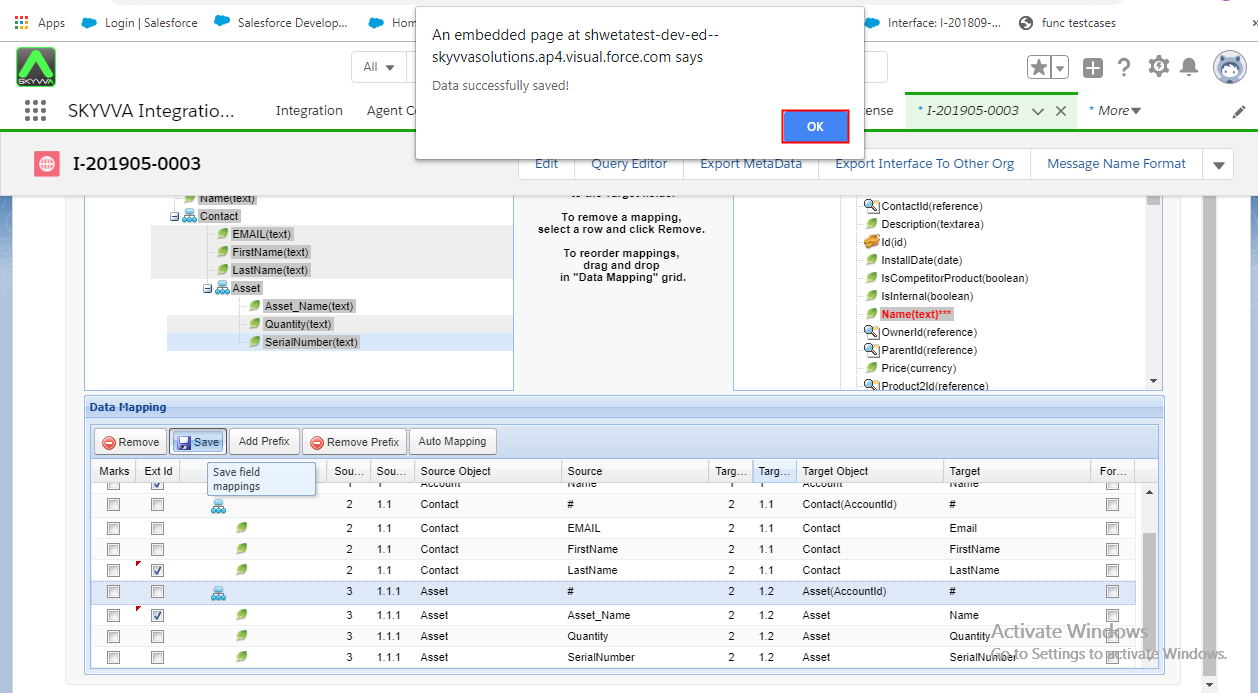
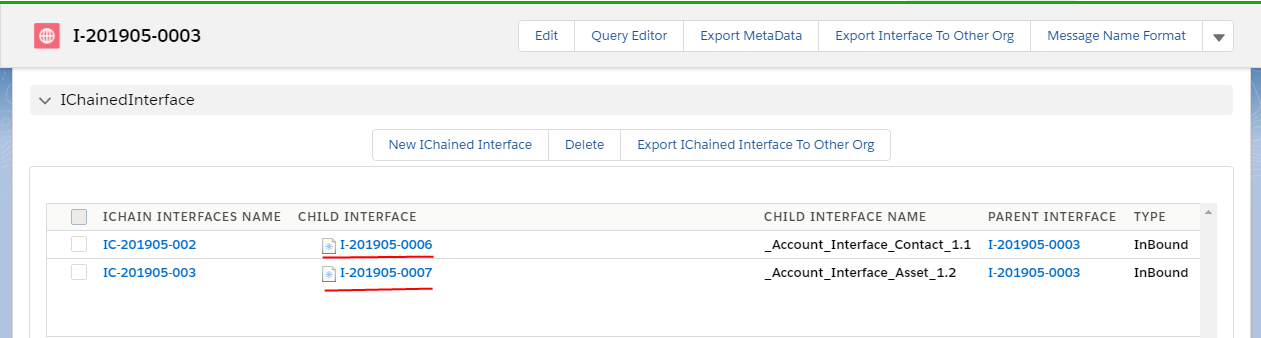
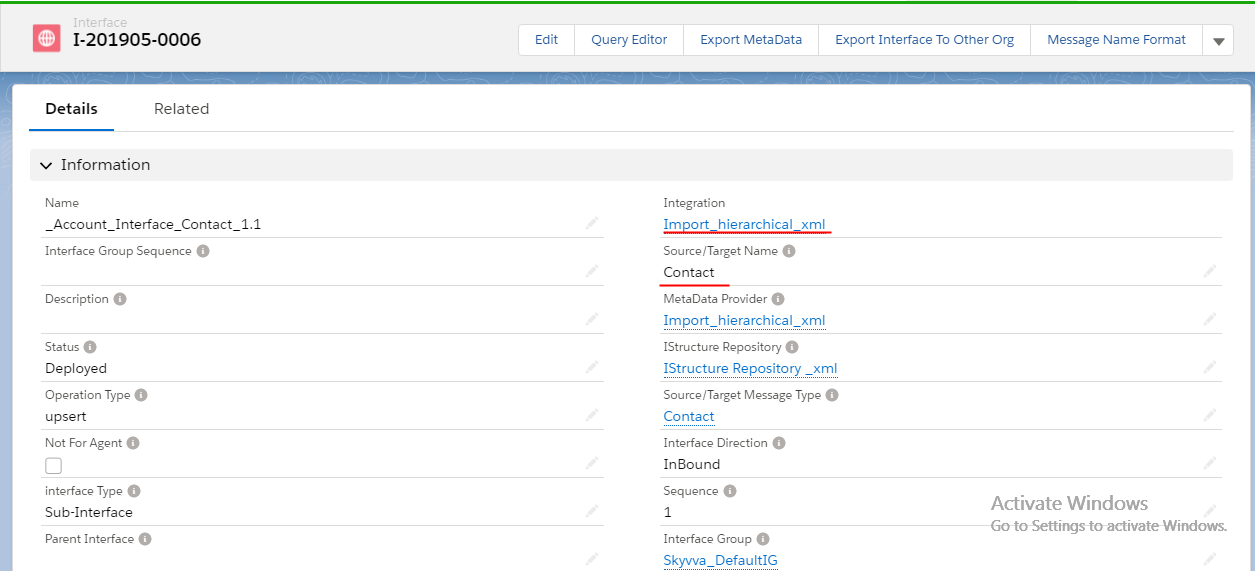
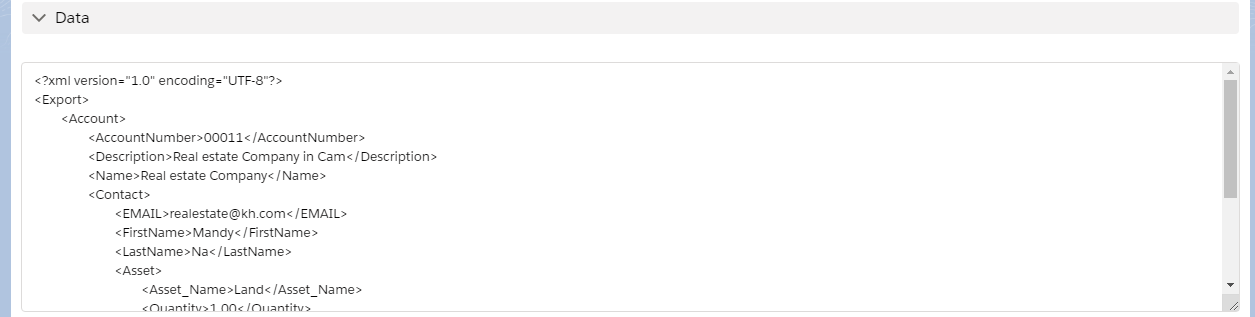
Finally, We Save our data mapping and confirm the message. To check the child interface click on Account_contact interface ID. It should navigate to: We can check our foreign key. Select the related option of contact Interface and scroll down the page till foreign key section. To check the child interface(Asset) click on Account_Asset interface ID. It should navigate to: Now we are ready to upload our xml file. On the Manual Load page we choose our active inbound Interface (1) And choose data type as XML (2) and choose your proper xml file and then open it and then click on the Upload (3) Button. In the Data area we see the structure of our xml file and in the Total Records Found area you can choose now which data you want to upload click on the Push (2) Button to upload the data into Salesforce and you get message that the process has started. Click on the Message Board (3) Button In the Message area you can see the messages and see if it got posted. As example you can jump into the detail of a message. Click on a Message Name link and you see the Message Details. You see the different Account field names (Name) and its content (Value). Besides you can jump directly to a Related Account. Click on one of the Related To Link.and verify the uploaded Account Data in the Account Detail


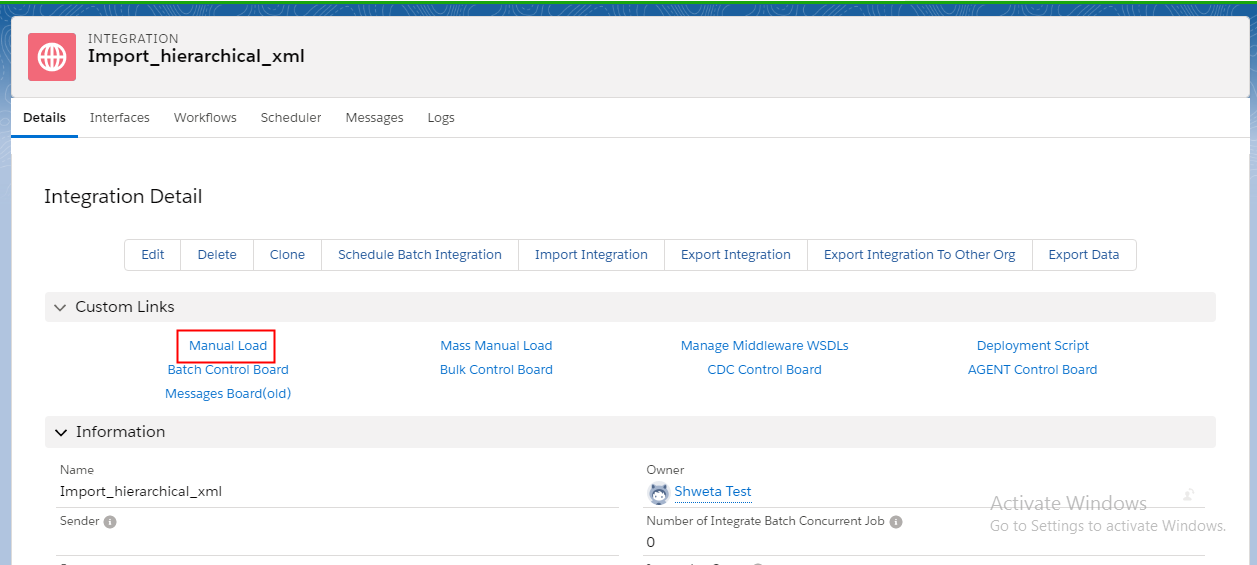
Step 3: Upload XML data using Manual Load
We go to our Integration Detail page and click on the Manual Load link.
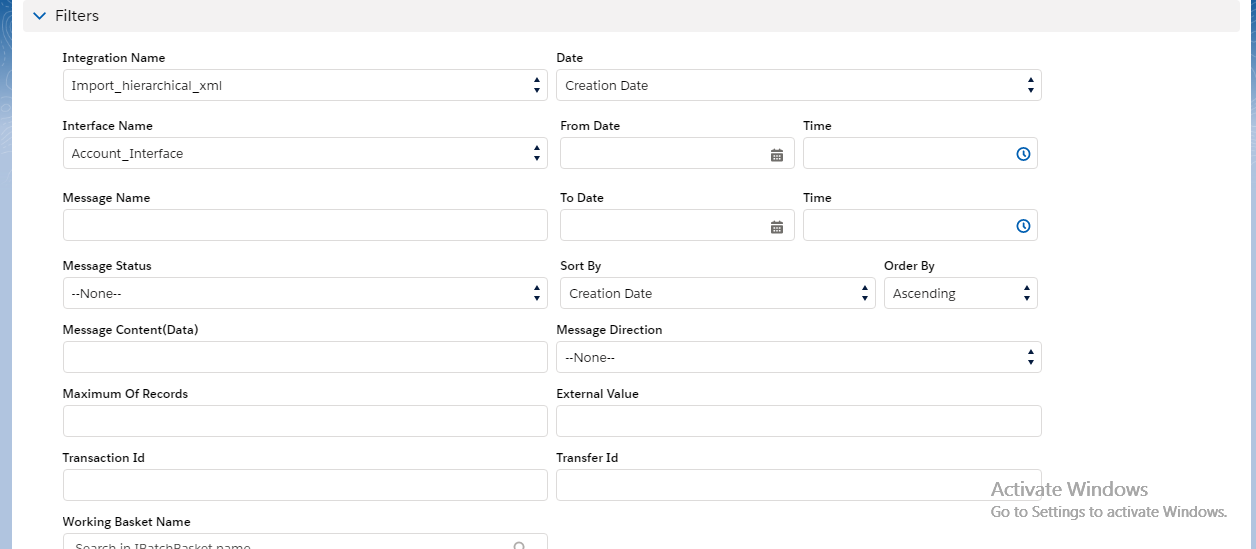
In the Message Board you can see on the Storage Usage area a short overview about your storage usage.

In the Filters (2) area you can search for different criteria e.g. Integrations, Interfaces, Message Status or Date. Click on search button.