
This tutorial explains about what you do after refresh your production instance. It explain also about license key, certificate and key store, and how to save or download them for using later.
What is formula? #
When a sandbox or development instance got refresh by a production instance,
some information or data get lost. The following have to be renew or create again:
1. SKYVVA license key
2. Certificate
3. Keystore
License key #
After refreshing, the license key is not valid anymore. You will see this error message when trying to send data to Salesforce. Before refreshing your sandbox you can save your old license key somewhere to use later. The screenshot below show an error has occur due to invalid or expire of license key.
This tutorial will tell you how to add or renew the license key. To add license key, you have to:
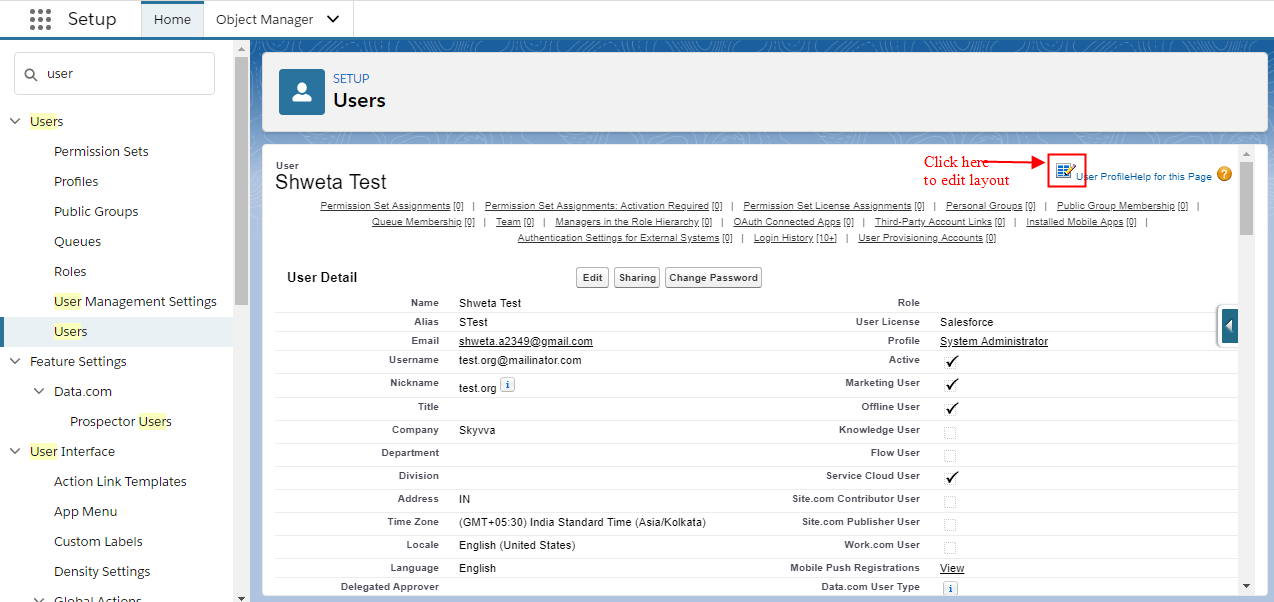
- Go to the user used for integration
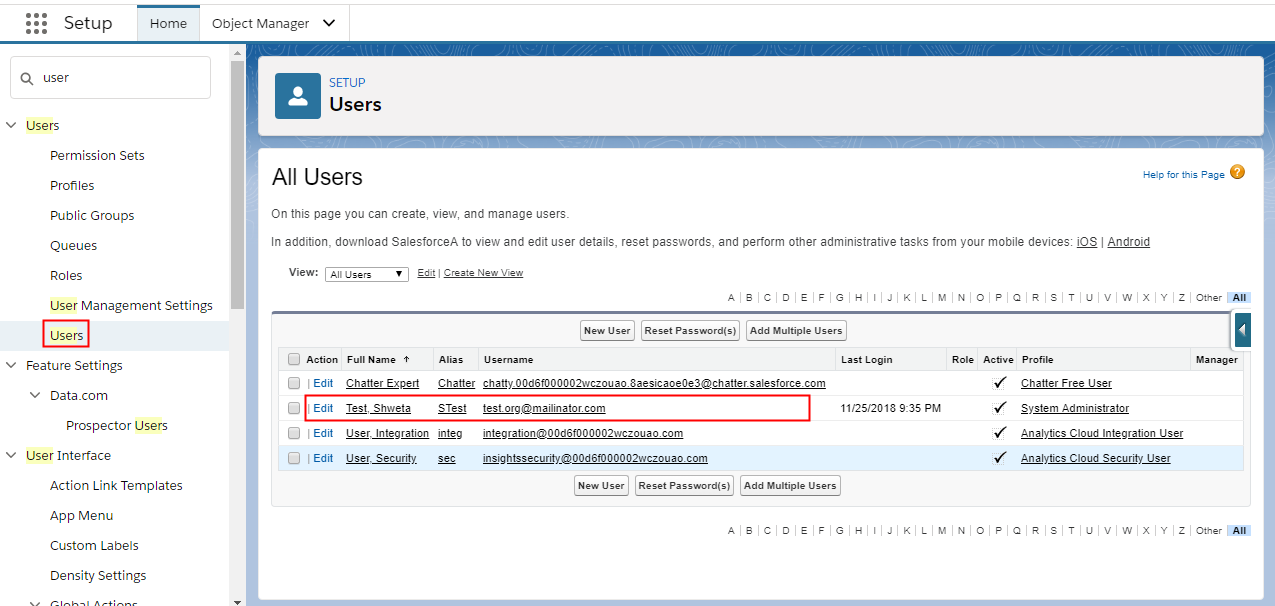
Note: If you don’t have the Skyvva licence key filed on user profile then Follow the given steps to add field by editing layout:
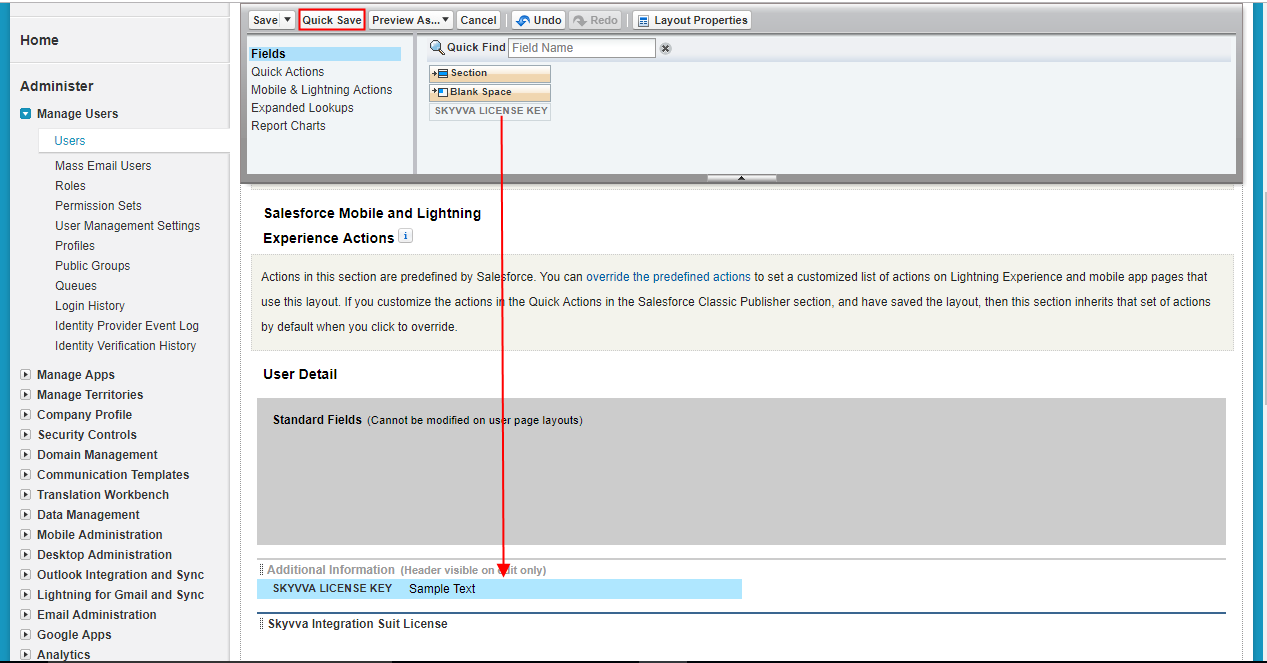
- Click on edit layout icon.
2. Add the Skyvva Licence filed and save it.
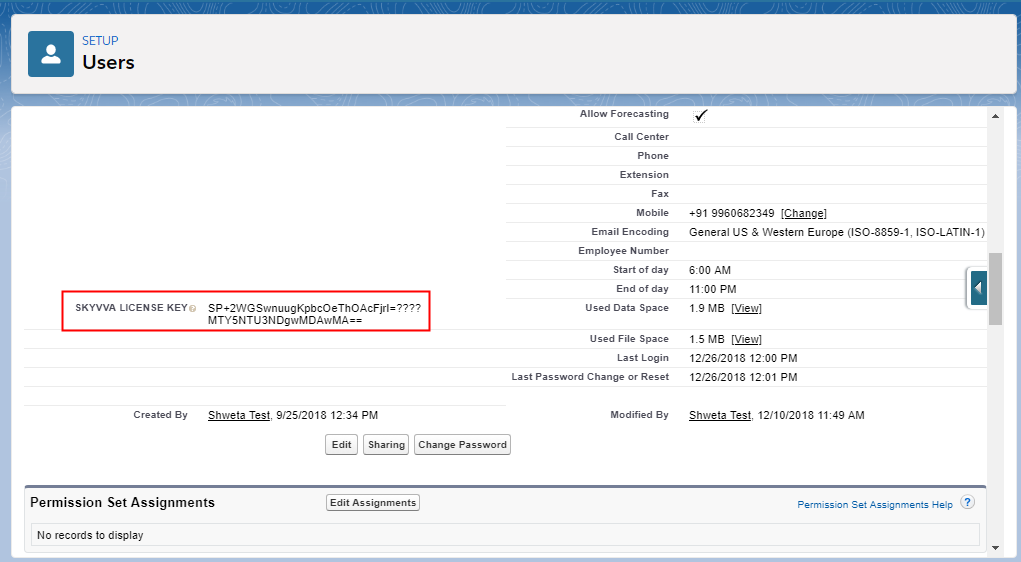
- Here you get the SKYVVA license key and it now invalid after refresh
- To generate a new license key we required some information i,e : Organization Name,Salesforce.com Organization ID
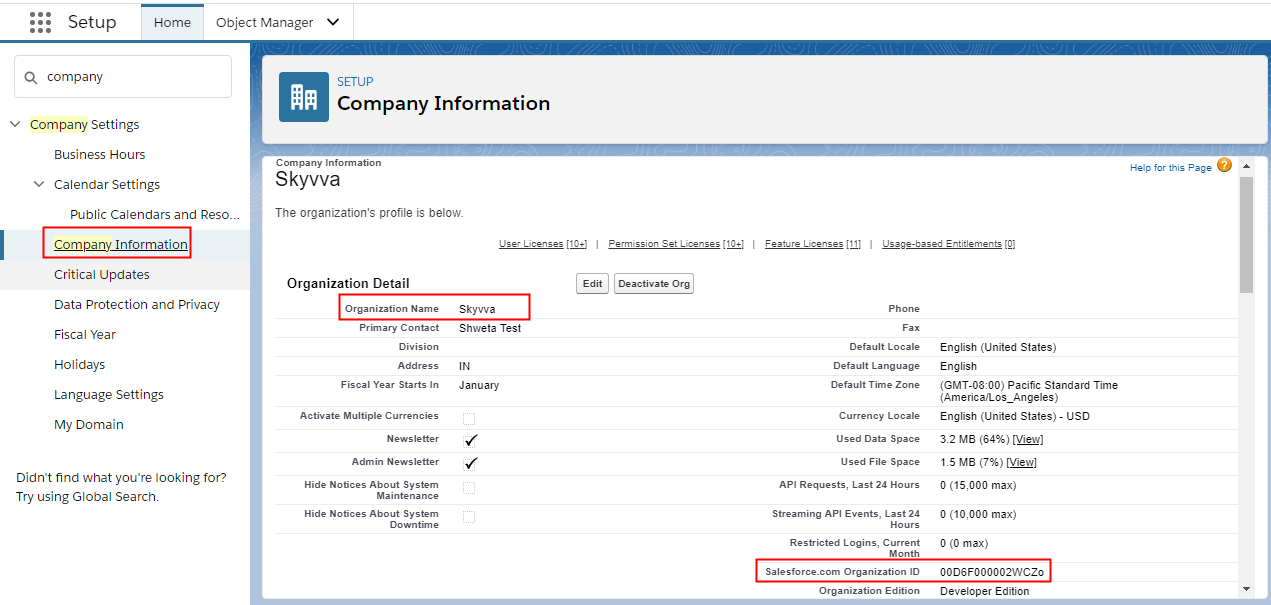
here My details are:
- Organization Name: Skyvva
- Salesforce.com Organization ID: 00D6F000002WCZo
- Old license key: SP+2WGSwnuugKpbcOeThOAcFjrI=????MTY5NTU3NDgwMDAwMA==
Now you can apply the old/new license key.
Go to edit mode and enter the new key provided by mail:

Certificate #
For example, after refresh a dev/sandbox instance from a productive instance, the certificate got lost and you have to create it again. However, you do not have to create them again. We are talking here about download each certificate and
export keystore.
Note: Please remember that, before you refresh your sandbox you have to save your certificate otherwise the keystore will override. However if you don’t have any keystore then please skip the steps below.
Download certificate
After you have created the certificate, you can download it and install into a reverseproxy or other component. #
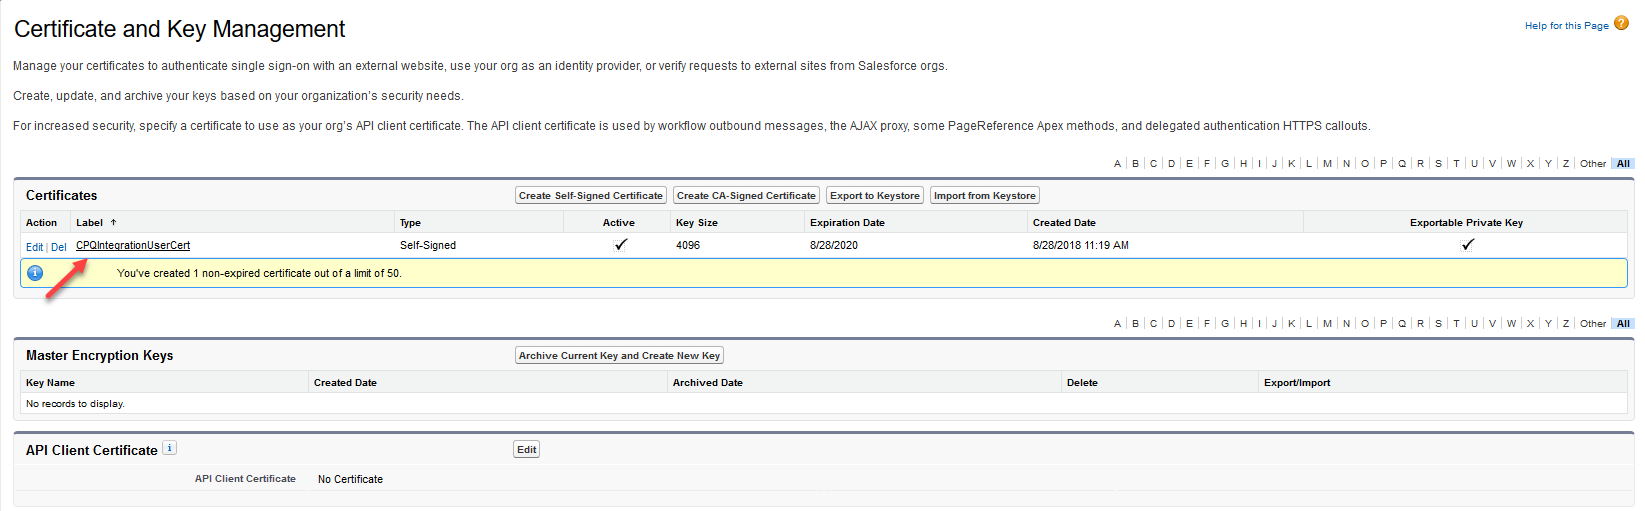
Open the list of certificate management screen and click on the appropriate certificate, which you want to download from Salesforce.

Open the certificate you have created and click on button “Download Certificate”. You have to save it to a directory on your PC at your choice.
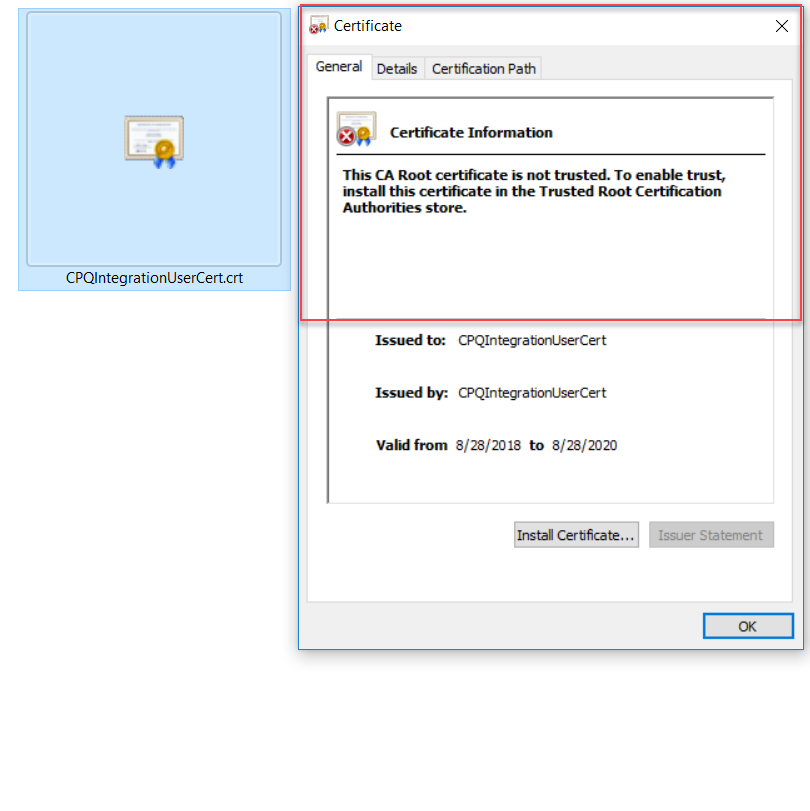
Here how the certificate looks like. Now you can use this certificate e.g. import it into the SAP WebDisaptcher.
Save Keystore
To save keystore you can follow some steps below:
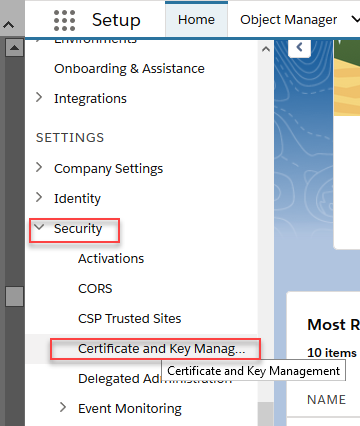
Here you can check the certificate and key management in Salesforce.
Click on “Export to Keystore” button.
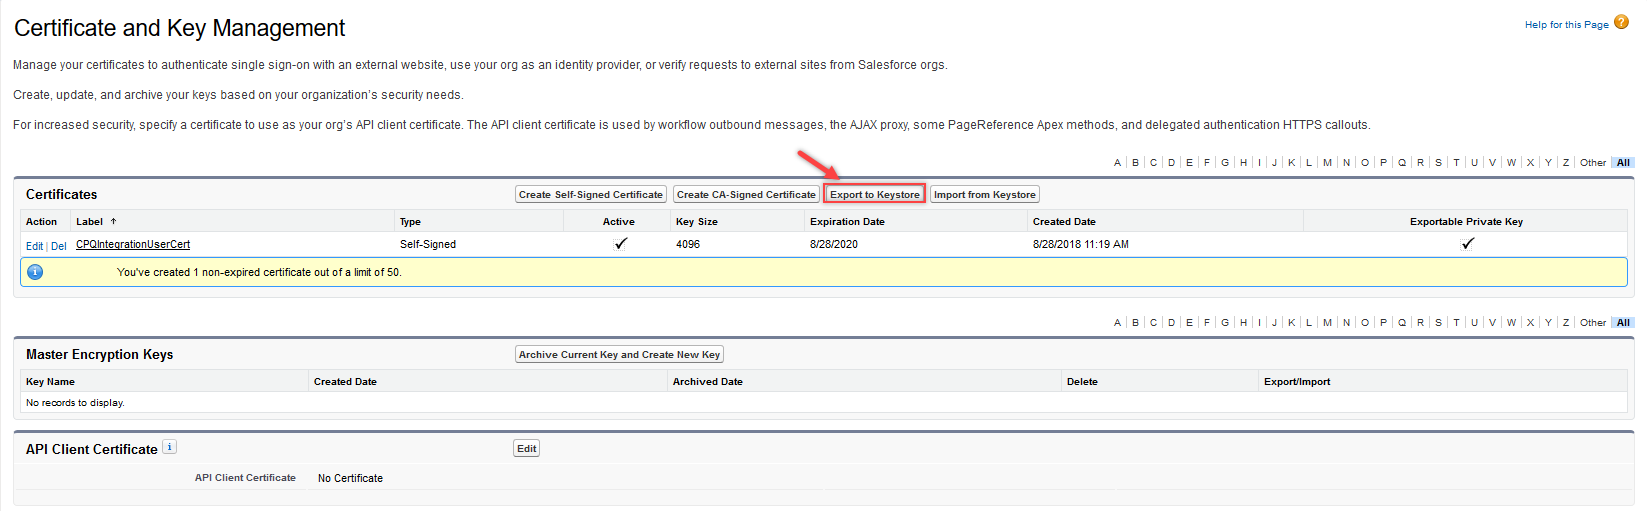
Input the password and click the Export button to save the keystore.

Adapt the outbound Adapter if needed
This step you need only if the name of the certificate has been changed when created it again after a refresh. If you keep the old name then you do not need to adapt the adapter. Not that this step is optional.
Currently, the adapter for the outbound interface looks like this:

Therefore, the name used here is “GRT_SAPDis”. Now we change the name to the new one e.g. to “CPQIntegrationUserCert”.
Note: we recommend creating a new self-signed certificate with the old name. In this case, you do not need to adopt the certificate in the adapter.

Take care to enter the correct name into the adapter. You have to take the name under the field “Unique Name” here in this example “CPQIntegrationUserCert”. Do not take the Label on the left side. In this example, we have given both fields the same name. Therefore, it is not a good example for showing about difference name.
Now go to the adapter and adopt the name of the certificate if you name it differently from the old one.
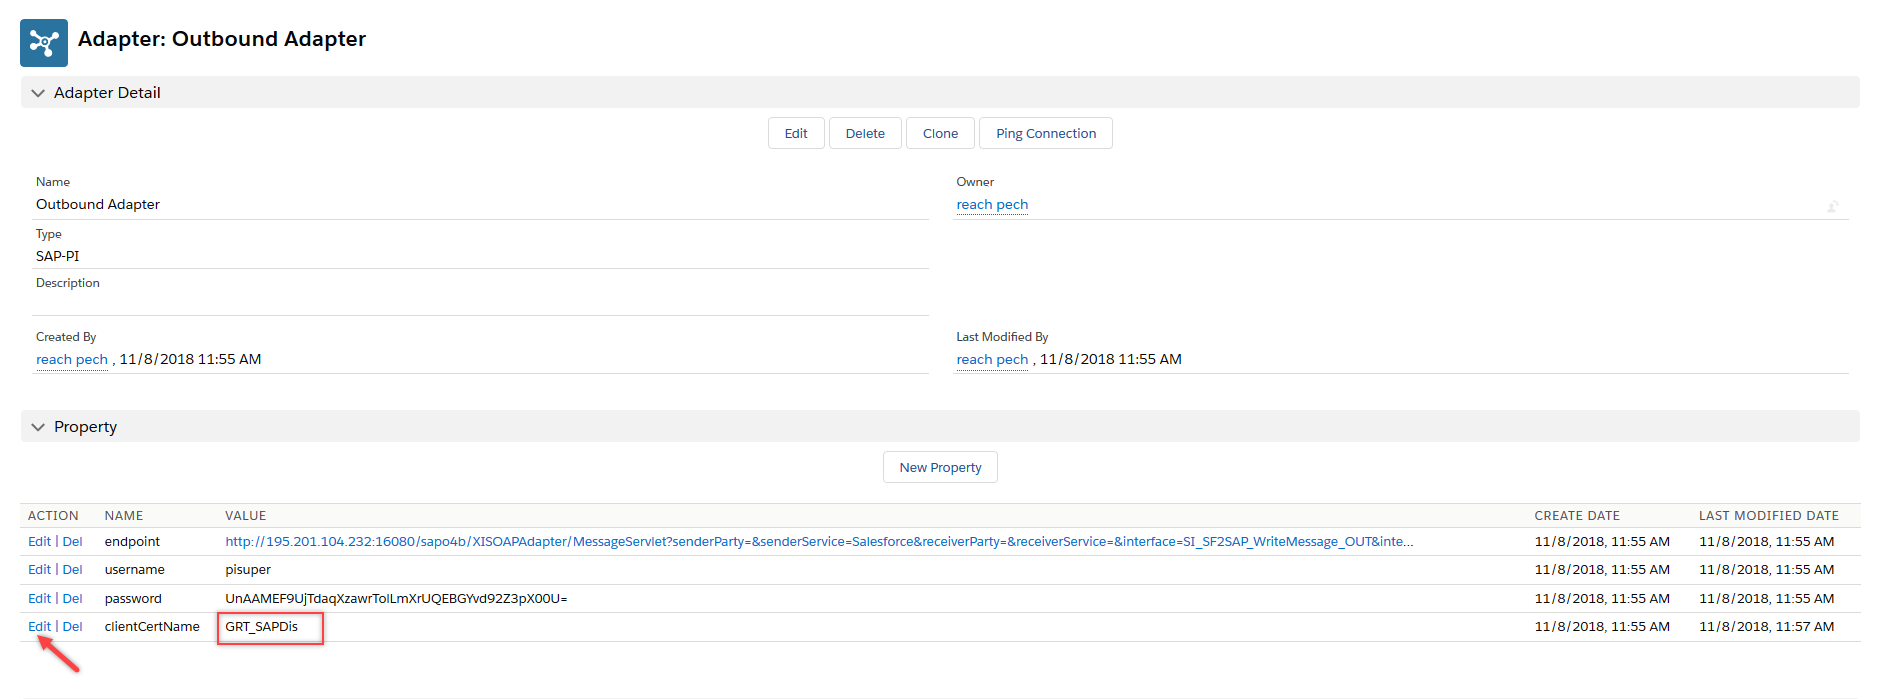
Click on “Edit” to change the value.
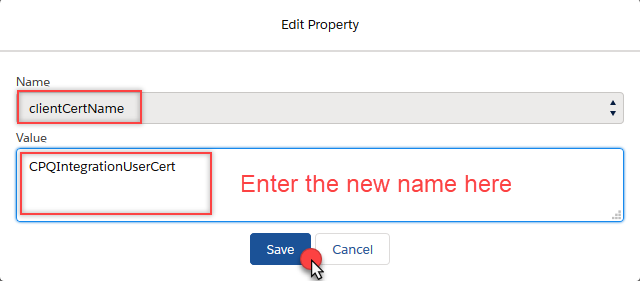
Now save it.

This is now the result after changing the certificate name of the adapter object.
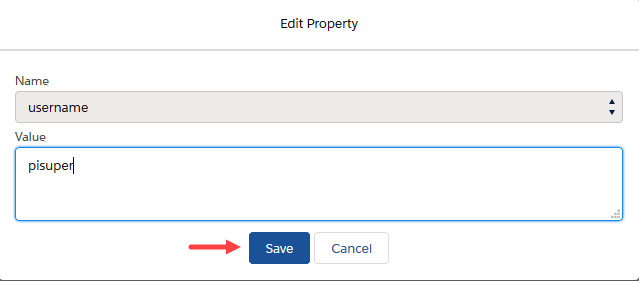
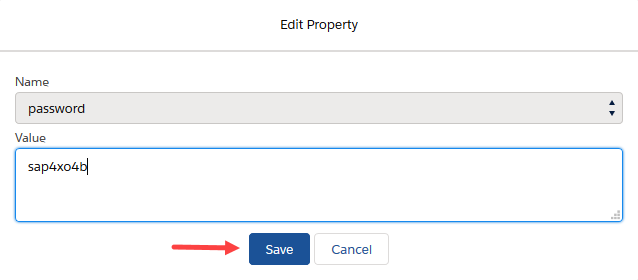
User and Password in the adapter (outbound call)
After refresh, the user and password are encrypted again when inserting the new data. So it is double encrypted and the decryption is not working. Therefore, the user and password have to be adapted as well.
We can test the adapter and we can see this error now:
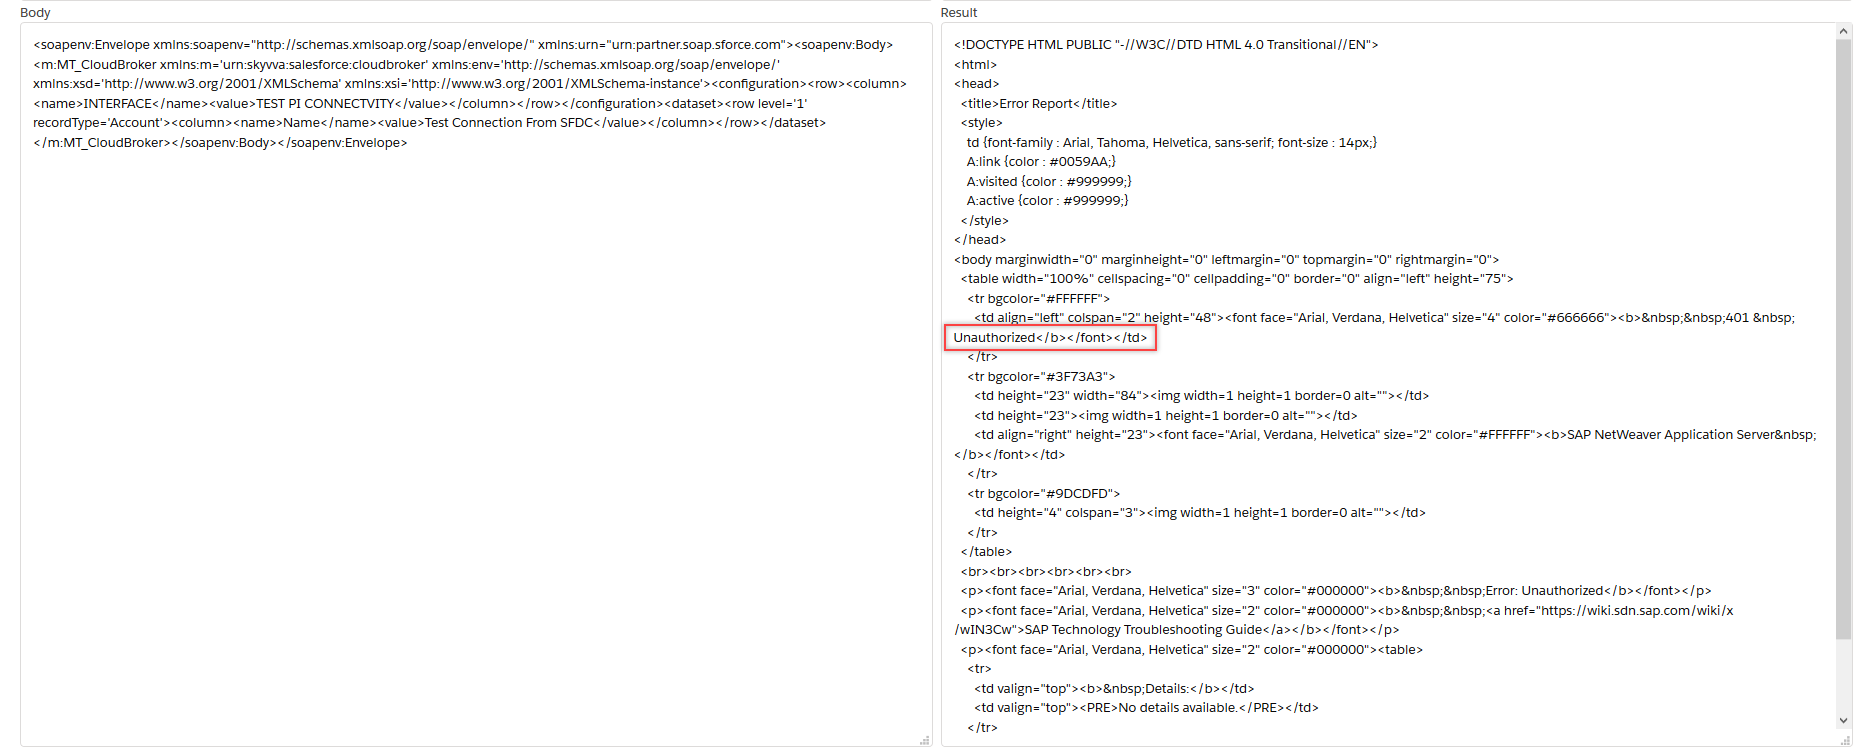
Now we change the user and password.
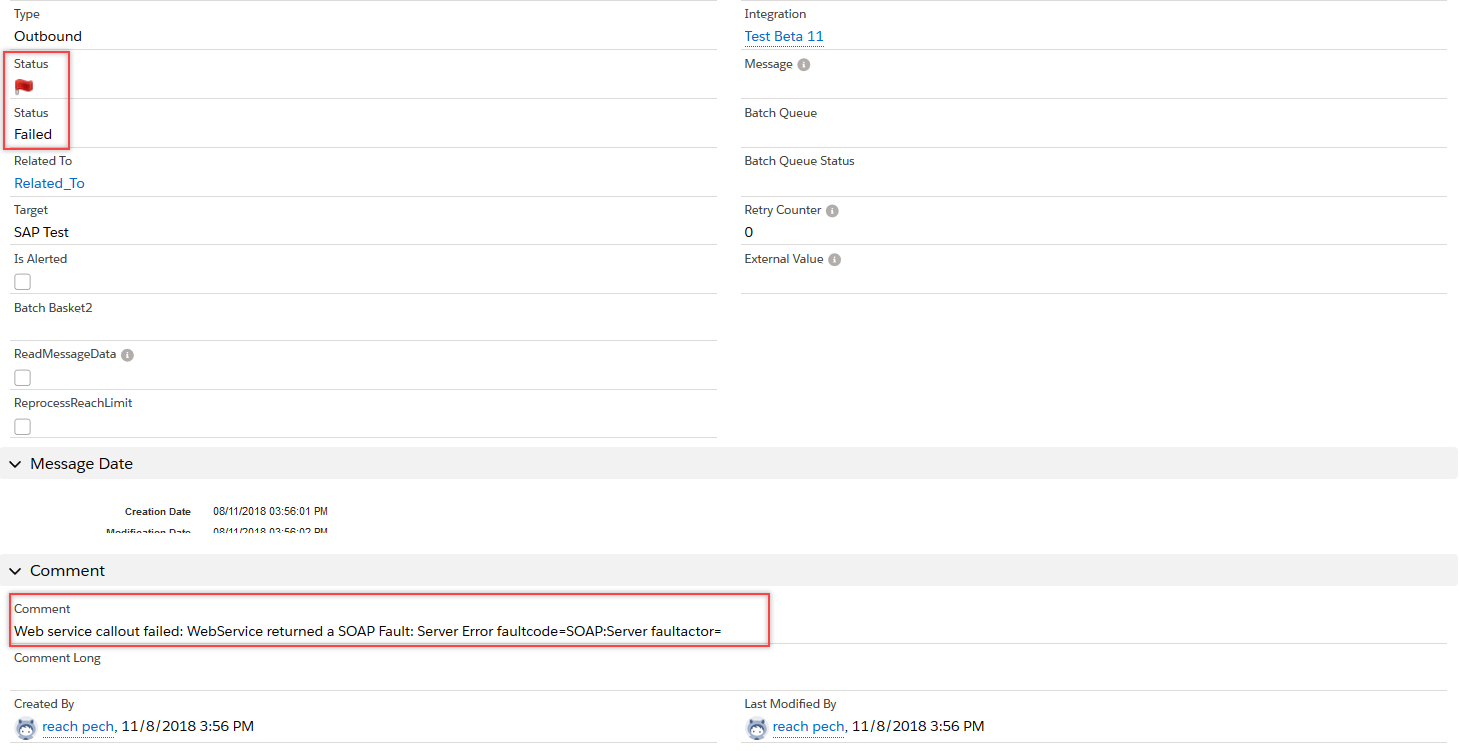
After changing user and password, we do not get the error with “unauthorized” anymore. Here is the test result:

So now, we can resend error message from the SKYVVA monitoring again to SAP. Here the error in the SKYVVA monitoring before we change the user and password:

When we select the entire message and reprocess it will do in batch via an Apex job. Here we can see the apex job for the reprocessing.
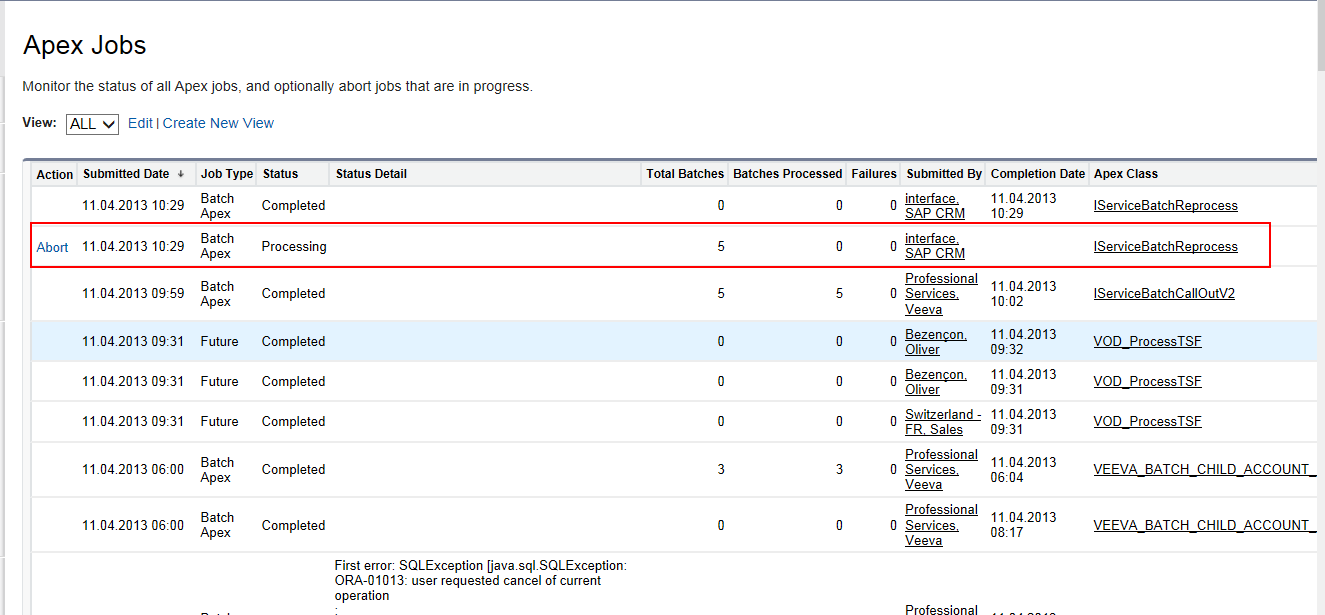
The number of “Total Batches” is 5 e.g. it was 5 messages to be reprocessed.
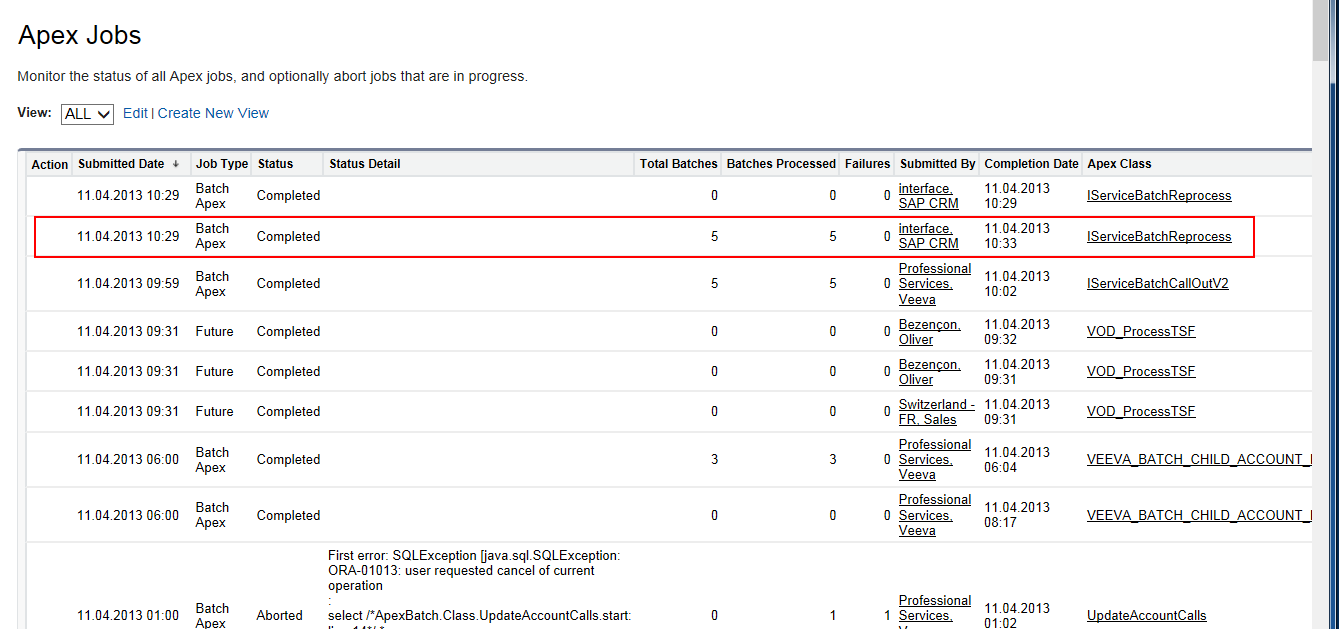
Now the reprocess is completed. Now the message is green in SKYVVA monitoring.

Test Connectivity
In Skyvva we can do a connection test from Salesforce to SAP.
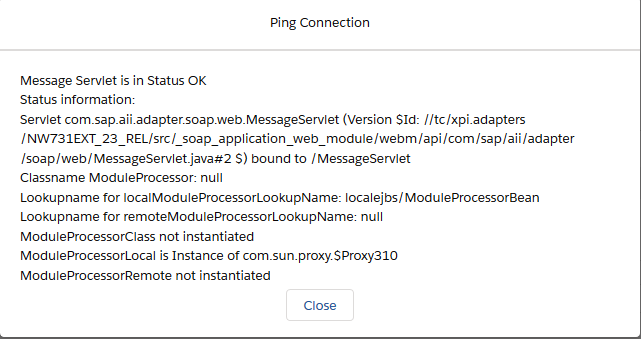
We can do a technical ping. Here is an example where the ping is not successful. The problem was not clear and after the restart, the sap web dispatcher the ping test is working. Here is the result.
Now we do a test connection with the test payload. The result of the test looks like this:

This is ok since the test payload is not correct we get this exception from the soap sender channel.
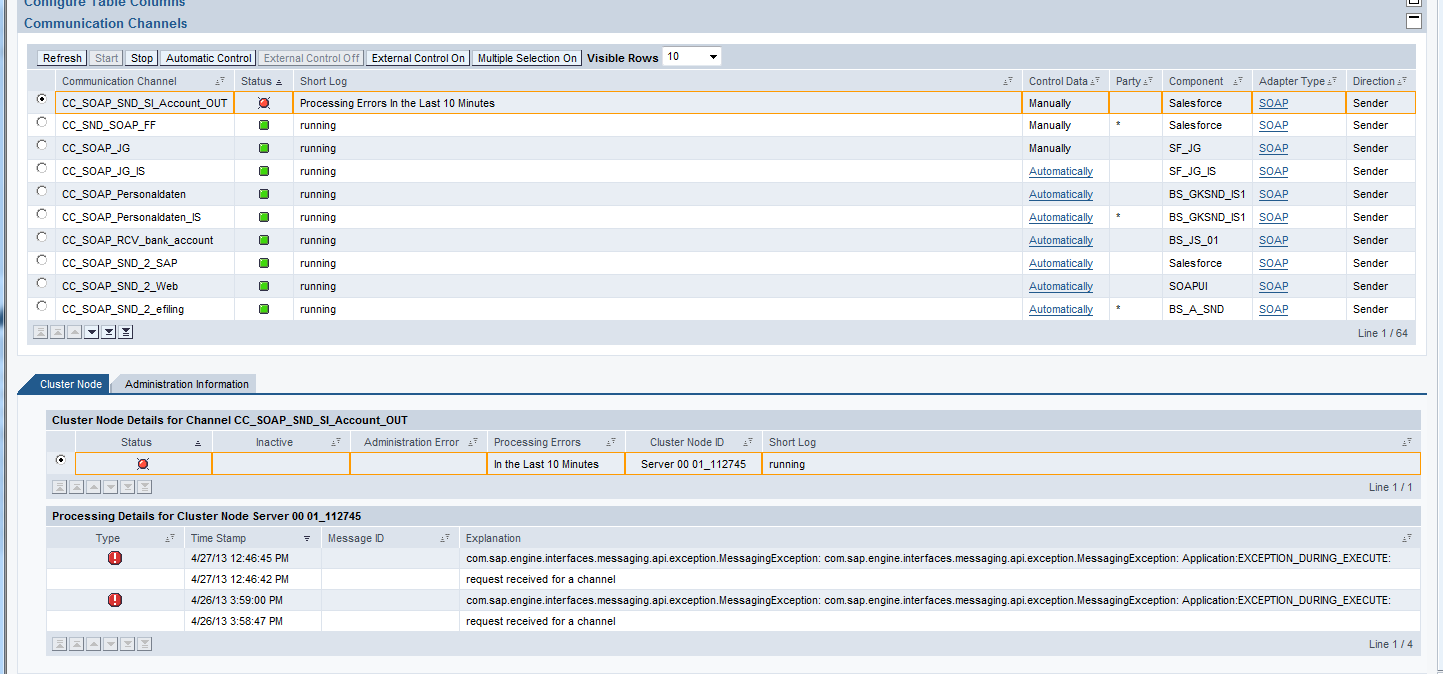
This error is ok at the SAP-PI adapter side. We see that the connection went through the firewall and that the soap sender channel received the data from Salesforce. Nevertheless, this data is not correct and this is ok like this. We just want to test the pure technical connectivity and if the firewall is, open for Salesforce.
Here the error message last time while the connectivity was not working.

Now we resend this message again after we restart the sap web dispatcher. The message was successfully reprocessed.

Adapt the integration Id in PI-Mapping and Module
In the mapping of SF-Inbound interface, you have to adapt the integration Id in the interface determination in the directory.
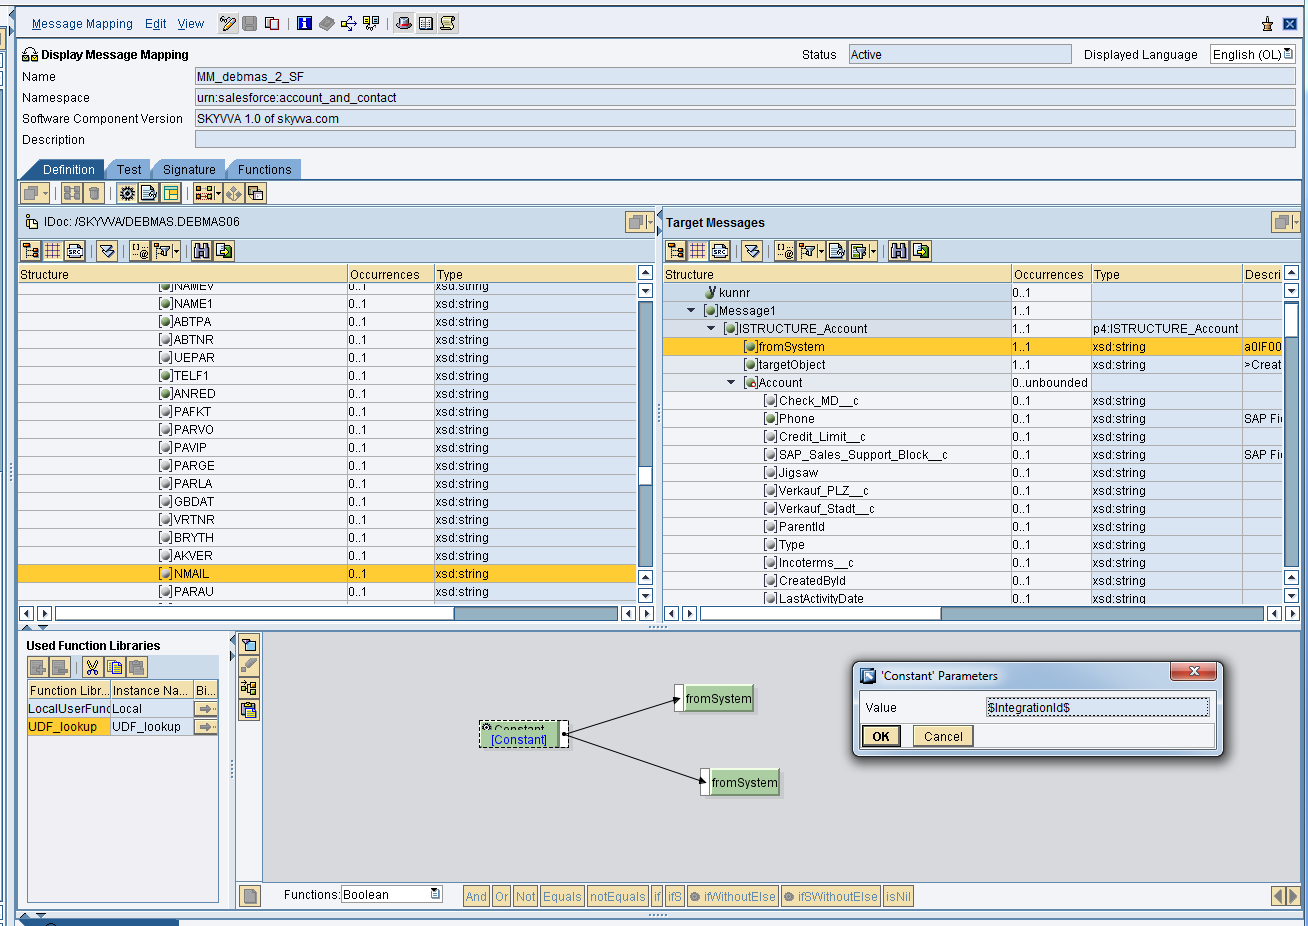
Like shown in this screen in the mapping you will need the integration id but you pass the integration Id from the directory at the configuration time at the interface determination.
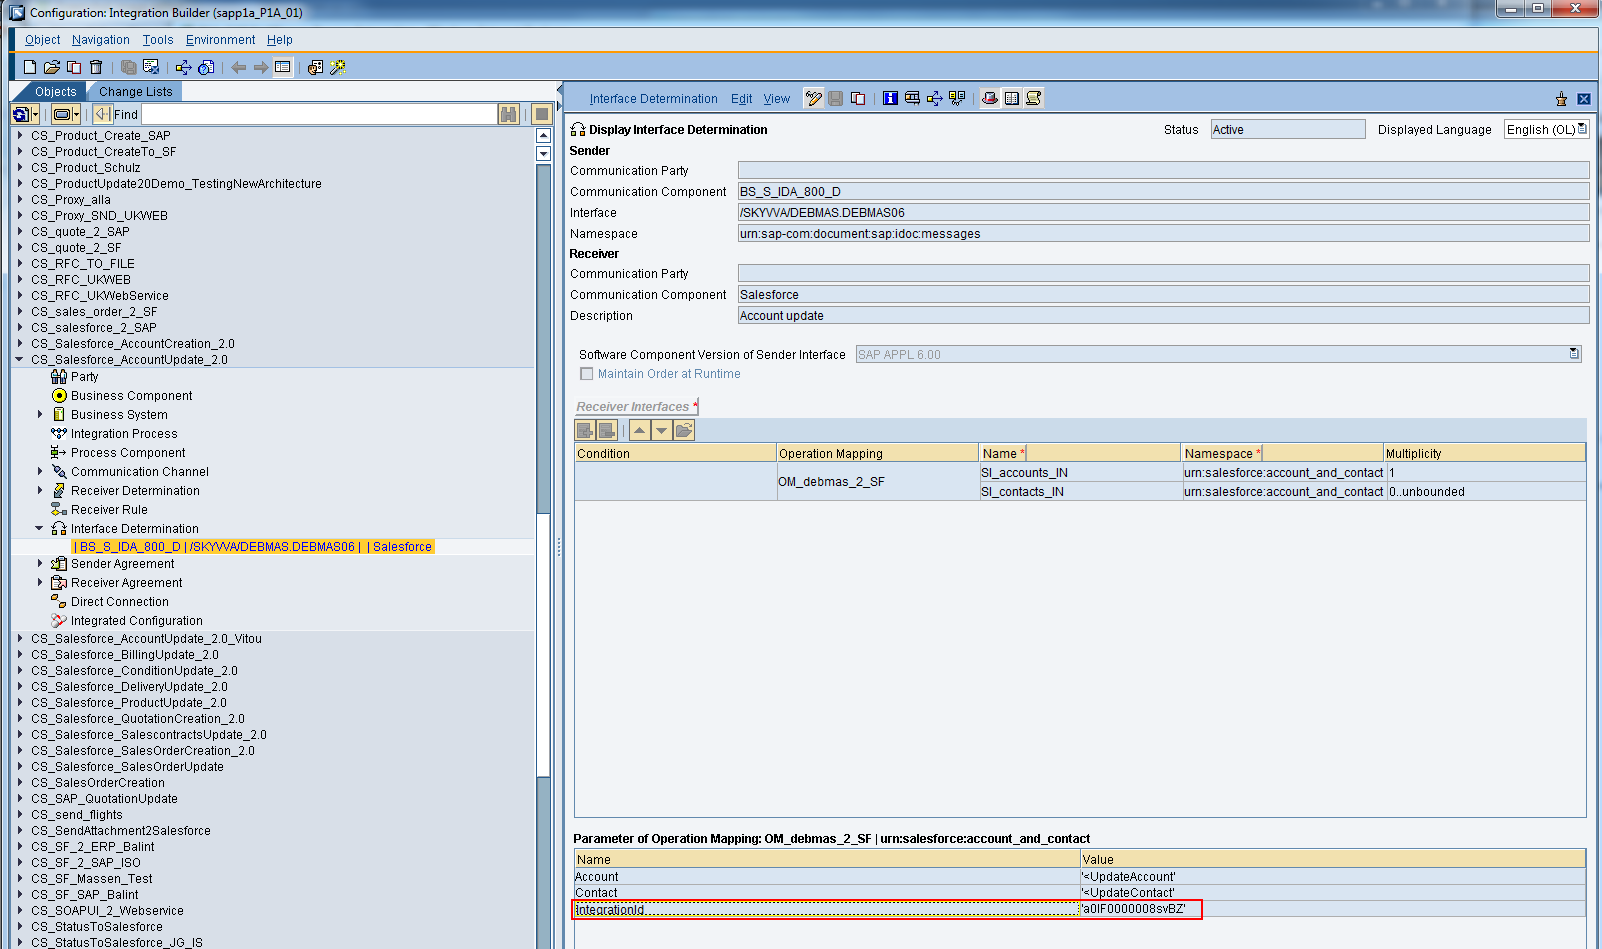
Here in the interface determination, you have to enter the new integration Id.
The integration id is used in the SKYVVA module as well and here you have to adapt it as well.
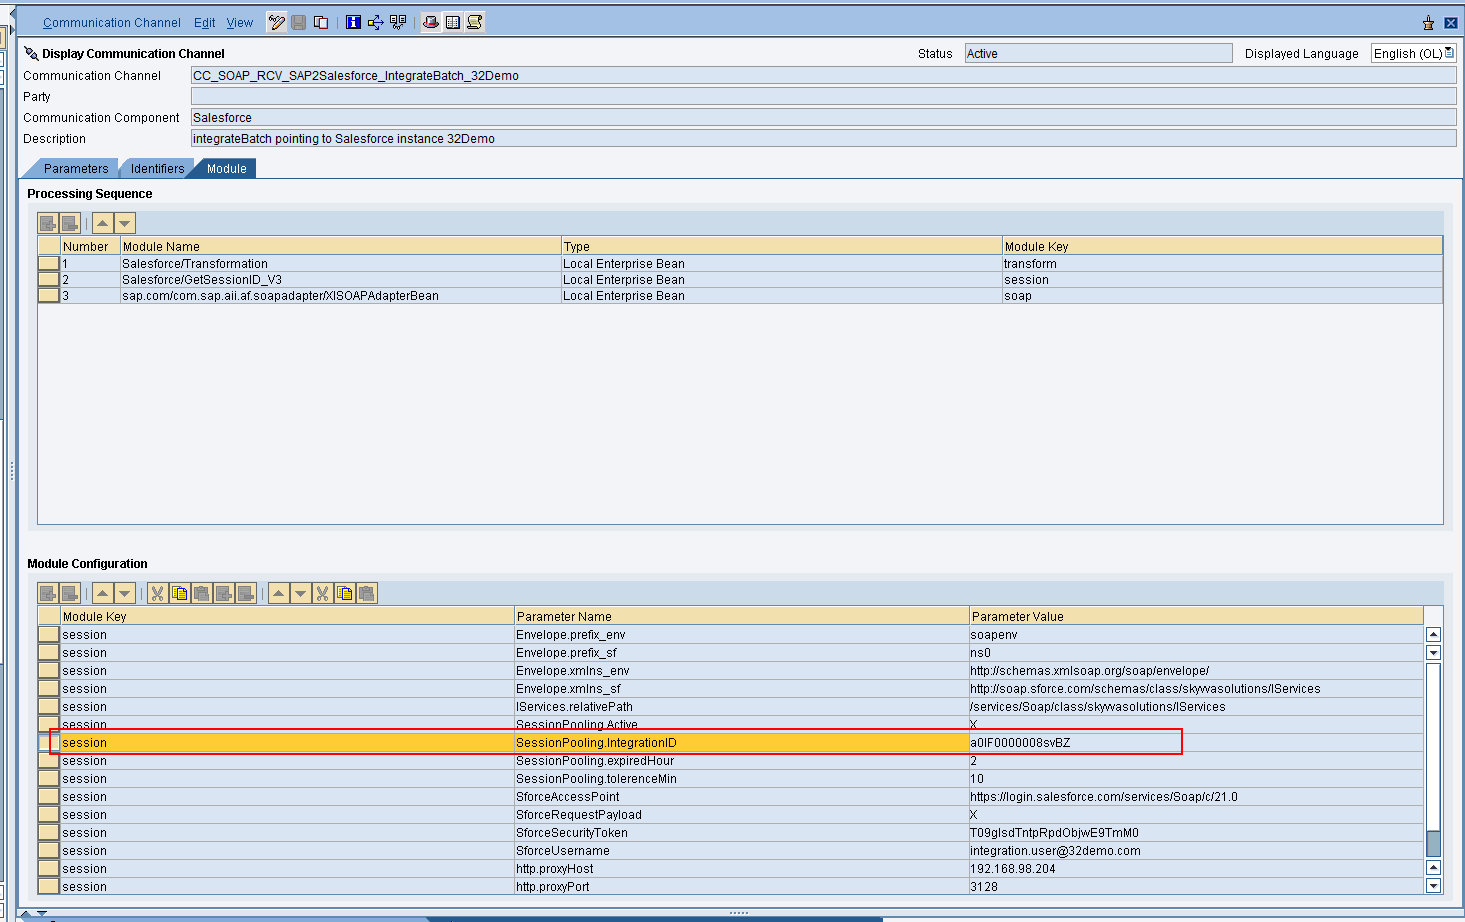
The parameter session pooling.ItegrationID has to be adapted to the new integration Id value.


