
Our webhook adapter offers seamless integration with Skyvva’s ‘V3/integratewebhook‘ API, facilitating the transmission of raw data without necessitating authentication. By leveraging this adapter, users gain the ability to conveniently send data payloads to the designated endpoints without the complexities of authentication processes.
Key Features:
- Simplified Integration: Our adapter streamlines the integration process, allowing users to swiftly incorporate the ‘V3/integratewebhook‘ API into their workflows without the need for authentication protocols.
- Custom API Key: Users have the flexibility to furnish their API key, granting access to Skyvva’s API and enabling the transmission of raw data effortlessly.
Advantages:
- Enhanced Accessibility: The adapter eliminates authentication barriers, enabling swift access to the ‘V3/integratewebhook‘ API for sending data, thereby enhancing accessibility and usability.
- Efficient Data Transmission: With the adapter, users can seamlessly transmit raw data to designated endpoints, ensuring efficient data flow within their systems.
Getting Started:
To initiate the integration process, users can easily configure the adapter with their preferred API key, thereby gaining immediate access to the ‘V3/integratewebhook‘ API for transmitting raw data.
How to Create a Public Site and Sharing Rule for using V3/integratewebhook
The expectation is that once the Public Site and Sharing Rule have been established, the resulting URL can be utilized as the Adapter URL to effectively employ it with the ‘V3/integratewebhook‘ API for sending raw data. This process typically involves these steps:
- Create a Public Site: This involves setting up a Public Site within the Salesforce environment, enabling access to certain Salesforce data via an externally accessible URL. This Public Site acts as an entry point for external systems to interact with Salesforce.
- Set up Sharing Rules: Sharing Rules define the level of access to records for different users or groups within Salesforce. Configuring Sharing Rules ensures that the intended external systems or users have the necessary access rights to retrieve or modify the data.
- Adapter URL Utilization: Once the Public Site and Sharing Rule setup is complete, the resulting URL from the Public Site configuration can be used as the Adapter URL. This URL can be plugged into the integration configuration as the endpoint for the ‘V3/integratewebhook’ API, enabling the transmission of raw data.
Required step:
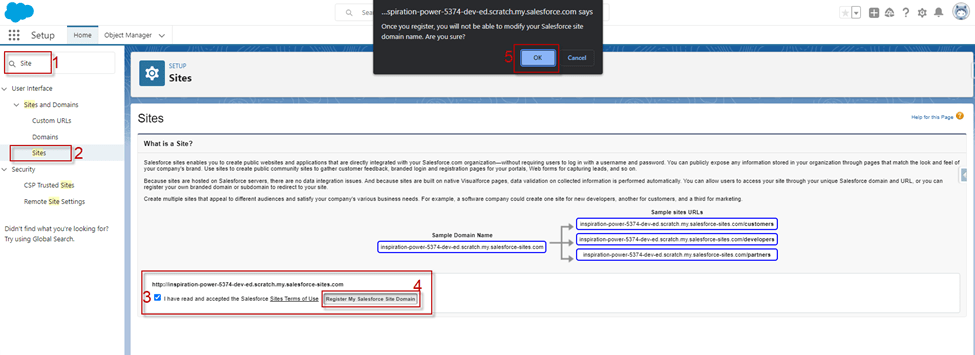
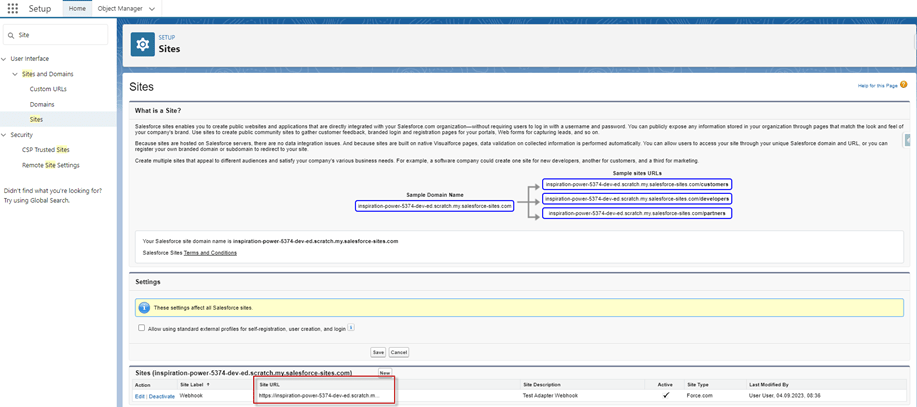
- Go to Setup -> enter Sites in the Quick Find box -> select Sites -> tick on Check Box -> click on Register My Salesforce Site Domain -> click OK
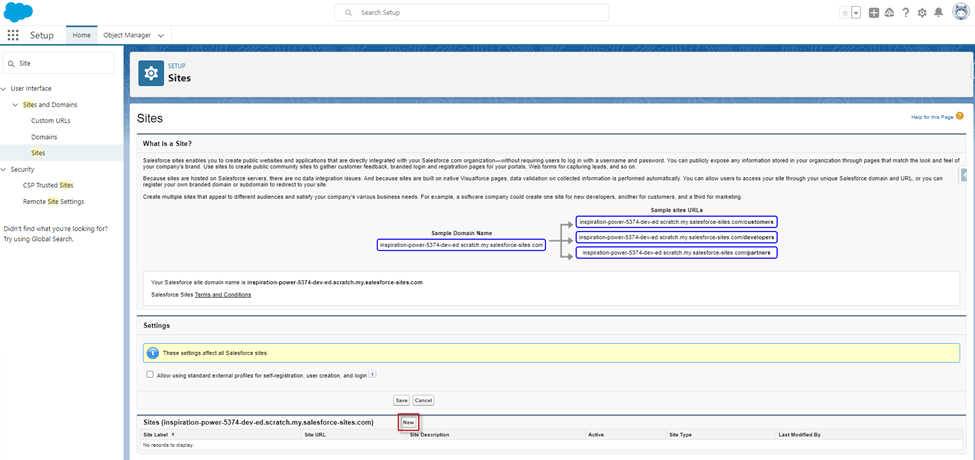
- After clicking OK we see the section Sites -> click on New Button to create a public site
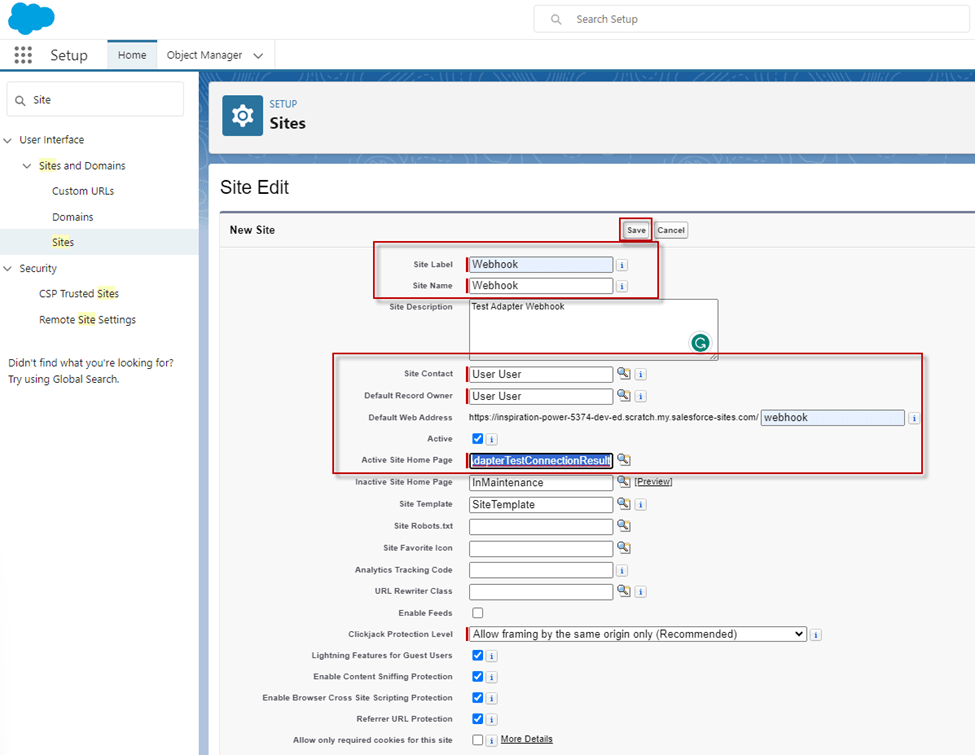
- Create New site -> Input Site Label: Webhook -> Input path on the Default Web Address -> tick Active -> Active Site Home Page: AdapterTestConnectionResult
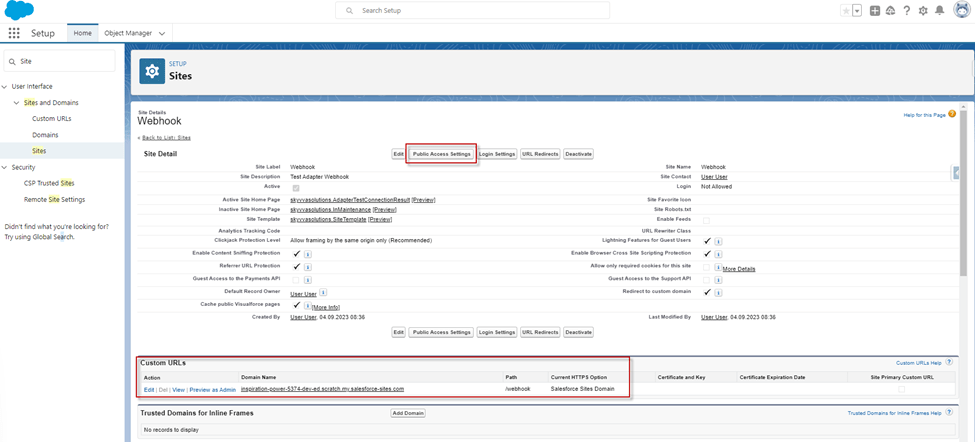
- After Save -> click on Public Access Settings
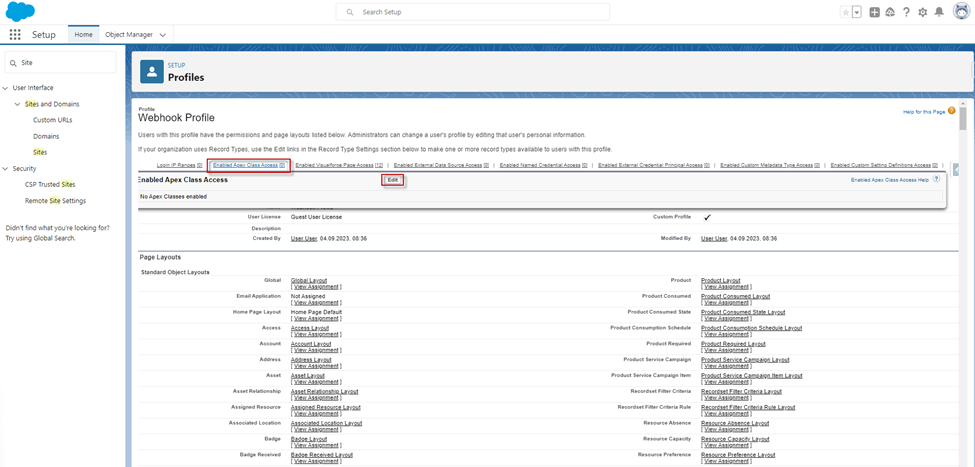
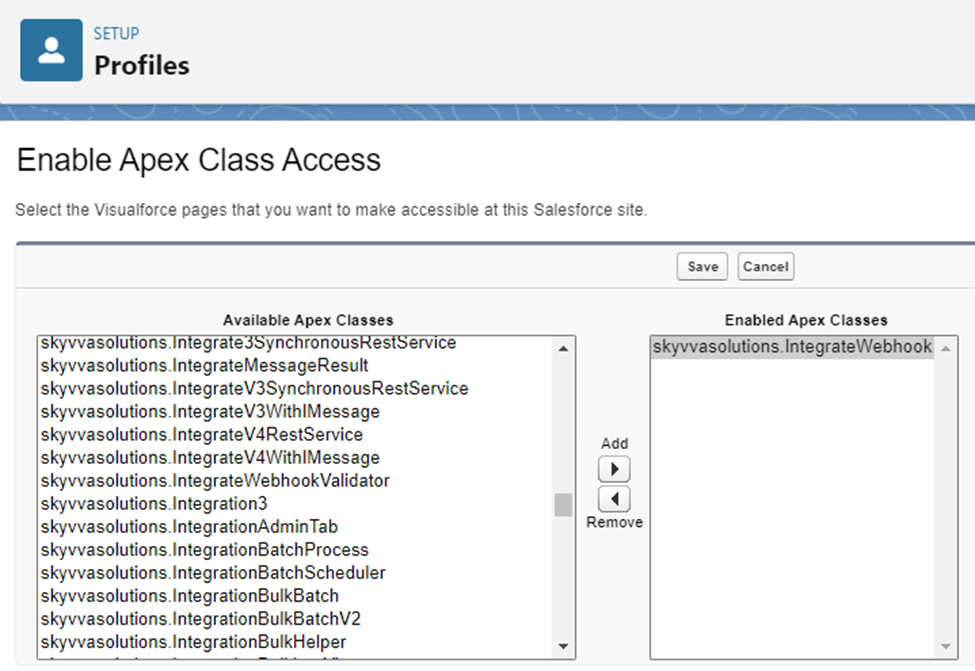
- After clicking on the Public Access Settings -> Enabled Apex Class Access -> Edit -> Enable class ‘skyvvasolutions.IntegrateWebhook’ -> Save
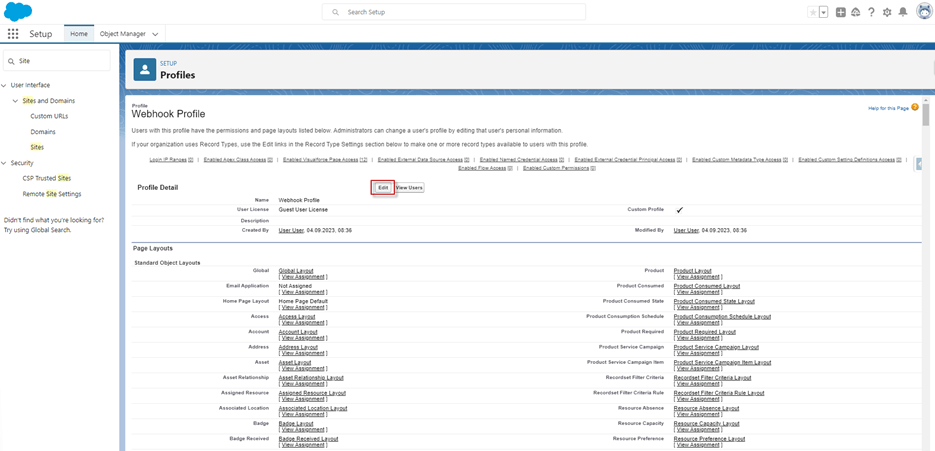
- For using a public site for guess users, you need to allow some permission for our API. Then click on the Edit button at the Profile Detail -> allow Custom Object Permissions -> click Save
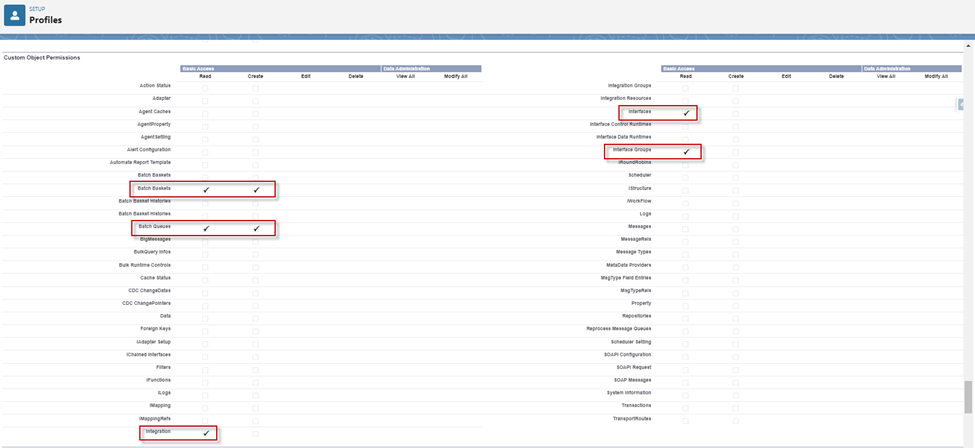
- Allow Custom Object Permissions:
- Integration, Interface, Interface Group (Read): we need this to query our object record.
- Batch Basket2, Batch Queues (Read/Create): here we need also permission to update our object record. e.g., for updating the status, the comment.
- After creating the Site and allowing Permissions, we got the Site URL below:
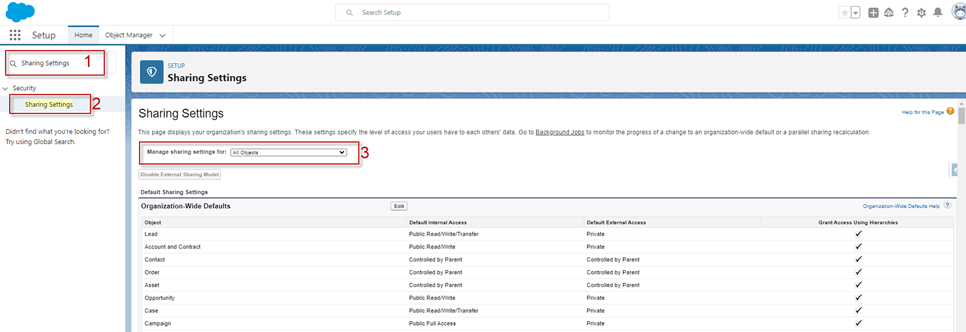
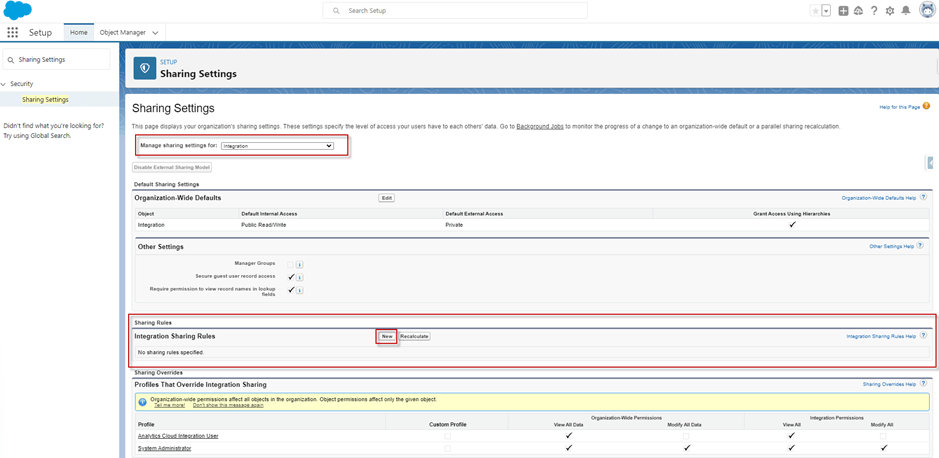
- Create Sharing Rules for that Site we create, Go to Setup and fine Sharing Setting
- Create Sharing Rules on the Integration, Interface, Interface Group, Batch Queue, Batch Basket2
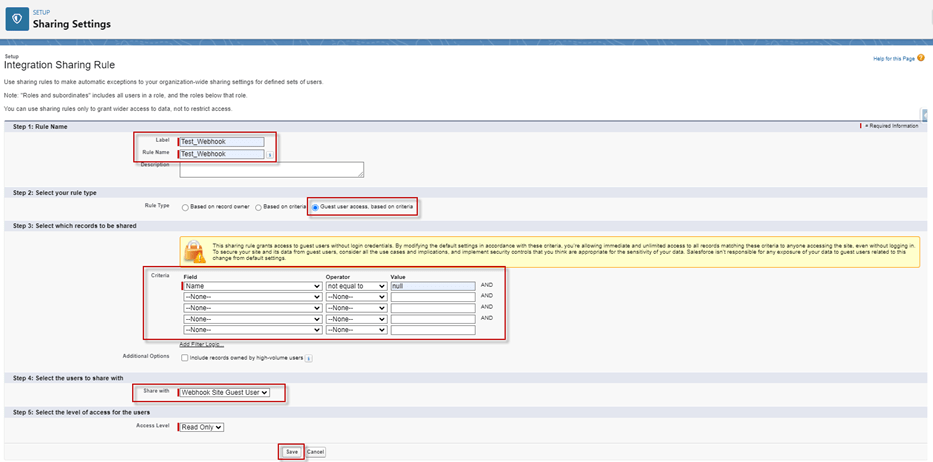
- Example Create Sharing Rules on the Integration
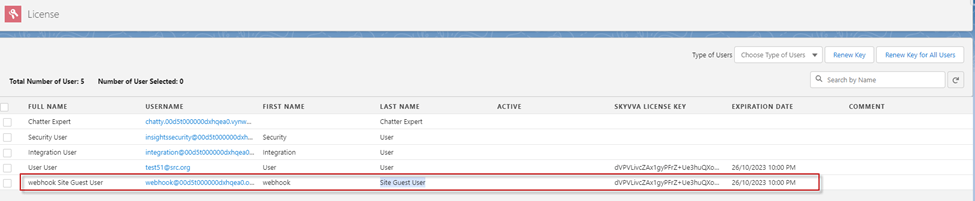
- After creating a Site, need we to add the License Key on the ‘Site Guest User’.
Now user has learned how to create the required steps, remember to thoroughly test the integration to ensure data transmission functions as intended after configuring the Adapter URL with the ‘V3/integratewebhook‘ API endpoint. Adjust security settings and access controls as needed to safeguard sensitive data during integration


