Table of Contents
Learning Objectives:-
This unit describes:- #
- How to configure the Login(Enterprise) Consumer Proxy in SAP?
Introduction:- #
While sending data from SAP to Salesforce, we first need to get the session ID of the Salesforce user so that we can post the data to Salesforce using this session ID. To achieve this we first need to configure the Login(Enterprise) Consumer Proxy in SAP.
How to use it:- #
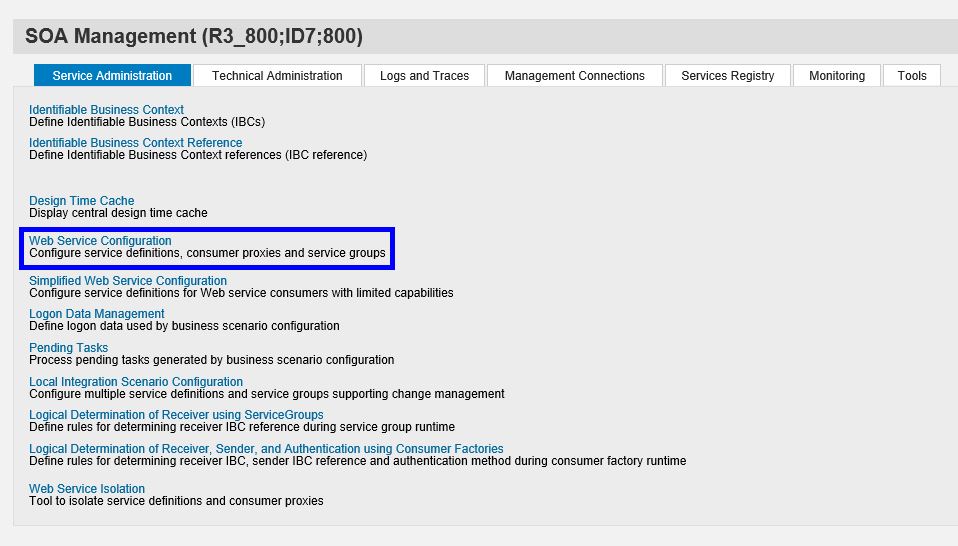
- Run the SOAMANAGER transaction in SAP, it will open below screen in Web Browser. Here select the option “Web Service Configuration”
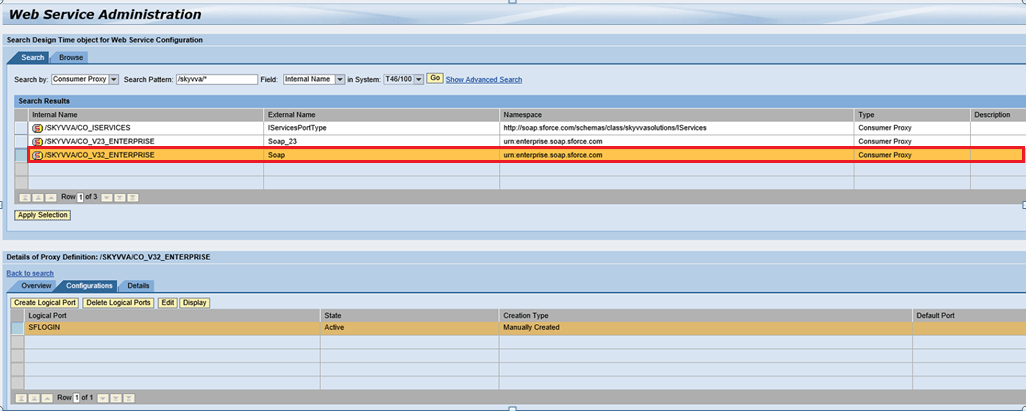
- Now in the new screen, for the Object Name search for /SKYVVA/*. It will list down all the available SKYVVA “Consumer Proxy” and Service.
- Select/Click the service /SKYVVA/CO_V32_ENTERPRISE
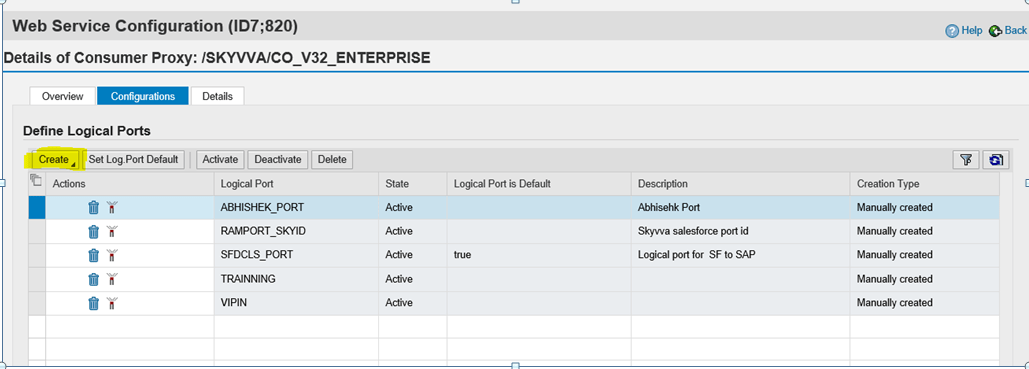
- It will open a new screen, here select the option “Create” and choose the option “Manual Configuration”.
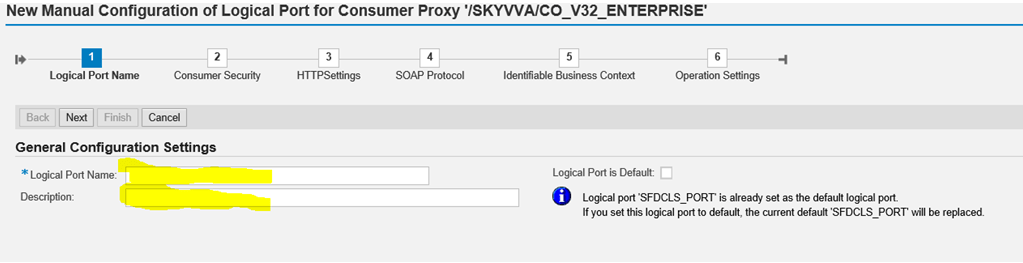
- Here, enter the “Logical Port Name” and its description and then press “Next”.
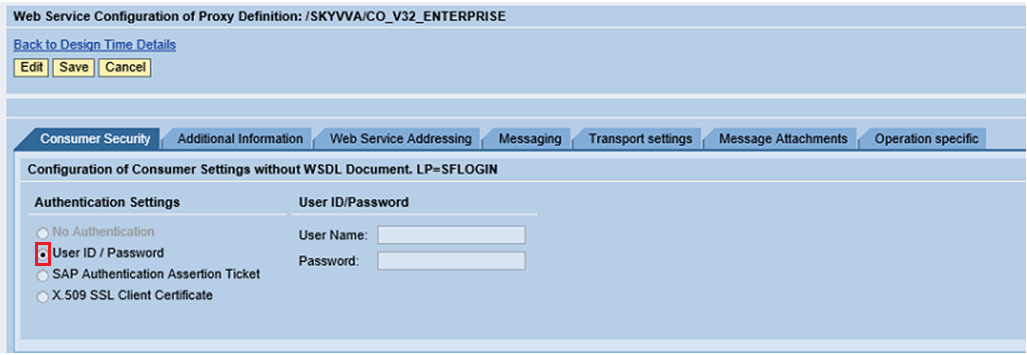
- Now select the option “User ID / Password” and press “Next”.
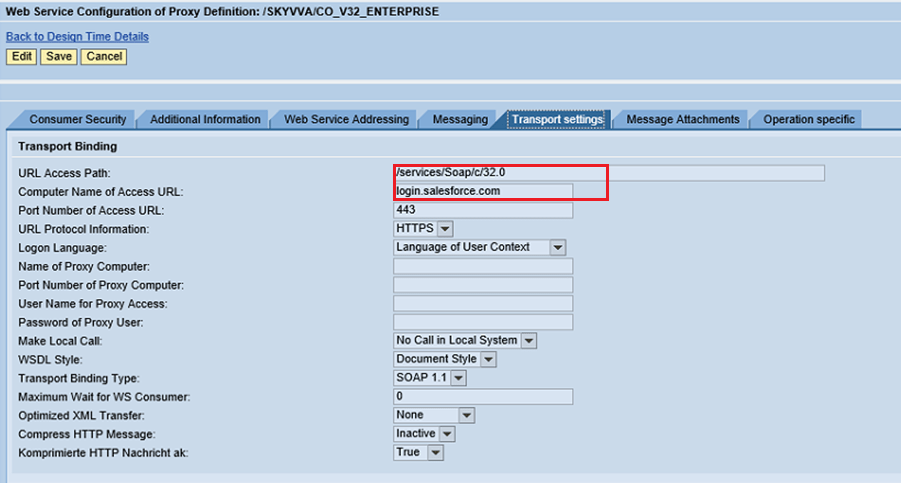
- In this screen, we need to give the details of the URL of Salesforce (whether it is a Sandbox or Enterprise edition) along with the path for the login service and also the protocol that will be used for login and once done press Next.
Put URL Access path :- /services/Soap/c/32.0
Computer Name of Access URL:- login.salesforce.com
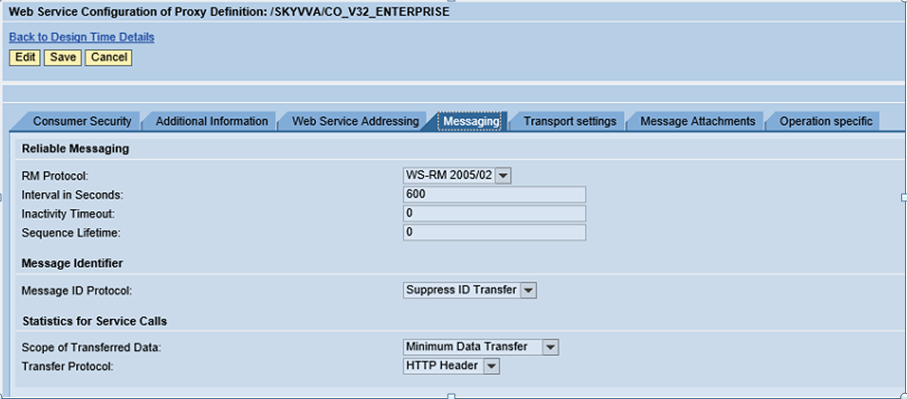
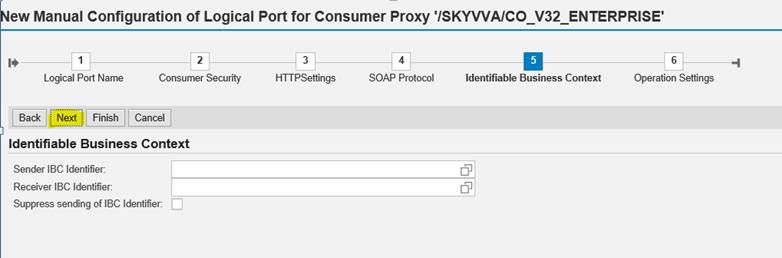
- In the next screen, we need to select the “Message ID Protocol“ and this should be “Suppress ID Transfer” and press Next.
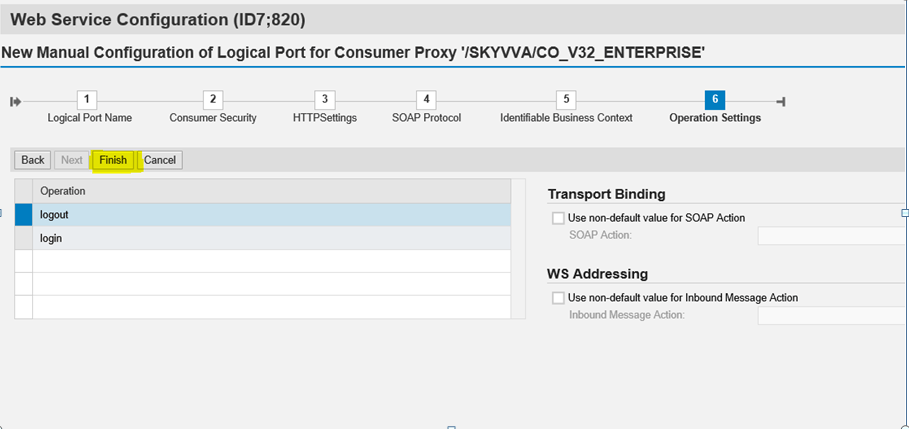
- Now, just press the Next button
- At last, it will show the operation involved in this proxy. Here select the option Finish.
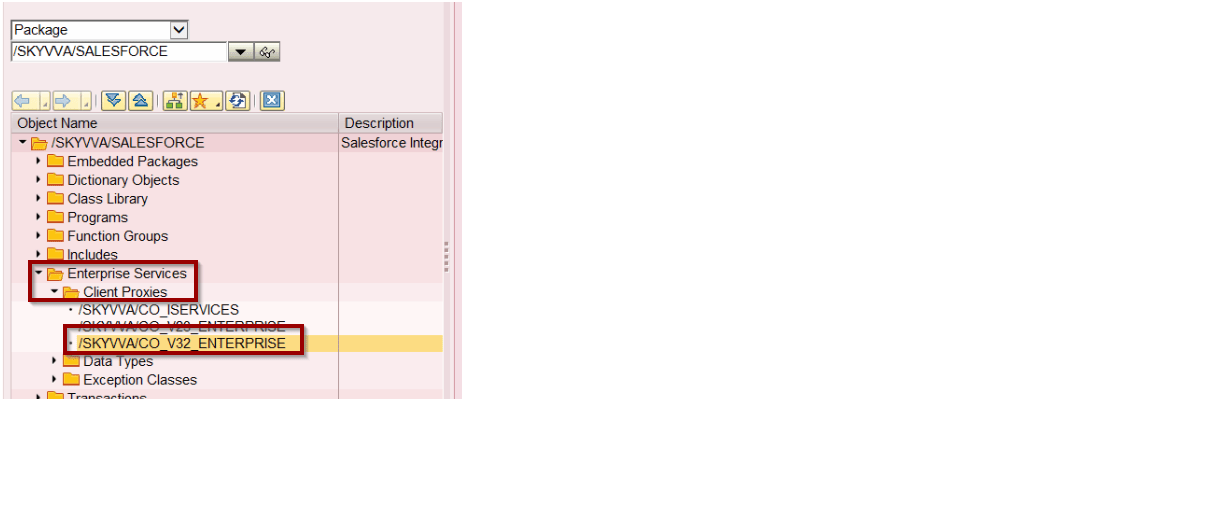
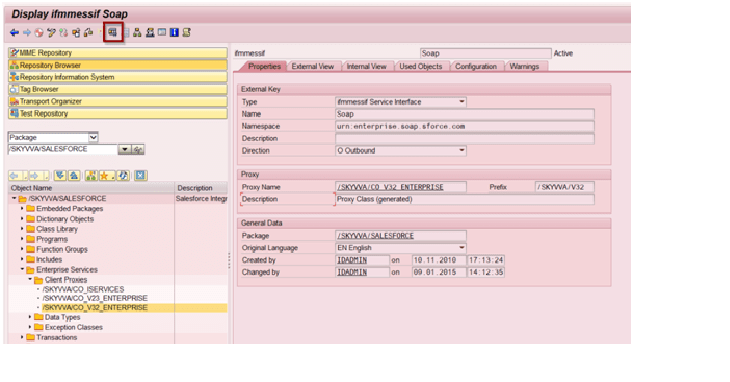
At this moment a logical port will be generated in the SAP. To verify if all the configuration is correct or not, login into SAP and go to the transaction code SE80. Here, select the package /SKYVVA/SALESFORCE and go to the option “Enterprise Services” and here under the option of “Service Consumers” select the CLAS/SKYVVA/CO_V32_ENTERPRISE.
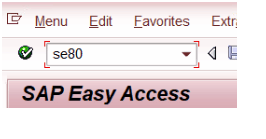
- Go to Tcode SE80
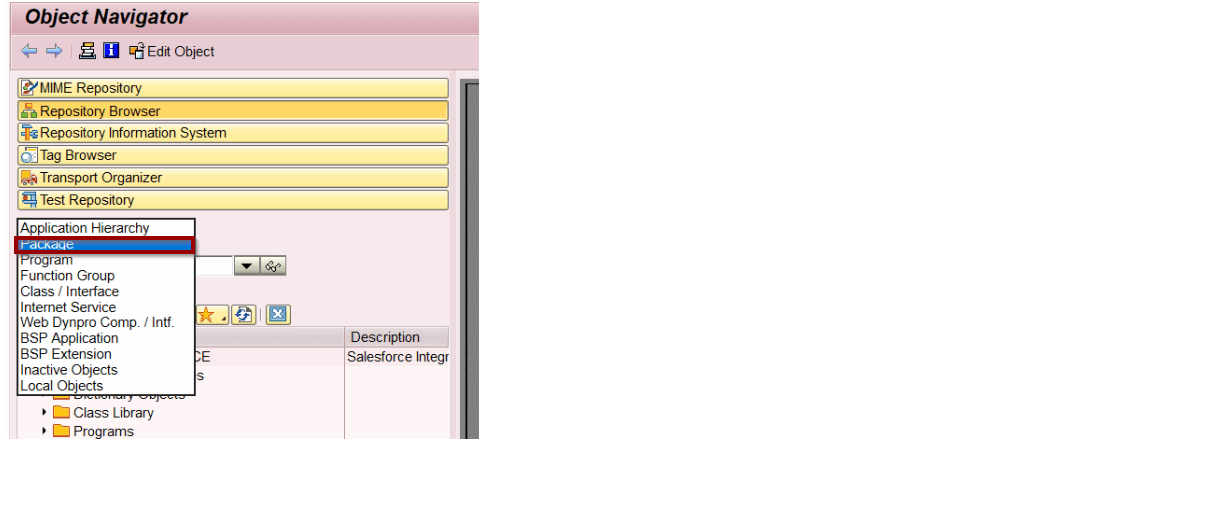
- Select “Package”
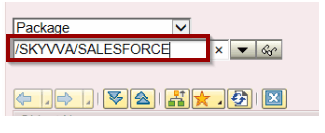
- Enter the package name as “/SKYVVA/SALESFORCE” and then press ENTER:-
- Here navigate as per below and double click on “/SKYVVA/CO_V32_ENTERPRISE”
- Double click on CLAS/SKYVVA/CO_V32_ENTERPRISE and execute it.
- Now, select the Logical Port Name and press F4 here, it will open a popup. Here double click/select the newly created Logical Port.
- And under the “Method Name” first press F4 and then select/double click the operation “Login” and after that Execute it.
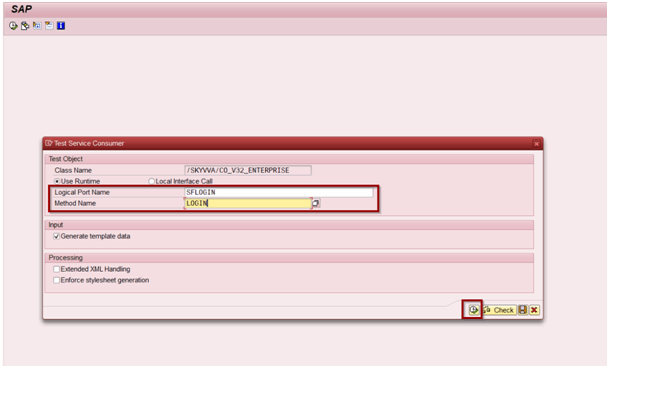
- Here no need to put anything and simply execute it.

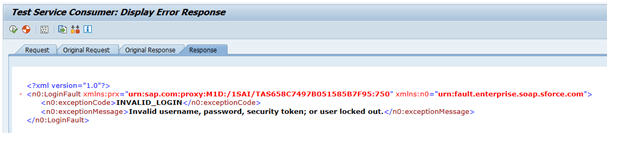
- If all the configuration has properly been set up then it will give below error: