
144.How to use the skyvva API to push data from Nav to Salesforce? #
Learning Objectives :-
This unit describes:-
- This unit describe Microsoft Dynamic NAV
Introduction #
This tutorial should show our new connector to push data to Dynamics e.g. create a Customer or other business object inside Nav.
This tutorial is the first step and the basic to understand the concept of the SKYVVA integration Cloud. It describes the main SKYVVA object called “Integration”. You can follow the Link for Integration and Interface https://docs.skyvva-dev.com/docs/tutorial-v2-41-lightning/what-is-an-integration-and-how-to-create-it/
What is Microsoft Dynamic NAV? #
Microsoft Dynamics 365 is a set of interconnected, modular Software-as-a-Service (SaaS) applications and services designed to both transform and enable your core customers, employees, and business activities. It combines CRM and ERP capabilities, integrating your data, business logic, and processes. So, instead of having separate, siloed sales and marketing functions, Dynamics 365 offers automated, integrated, and intelligent sales and marketing capabilities that efficiently connect, prioritize, and convert leads into paying customers. It is built on Microsoft Azure, which offers both a trusted platform and a broad ecosystem of services. And it is natively integrated with Microsoft 365’s productivity apps, giving you a unified way to manage users and services.
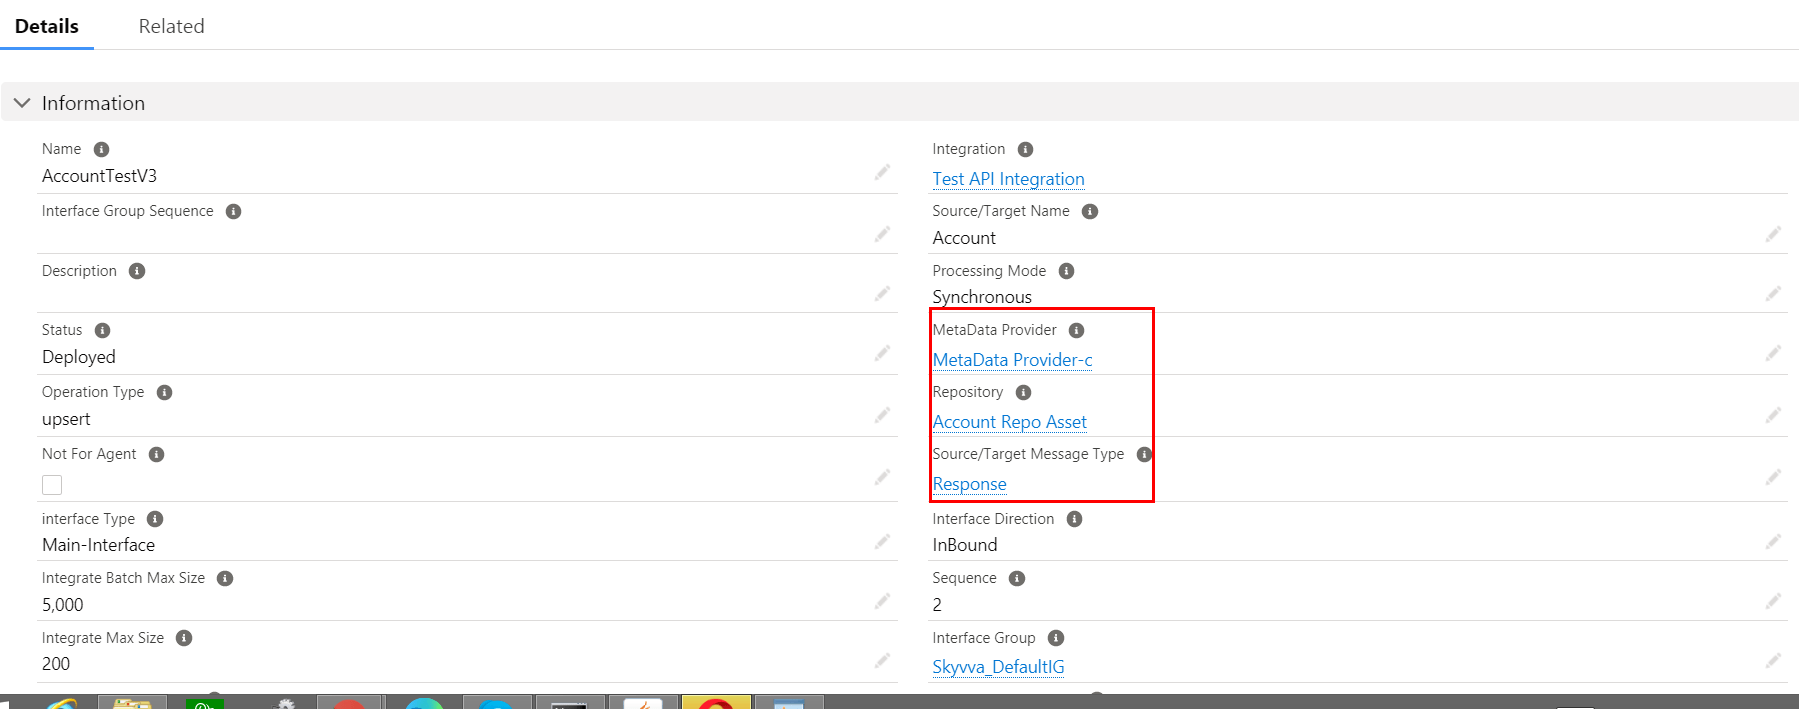
Pre-requisites:-
• Create an Integration
• Create Metadata Provider
• Create Repository.
• Create a Message Type.
2. Do Mapping:-
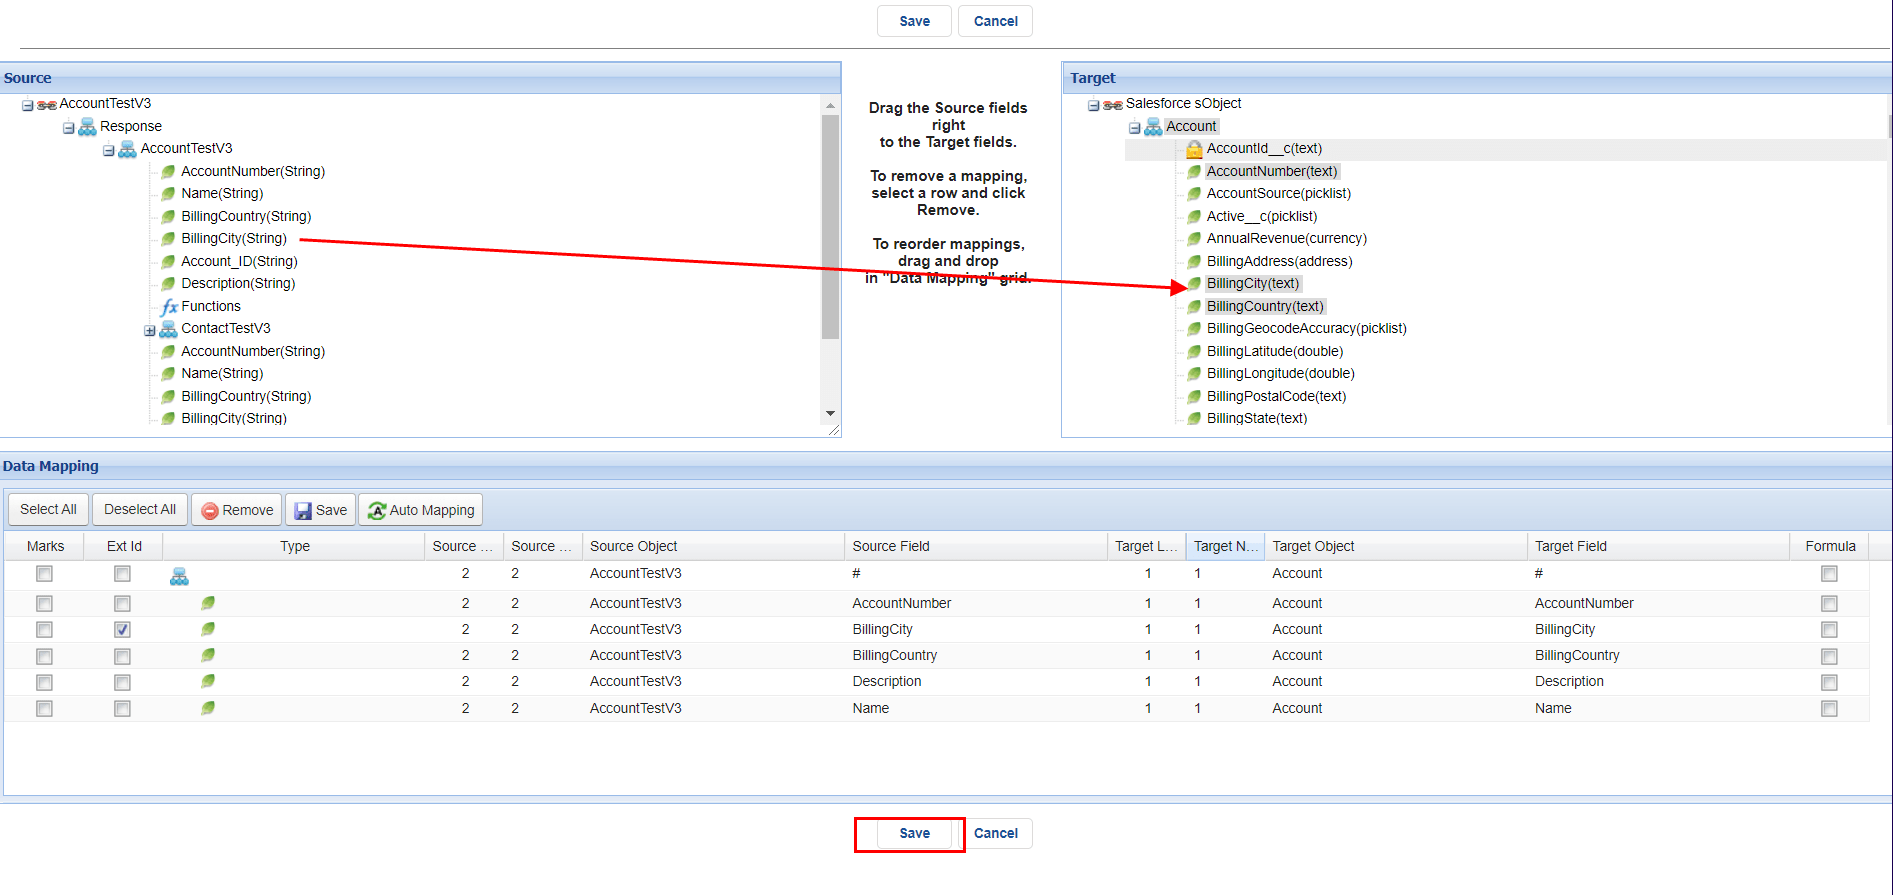
• Save Mapping.
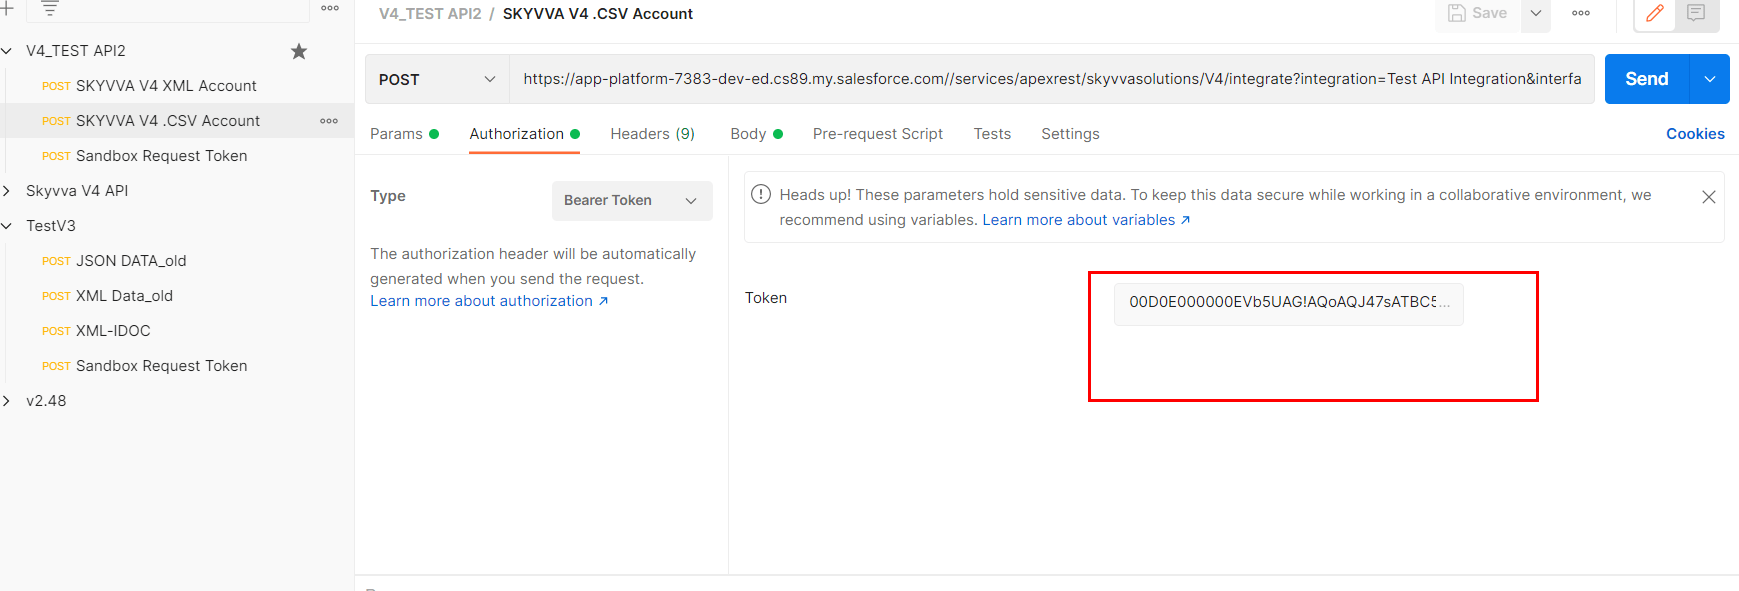
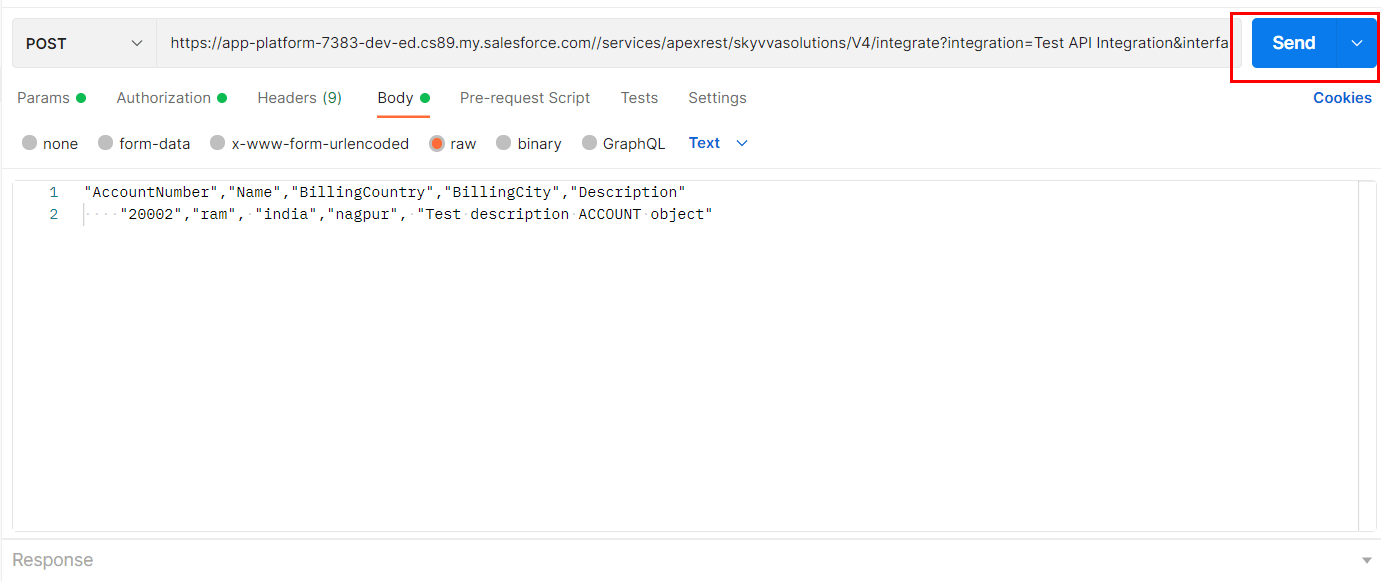
3. Configuration on postman side:

1. V4 API:-
V4 API pass Integration, Interface, mode, request-format, response-format parameter inside
the URL query parameter.
2. The URL contains:-
1. Salesforce classic URL.
2. Integration name.
3. Interface name.
4. mode.
5. response-format.
6. request-format.
3. Authorization:-
• Select Bearer token.
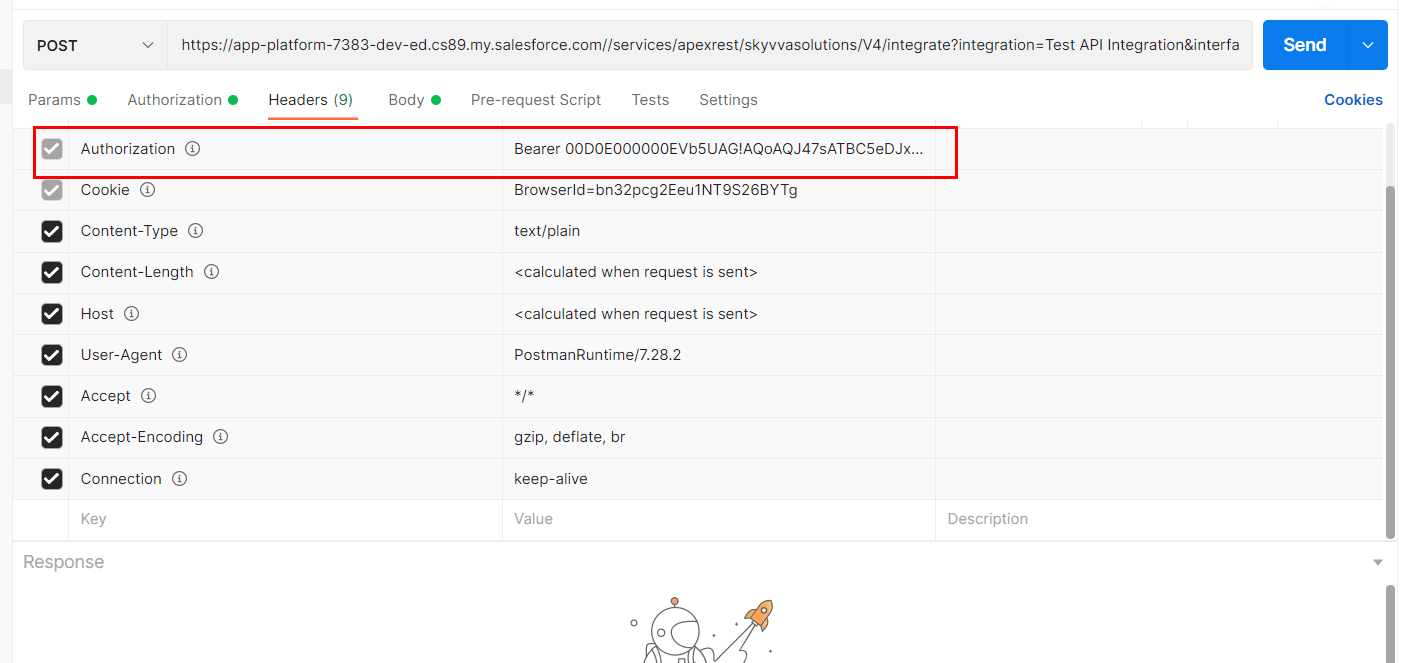
4. Header:-
• Enter “Bearer+Session ID”.
5. Body:-
• Enter JSON ,csv or XML payload as per your message type which we have created earlier.

6. Send the Request:-
• Click on send button.
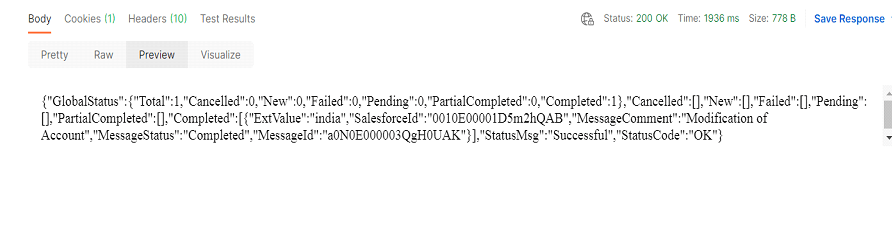
7. Check the Result:-
8. Check Result on Message monitoring:-


