
This document explains us about how to get an acknowledgement from SAP after we have sent message to SAP. The process starts from Salesforce where with the outbound interface message is send asynchronously to SAP. Then SAP will send to Salesforce an acknowledgement using for example the acknowledgment IDOC or another message. When Skyvva send the outbound message to SAP it will send the Salesforce Id and the Skyvva message Id. The Skyvva Message Id has to be send back in the acknowledgment message. If the Skyvva message Id is not sent back with the acknowledgement message from SAP then the correlation on Skyvva side cannot be done.
Figure below depicts the actual flow of the message.
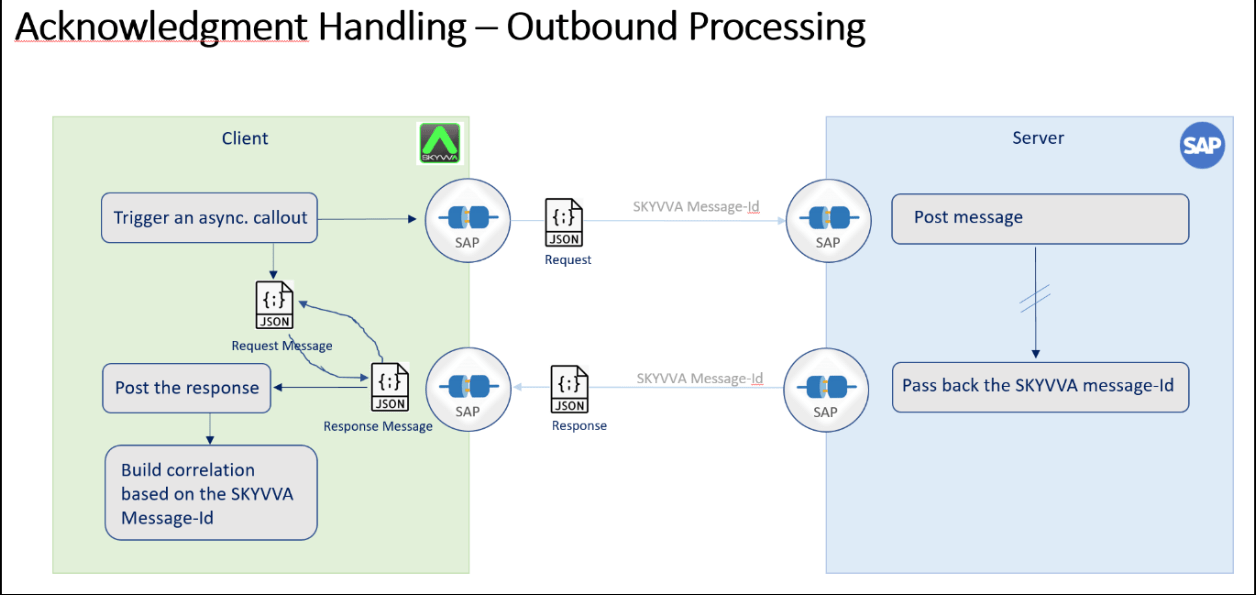
In the real scenario we have to route the skyvva message id to SAP back-end into an idoc field, then sap-back-end will send the skyvva message id back to SKYVVA as an acknowledgement.
Note: Currently we are just showing the response message (SKYVVA__MessageId) coming from PO. Because our SAP system is not able handle the acknowledgements. But usually it should come from SAP.
Steps needs to be done in Skyvva
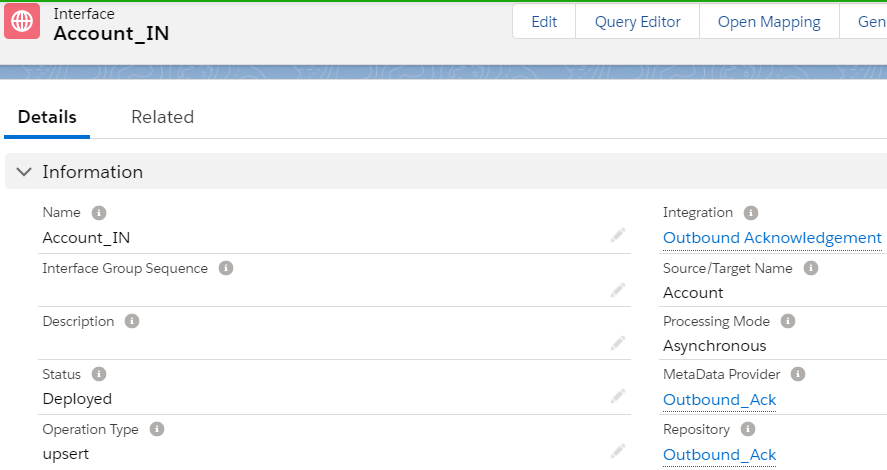
- Create Asynchronous Request Outbound Interface
- Create Asynchronous Response Inbound Interface to get the Skyvva message Id back from SAP.
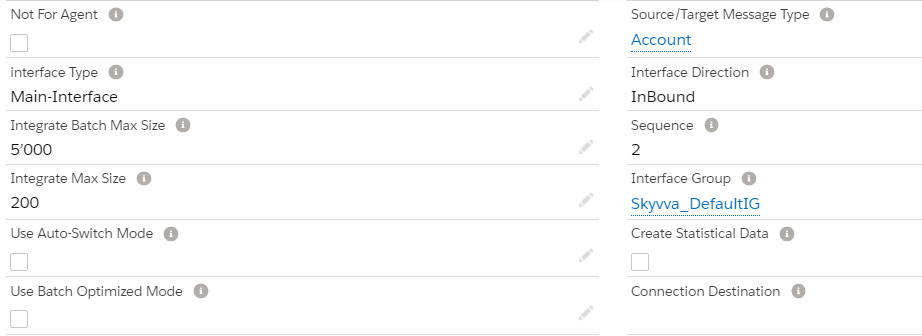
Acknowledgment handling works only with Skyvva message type.
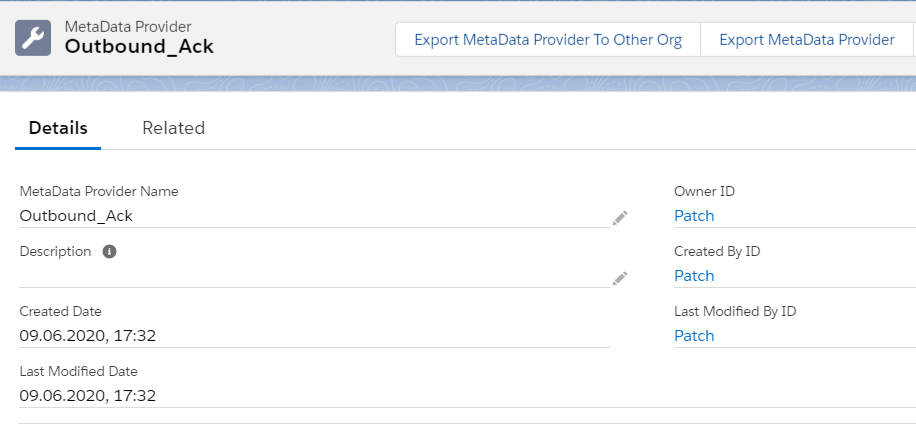
Create Metadata Provider:
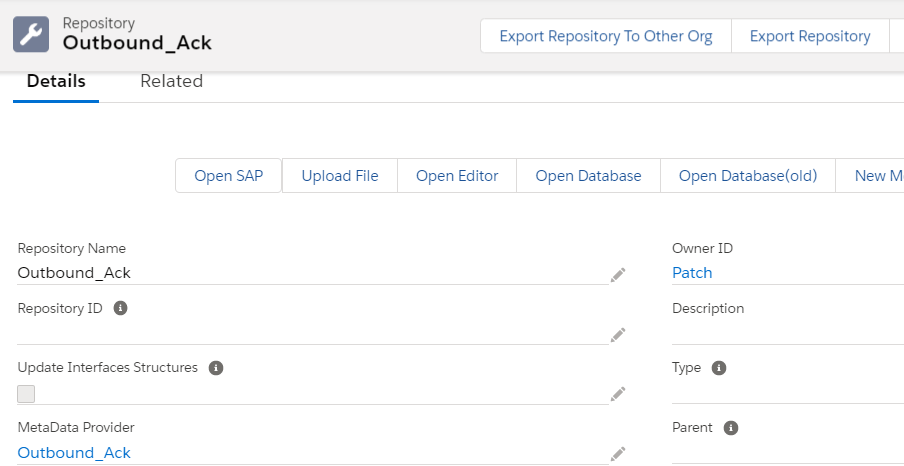
Create Istructure Repository:
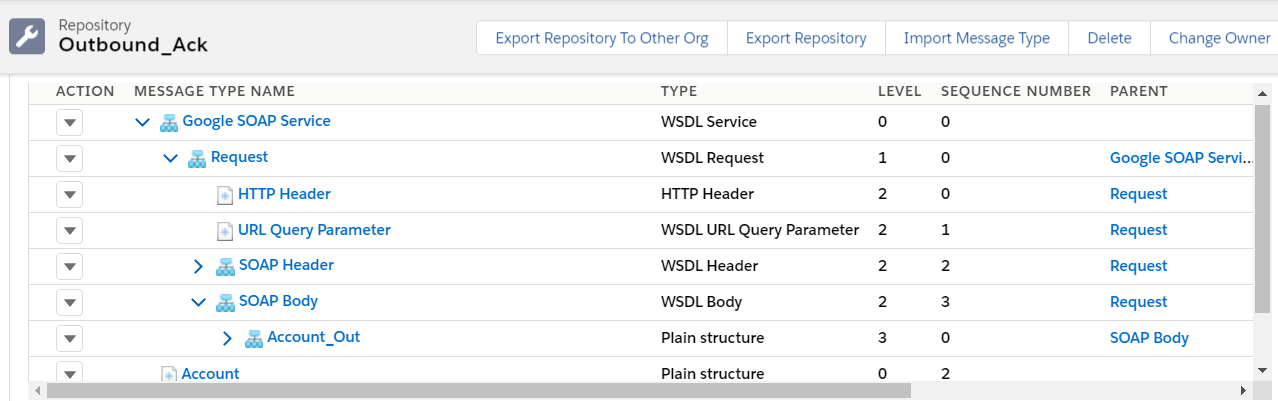
Create Message type:
In this example i am using SOAP V3 adapter. So, i am using soap template message type for Outbound request interface. For Inbound we can use normal message type as shown.
{
“Google SOAP Service”: {
“Request”: {
“HTTP Header”: {
},
“URL Query Parameter”: {
},
“SOAP Header”: {
“SessionHeader”: {
“SessionId”: “”
}
},
“SOAP Body”: {
“Account_Out”: {
“Account”: {
“BillingCity”: “”,
“skyvvasolutions__SAP_Customer_ID__c”: “”,
“Phone”: “”,
“Name”: “”,
“BillingCountry”: “”,
“BillingPostalCode”: “”,
“BillingState”: “”,
“BillingStreet”: “”,
“Fax”: “”,
“Industry”: “”,
“SKYVVA__MessageId: “”
}
}
}
}
}
}
{
“Account”: {
“BillingCity”: “”,
“skyvvasolutions__SAP_Customer_ID__c”: “”,
“Phone”: “”,
“Name”: “”,
“BillingCountry”: “”,
“BillingPostalCode”: “”,
“BillingState”: “”,
“BillingStreet”: “”,
“Fax”: “”,
“Id”: “”
}
}
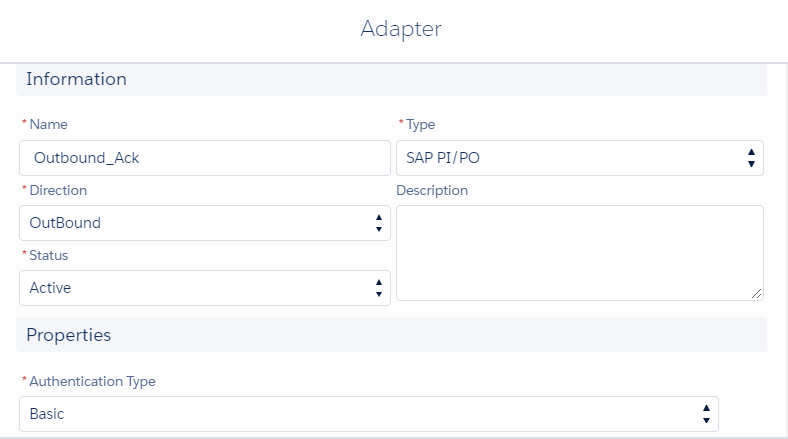
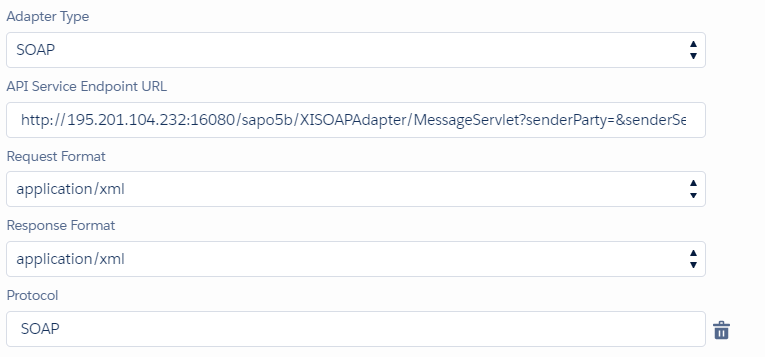
Creating new a SAP PI/PO Adapter with adapter type SOAP for outbound call:
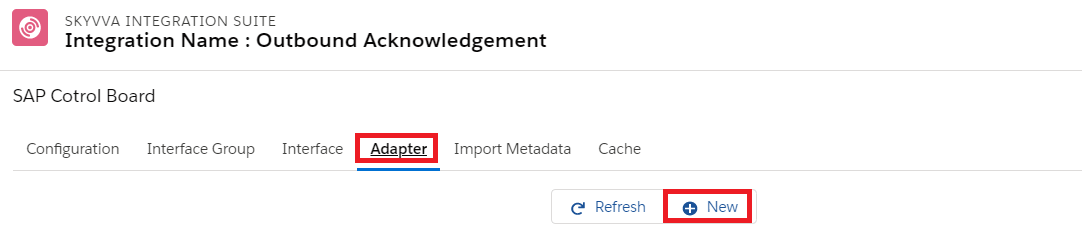
For this we need to go to Integration details tab and select SAP Control board
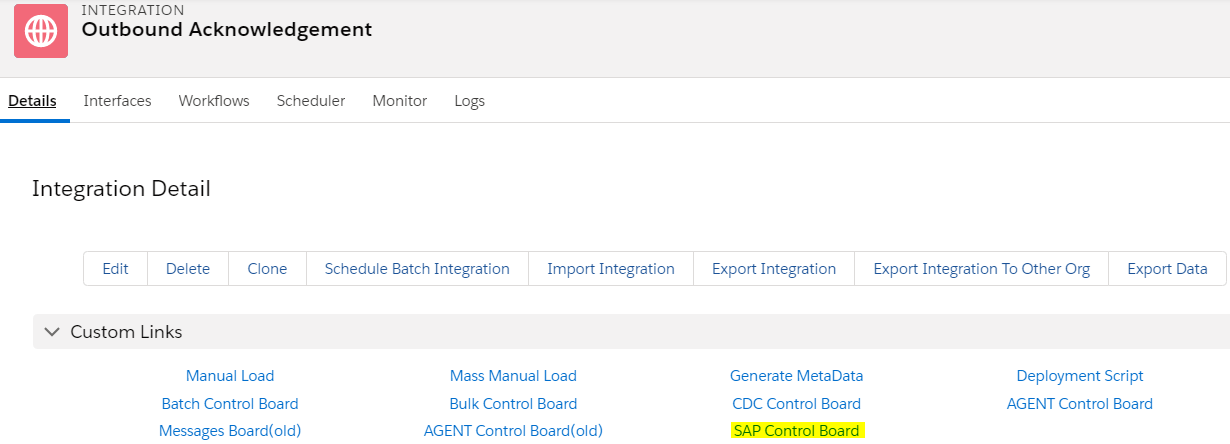
Now go to Adapter Tab and click on New button to create new SAP PI/PO Adapter
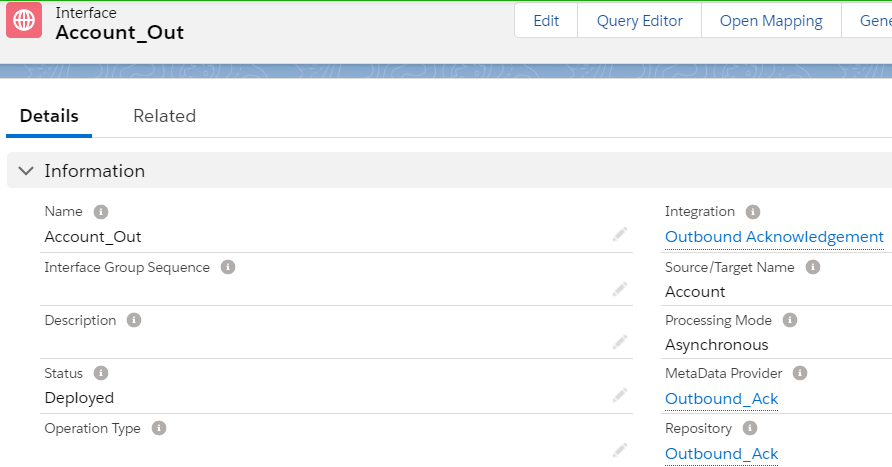
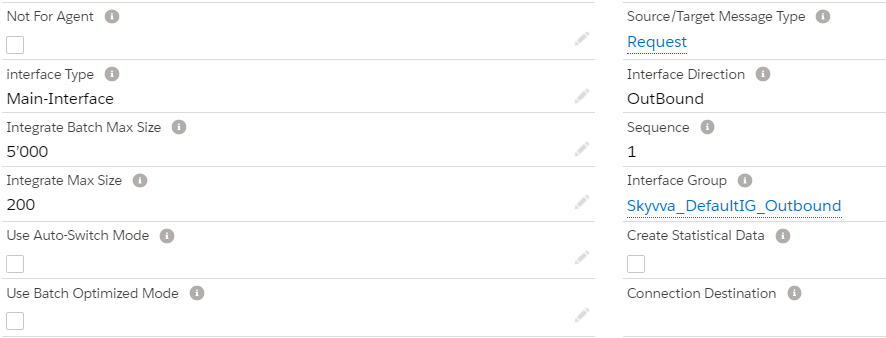
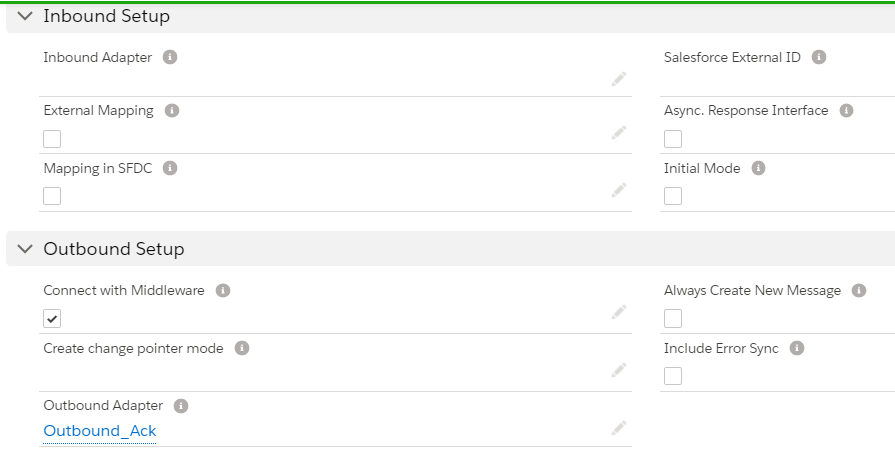
Outbound Request Interface –
In this example i am creating the interfaces under “Outbound Acknowledgement” Integration

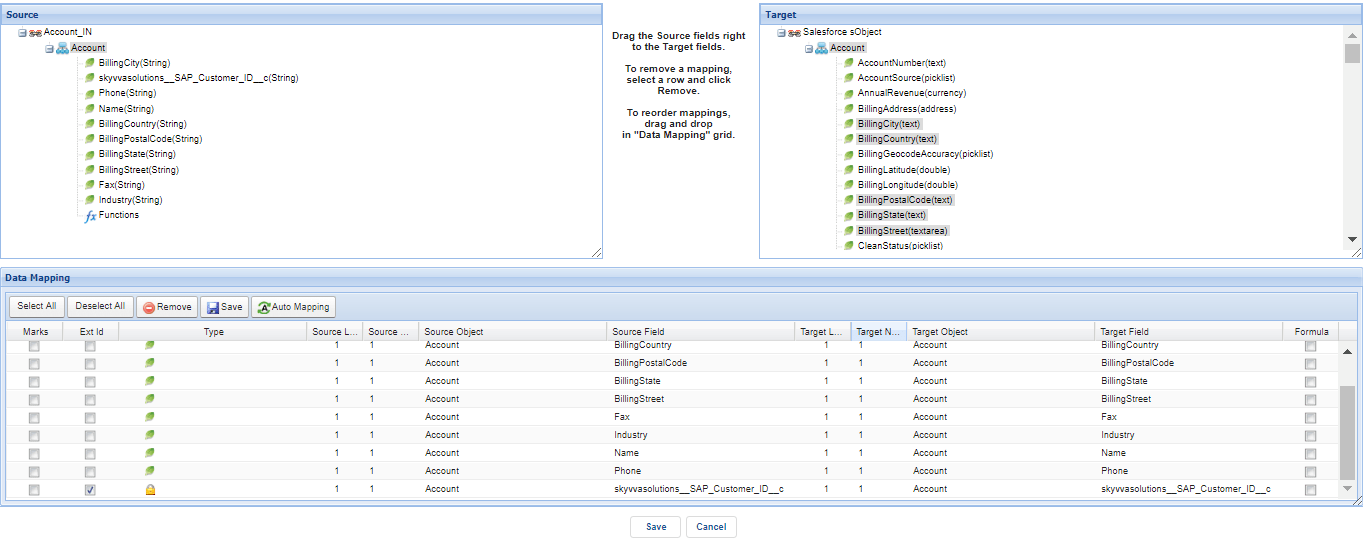
Do the mapping as shown below
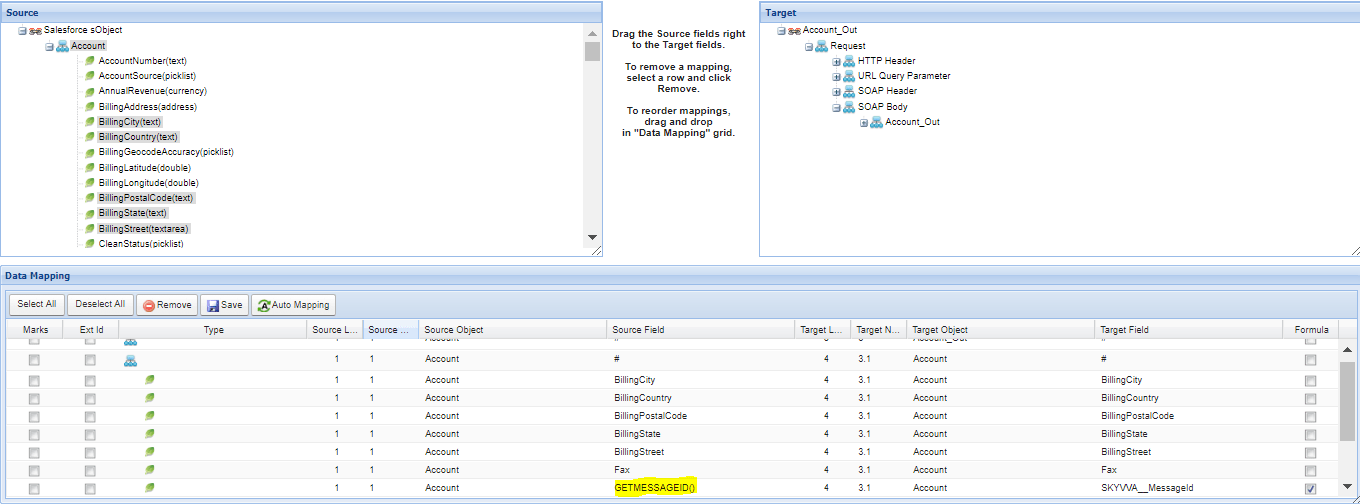
The field SKYVVA__MessageId will be in the XSD when we create it as message type field entry for the message type ‘Account’ from the Repository page.
We have to use the formulae GETMESSAGEID() to read the SKYVVA message Id and it will reach to SAP. SAP uses this Message ID and send back as an acknowledgement message.
Create Inbound Response Interface:
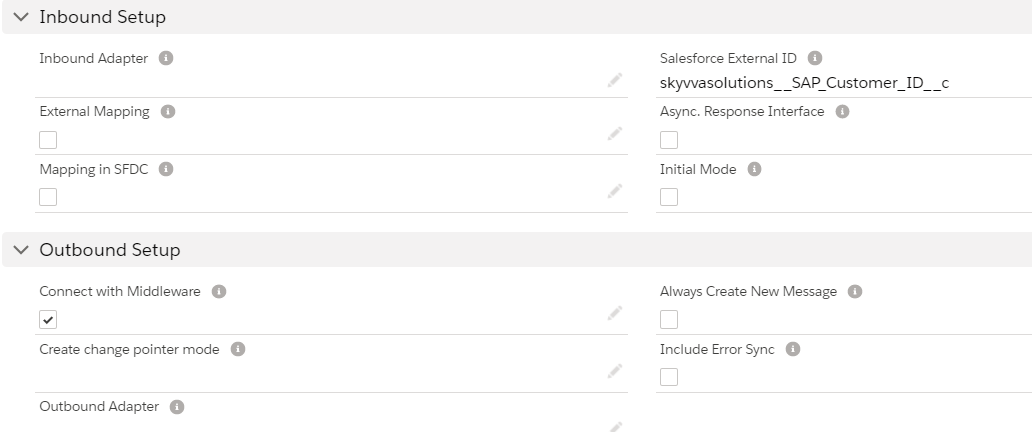

Do the mapping as shown below
Download the inbound and outbound interface WSDL’s to import to SAP PO for mapping.
In SAP PI/PO we need to create two Asynchronous interfaces
One for Request from Skyvva to SAP and one for the response from SAP to Skyvva
Request Interface(Salesforce to SAP)
Import WSDL into ESR
Initially, we have to create a namespace in ESR like “http://Account_to_DEBMAS07_Customer“.
Now create an external definition under the namespace like below. Here the WSDL is for Account. So, we can give the name as “Account_Ack_Out”
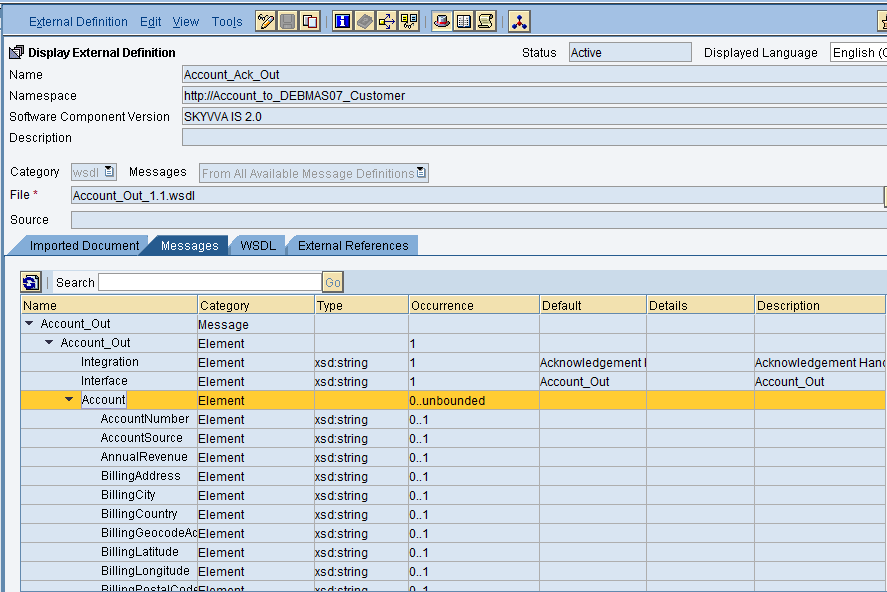
Now import the WSDL and Save and activate it.
No need to create Datatype, Messagetype and Service Interface for Target system SAP as we are using IDOC
Service Interface
Create outbound service interface
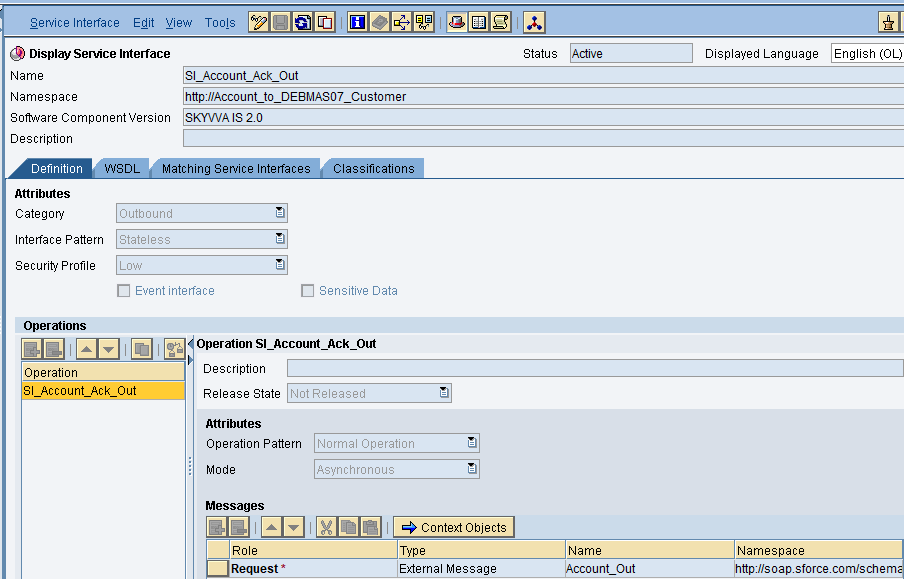
Now click on Save and activate it.
Message mapping
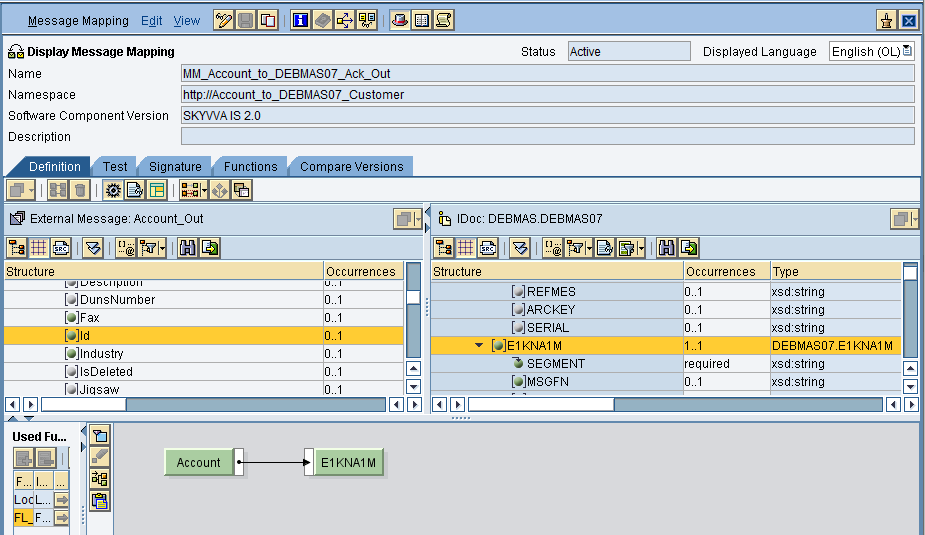
Do the respective mapping and save and activate it.
Operation Mapping for asynchronous Outbound interface
Create Operation mapping.
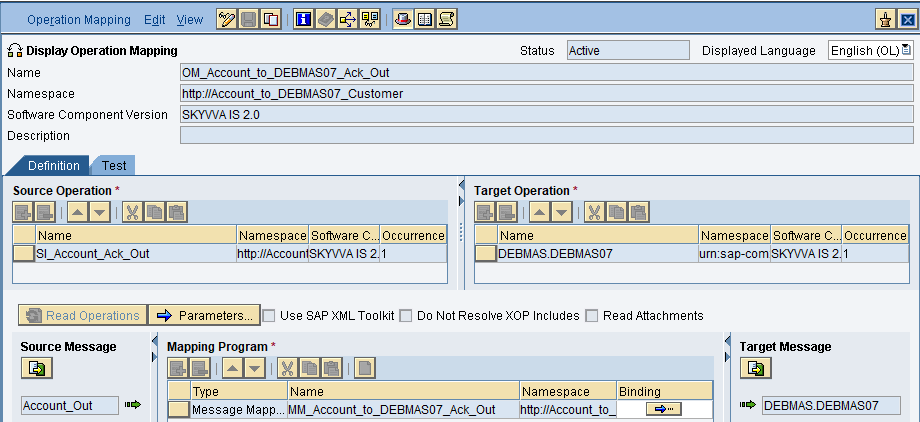
Then save and activate the operation mapping.
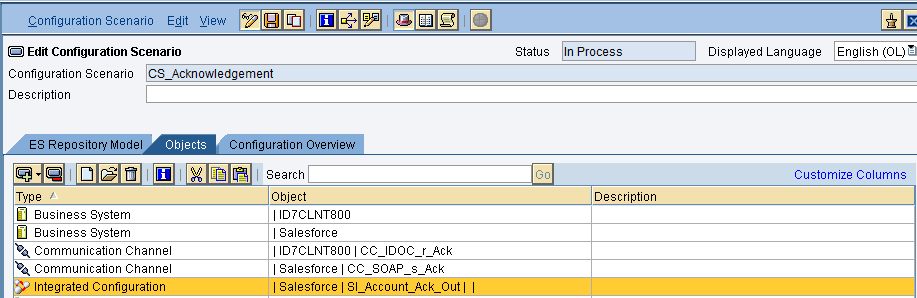
Creation of Integrated Configuration Objects
After creating the objects in ESR. We have to configure these objects in the integration directory.
First, we have to create Configuration Scenario. Now enter the name of the scenario, description and choose a folder if you have created then press on create button.
An Integration scenario has the following objects.
- Business System for Sender and Receiver
- Sender and Receiver Communication channel
- Integrated Configuration
These are the objects we should create.
We have to define our business system e.g. for the SAP-Backend. For Salesforce you can use our proposal “Salesforce” as the business system. We have to import these business systems from SLD.
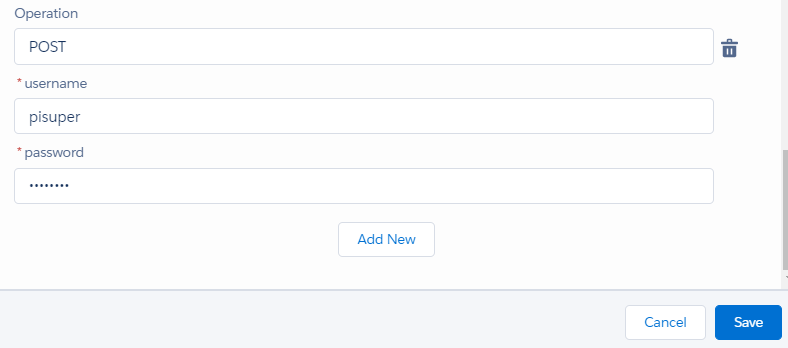
Configuring the Sender SOAP communication channel
Create sender communication channel as shown below.
Since we are using an SOAP as a source. So, here we are using SOAP adapter in the sender channel.
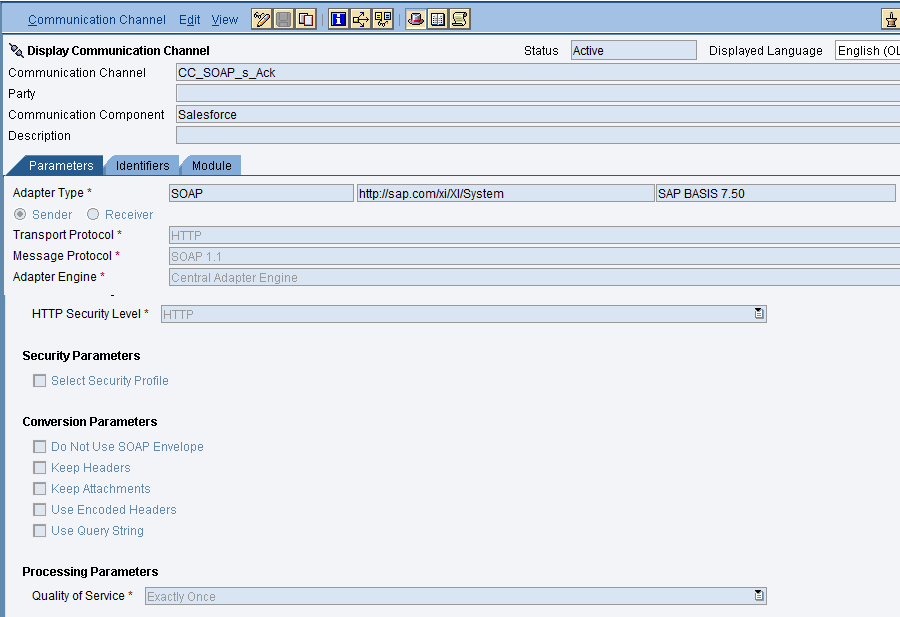
Provide the necessary details. After that save and activate the channel.
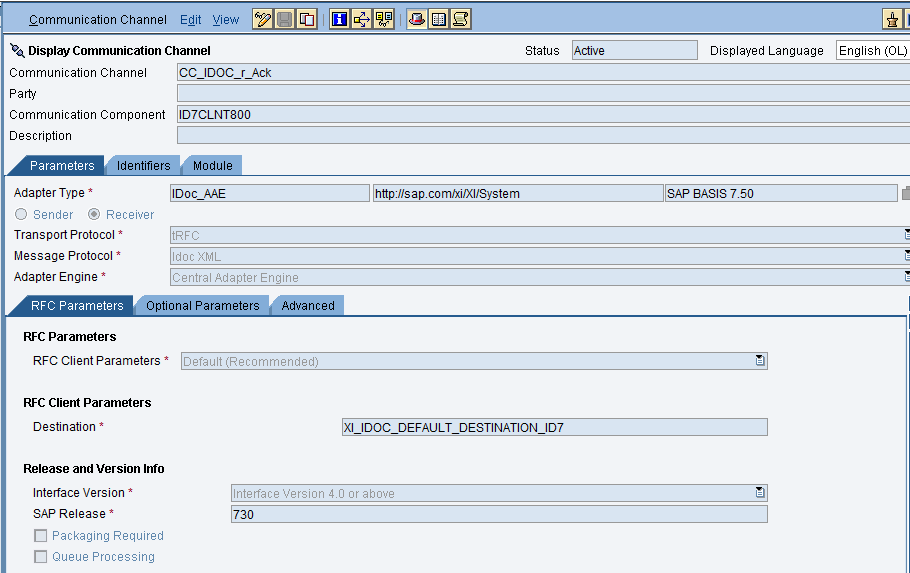
Configuring the IDOC receiver channel
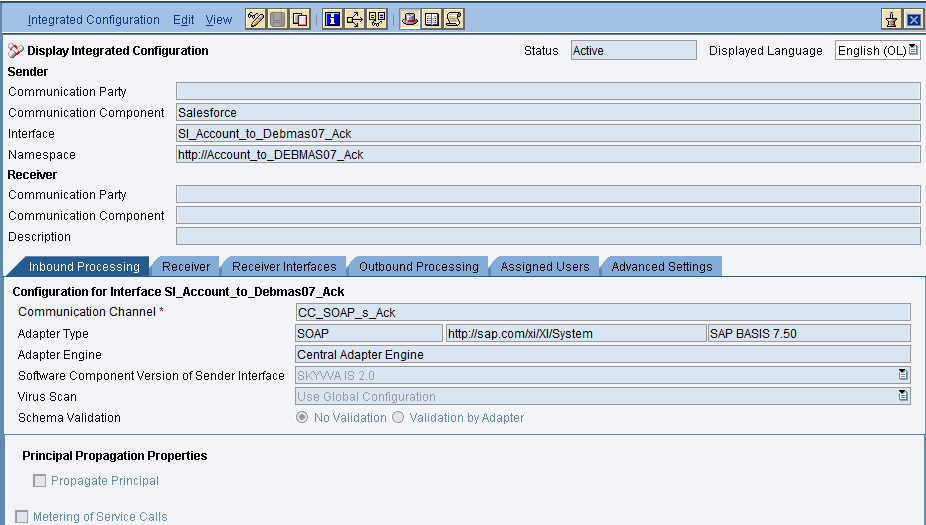
Integrated Configuration
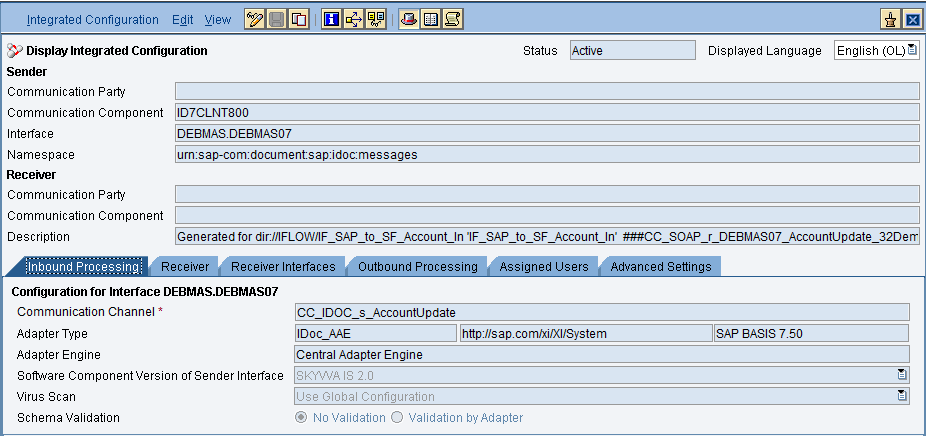
Create integrated configuration objects as shown below.
Enter the required data e.g. the Communication Component, Interface and Namespace and then click on create button to create an ICO.
Now go through the tabs from left to right to configure the relevant objects. In this first tab “Inbound Processing” here we have to specify the sender communication channel.
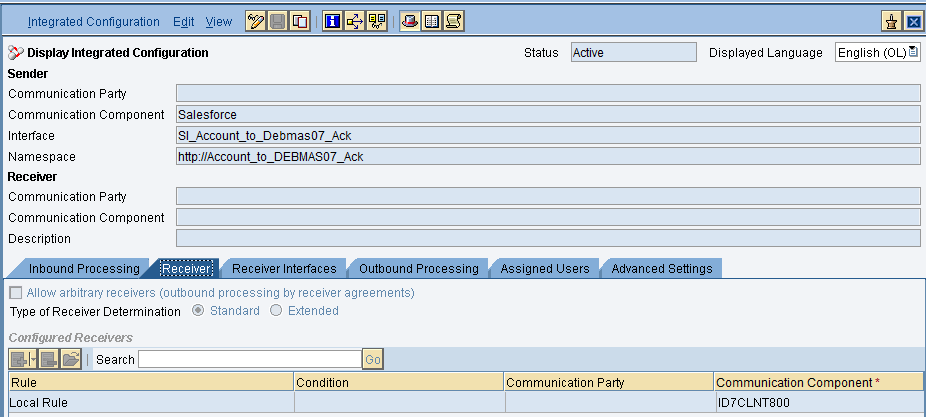
Here in the “Receiver” tab, we have to specify the receiver business system.
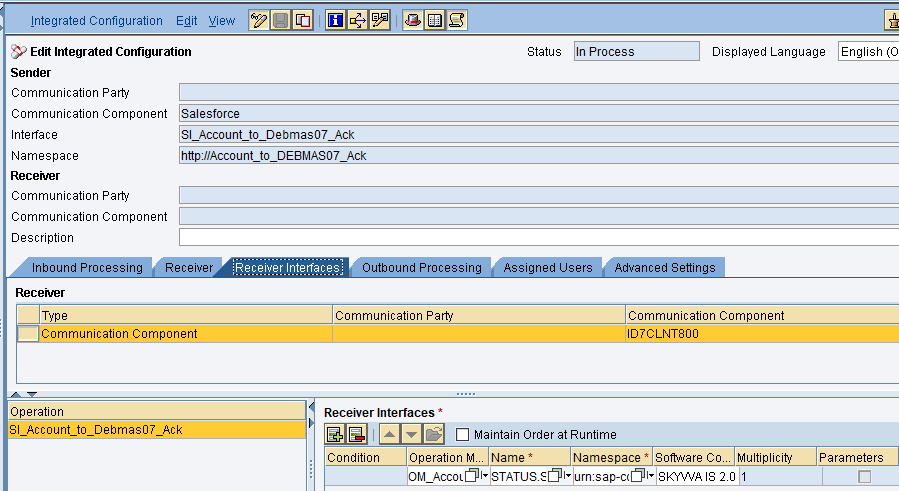
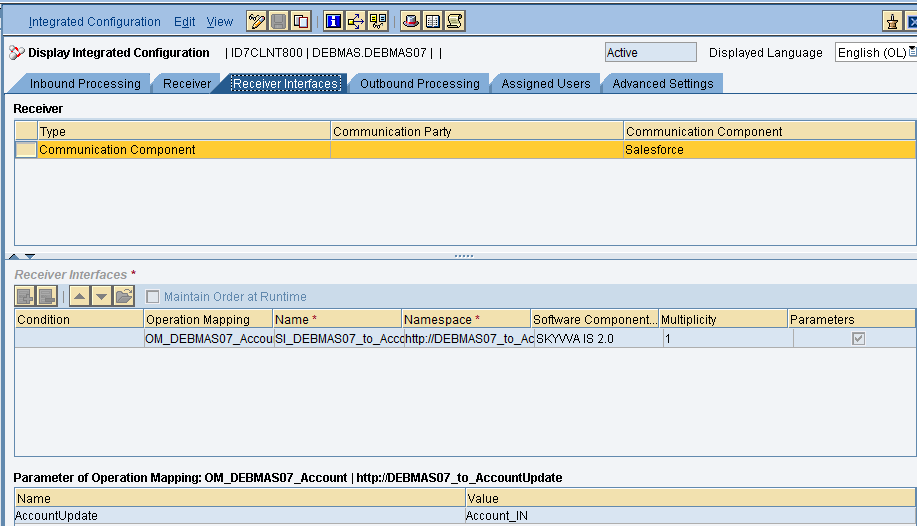
In Receiver interfaces tab specify the operation mapping
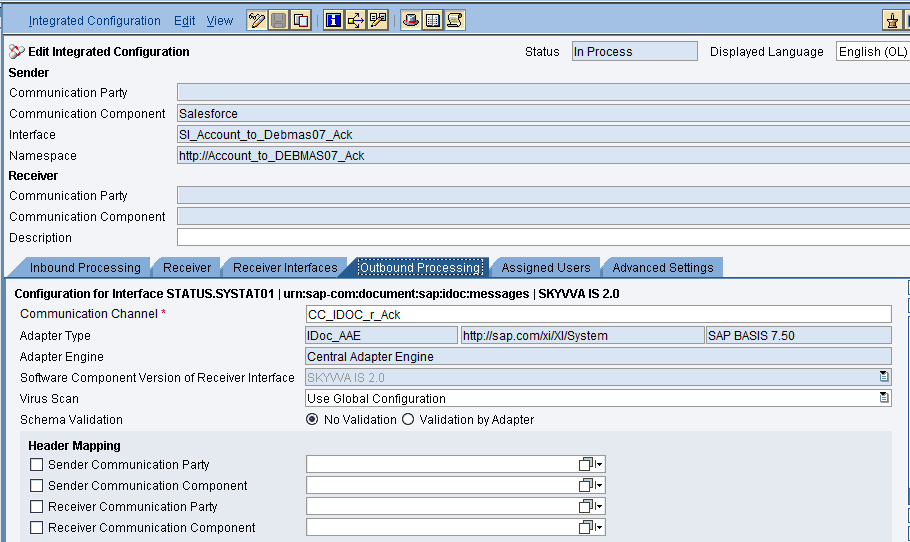
In the “outbound processing” tab, we have to specify the receiver channel.
Response Interface(SAP to Salesforce)
Import WSDL into ESR
First, we have to create a namespace in ESR like “http://DEBMAS07_to_AccountUpdate“.
Now create an external definition under the namespace like below. Here the WSDL is for Account. So, we can give the name as ED_Ack_IN.
In the Inbound interface WSDL the SKYVVA__MessageId system field show be present. So that we can map the respective IDOC field to get the message Id to the SKYVVA__MessageId field.
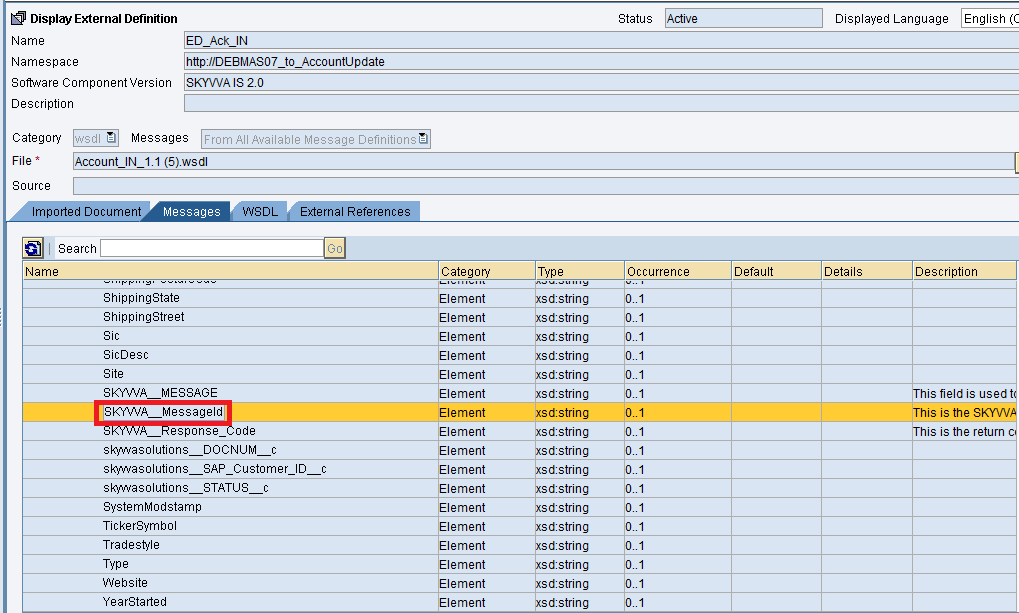
Now import the WSDL and Save and activate it.
No need to create Datatype, Messagetype and Service Interface for Sender system SAP as we are using IDOC as a source.
Service Interface
Create service interface
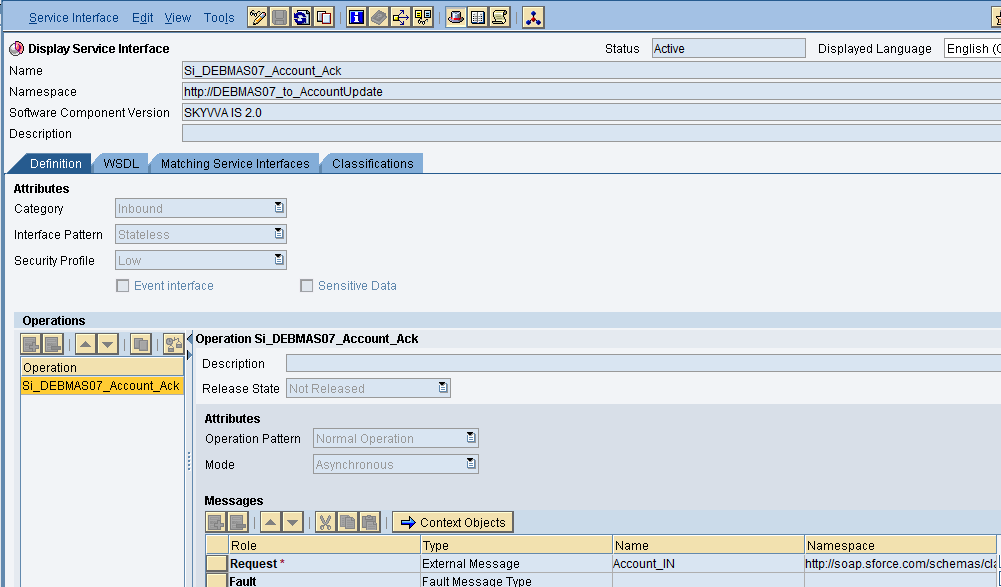
Now click on Save and activate it.
Message mapping
Here we need to map from an idoc field where the skyvva message id is stored to the field SKYVVA__MessageId to the Skyvva system field “SKYVVA__MessageId“. But here in this example we are not sending the MessageId from SAP because currently our SAP system is not handling the IDOC acknowledgements. So in this example we are sending the message Id directly from SAP PO to Skyvva.
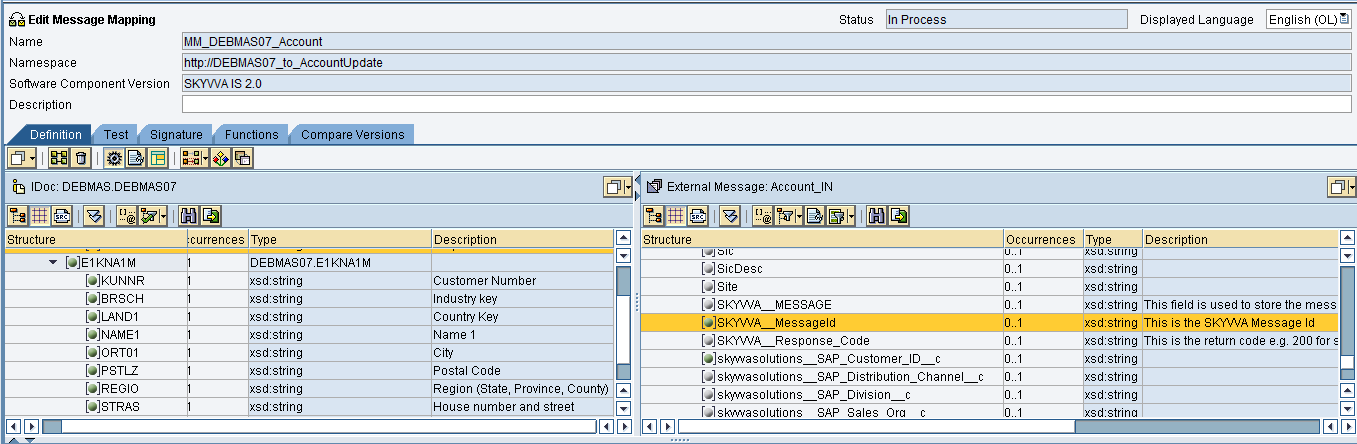
Do the respective mapping and save and activate it.
Operation Mapping for asynchronous inbound interface
Create Operation mapping.
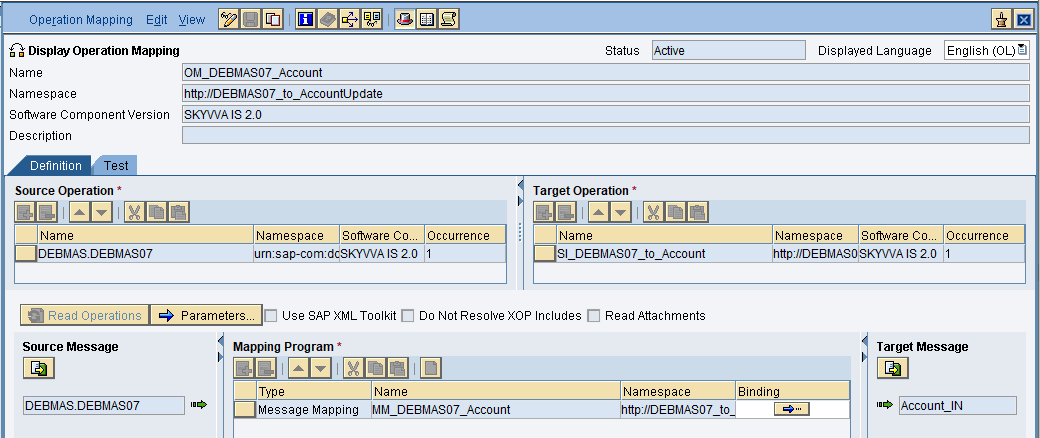
Then save and activate the operation mapping.
Creation of Integrated Configuration Objects
After creating the objects in ESR. We have to configure these objects in the integration directory.
First, we have to create Configuration Scenario.Now enter the name of the scenario, description and choose a folder if you have created then press on create button.
An Integration scenario has the following objects.
- Business System for Sender and Receiver
- Sender and Receiver Communication channel
- Integrated Configuration

These are the objects we should create.
We have to define our business system e.g. for the SAP-Backend. For Salesforce you can use our proposal “Salesforce” as the business system. We have to import these business systems from SLD.
Configuring the Sender Idoc communication channel
Create sender communication channel as shown below.
Since we are using an IDOC as a source. So, here we are using IDoc adapter in the sender channel.
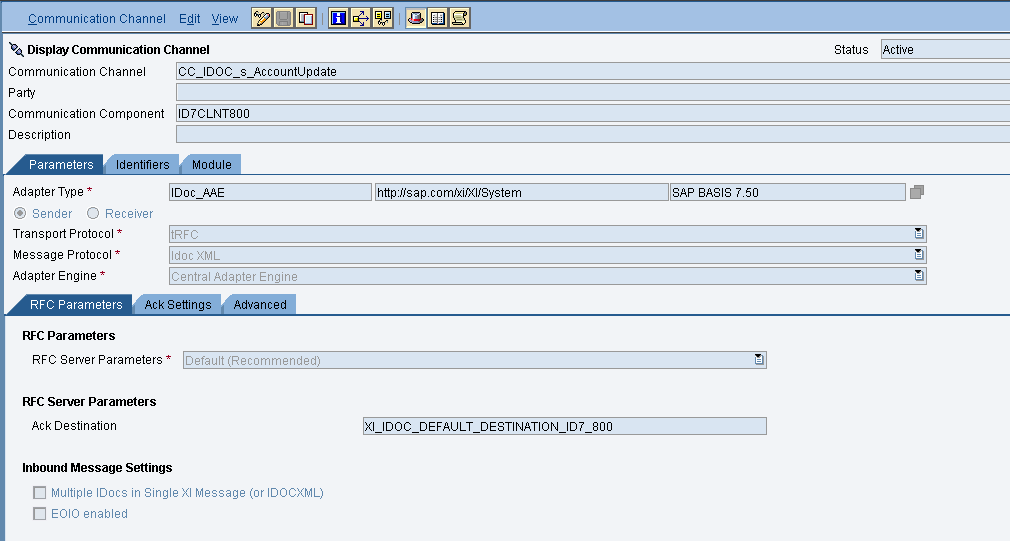
Provide the necessary details. After that save and activate the channel.
10. Configuring the SOAP receiver channel
Configuration for Tab “General”

Specify the parameters as shown in the above screenshot.
Below is the configuration for the “Advanced” Tab.
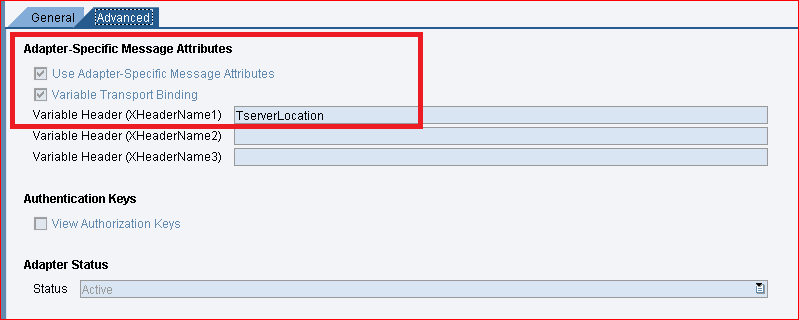
The value “TserverLocation” has to be entered for the parameter Variable Header (XHeaderName1).
Below are the settings for Tab “Module”. Here, the SKYVVA module containing the logic for session handling and transformation logic must be specified.
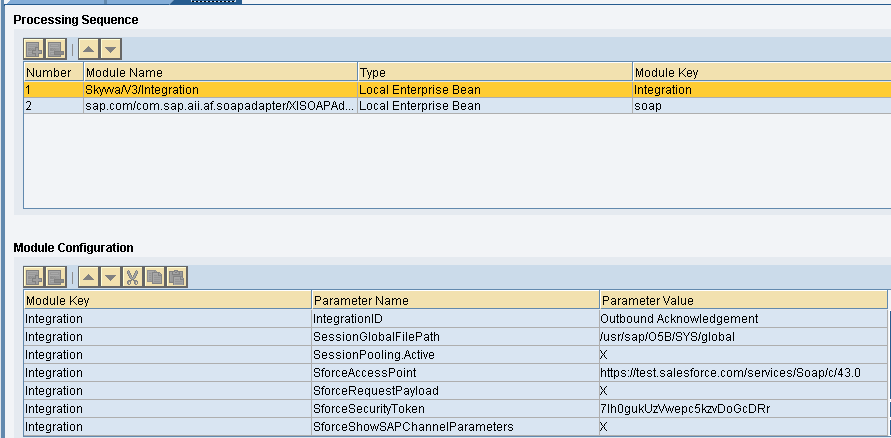

Configuration of module parameters are described in detail below
Skyvva Module Parameters
“Skyvva/V3/Integration” to be used with SOAP receiver channels. Module parameters are outlined below
|
Parameter |
Description |
Value |
|
IntegrationID |
This parameter contains the skyvva engine integration id on Salesforce. Here we recommend to use only Integration name instead of id because if we transport the objects from one environment to other environment IntegrationId will be changed but Integration Name will not be changed. |
Lalitha_Test_Integration |
|
SessionGlobalFilePath |
This parameter holds the path in which the session id is being stored |
/usr/sap/O5B/SYS/global |
|
SforceAccessPoint |
This parameter represents the URL(endpoint) for getting the session id. The URL is that of the Enterprise WSDL for Salesforce used for logging in and getting the session id |
https://test.salesforce.com/services/Soap/c/43.0 |
|
SessionPooling.Active |
A flag that actives or deactivates the session pooling. Set for better performance |
X |
|
SforceRequestPayload |
It will show the request payload of skyvva |
X |
|
SforceSecurityToken |
This parameters holds the security token from salesforce. Necessary only of configured in the salesforce instance |
By54dfe0000DerYvvv |
|
SforceShowSAPChannelParameters |
It displays the SAP PI parameters in the output log |
X |
|
SforceUsername |
This parameter is the salesforce username |
xxx@bbbb.com |
|
SforceWebServiceOperation |
Defines the webservice operation in skyvva |
integrate |
|
pwdSforceLoginPassword |
It holds the password of the salesforce user used to log in to the salesforce |
xxxxxxx |
Integrated Configuration
Create integrated configuration objects as shown below.
Enter the required data e.g. the Communication Component, Interface and Namespace and then click on create button to create an ICO.
Now go through the tabs from left to right to configure the relevant objects. In this first tab “Inbound Processing” here we have to specify the sender communication channel.
Here in the “Receiver” tab, we have to specify the receiver business system.
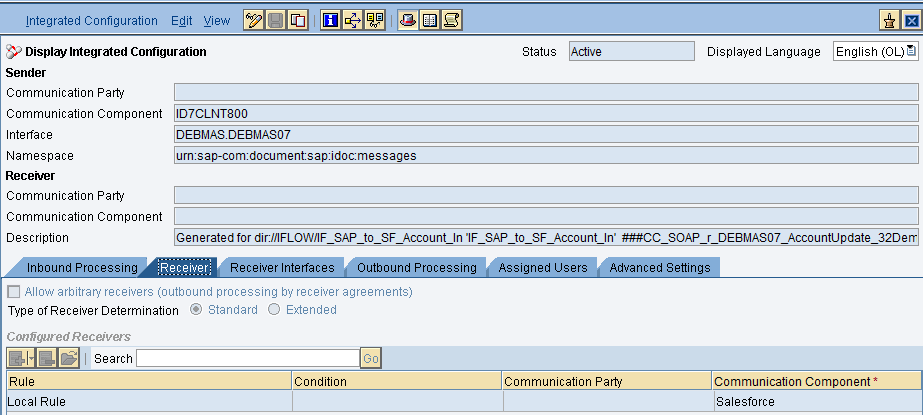
In Receiver interfaces tab specify the operation mapping and also the values of the parameters.
The parameter Account_Update_In is the interface name (on Skyvva side) of the interface Account.
In the “outbound processing” tab, we have to specify the receiver channel.

Testing the Interface –
Triggering the data from SKYVVA using the below apex code
skyvvasolutions.CallOutControl c=new skyvvasolutions.CallOutControl();
c.returnXml=true;
c.returnListRecord=true;
c.isCreateMessage=true;
c.actionDoIntegrate=true;
String[] ids=new String[]{‘0013N00000P9QVOQA3’};
skyvvasolutions.Iservices.invokeCalloutV3(‘Outbound Acknowledgement’,’Account_Out’,ids,’AUTO’, c);

In the inbound interface we can see the SKYVVA_MessageId back from SAP
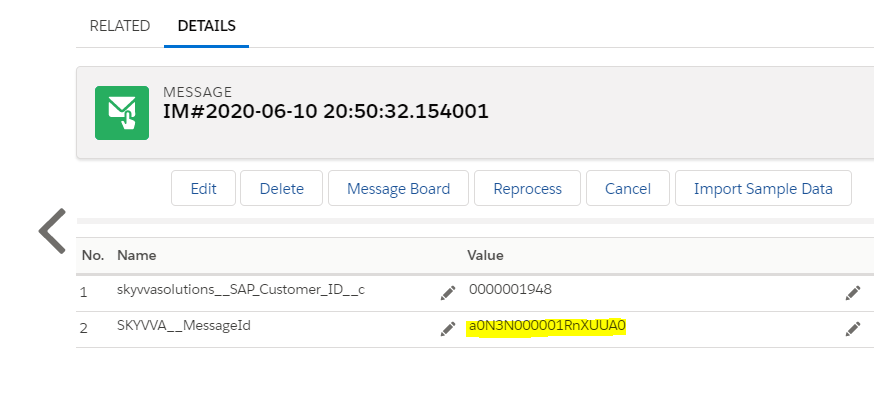
This means we got the acknowledgement from SAP


