Create Customer in SAP from Salesforce using BAPI and Save created customer in Salesforce table.SYNCHRONOUS call)
Table of Contents
-
- Skyvva software landscape and building blocks
- Used Convention
- Introduction, Prerequisite for creating an outbound interface
- Creating Outbound Interface
- Define BAPI and fields in the skyvva config
- Export BAPI structure from SAP
- Create an interface
- Import BAPI structure
- Query editor
- Mapping of fields
- Create Inbound Interface in Salesforce
- Import XML file
- Mapping of field
- Changing the outbound interface
- Making Response Interface in sap
- Run Apex code
- Testing Result
From Step 1 to Step 4 refer to the document: How to develop an Outbound interface using BAPI asynchronously?
After following the above document, the outbound interface would have been created.
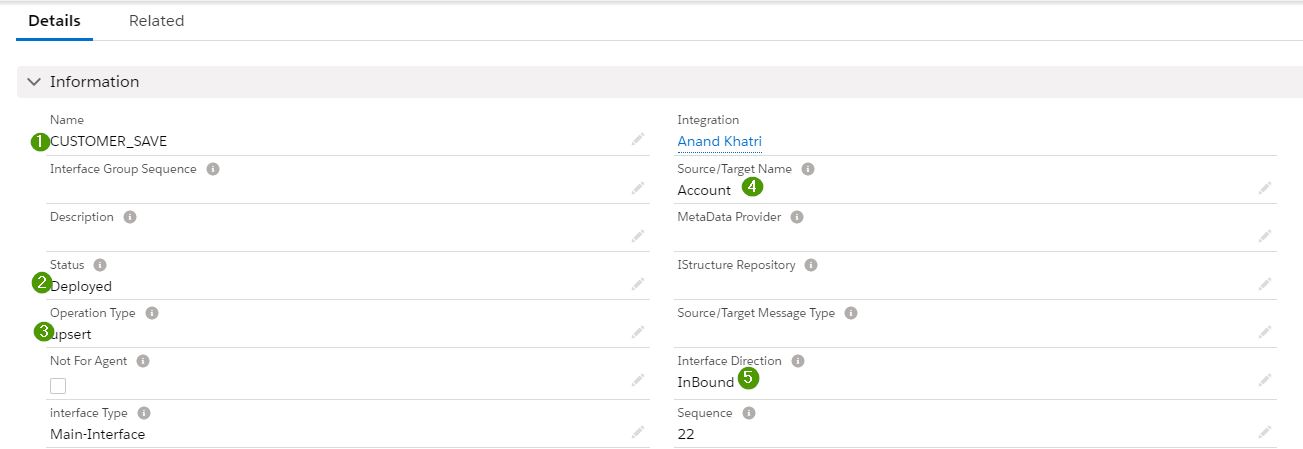
5. Create Inbound Interface in Salesforce #
Here, we Need to create Inbound Interface to save the created customer number into the salesforce table.
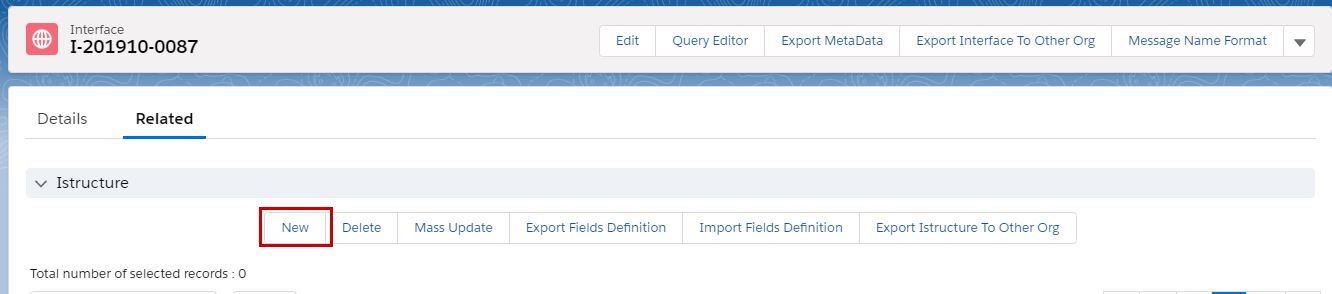
Create a New Interface.

- Give appropriate interface name
- Deployed
- Operation Type: upsert(update fields)
- Source/Target Name: Account (Table to update)
- Interface Direction: Inbound
6. Import XML #
Save and Goto Related tab for XML file upload.
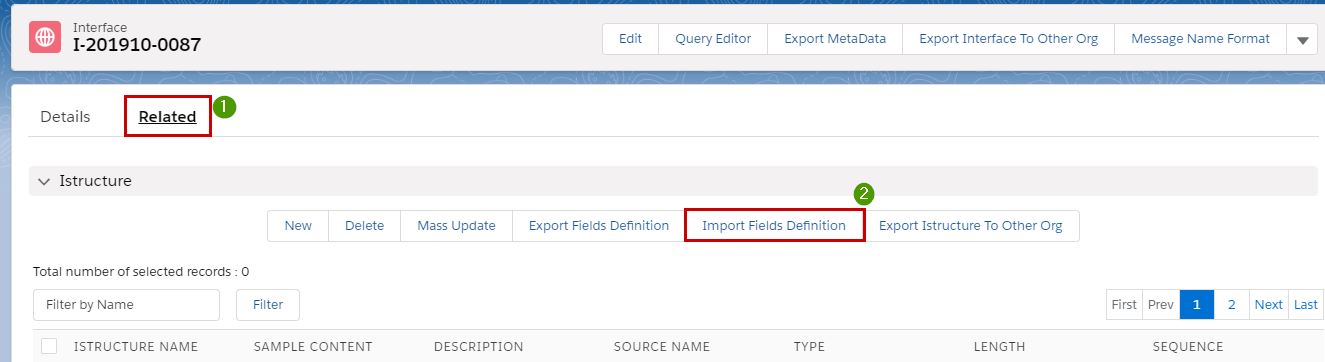
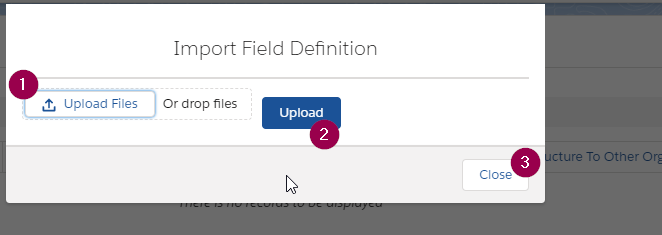
Upload file and then click on the upload button and then close the pop-up, the file will be loaded.
Now after loading we can see all the SAP interface fields which we have used from parameters.
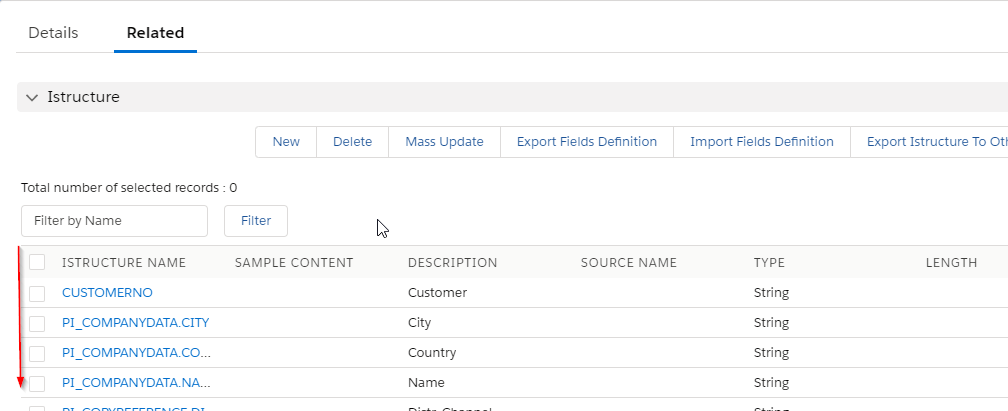
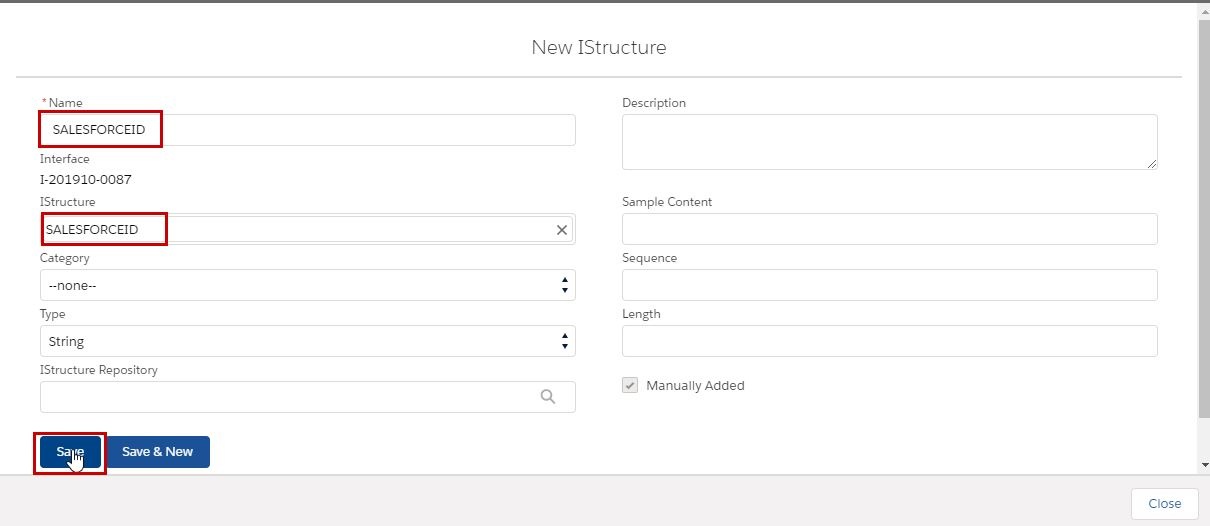
Add a salesforce id field to uniquely identify the table data as ext. id.
Provide the necessary details.
7. Mapping of fields #
Goto Detail tab and Mapping section.
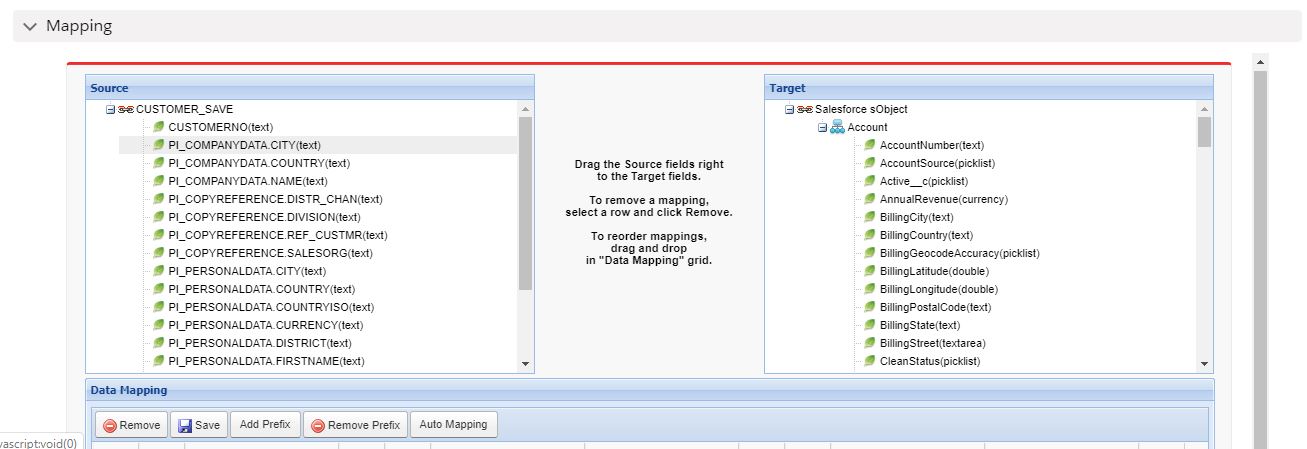
Here, we need to map only 2 fields, salesforceid and customerid.
- SALESFORCEID : This field identifies the record in a table which is needed to update, the salesforce will be what we have used in apex code for running interface, same record will be updated.
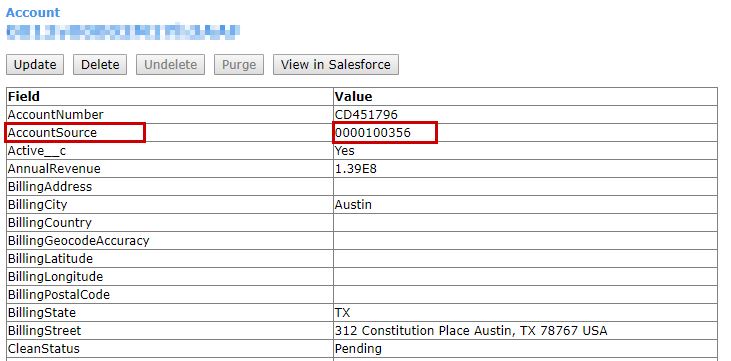
- CUSTOMERID: This field is a customer number which is created in SAP and the same needs to save in our salesforce ‘ACCOUNT’ table. So, we need to map the customer field with our salesforce ACCOUNT table field.
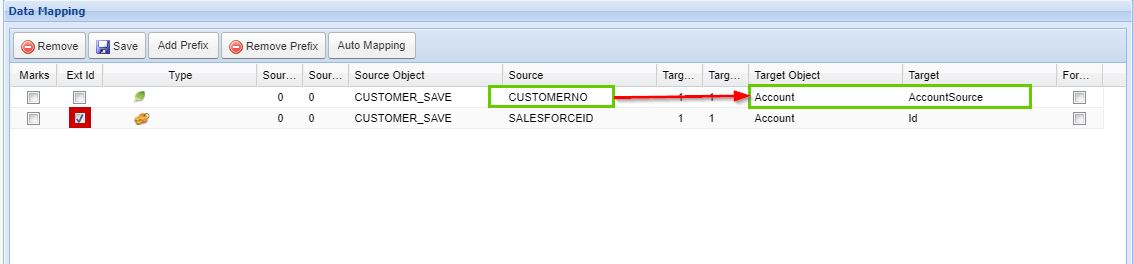
Here, CustomerNo is mapped to Account->AccountSource field, where CustomerNo is going to save.
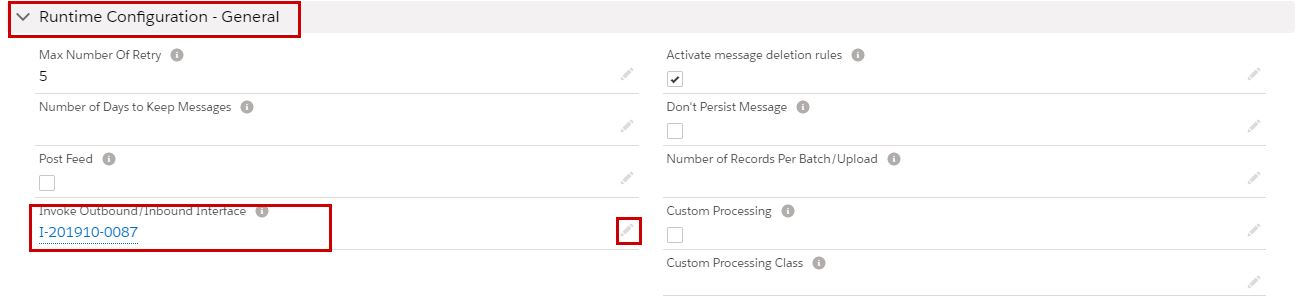
8. Change Outbound Interface. #
Goto to the interface created in step 4.
Goto Runtime Config. and Add Inbound interface-id which we created in Step 5. Save it.
It specific the workflow of execution after the Outbound Interface, Inbound Interface will be called (CUSTOMER_SAVE).
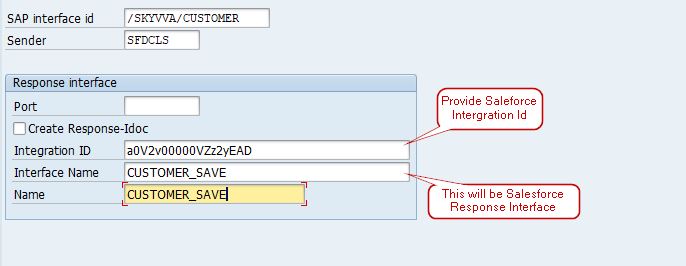
9. Making Response Interface in sap #
Goto T-code /skyvva/config:
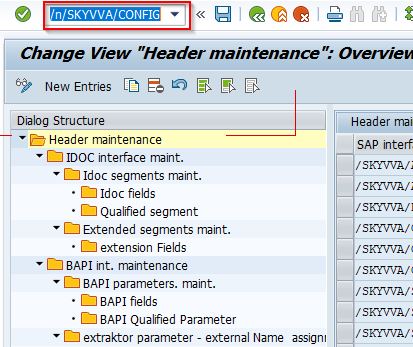
Goto Response interface tab.
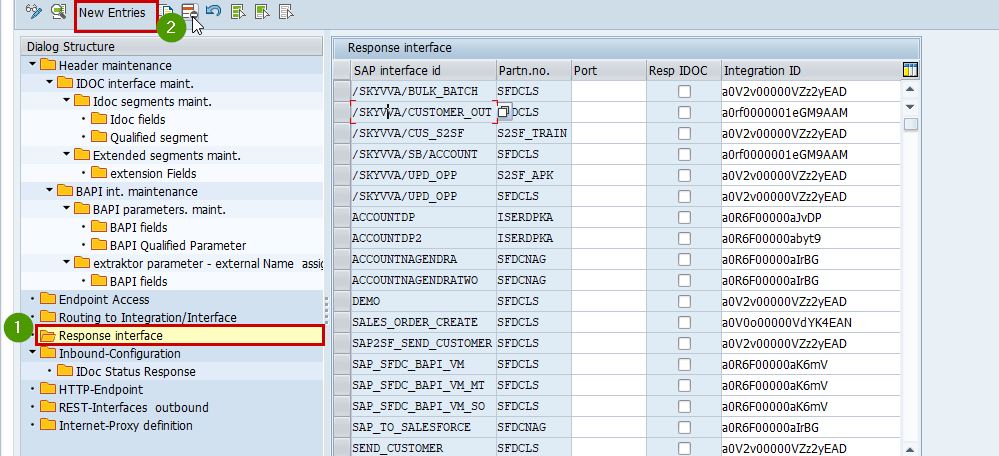
After New entry, the parent the Interface and port from f4 help.
#
10. Run Apex code #
Now, SALESFORCE and SAP interface is ready.
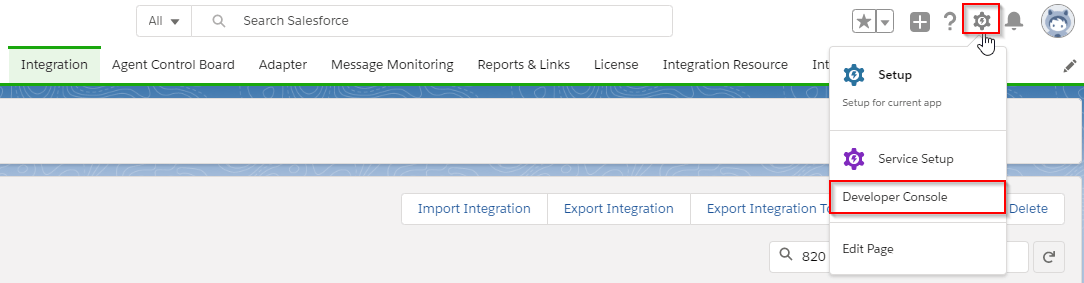
Run the apex code from Developer Console.
Open Console by going to set at the top corner and the Developer Console.
New Window will appear and press ctrl+E to open Apex editor.
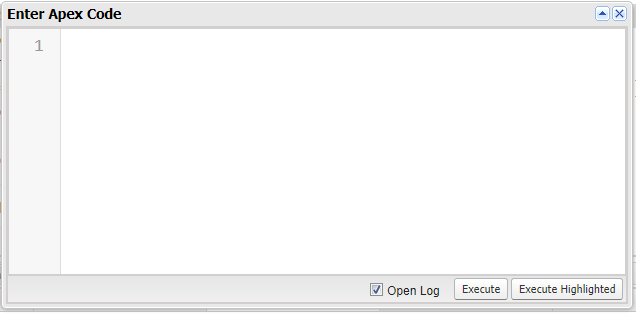
Sample Apex Code.
skyvvasolutions.CallOutControl c=new skyvvasolutions.CallOutControl();
c.returnXml=true;
c.returnListRecord=true;
c.isCreateMessage=true;
c.actionDoIntegrate=false;
String[] id1=new String[]{‘Data Record-Id’};
skyvvasolutions.CallOutResponse r=skyvvasolutions.Iservices.invokeCallout2(‘Integration Name’,’Interface Name’,id1,’SYNC’, c);
Data Record Id: Each database table in salesforce have Id field, which is a unique identification of particular records.
And then Execute, Data will be saved in save.
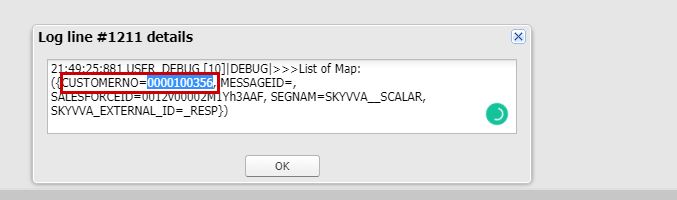
After successful execution, the response will come with the created customer number.
11. Testing Result #
Now, we can the Message in Integration.
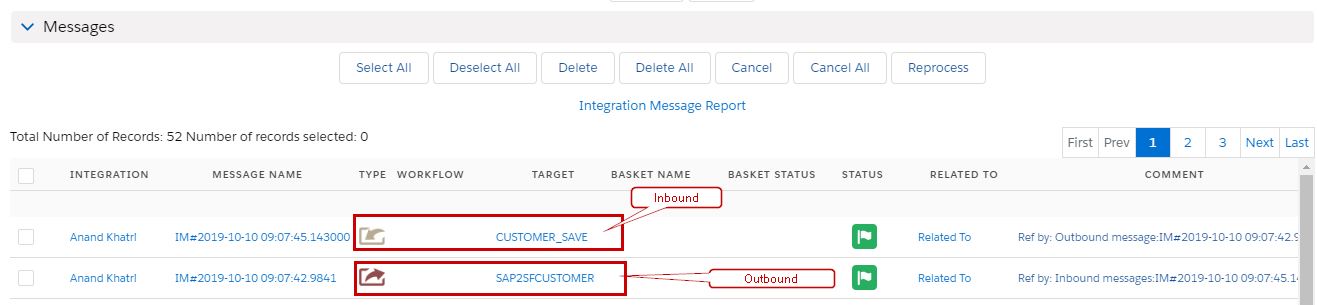
Both the Outbound and Inbound get called one after another.
Now, we see out the created customer in the Account Table.