What is Change Data Control? #
Change Data control is a function that provided to record all data changes (Change Pointer) you create on any business object. It is capable to send the deleted records to the receiver as well. This means it executes the find/fetch record base on Salesforce’s query. With the SOQL query statement, you can fetch the deleted records in the recycle bin as well with the “ALL ROWS” keyword. Overall, it handles the change data in salesforce. You can send all your change data using CDC Scheduler or manually.
CDC Setting #
This section is created for some fields that use CDC features. Before configuring the CDC you need to know about these parameters which require to set on the interface.


- Use SKYVVVA Outbound Scheduler: This flag use for CDC Processing. When you check this flag, it’s mean that you activate the CDC processing. It activates both CDD and CDT. You can set an interface for running only CDD or CDT in some time.
- CDC Mode Only: This field is used for separating the process of CDD and CDT follow flag Use SKYVVA Outbound Scheduler. Select CDD to run only CDD for interface or select CDT to run only CDT. Select None to run both CDD and CDT at the same time. You can select the picklist value to specify the run time.
- CDT Worker Query Limit: This field is used to define the number of the query record. When the CT worker runs the start method will query record to send out. If it is too much we will run into a CPU time out. Set this field to an appropriate value so that you don’t any error.
- Interface Control Runtimes: Interface Control Runtime could be used for another purpose. for CDD, it is used where the user can set LastRun DateTime that CDD finds the record change which is record’s LastModifiedDate>that date.
When to use Change Data Control? #
Use Change Data Control to:
- To Detect or record all data (Change Pointer) that create, change, update, delete in Salesforce
- Transfer data to the external system anytime without disturbing your online business
- Overcome the limitation of sending changed record by record
CDC is made up of two components, the CDD, and the CDT. These two-component have different functionality.
|
CDC Component |
Description |
| CDD | CDD stand for Change Data Detection. |
| CDT | CDT stands for Change Data Transfer. |
Change Data Detection
With CDD, you can detect all the changed data in Salesforce to any external system. CDD is a scheduler that is running to call batch Apex in order to collect data change and save all those data into the Change Pointer table.
Change Data Transfer
CDT is another scheduler that is running to collect the records from the Change Pointer Object and sent to the external System such as SAP… etc. The Schedule will execute callout as the parallel of future, queueable, batch based on priority, integration resource and interface group type (EO/EOIO).
The configuration of the CDC #
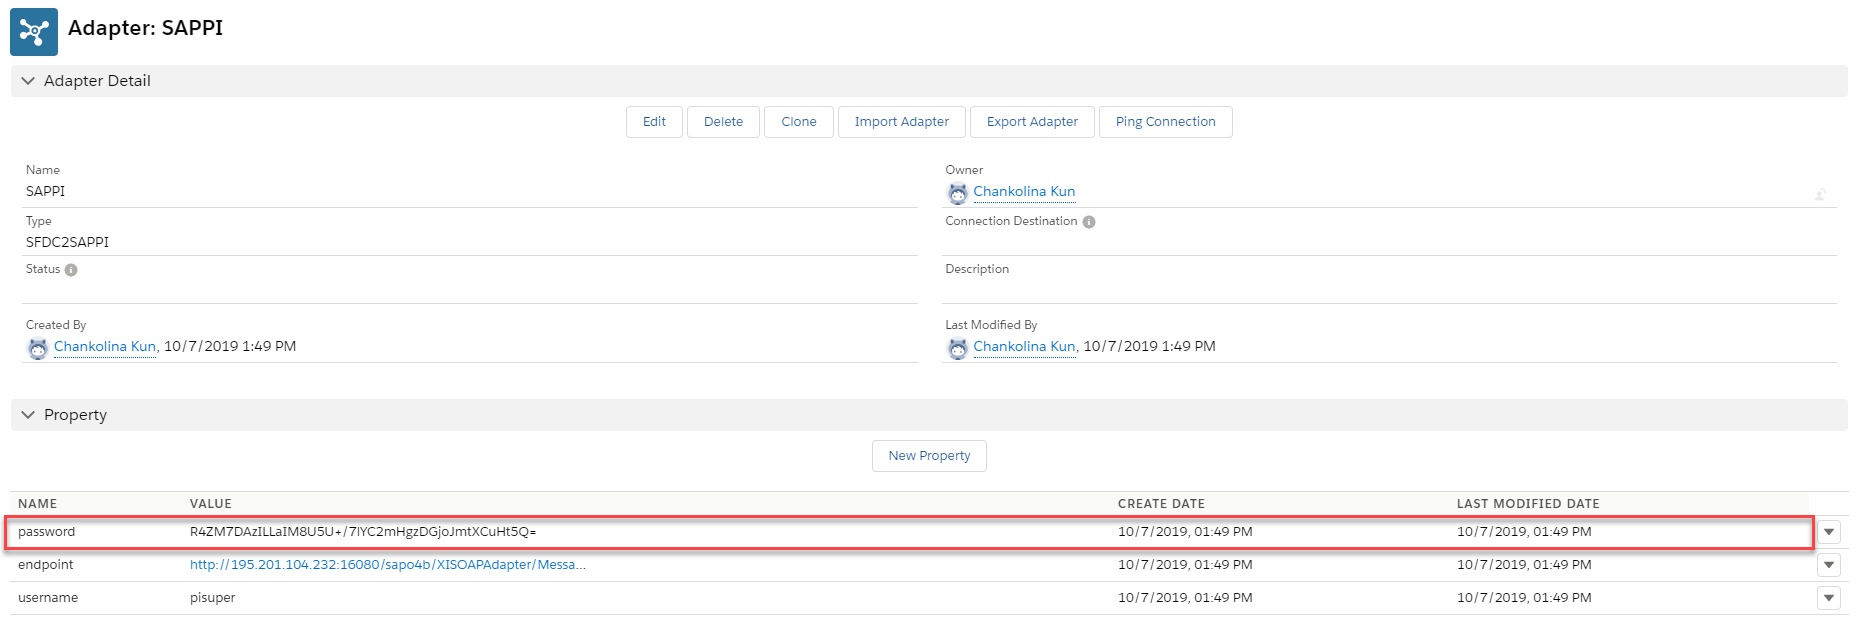
Step 1: Create an outbound adapter
An outbound interface can be processed with the different adapters to configure CDC. For example, we use SFDC2SAPPI adapter, Rest Adapter, Soap adapter. Follow the given step to process the outbound interface using the adapter. We are using SFDC2SAPPI adapter as an example, you can follow the given steps:
- Go to an Adapter tab
- Click on New Button
- Fill the username, endpoint, and password
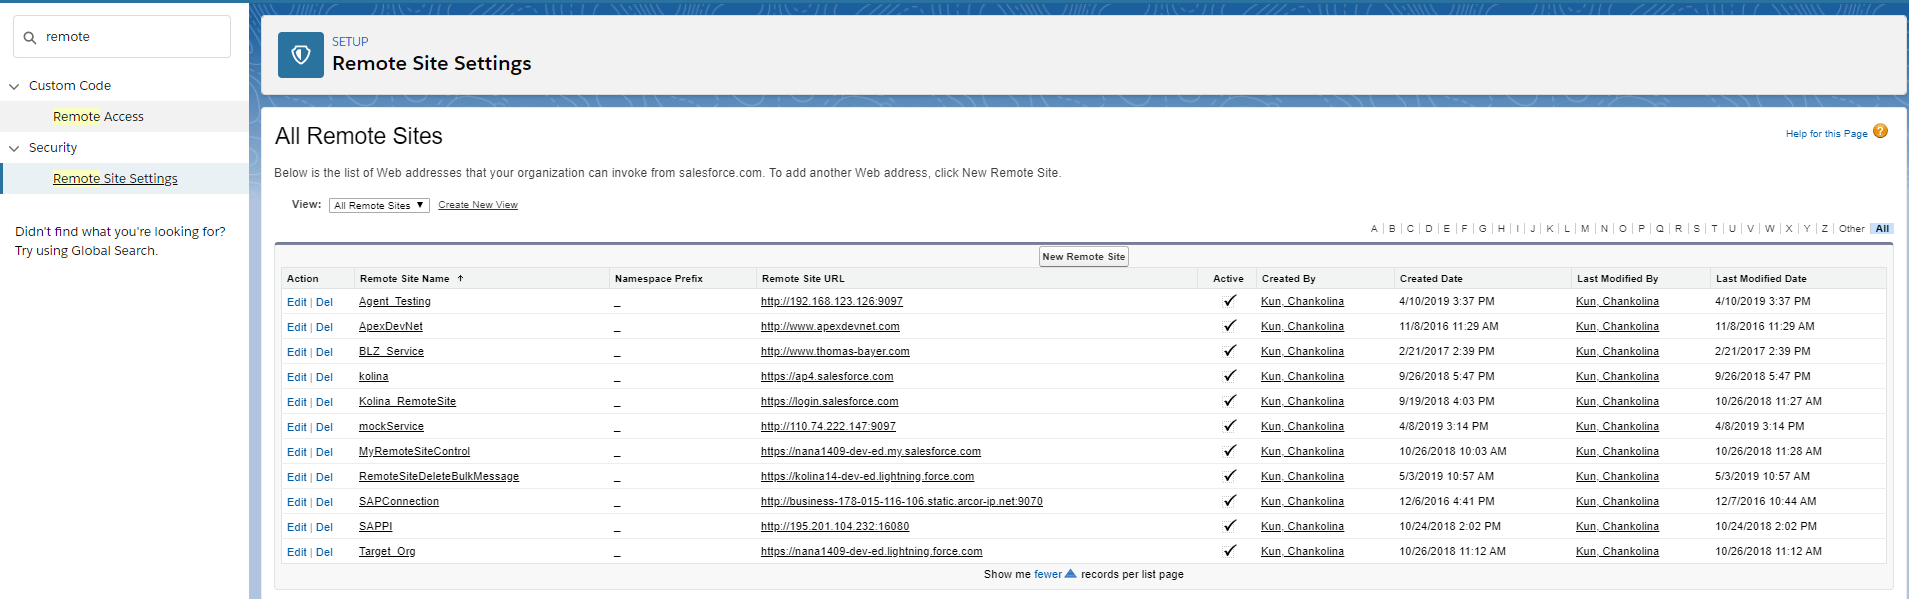
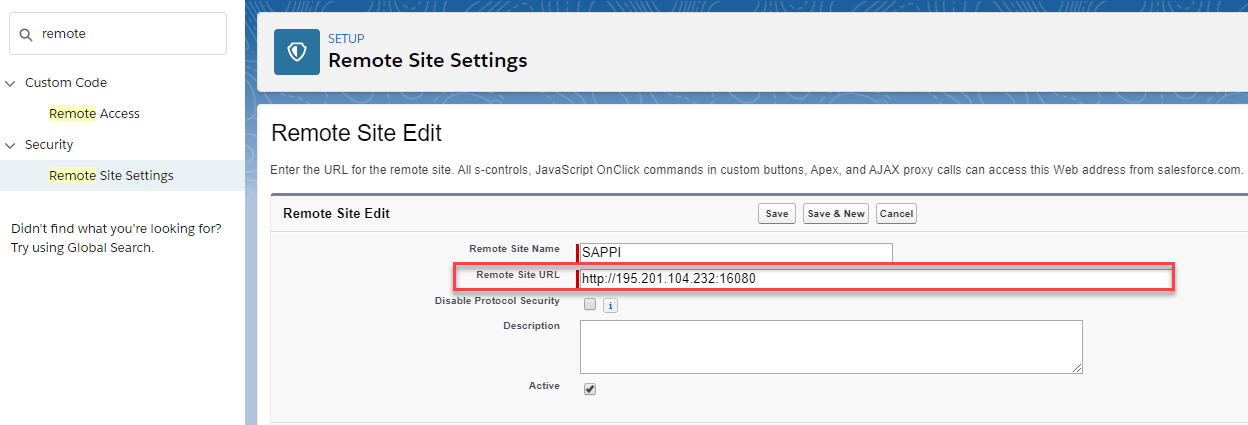
Step 2: Create a Remote Site
- From Setup, enter Remote Site Settings in the Quick Find box, then select Remote Site Settings.
- Click New Remote Site.
- Enter a descriptive term for the Remote Site Name.
- Enter the URL for the remote site.
- Optionally, enter a description of the site.
- Click Save.
Step 3: Create an outbound Interface
In order to configure the CDC for an Interface, you have to create an interface.
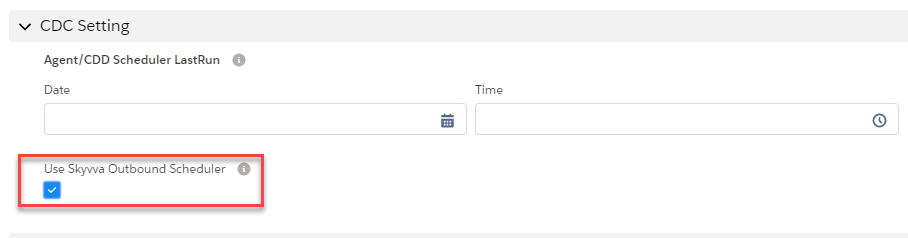
- Open it and scroll down to the CDC setting section.
- Specify the parameter
- Check the “Use Skyvva Outbound Scheduler” checkbox.
Step 4: Schedule CDD and Monitor it on CDC Control Board
After you have done configuring the CDC processing you have to set the scheduler for CDD in order to collect the change data (CP records). To schedule CDD, follow the given steps:
- Open Integration Detail Page and navigate to Custom Link section then click on CDC Control Board
- Select Scheduler Tab
- Set the time as you prefer and start the scheduler
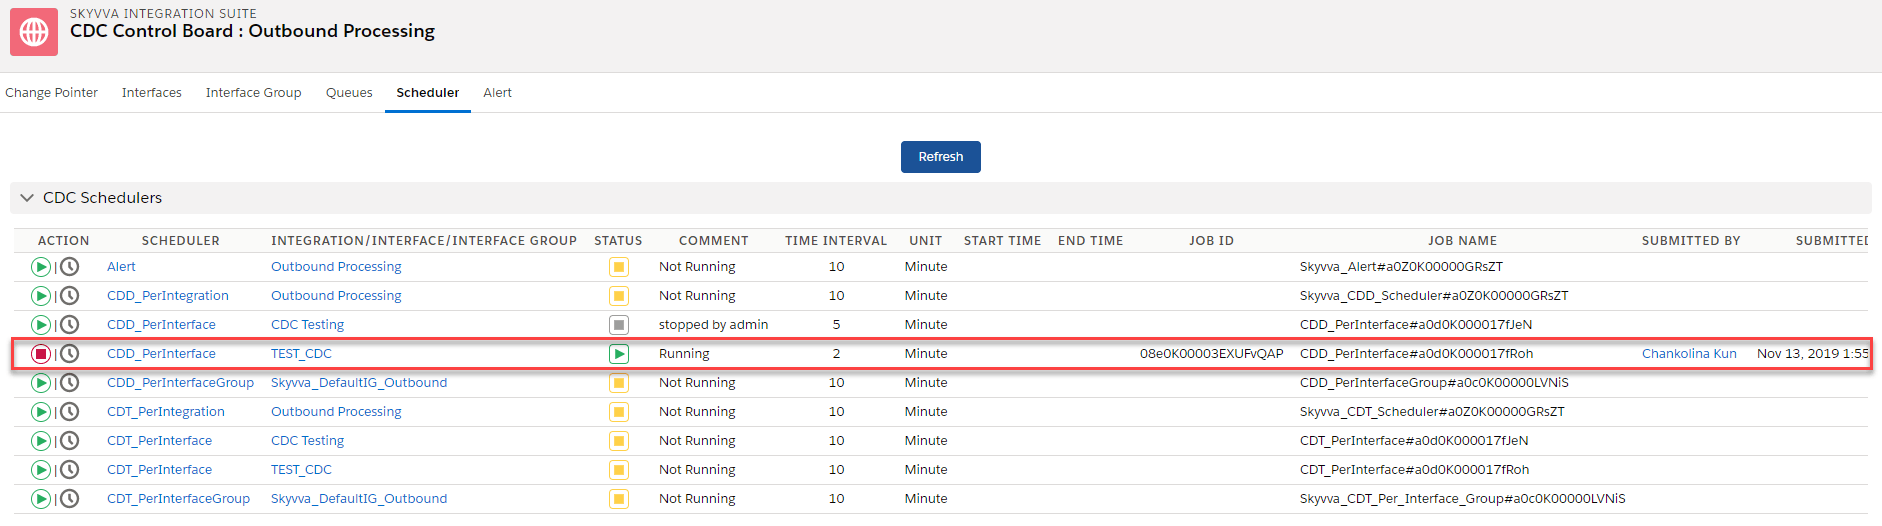
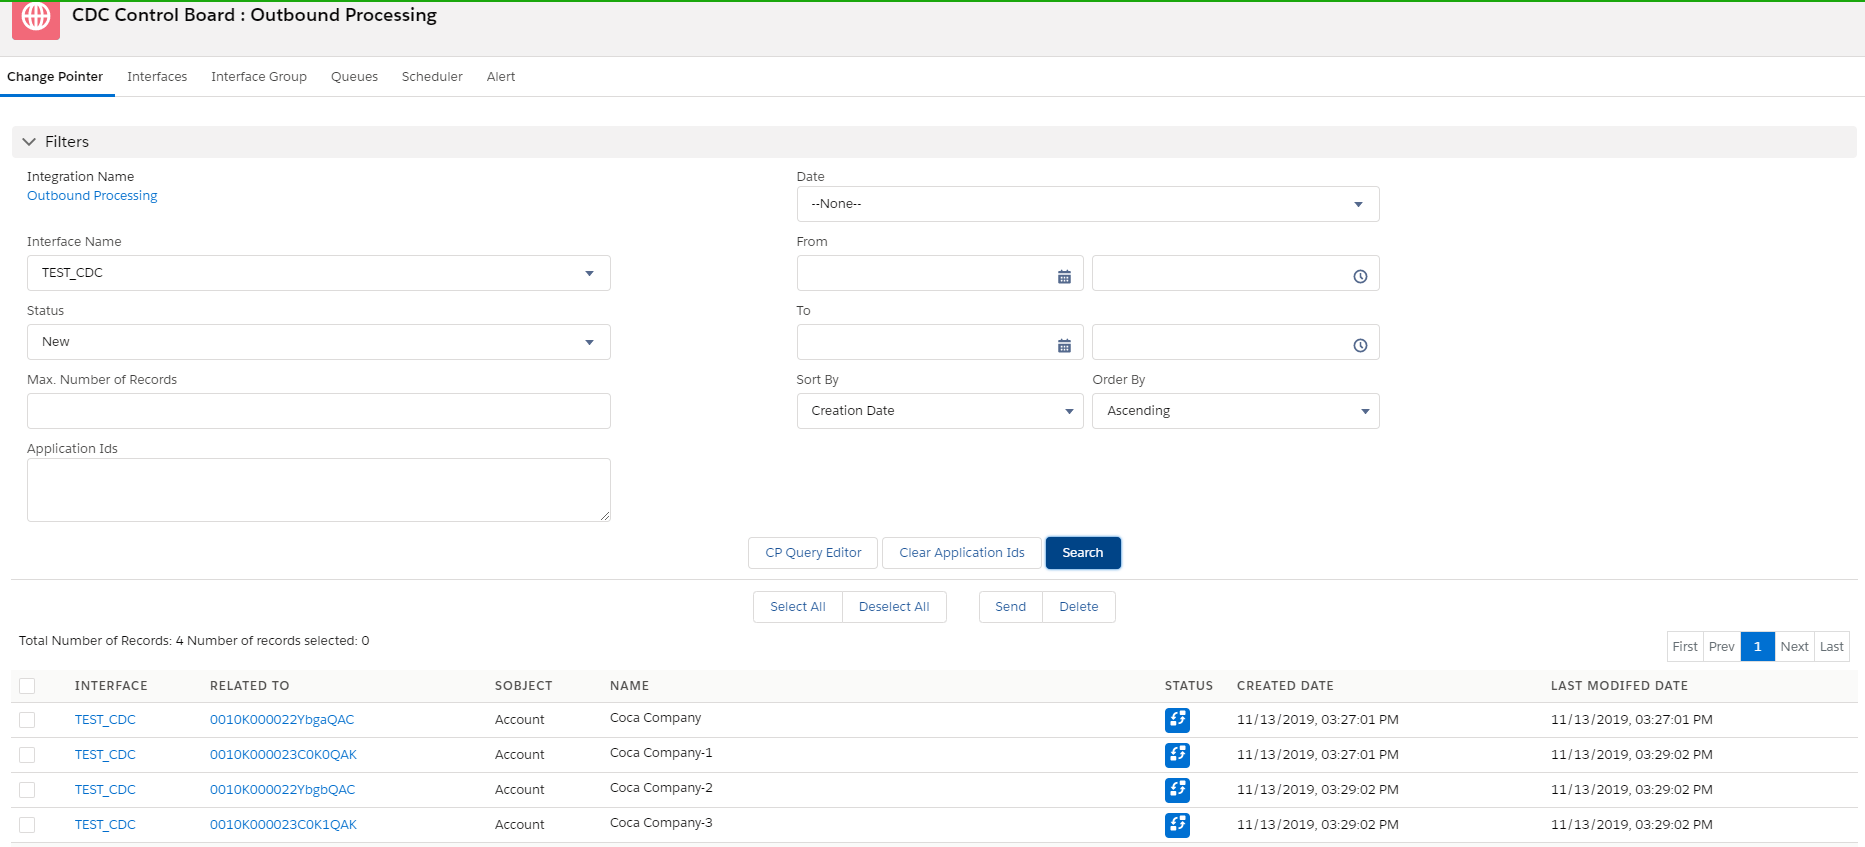
- Select on Change Pointer Tab and apply the filter on Integration Name, Interface Name, Status and click Search
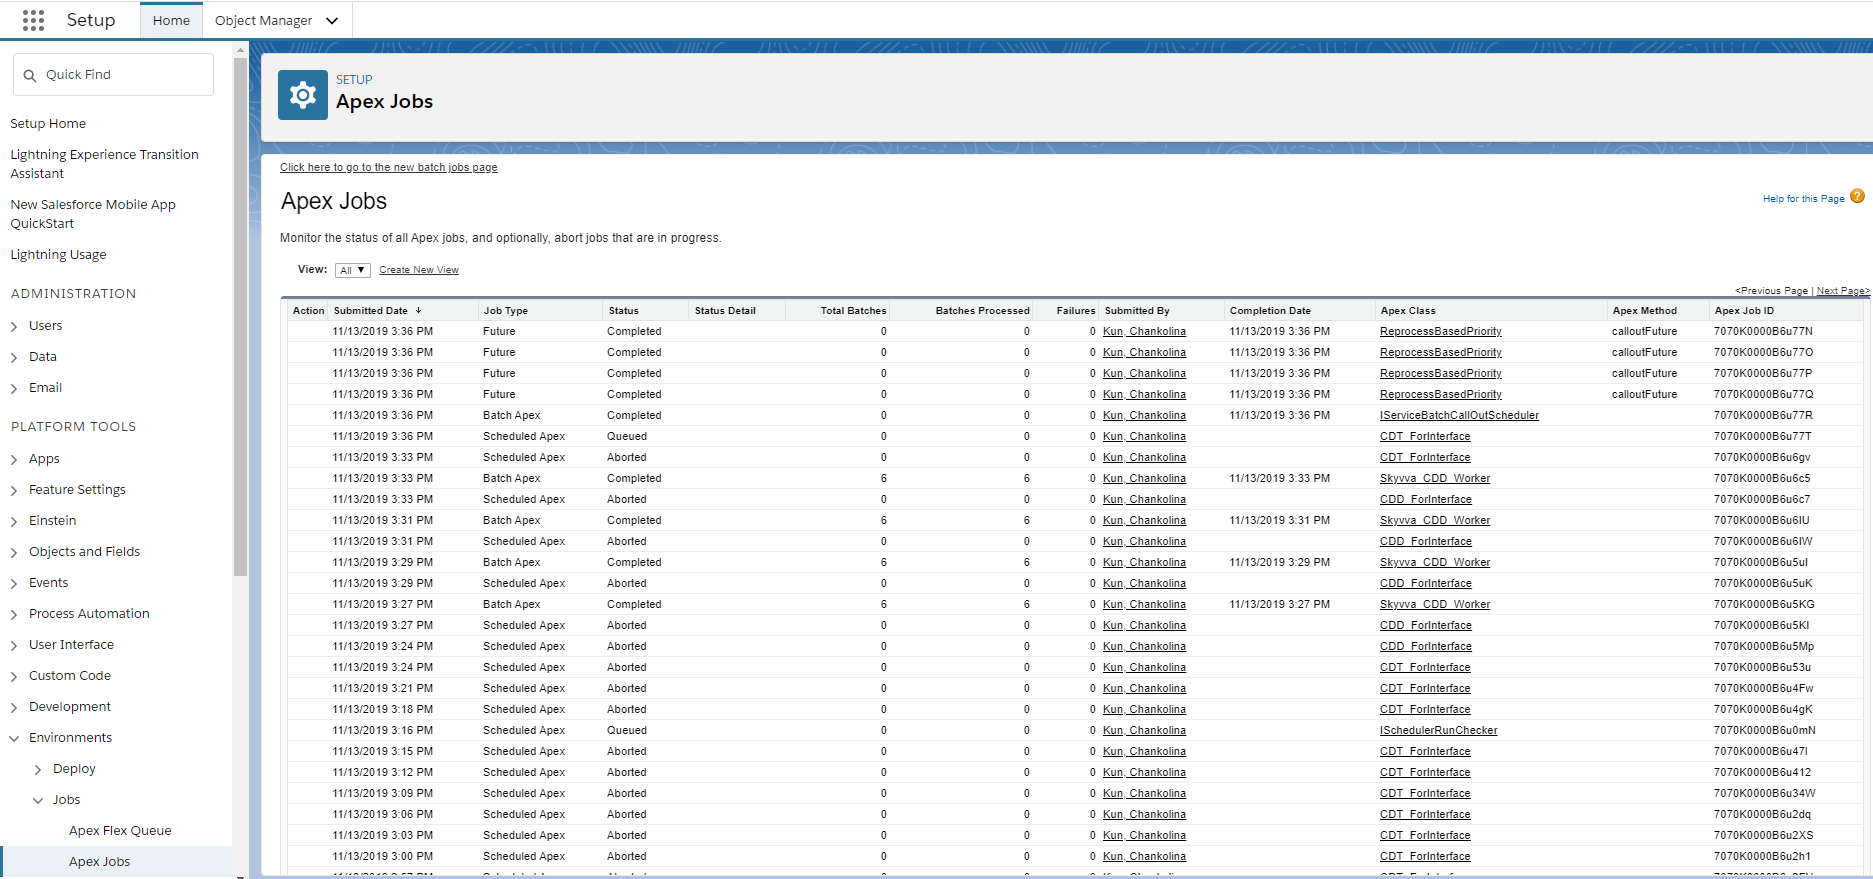
Step 5: Schedule CDT and monitor it on Apex Job
After collecting all the change pointer records you can transfer those records out by using the CDT scheduler. To schedule CDT, just follow some steps below:
- If you are in CDC Control Board, just select on Scheduler Tab and set the time as you wish. Then click the scheduler to start
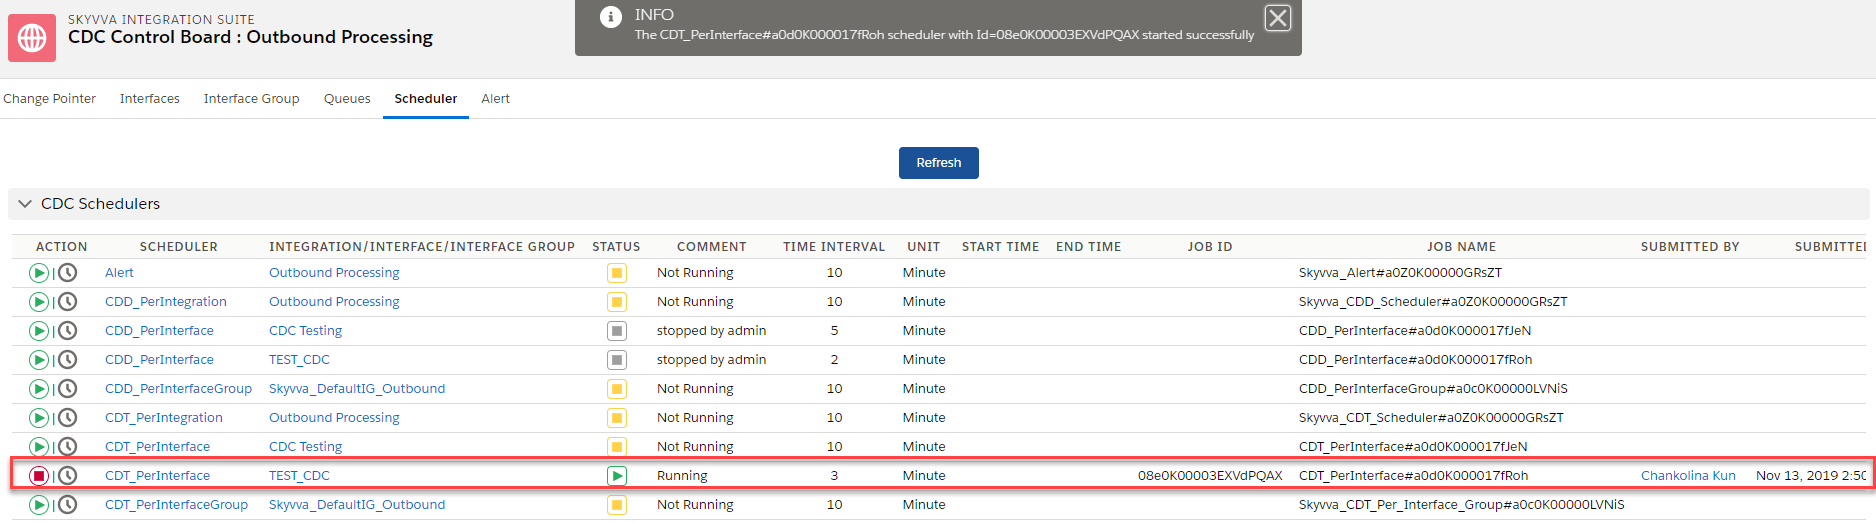
- Enter Apex Jobs Monitoring to see CDT workers:
- Future
- Worker (Batch) Process
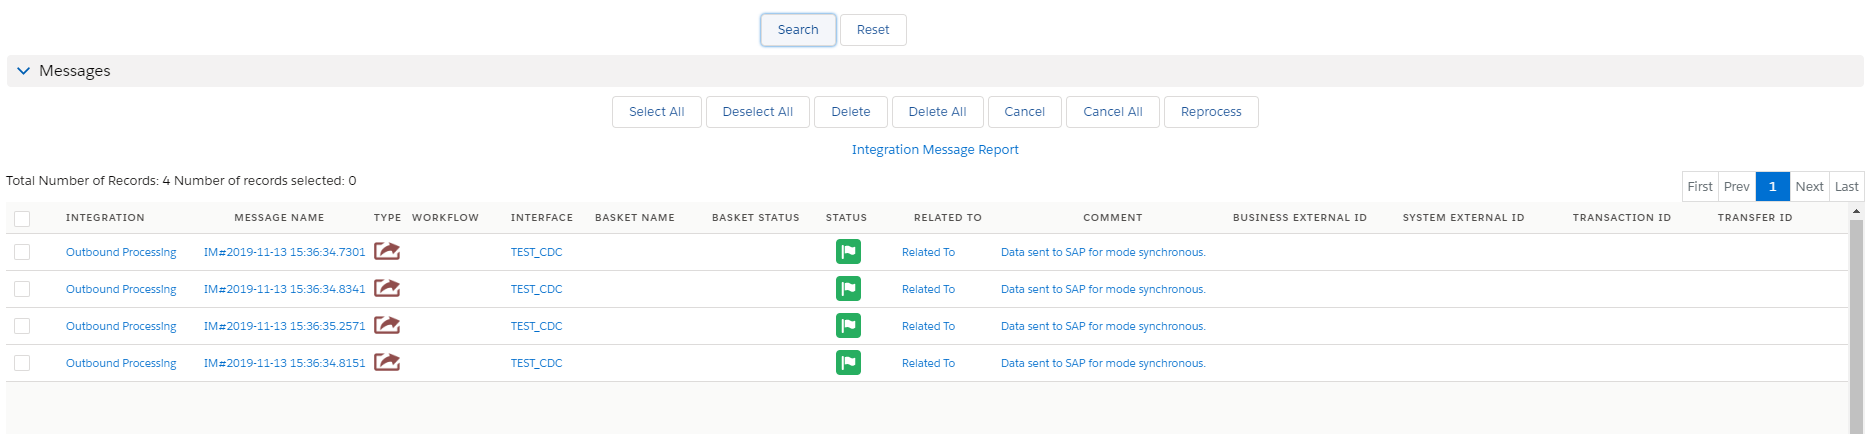
Step 6: Check the result on Message Monitoring Board
- Enter integration detail and click on Message Tab