Posting BAPI to SAP S/4 HANA From Salesforce using Skyvva SAP S/4 HANA Adapter
Importing BAPI/RFC’s from Import SAP metadata
To Import SAP metadata first we need to create SAP Connection in skyvva as shown below
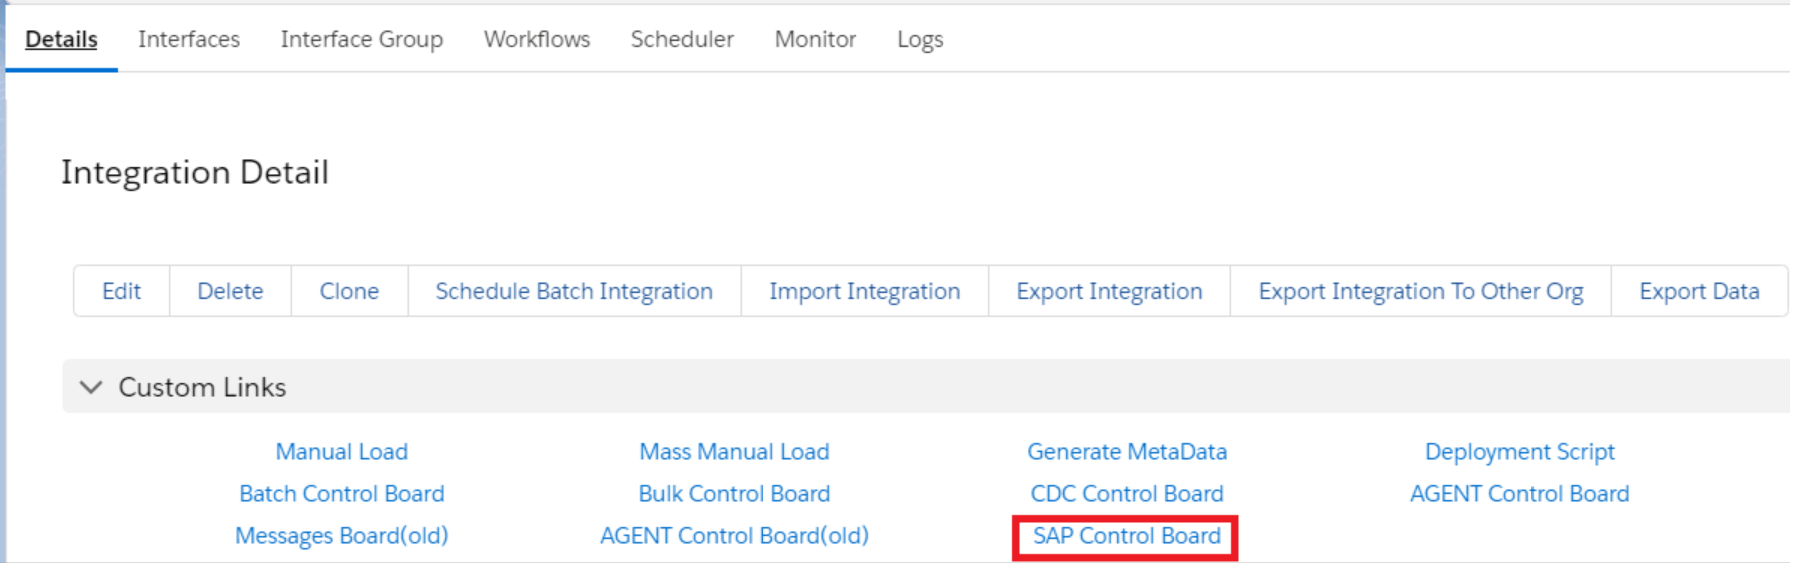
Go to Integration details tab and then select SAP Control Board
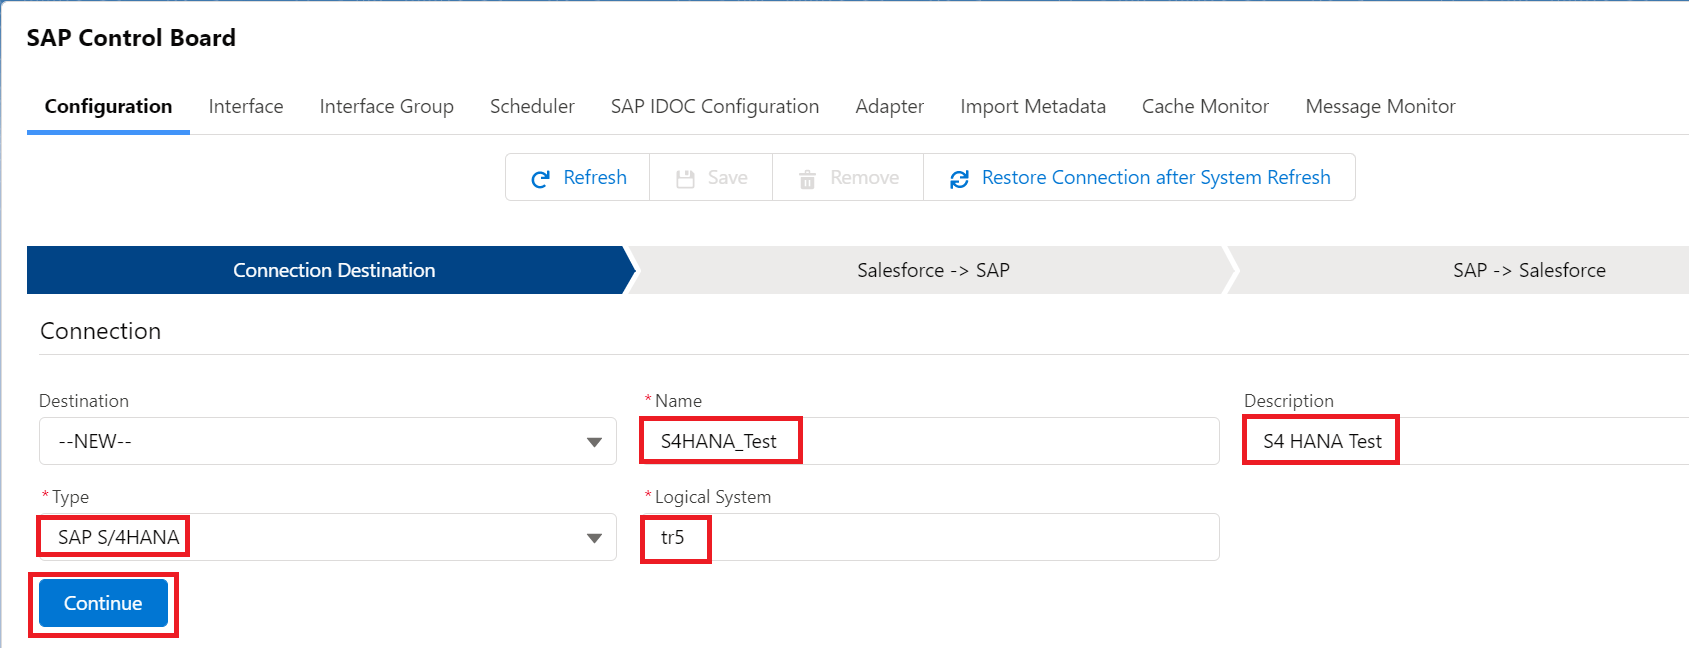
Provide the details as shown for the SAP system
In the Configuration tab. Provide the details
Here we need to provide the sap configuration details as below
Type: SAP S/4 HANA
Deployment: Embedded
Logical System: tr5
Host Url: http://xxxx.com
Port: 16xxx
Username: xxxx
Password: ******
SAPID: System Id
Client: 820
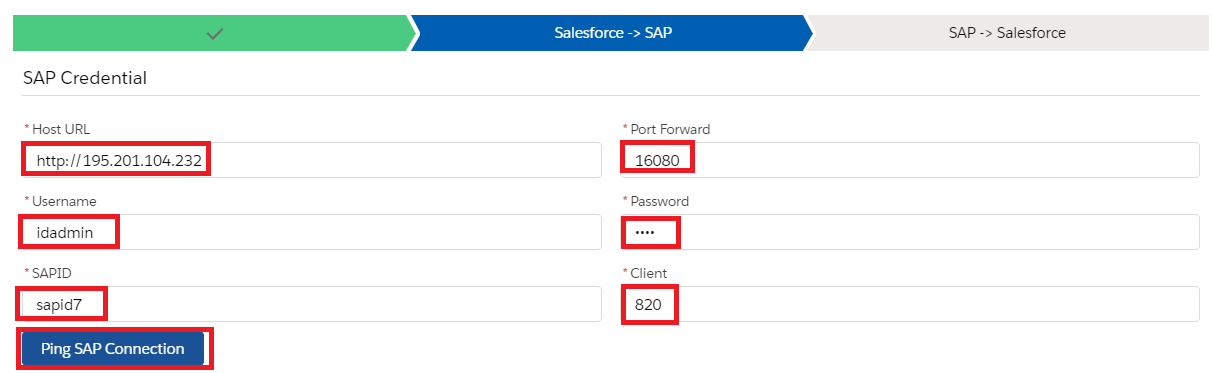
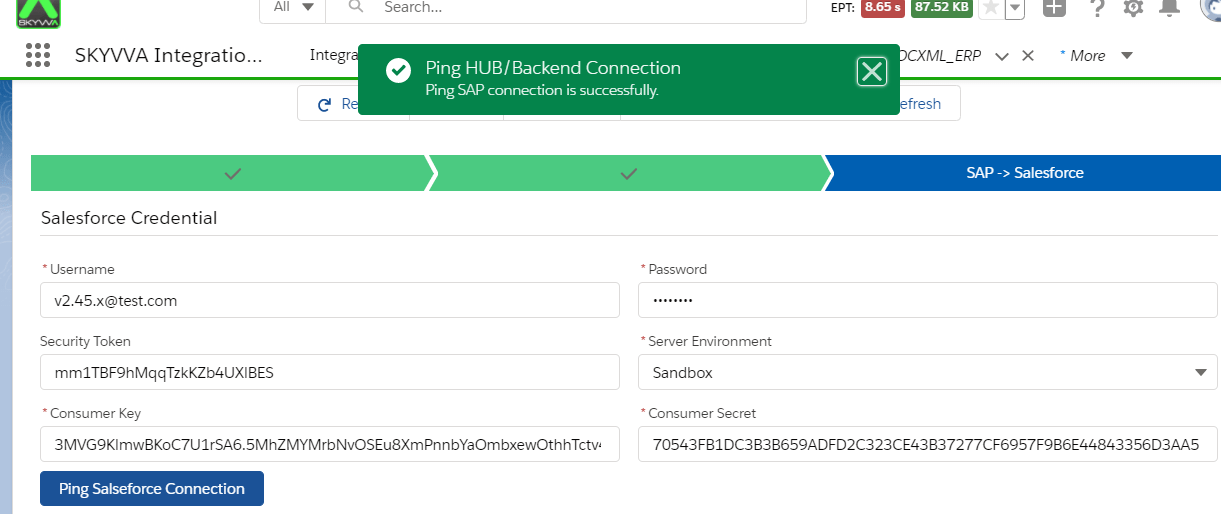
Once we provide the details we need to ping the SAP Connection. Then we can see the pop-up like its successfully connected to SAP Backend.
Now we have to provide the salesforce details as shown below.
Consumer Key and Consumer Secret we can get from the connected App.

Click on Ping Connection of Salesforce to check if its connected successfully.
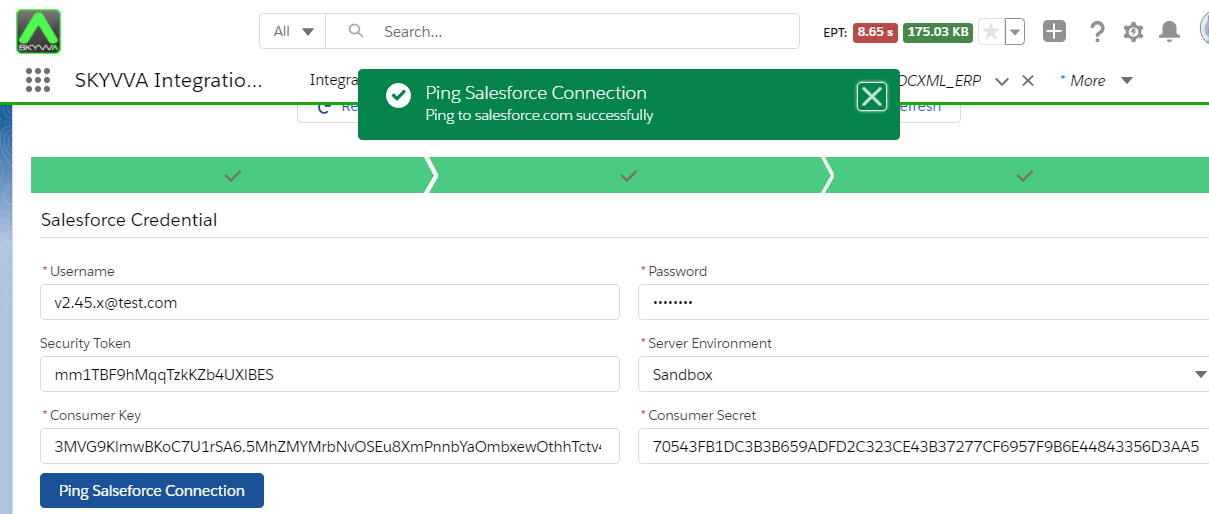
We got the Consumer Key and Consumer Secret from App manager.
With this connection. we can import the IDOC/RFC’s from SAP.
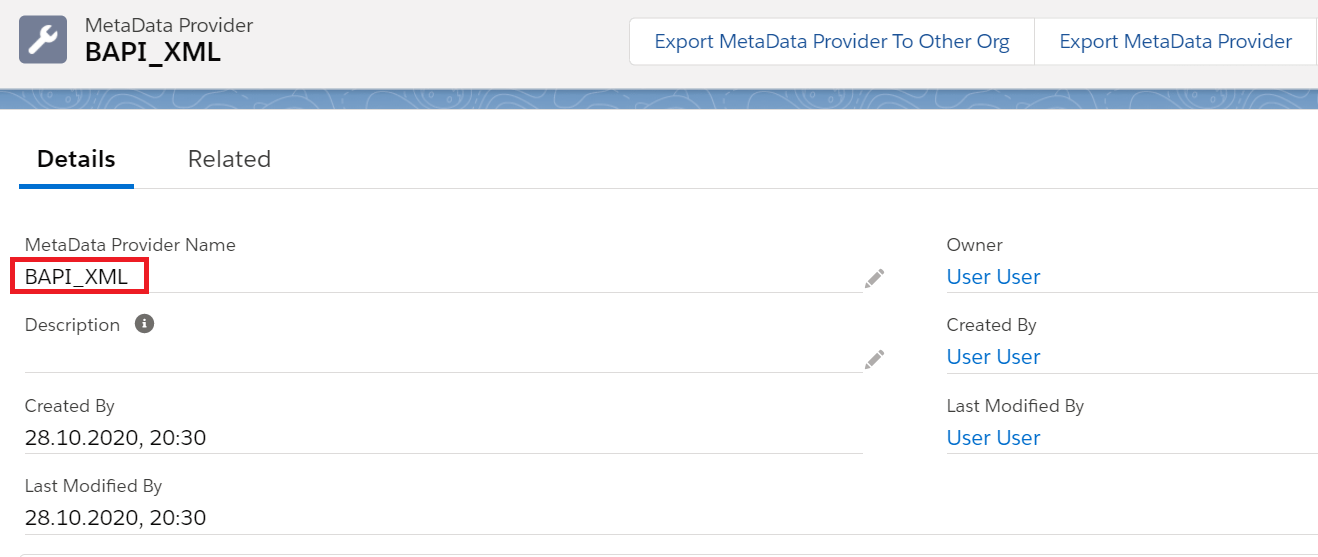
Create Metadata Provider
Create Repository
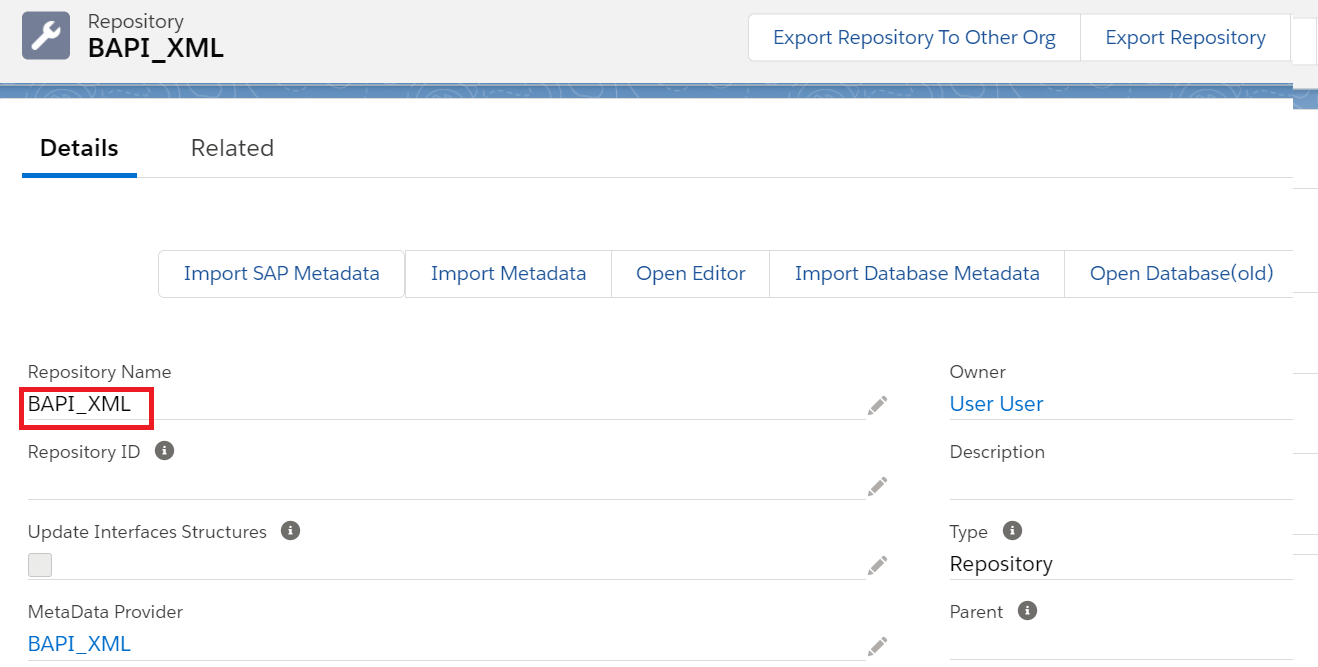
From the Repository Click on Import SAP Metadata Tab
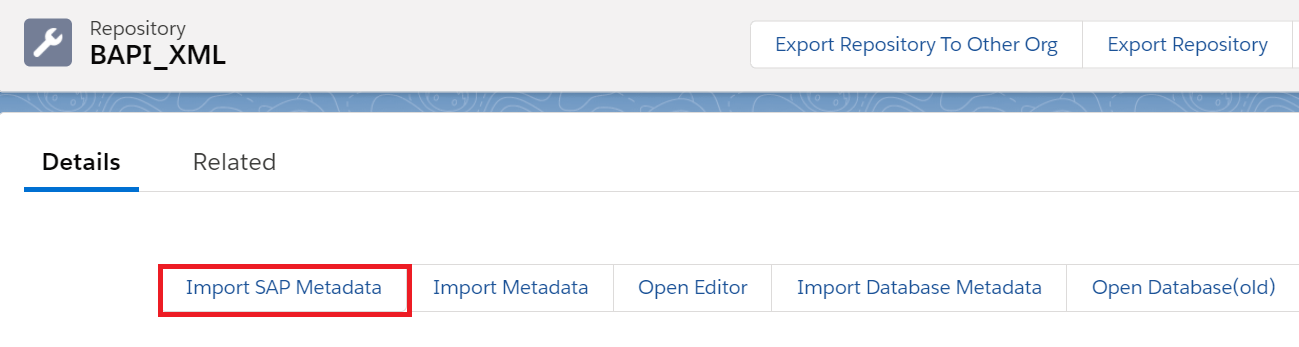
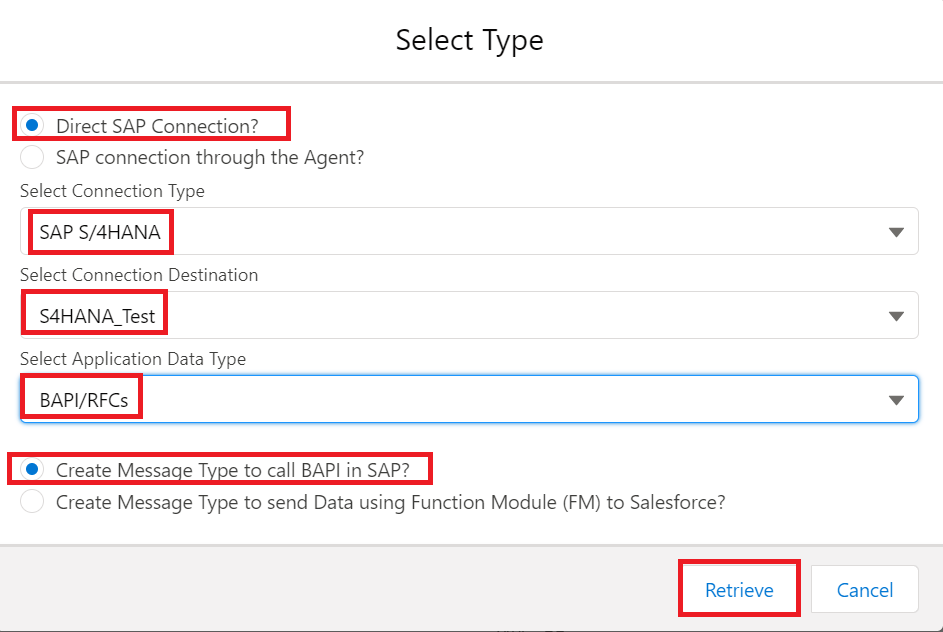
Here we need to give the details of connection type, Connection Destination which we created earlier in the SAP Control Board and Select the Application Data type BAPI/RFC’s and then click on Retrive.
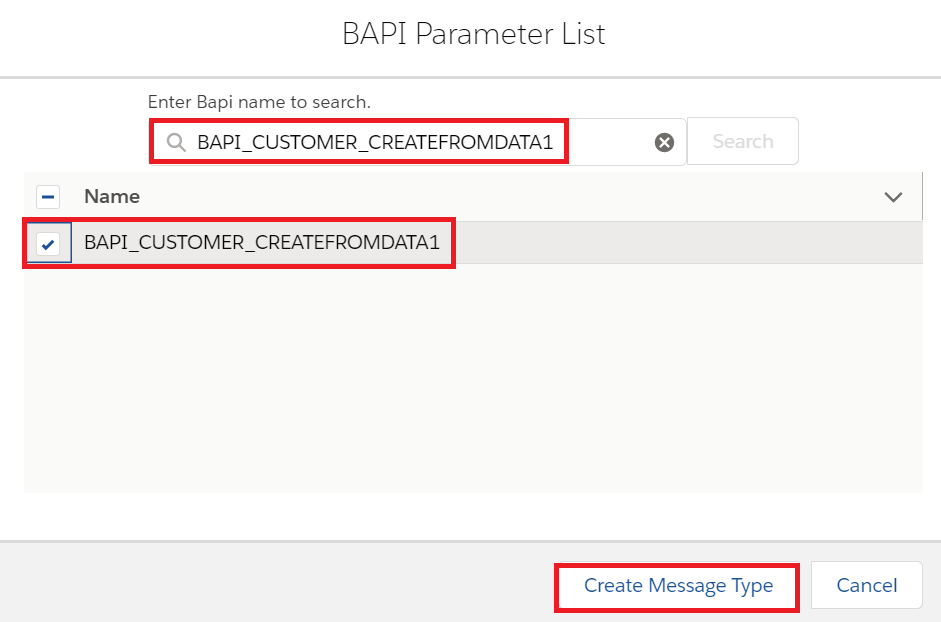
Select the BAPI name to create message type
Below is the message type template for BAPI
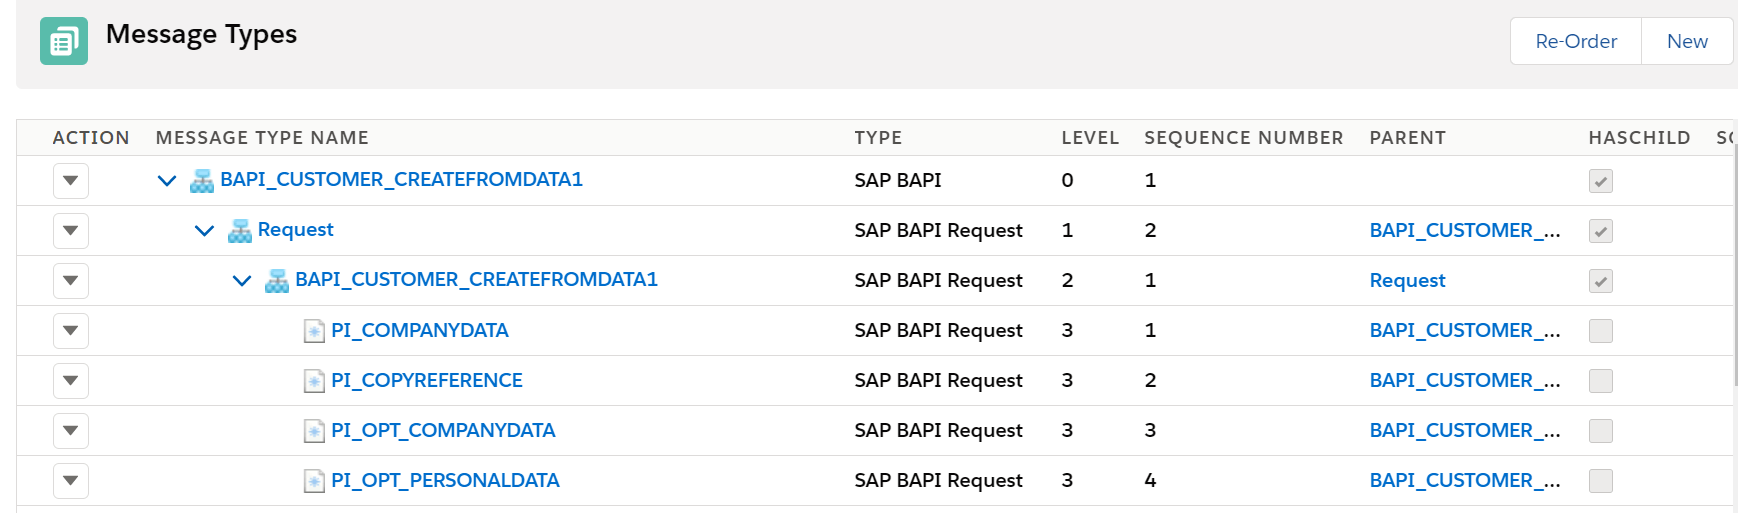
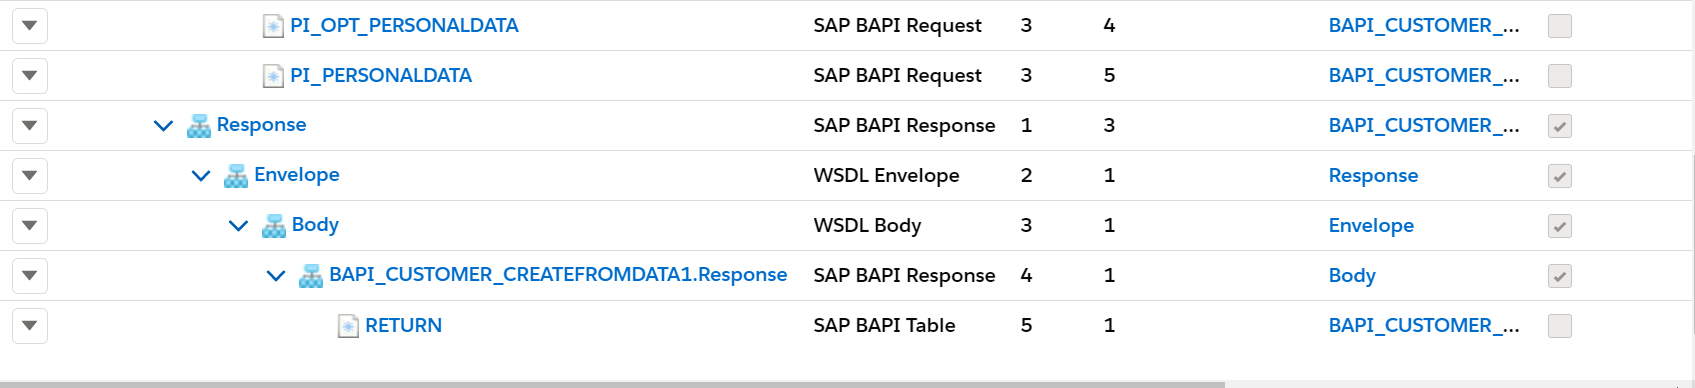
This message type we use in the outbound interface and inbound interface
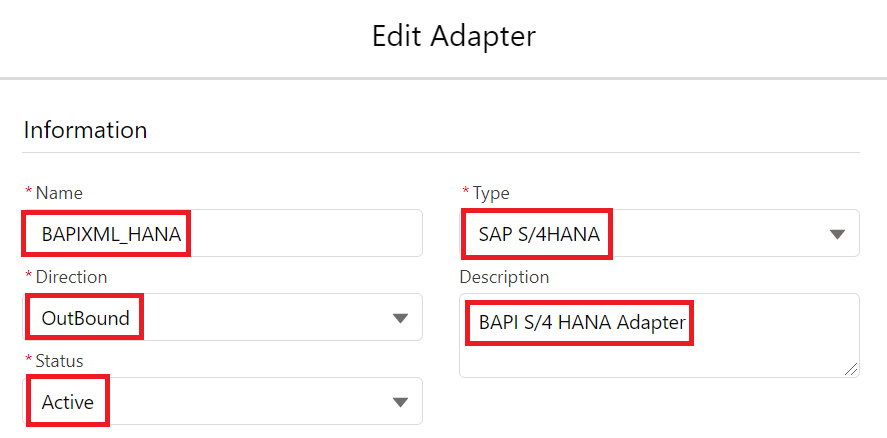
Creating the SAP S/4 HANA Adapter in Skyvva
We need to provide the following details to create the Skyvva SAP ERP adapter
Name – Name of the adapter
Type – SAP S/4 HANA
Description – BAPI S/4 HANA Adapter
Direction – Outbound
Status – Active
Deployment – On Premise
objectFormat – BAPI
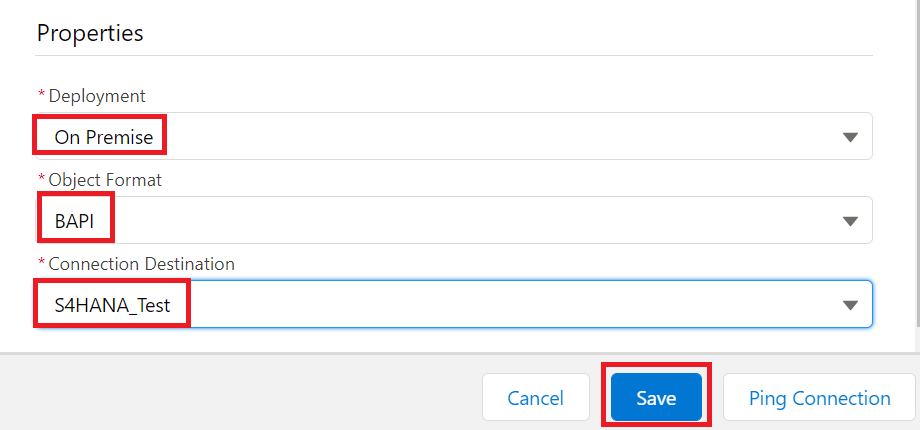
Connection Destination – It means the SAP Connection which we created earlier for the backend connection – S4HANA_Test
Now click on save button to create the adapter.
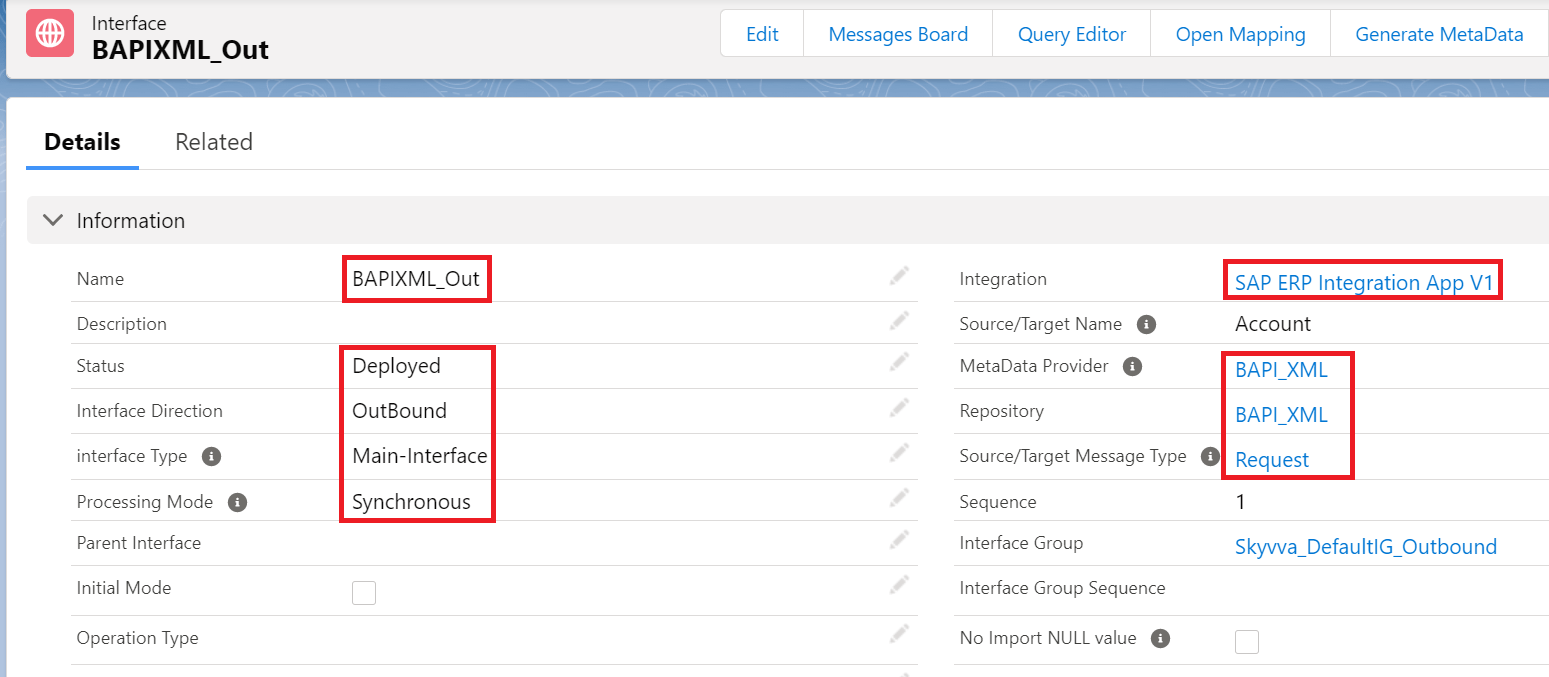
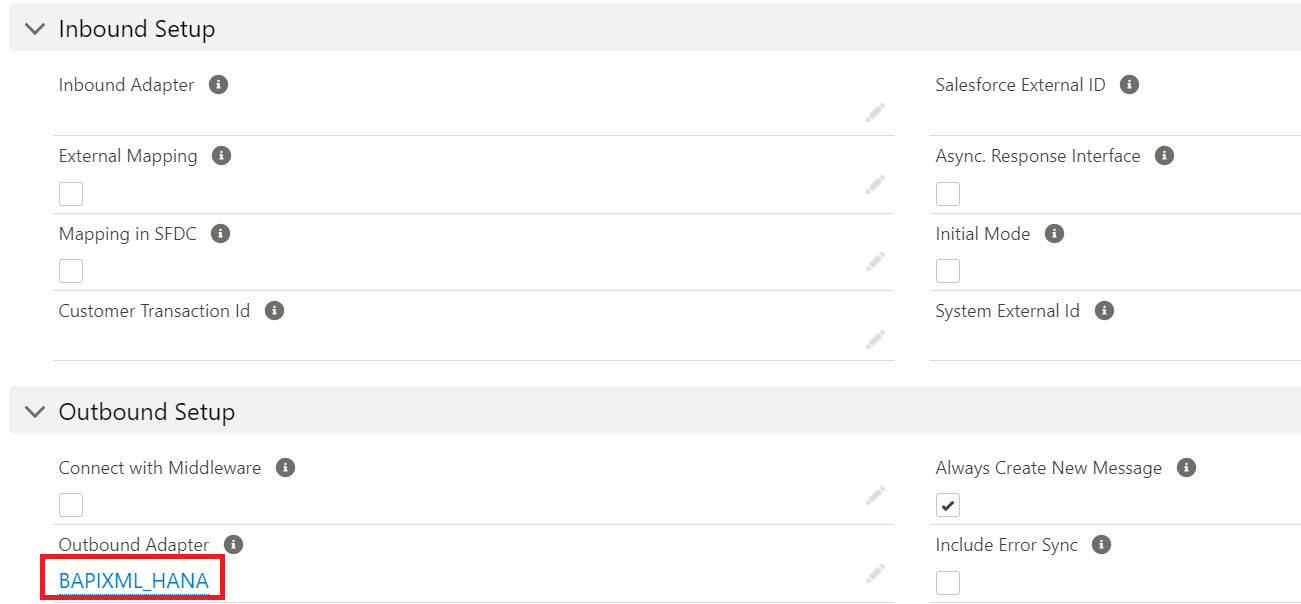
Creating an Outbound Request interface:
Provide the Name, sObject type, Description, Processing mode, Status, Metadata provider, Repository, Message type, outbound adapter and the SQL statement as shown in the screenshots below
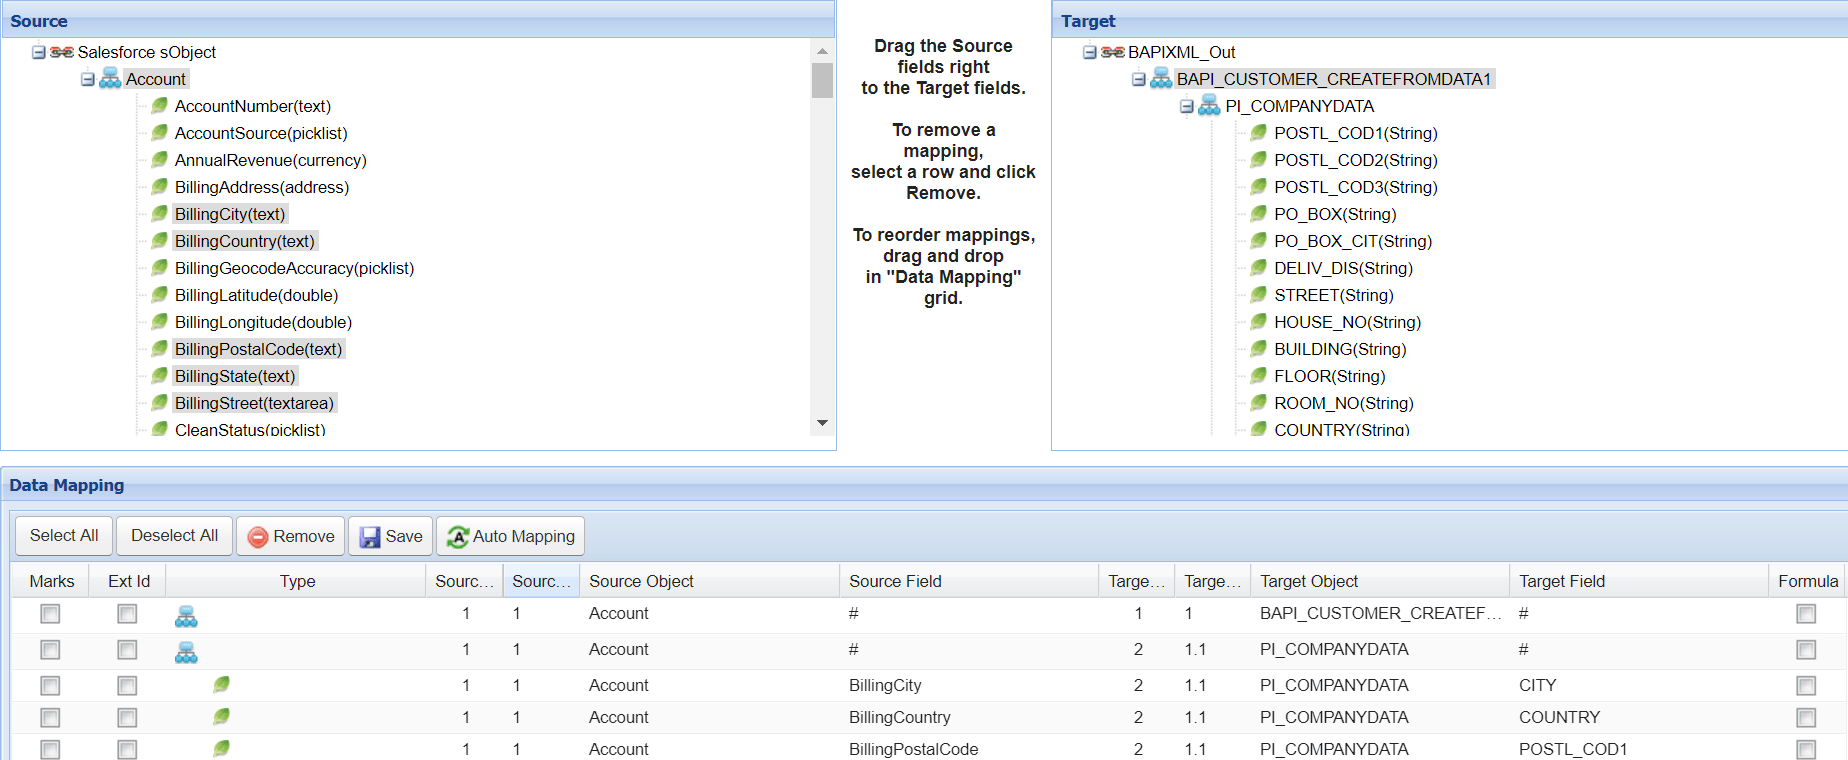
In the message type we have to select the root message type then it will automatically point to Request in the request interface and point to Response in the response interface.
In our example BAPI_CUSTOMER_CREATEFROMDATA1 is the root message type as shown below.


Add the response interface in the request interface.

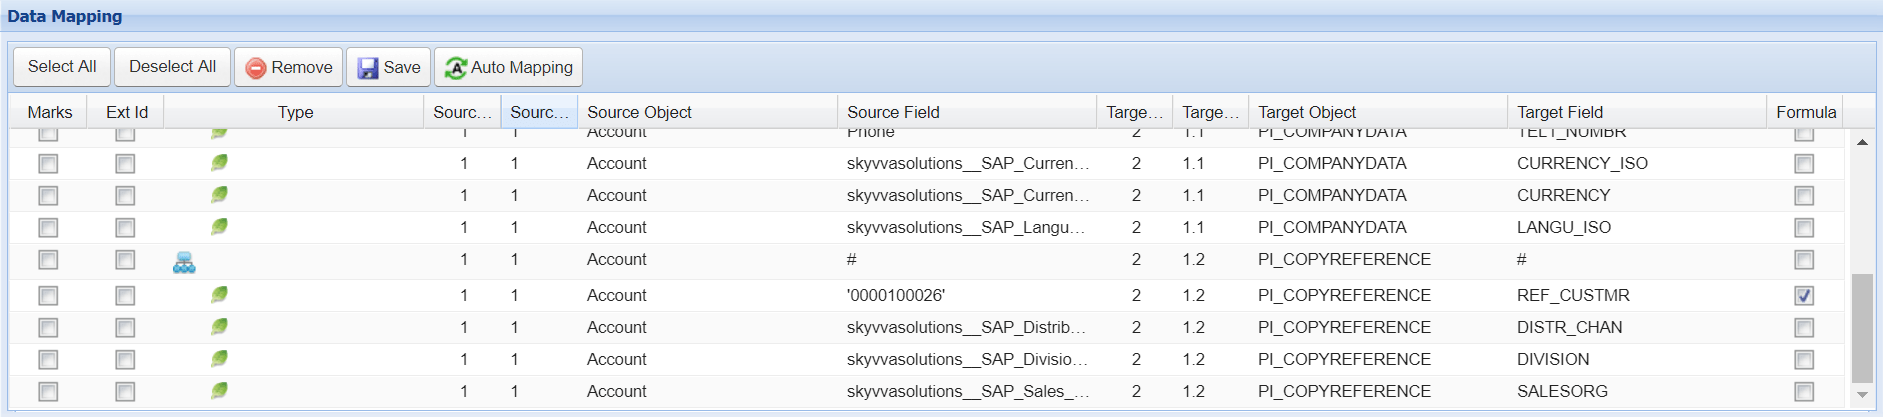
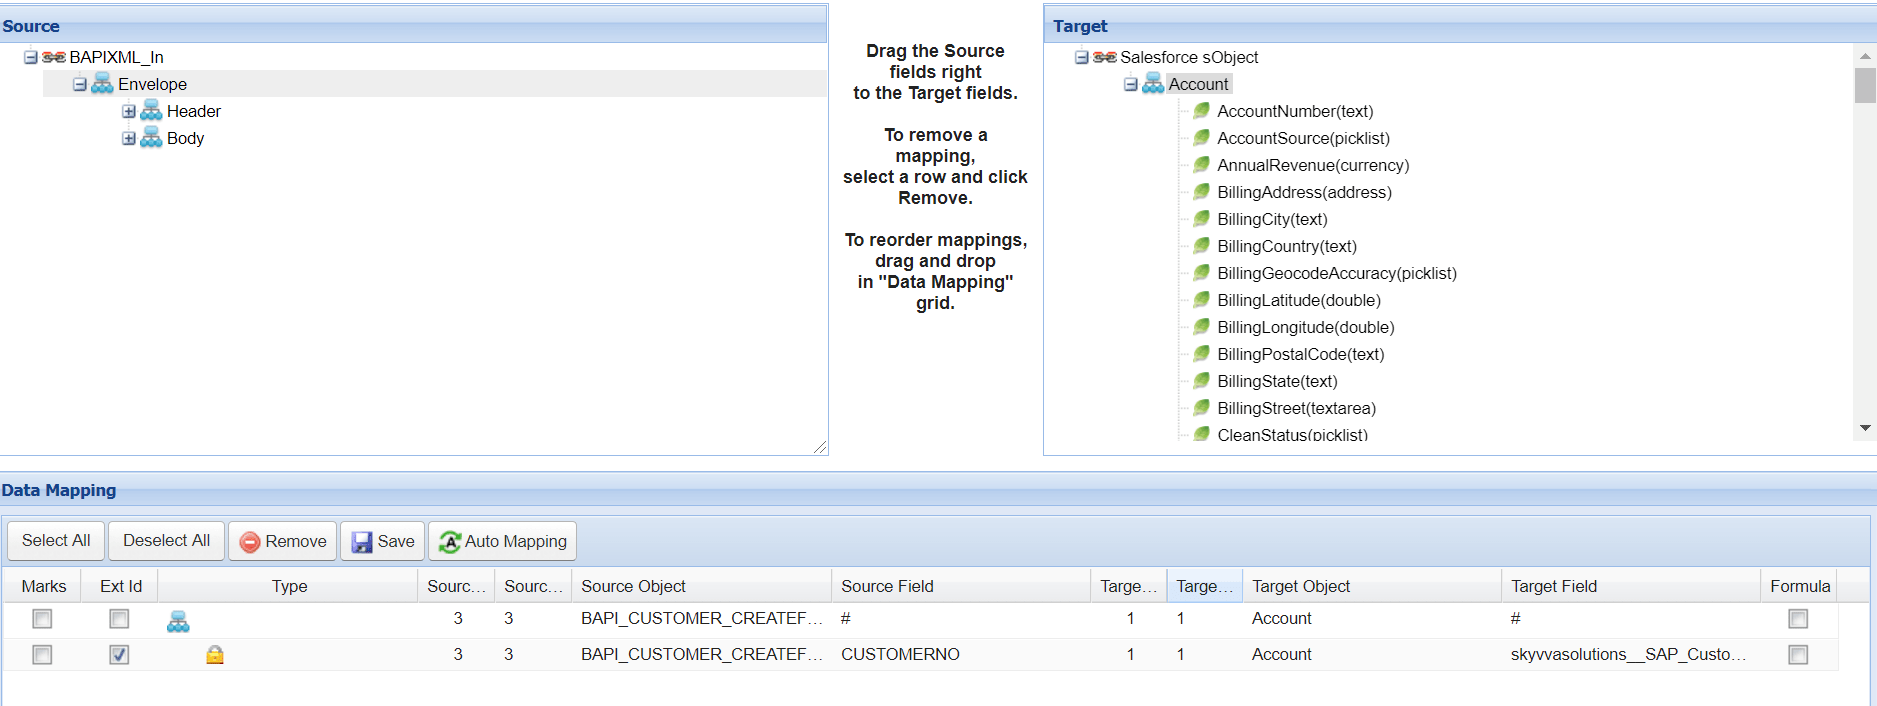
For outbound interface we have to do mapping in Skyvva as shown.
Save the interface once provide all the necessary details.
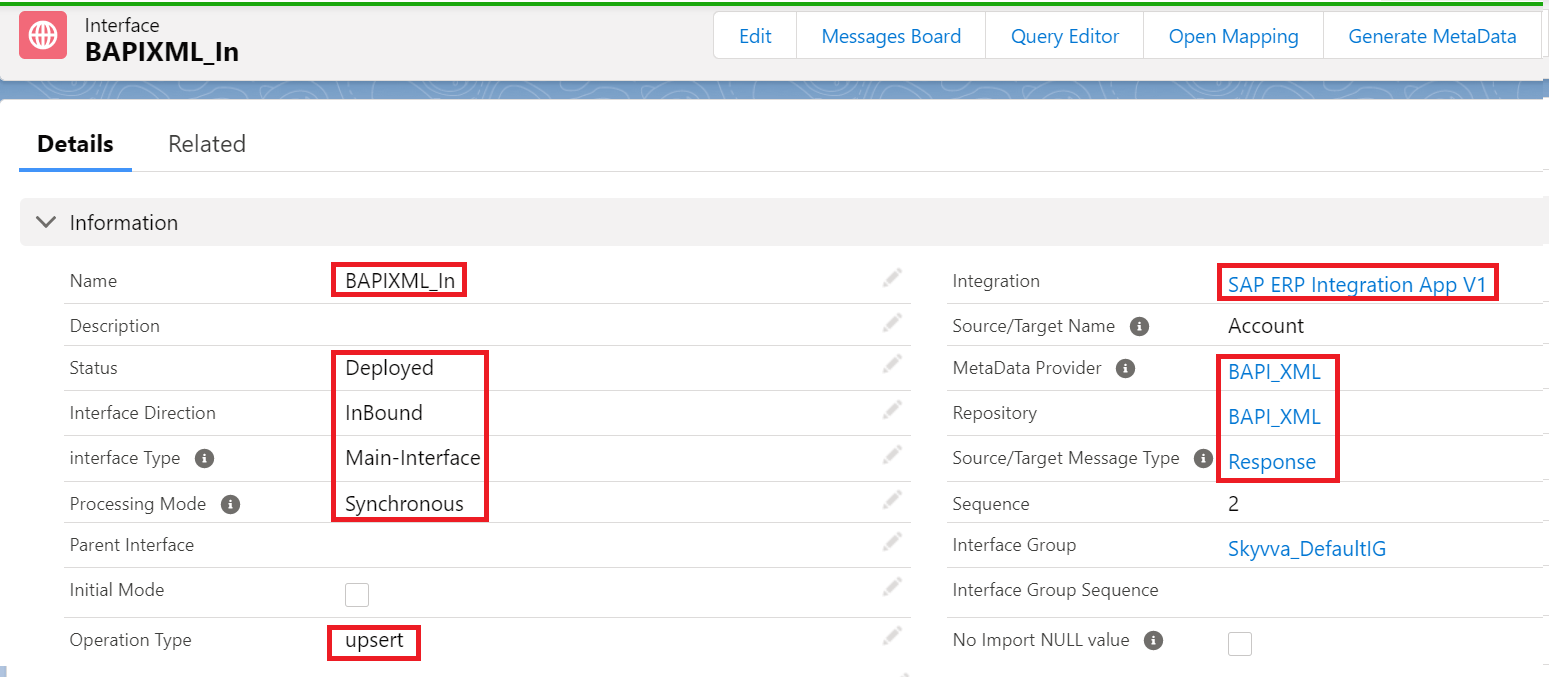
Creating an Inbound Response Interface:
Provide the Name, sObject type, Description, Processing mode, Status, Operation Type, Metadata provider, Repository, Message type as shown in the screenshots below
Do the inbound mapping as shown below.
Now do the callout using below apex code:
skyvvasolutions.CallOutControl c=new skyvvasolutions.CallOutControl();
c.returnXml=true;
c.returnListRecord=true;
c.isCreateMessage=true;
c.actionDoIntegrate=true;
String[] ids=new String[]{‘0013E00001DKgY9QAL’};
skyvvasolutions.Iservices.invokeCalloutV3(‘BAPIXML_ERP’,’BAPIXML_Out’,ids,’SYNC’, c);
Now we can see the message in the message monitor:

Click on Related to as shown in below screenshot

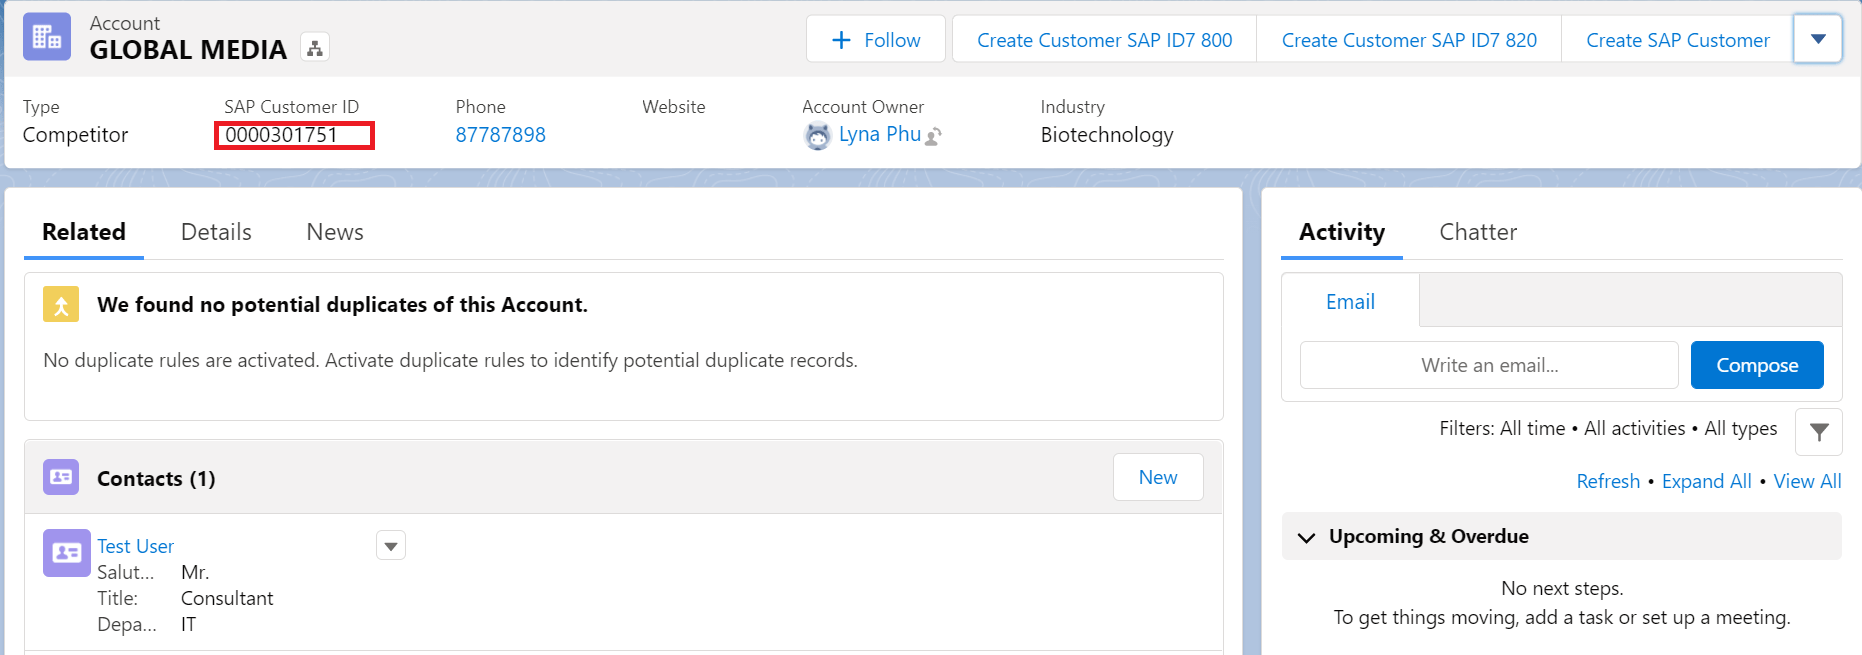
Then we can see the updated customer ID in SKYVVA as shown below