
2.5.1 Database Integration (JDBC) #
Database Integration includes Oracle, SQL Server, Ms Access, and MySQL Integration.
A. SF – Agent: JDBC Oracle Integration
Use Case:
- Users want to synchronize Account data from the Salesforce system to their DBMS system and vice versa.
- In this use case, we use Oracle as DBMS to/from which Account data will be synchronized from/to Salesforce respectively.
Requisites:
- Oracle DBMS has been installed on User-machine
- Integration Agent installed on User-machine
- Salesforce Organization set up for the User
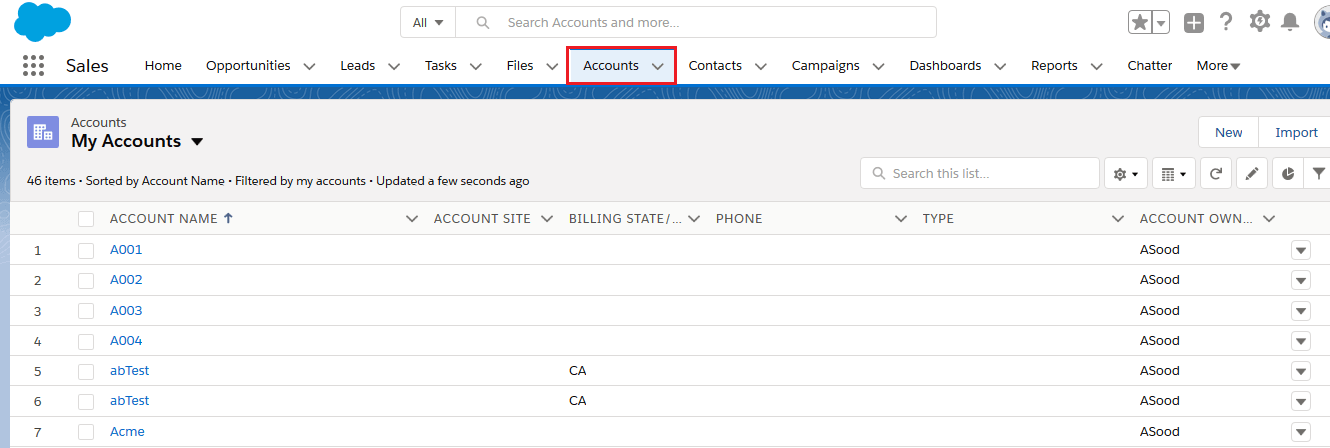
Assume that on Salesforce, there is Account data created today as follows:
- Mappings defined for Account Synchronization (SF-Agent and Agent-SF)
SF – Agent (Oracle)
Agent (Oracle) – SF
- It is required that the client tool for those DBMS exists on the client machine where it will be used for doing batch integration (SF – Agent).
For example, in this case of Oracle, the SQLPLUS.exe tool is required.
In the case of the SQL server, either osql.exe or sqlcmd.exe is required depending on the version of the SQL Server.
- For this version of the Integration Agent, only Oracle and SQL servers are supported.
Implementation:
Step 1: DBMS configuration
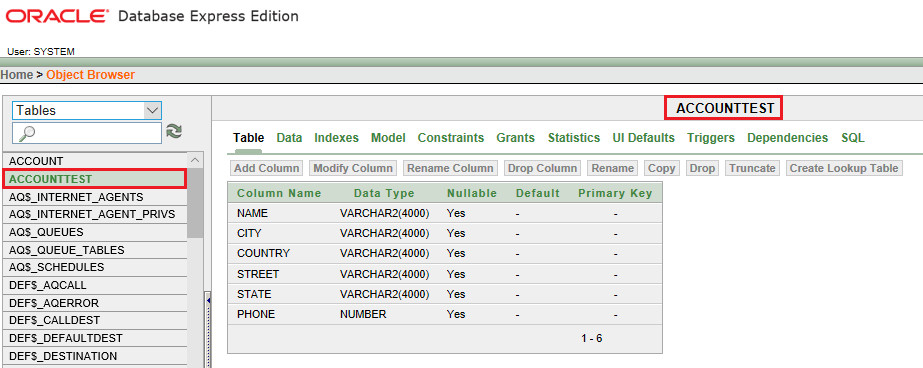
- Log in to Oracle and create a table named “ACCOUNTIN” on Oracle system with the following structures:
Step 2: Agent UI interaction
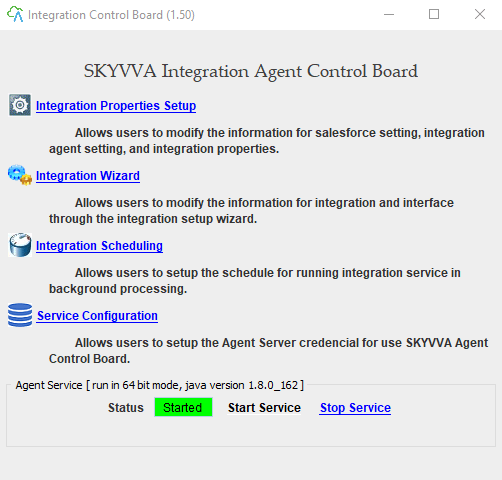
- Run Integration Agent UI
A. Salesforce – Agent Integration:
- Create a New Integration (for SF-Agent integration) as follows:
- Either click the Integration Wizard link on the above figure or
- Integration Properties Setup link as shown in the below figure:
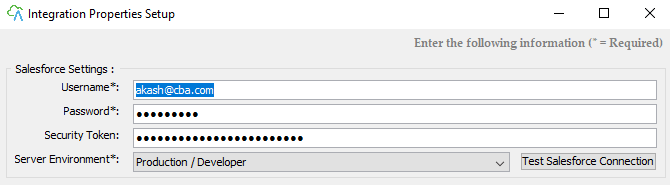
Supply your Salesforce organization info and environment and click “Test Salesforce Connection” for Testing.
- Integration (Agent – SF): this one is used to do integration from Agent to Salesforce
- Integration (SF – Agent): this one is used to do integration from Salesforce to Agent.
We need to create a new integration for SF – Agent by clicking New Integration:
- Choose Integration Direction “SF – Agent” among (SF-Agent; Agent-SF)
- Name your integration
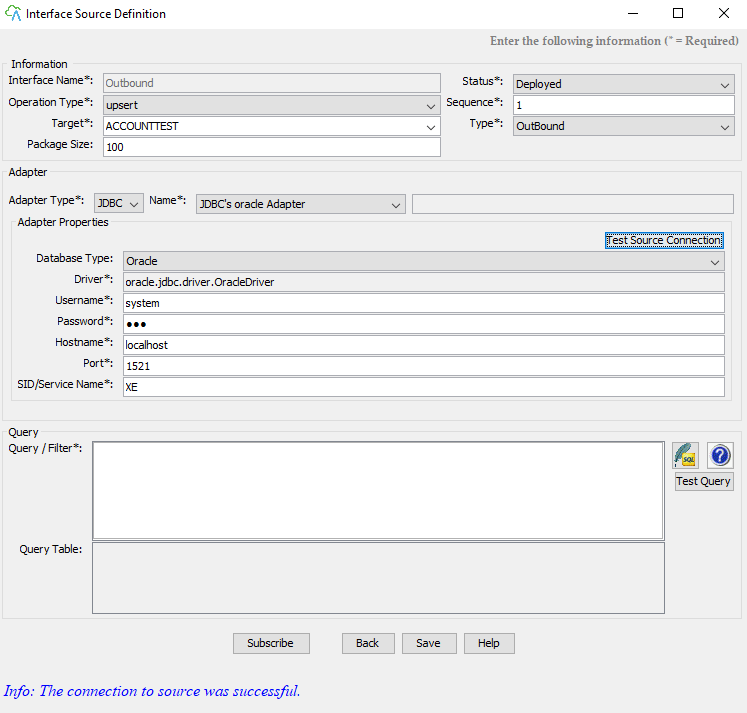
- Choose the appropriate adapter type. Here we use the JDBC adapter and name the adapter
- On Adapter Property information section
- Choose Database Type Oracle among (“Oracle” or “SQLServer”)
- Fill in all necessary information needed to make connections and data manipulation to the Oracle system.
Please see section “FAQs” for more details
- Click “Test Source Connection” to test the connection to the specified Oracle instance
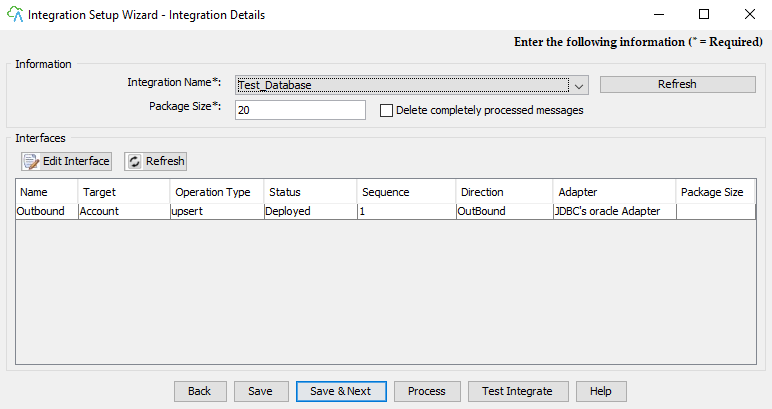
- Click “Save & Next” to save the Integration and its Adapter and Properties and to create a New Interface and fill in all necessary info as shown in the below figure :

- Name the interface
- Status: Deployed
- Choose type “Outbound” among the list (“Inbound”; “Outbound”).
Inbound: for Agent – SF
Outbound: for SF – Agent
- Target: the table name in the Oracle system where we created on Step 1
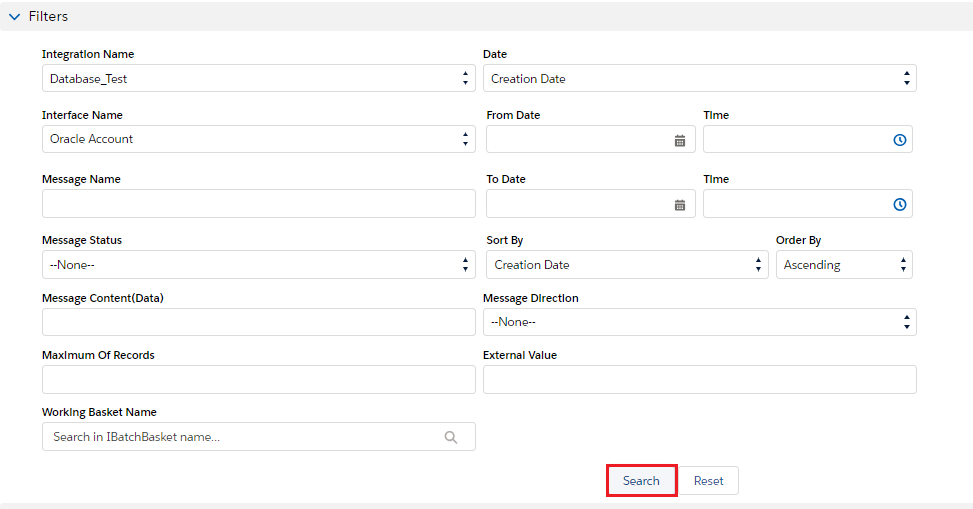
- On the Query section: input the Salesforce SOQL statement. Here select a statement from Account for those created on today.
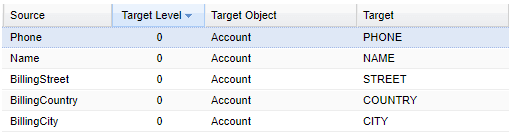
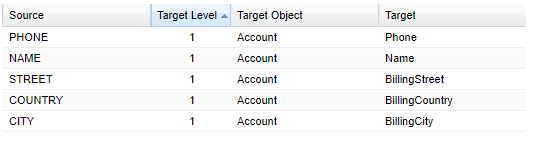
- Click Next to do Mappings as shown in the below figure:
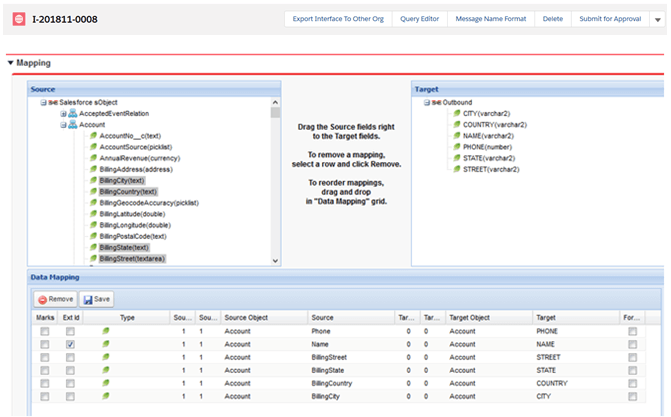
- Click the button “Save” on the Data Mapping grid to save the defined Mappings
- Then click “Process” to test integrate
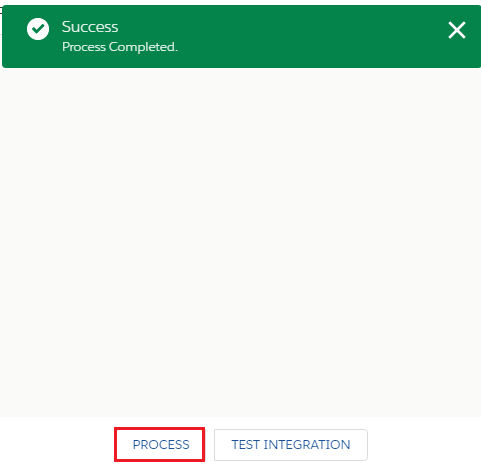
- Click “Test Integrate” to test this interface setup and data integration from Salesforce Account data as shown in the table into the Oracle system on table ACCOUNT.
- Finish completing the wizard. You will be asked as in the figure:
- Click “Yes” to save the integration you have just created on the Integration Properties Setup page.
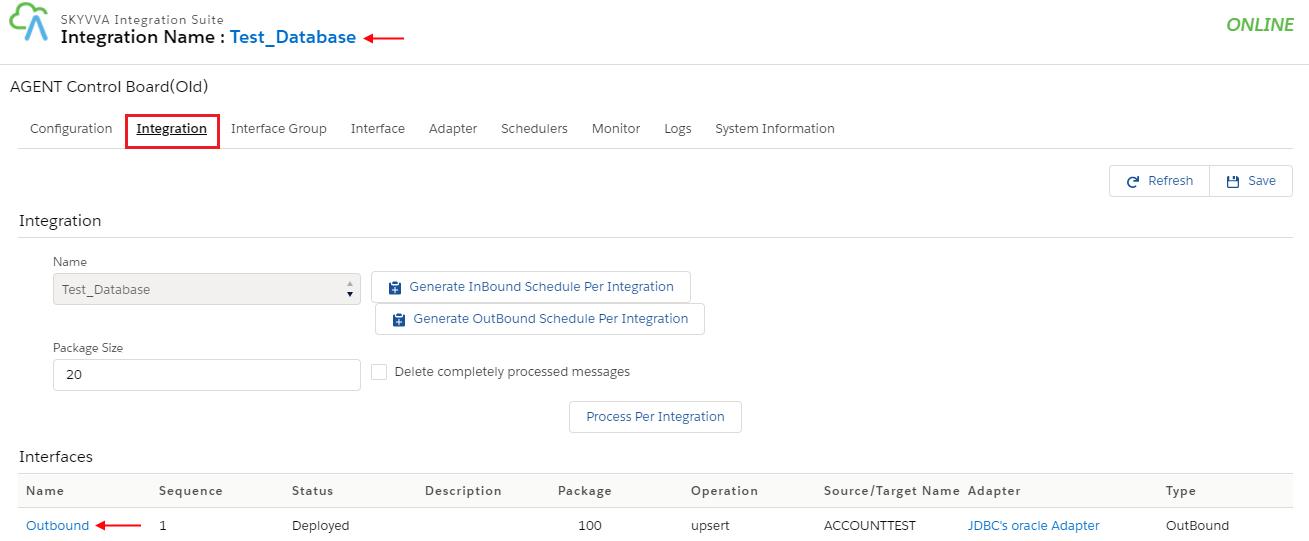
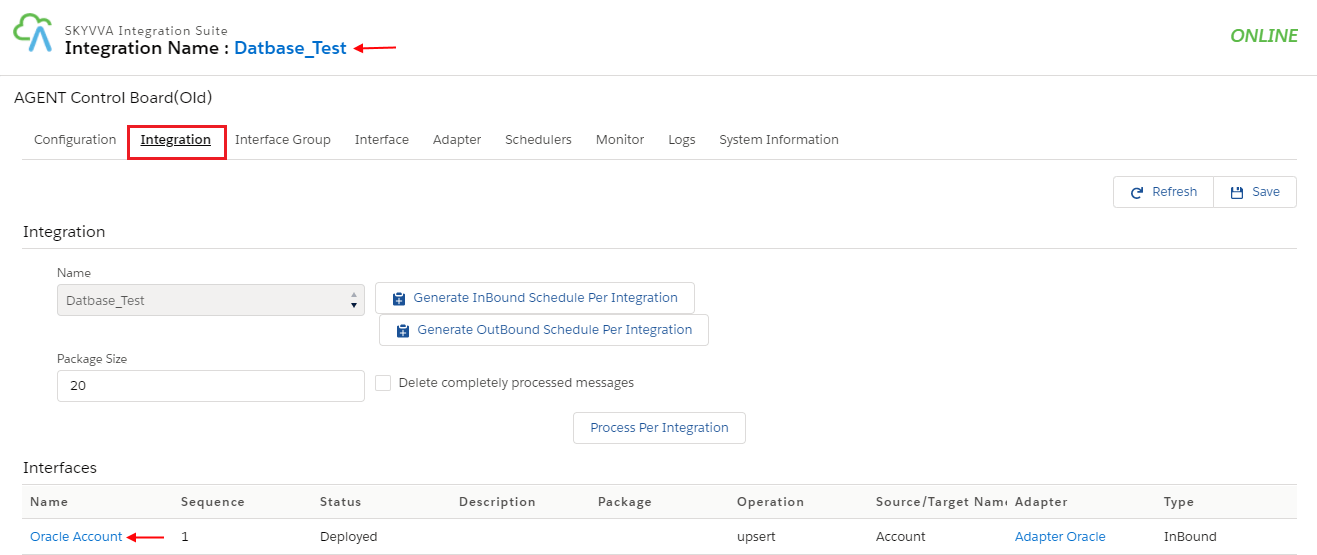
As a result, you will see the figure as shown below:
B. Agent – SF: JDBC Oracle Integration #
Agent – Salesforce Integration:
The process is very similar to Step 2’s A section.
Click “Edit Interface” on the Integration Properties Setup page as shown in the below figure:
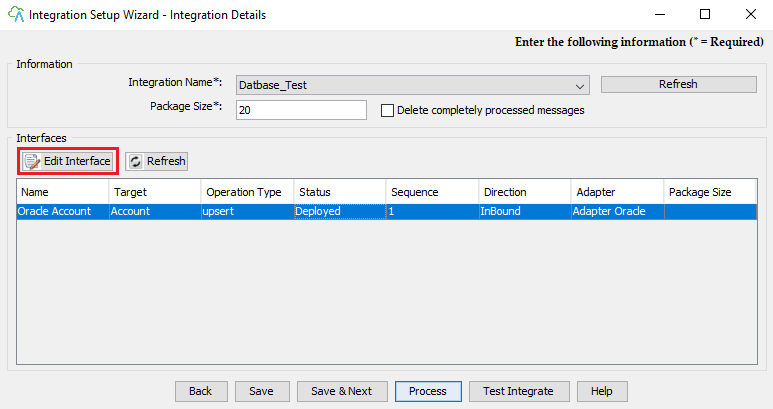
- Choose Integration Direction “Agent – SF” among (SF-Agent; Agent-SF)
- Name your integration
- Choose the appropriate adapter type. Here we use the JDBC adapter and name the adapter
- On Adapter Property information section
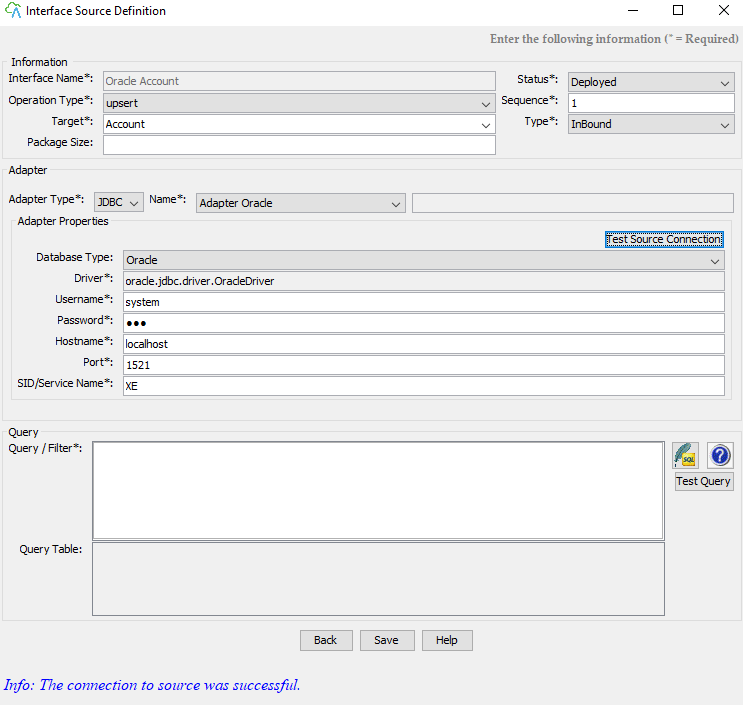
- Fill in all necessary information needed to make connection and data manipulation to the Oracle system
- Click “Test Source Connection” to test the connection to the specified Oracle instance
- Click “Save” to save the Integration and its Adapter and Properties and to create a New Interface and fill in all necessary info as shown in the below figure
- Name the interface
- Status: Deployed
- Choose type “Inbound” among the list (“Inbound”; “Outbound”).
- Inbound: for Agent – SF
- Outbound: for SF – Agent
- Target: the sObject name in the Salesforce system “Account”
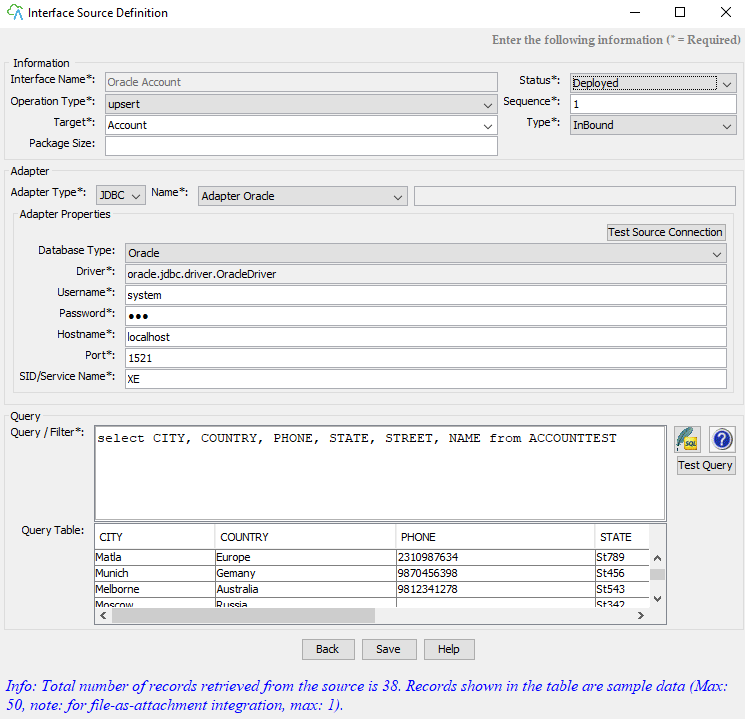
- On the Query section: input the DBMS SQL statement. Here select a statement from ACCOUNT on Oracle.
- Click Next to do Mappings as shown in the figure below:

- Click the button “Save” on the Data Mapping grid to save the defined Mappings
- Then click “Next” to test integrate
- Click “Process” to test this interface setup and data integration from Oracle ACCOUNT Data to Salesforce Account.
- Finish completing the wizard. You will be asked as in the figure:
- Finally, click “Save” to save the configuration onto the Integration properties file
In the figure above, noticeably:
- Integration: the integration id of Agent – SF
- IntegratonSF2Agent: the integration id of SF – Agent
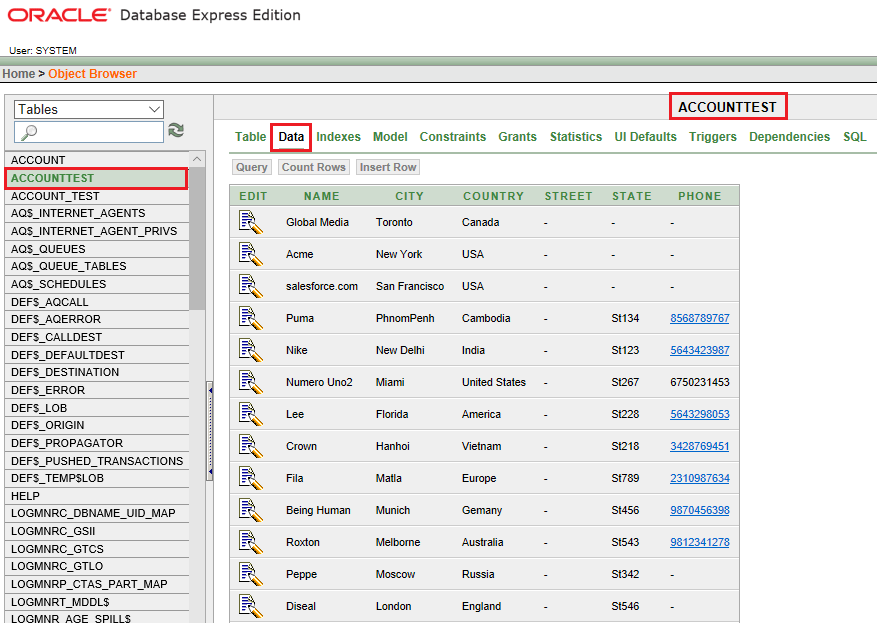
1-Oracle Monitoring:
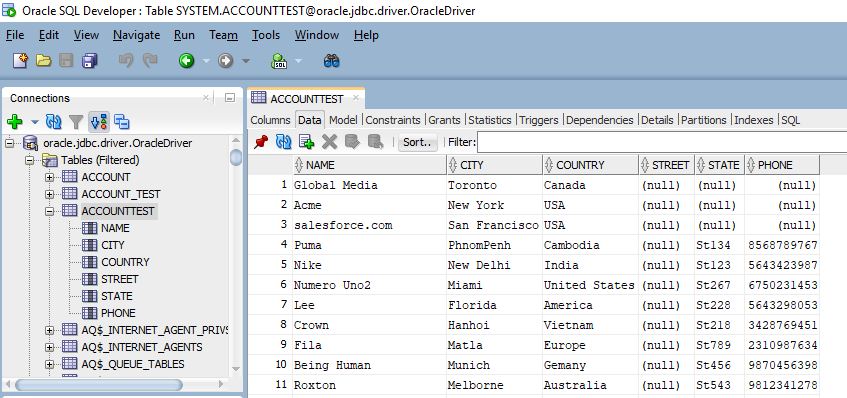
- Log in to the Oracle if not logged in and check the Account data, you will see :
2-Salesforce Monitoring:
- Login to the Salesforce instance
- Go to the integration “SF2Agent Integration 122010” for Salesforce – Agent integration and “Agent2 SF Integration 122010” for Agent – Salesforce integration
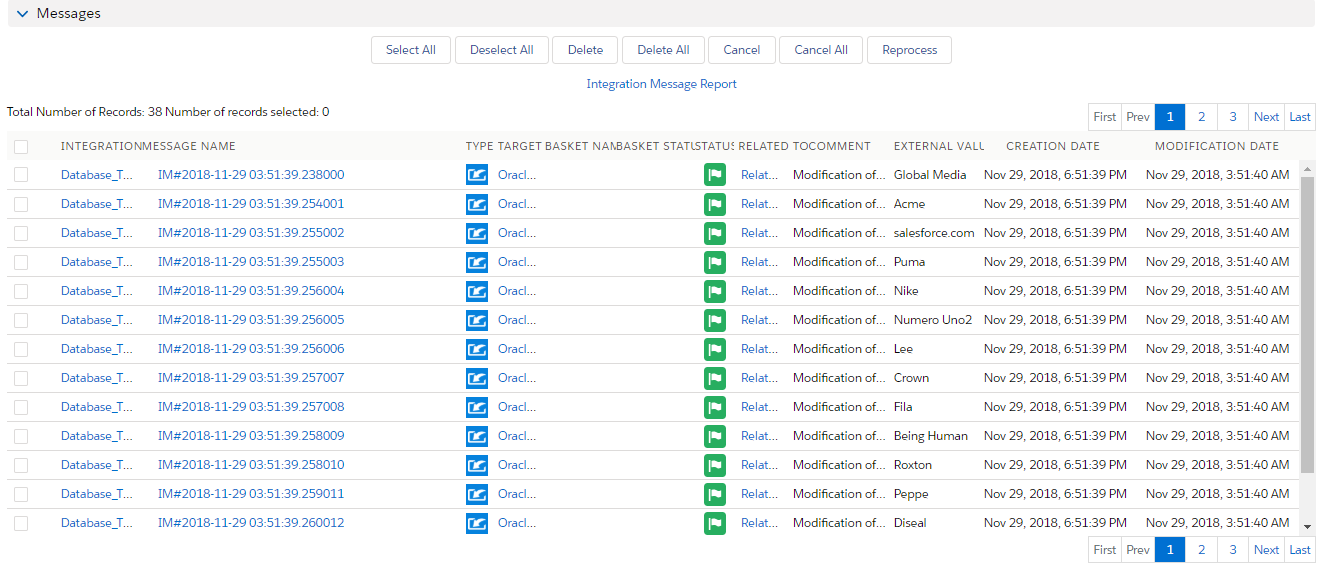
- See their Messages Board

C. MySQL Integration
- Pre-Integration: Check whether MySQL service is running and the required tool for integration has been installed along with the MySQL installation. The tool required for the batch process is “mysql.exe” in the directory “C:\Program Files\MySQL\MySQL Server 5.5\bin
- Integration Adapter properties:
- Data Source Name: (ODBC type) data source specified in the ODBC configuration of the computer
- Username: user name to log in to MySQL
- Password: password to login to MySQL
- Hostname: host address of MySQL server.
Ex. “localhost” for the server installed in the current agent computer
- Port: port number of the MySQL server, 3306 by default.
- Database Name: Name of the database you wish to integrate.
D. Oracle Integration #
- Pre-Integration: Check whether Oracle service is running and the required tool for integration has been installed along with the Oracle server installation. The tool required for the batch process is “sqlplus.exe” in directory “C:\oraclexe\app\oracle\product\10.2.0\server\BIN”
- Integration Adapter properties:
- Data Source Name: (ODBC adapter type) data source specified in the ODBC configuration on the computer
- Username: user name to log in to Oracle
- Password: password to login to Oracle
- Hostname: host address of Oracle server.
Ex. “localhost” for the server installed in the current agent computer
- Port: port number of the Oracle server, 1521 by default.
- SID/Service Name: Name of Oracle Service or SID (Service ID).
E. SQL Server Integration
1. Pre-Integration: Check whether Oracle service is running and the required tool for integration has been installed along with the Oracle server installation.
a. For SQL 2000, the tool required for the batch process is “osql.exe”
b. For SQL 2005 or higher, the tool required for the batch process is “sqlcmd.exe”
2.Integration Adapter properties:
- Data Source Name: (ODBC adapter type) data source specified in the ODBC configuration on the computer
- Username: user name to log in to SQL Server
- Password: password to login to SQL Server
- Hostname: host address of SQL Server.
Ex. “localhost” for the server installed in the current agent computer
- Port: port number of the SQL Server. By default, the value is 1433 for SQL Server 2000, and 2934 for SQL Server 2005 or higher
- Database Name: Name of the database you wish to integrate.
- Server Instance: Instance name of the SQL Server.
F. Access Integration
1. Pre-Integration: Make sure Ms Access has been installed on the computer, and the database file format supported for the integration is 2003 file format.
2.Integration Adapter properties:
- Data Source Name: (ODBC adapter type) data source specified in the ODBC configuration on the computer
- Username: user name to log in to Ms. Access
- Password: password to login to Ms. Access
- URL: URL for access to Ms. Access.


