
Learning Objectives #
- About Auto launched
- Flows
What is Auto launched?
Auto-launched Flow is leveraged to automate complex business processes without writing code. It can be auto-launched from Apex class or Process Builder when a record is changed while inserting, updating, or deleting. This flow type doesn’t require any user interaction to start. They won’t include steps, screens, or dynamic choices in the flow.
What are Flows?
A flow is the part of Salesforce Flow that collects data and performs actions in your Salesforce org or an external system. Salesforce Flow provides two types of flows: screen flows and auto-launched flows. To automate a business process that collects data from people, use a screen flow. For example, create a guided tutorial or wizard with screens. To launch a flow internally when the record changes or when a user clicks a button, use an auto-launched flow. For example, add automation to your page or app to perform an action to a record when a user clicks a button.
Prerequisite:
Before creating the Salesforce Auto Launched flow, there are some properties you must know:
- Create Integration
- Create Interface
- Mapping
What is Integration and how to create it?
Here is the step to use the Operation Auto launched Flow:
Step 1:
Create a Flow with type auto launched
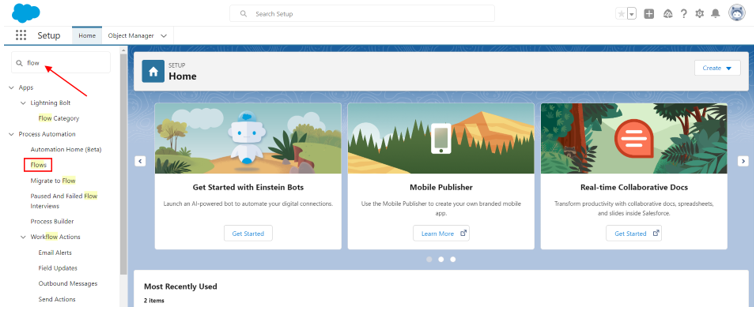
Go to Setup and search flow in the Quick Find box:
Step 2:
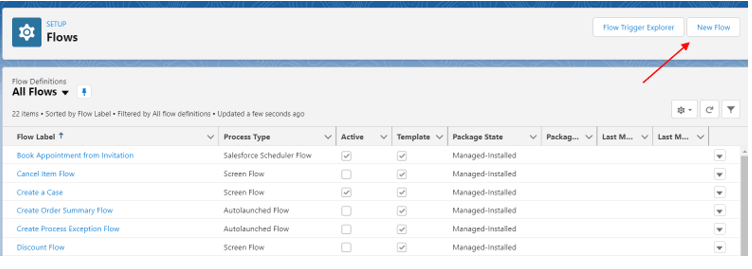
Select New Flow:
Step 3:
Select AutoLaunched Flow (No Trigger)

Step 4:
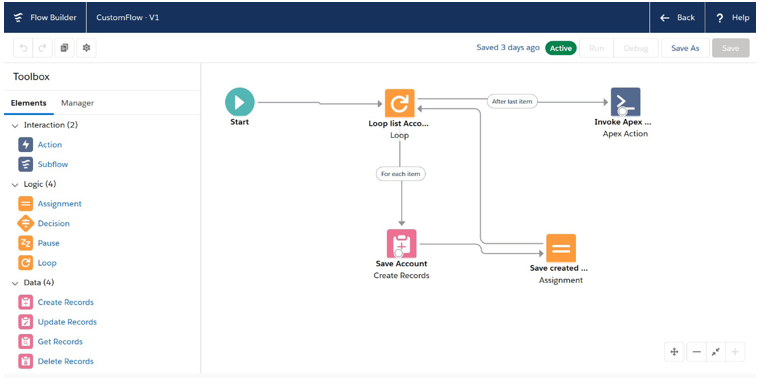
Create a new flow with the name customer flow
Step 5:
Create an apex class for invoking from flow (customerflow)
This apex class is used to update the status and comment messages after the processing flow is finished.
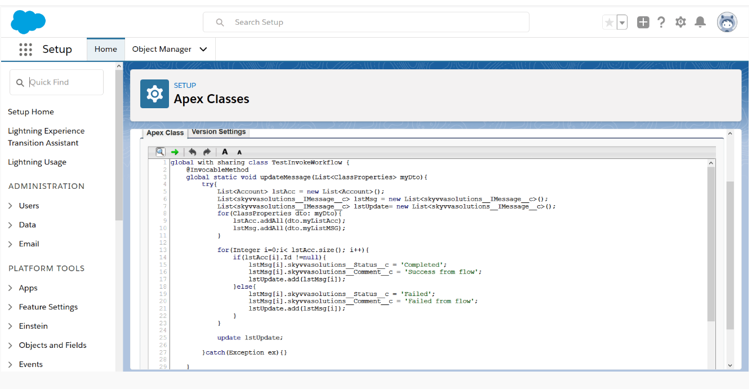
global with sharing class TestInvokeWorkflow {
@InvocableMethod
global static void updateMessage(List<ClassProperties> myDto){
try{
List<Account> lstAcc = new List<Account>();
List<skyvvasolutions__IMessage__c> lstMsg = new
List<skyvvasolutions__IMessage__c>();
List<skyvvasolutions__IMessage__c> lstUpdate= new
List<skyvvasolutions__IMessage__c>();
for(ClassProperties dto: myDto){
lstAcc.addAll(dto.myListAcc);
lstMsg.addAll(dto.myListMSG);
}
for(Integer i=0;i< lstAcc.size(); i++){
if(lstAcc[i].Id !=null){
lstMsg[i].skyvvasolutions__Status__c = ‘Completed’;
lstMsg[i].skyvvasolutions__Comment__c = ‘Success from flow’;
lstUpdate.add(lstMsg[i]);
}else{
lstMsg[i].skyvvasolutions__Status__c = ‘Failed’;
lstMsg[i].skyvvasolutions__Comment__c = ‘Failed from flow’;
lstUpdate.add(lstMsg[i]);
}
}
update lstUpdate;
}catch(Exception ex){}
}
global class ClassProperties{
@InvocableVariable(Required = true)
global List<Account> myListAcc;
@InvocableVariable(Required = true)
global List<skyvvasolutions__IMessage__c> myListMSG;
}
}
Step 6:
Create new integration and interface
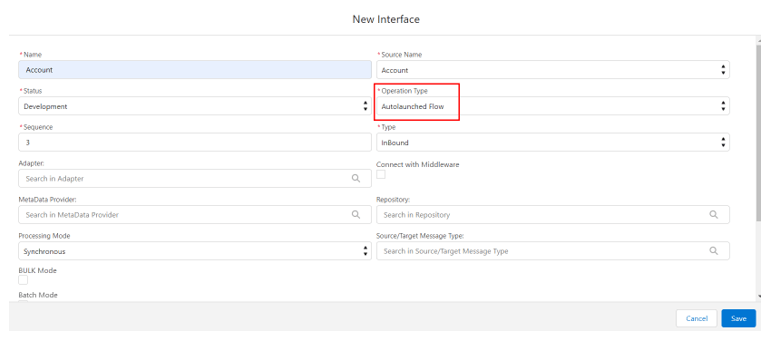
We create a new interface with:
– Operation type: Auto launched Flow
– Source/Target Name: Account
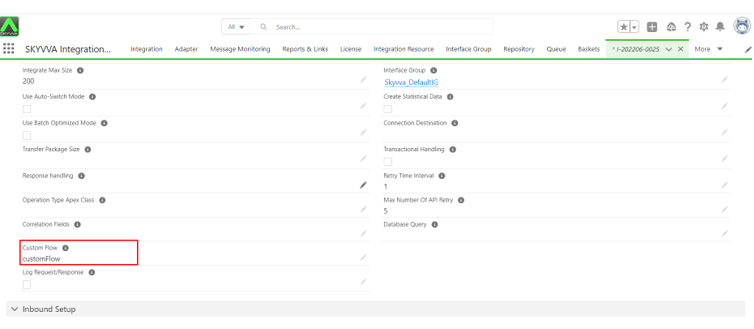
– Custom Flow: customer flow
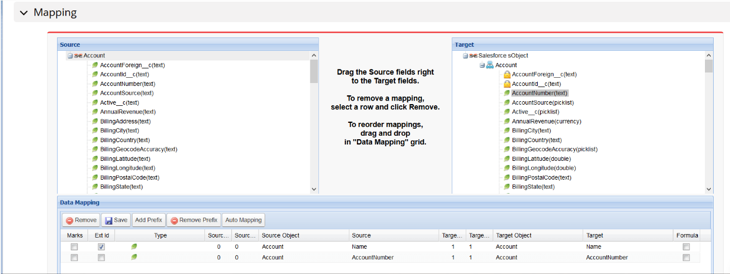
– Do mapping (Account)
Go to interface details:
Scroll down the page to the mapping section:
Step 7:
Push data by Manual Load:
We choose the account as sample data.
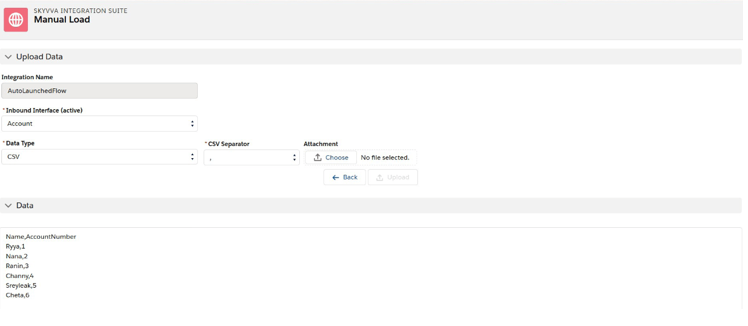
Push the selected data and click on the message board button.

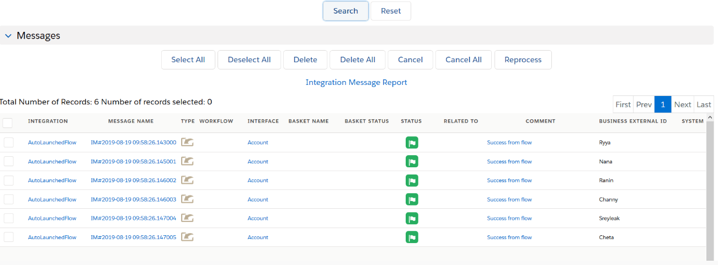
Step 8:
We can check on the message board:
When we push uploaded data, we can see the result on the message monitoring page.
Summary: #
Now we are able to understand and able implement the Auto launched flow and how to use the salesforce auto-launched flow in custom inbound processing in detail.


