Introduction #
In this tutorial, you will learn how to import files from Data Loader using flat and hierarchical mapping of CSV files. In flat mapping API V2 and hierarchical mapping API V3 processing.
In this tutorial, we are showing usecase with different CSV formats:
- Flat CSV mapping
- Hierarchical CSV mapping
- sObject Hierarchical without Message Type.
1. Import Flat CSV File with inbound Interface. #
Pre-requisite: #
- Create Integration and inbound Interface.
- Upload Istructure.
- Do mapping.
Here are the steps to import a CSV file with the inbound interface:
Step 1: Create Integration.
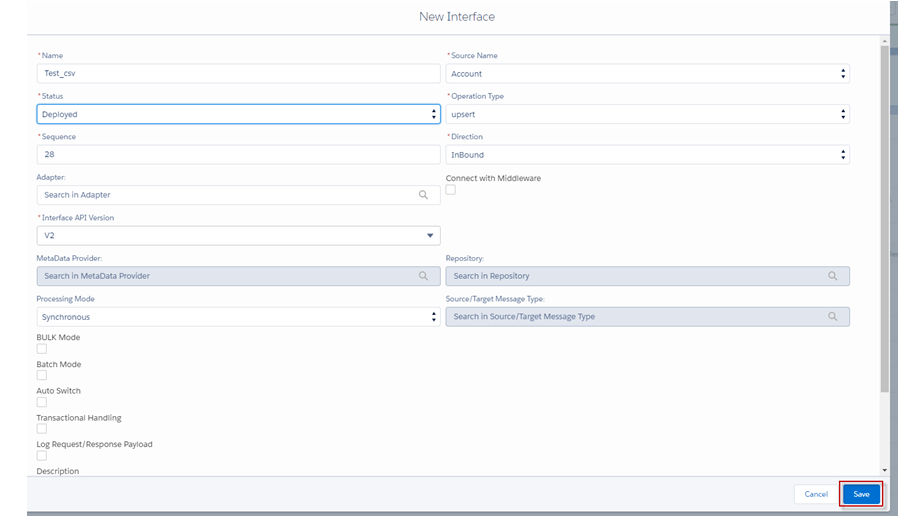
Step 2: Create Inbound Interface.
- Fill Name
- Select Delopyed Status
- Select Account Source Name
- Select Inbound Direction
- Select V2 Interface API Version
- Click Save Button
Step 3: Upload Istructure to create a flat mapping.
- Enter to Interface Detail page -> Scroll down Interface to find -> Source Definition section -> click choose file CSV ->click Save.

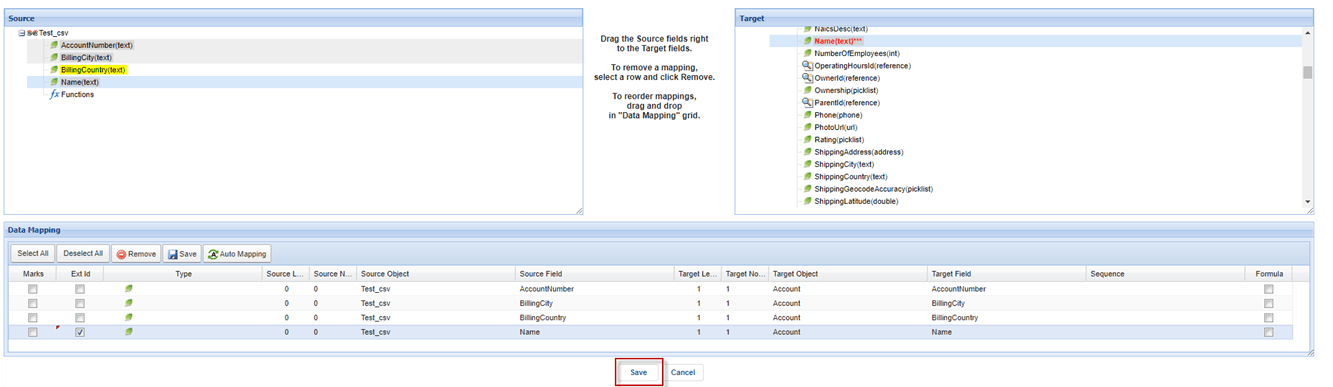
Step 4: Do mapping
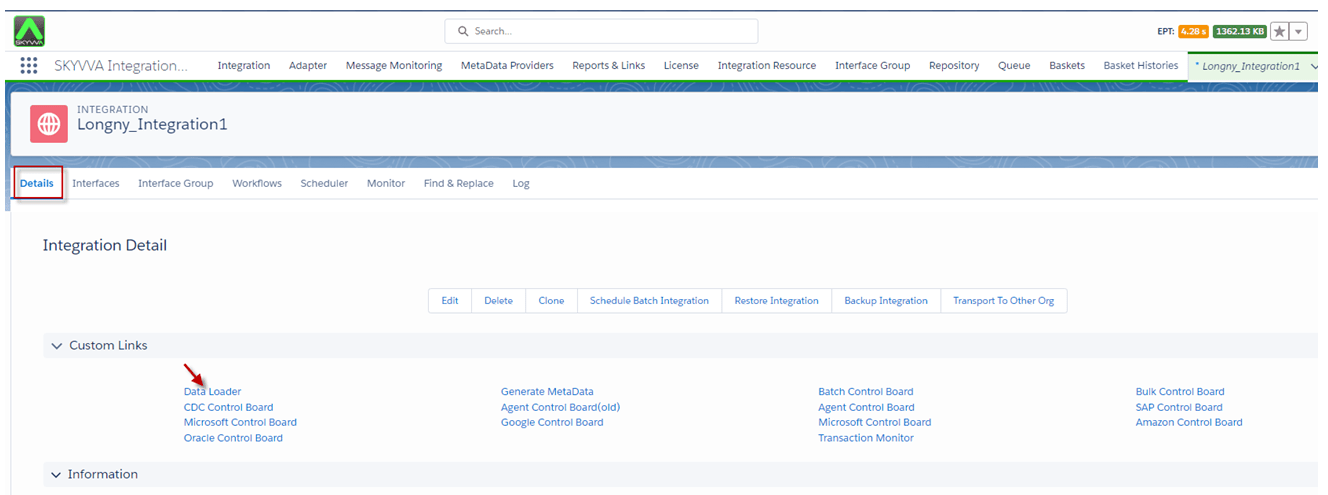
Step 5: Go to Integration -> Click Details page ->Click Data Loader link on Custom Links Section.
- Choose Import Data Function and click the next button.
- Select Interface and click the next button.
- Format data type CSV, separate Comma, and click the next button.
- Click on the Upload File button to choose a file and click the upload file button.
- Select all and click the push button.
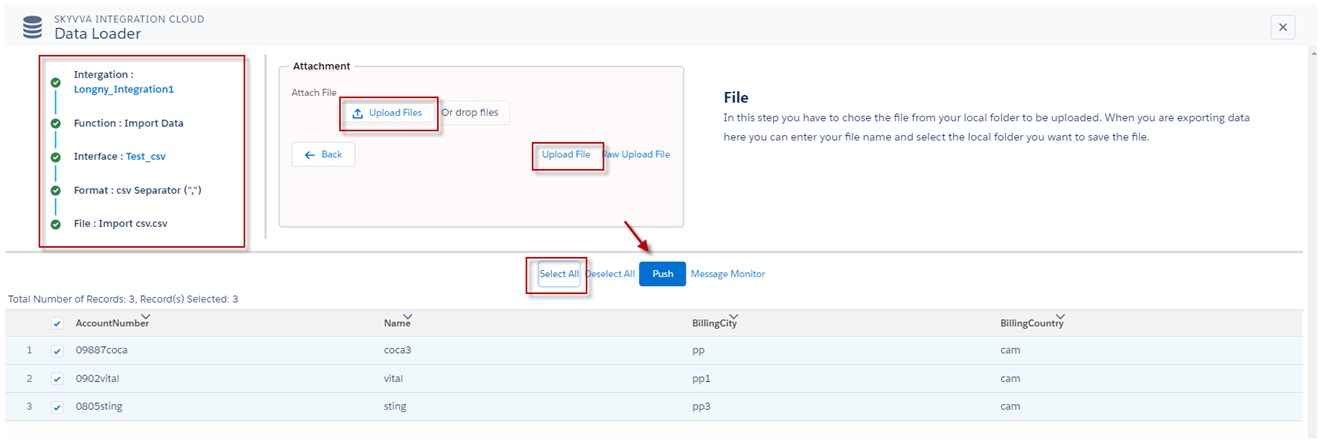
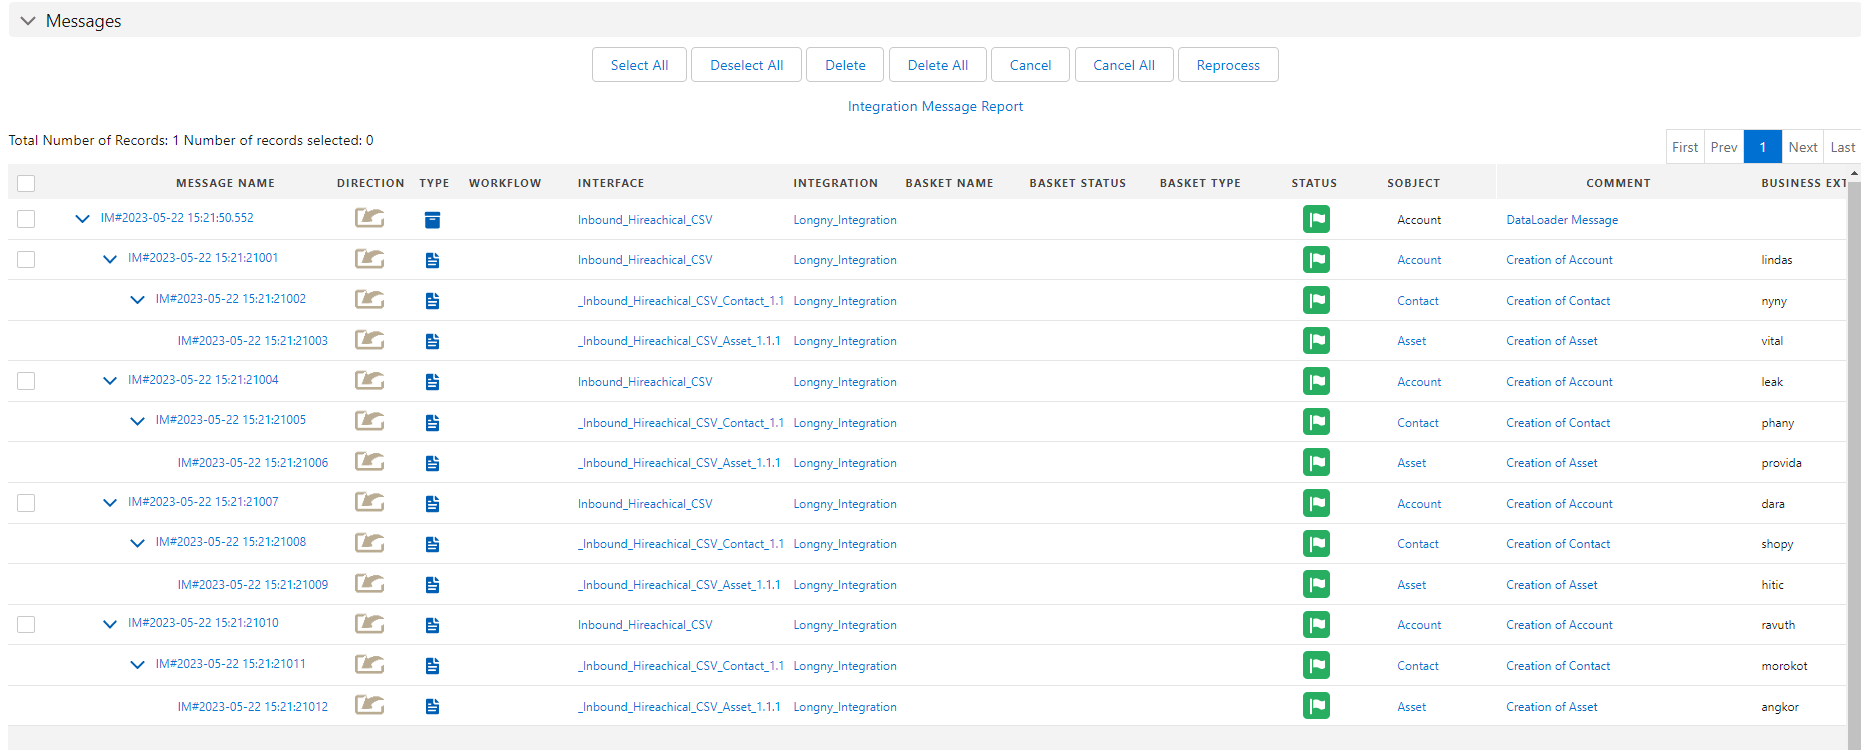
- We can search on the message monitor to see the result.

2. Import Hierarchical CSV File with Inbound Interface with message type. #
Pre-requisite #
- Create Integration.
- Create Inbound Interface.
- Upload or Create a Message Type.
- Do mapping.
Here are the steps to import a Hierarchical CSV file with the inbound interface:
- If you have not yet configured CSP Trusted Sites and CORS, you will not be able to import hierarchical CSV, XML, and JSON files. An error message will be displayed as shown in the screenshot below.
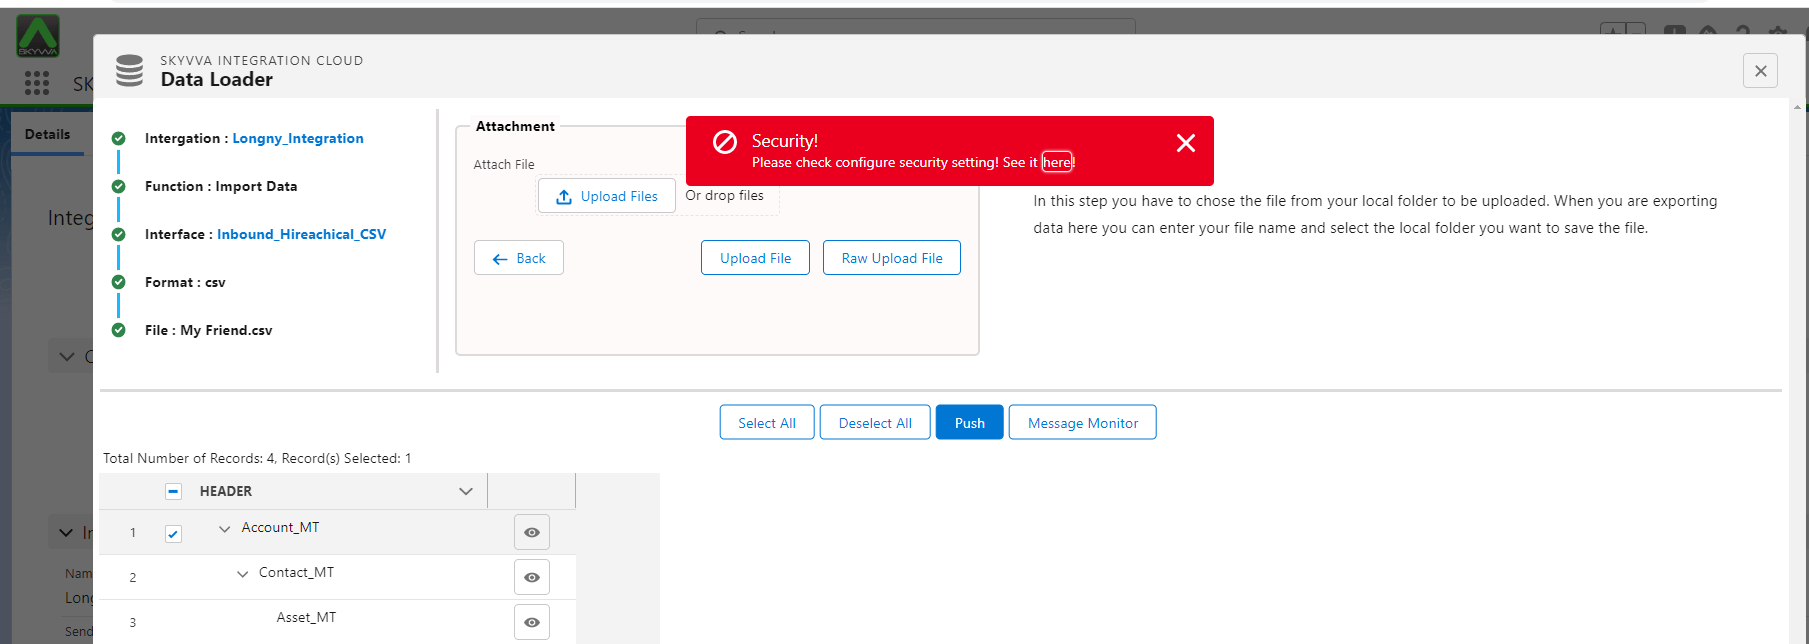
Note: Before importing data, you need to create CORS and CSP Trusted Sites to enable the data loader to use the REST API for import files . If you have already completed this step, please ignore this reminder: Here is the link for creating https://docs.skyvva-dev.com/docs/the-configuration-enables-to-use-new-data-loader/
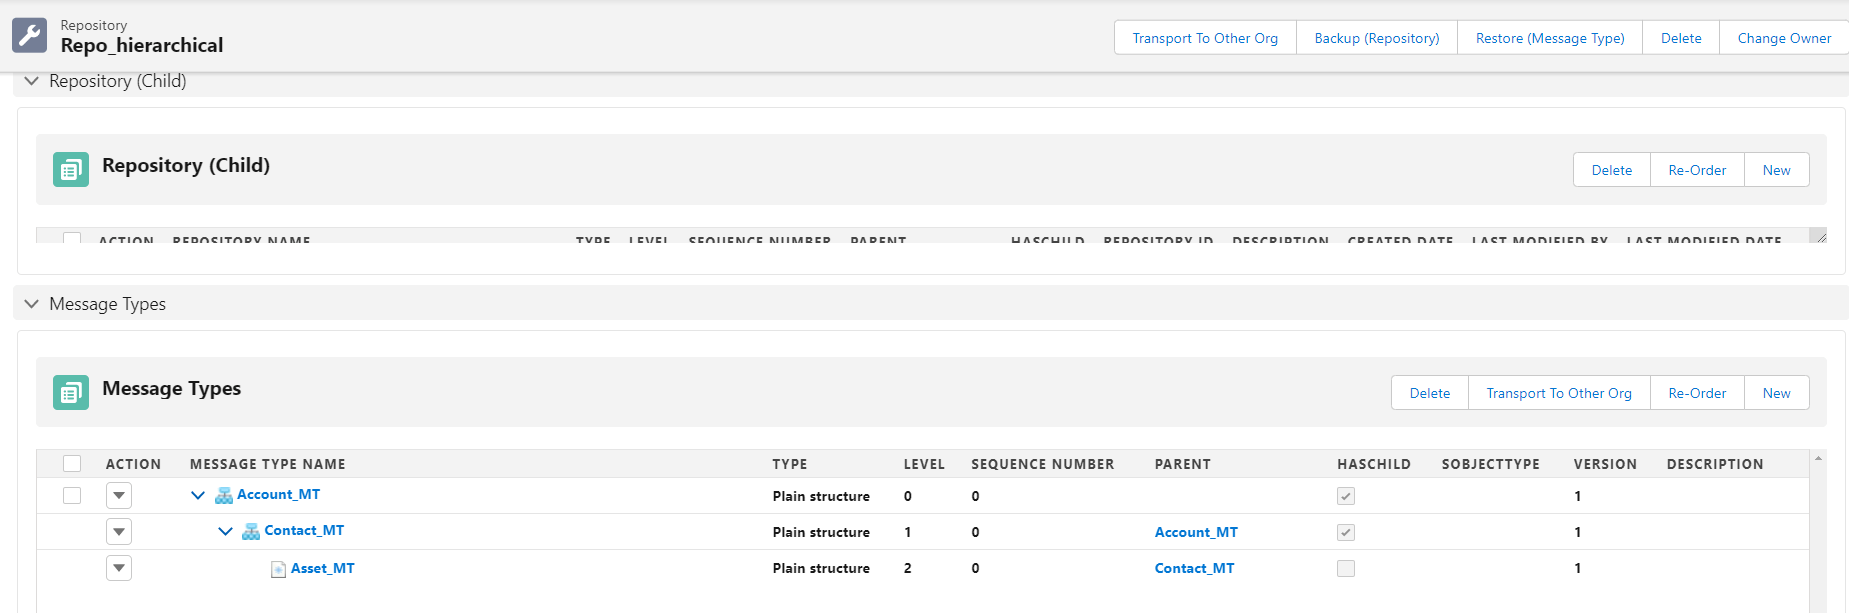
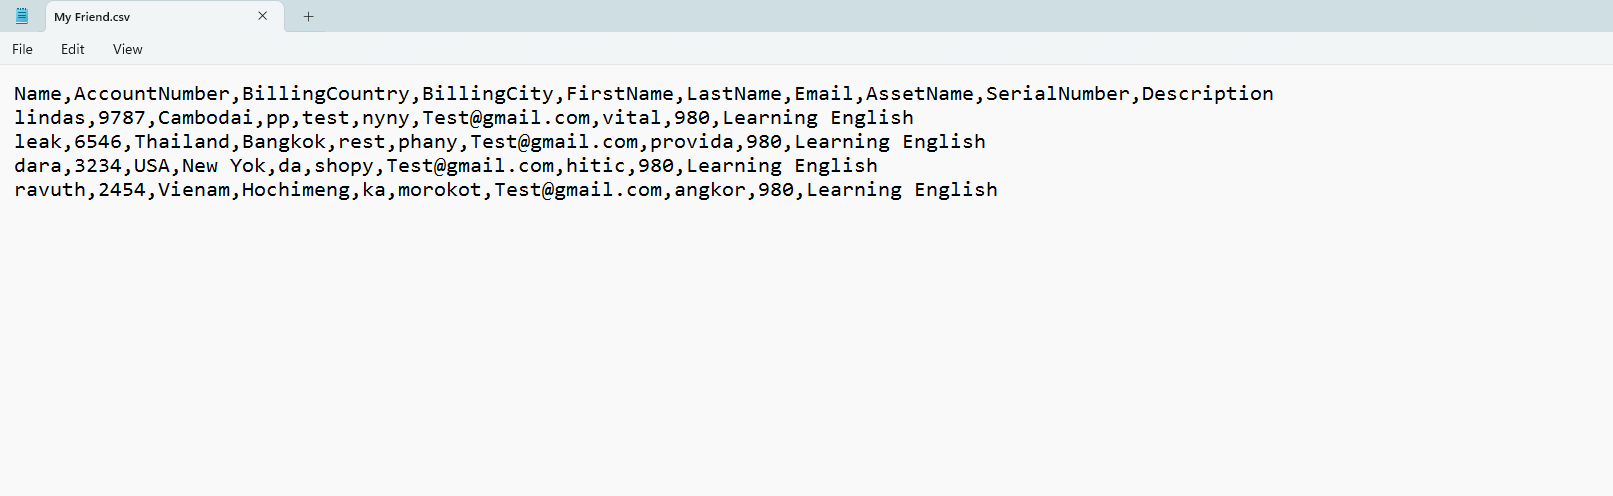
Step 1: Create or upload Message Type hierarchical CSV.
- Here’s message Type.
Step 2: Create Integration.
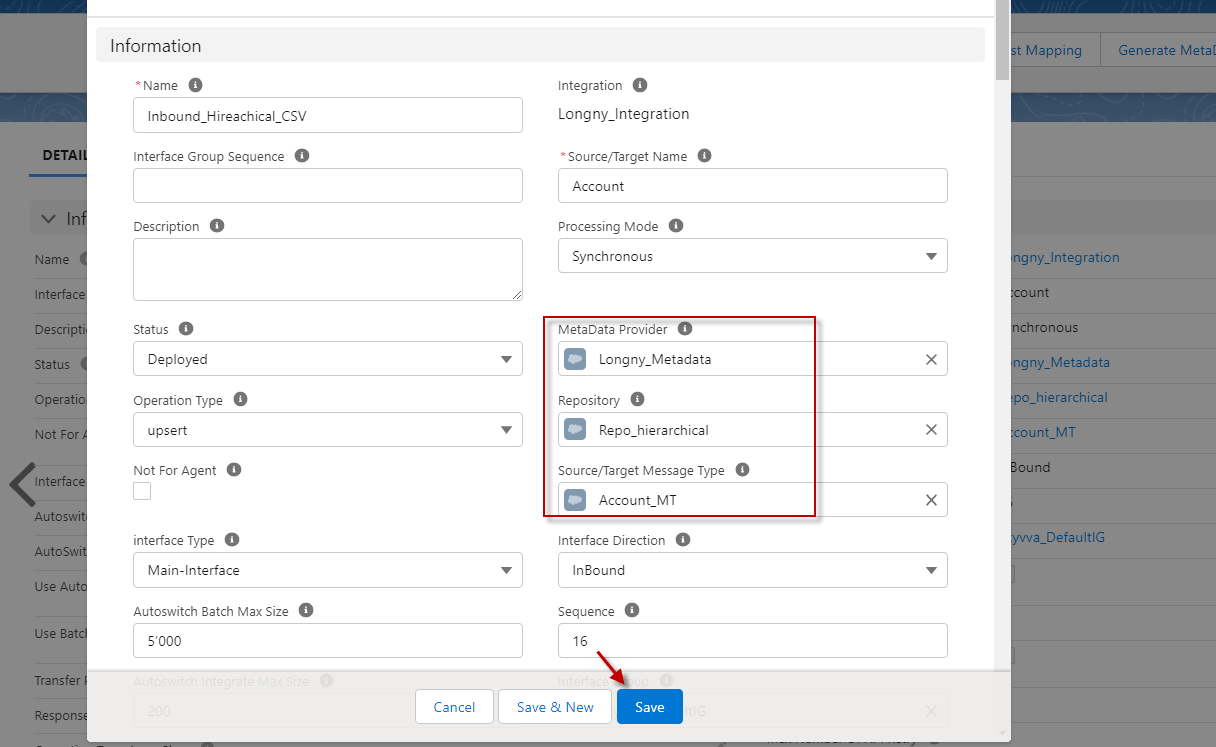
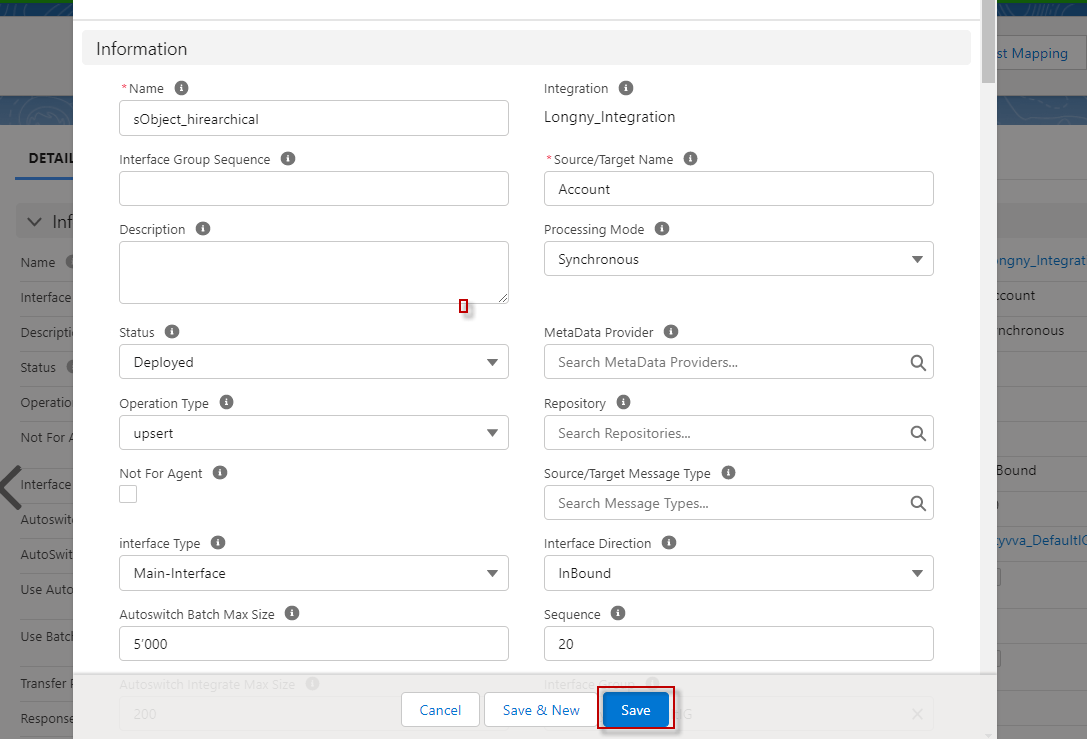
Step 3: Create an Inbound Interface link with the message type.
- Fill Name
- Select Delopyed Status
- Select Account Source Name
- Select Inbound Direction
- Select V3 Interface API Version
- Click Save Button
 Step 4: Do mapping.

Step 5: Go to Integration -> Click Details page ->Click Data Loader.
- Choose Import Data Function and click the next button.
- Select Interface and click the next button.
- Format data type CSV, separate Comma, and click the next button.
- Click on the Upload File button to choose a file and click the upload file button.
- Select all and click the push button.
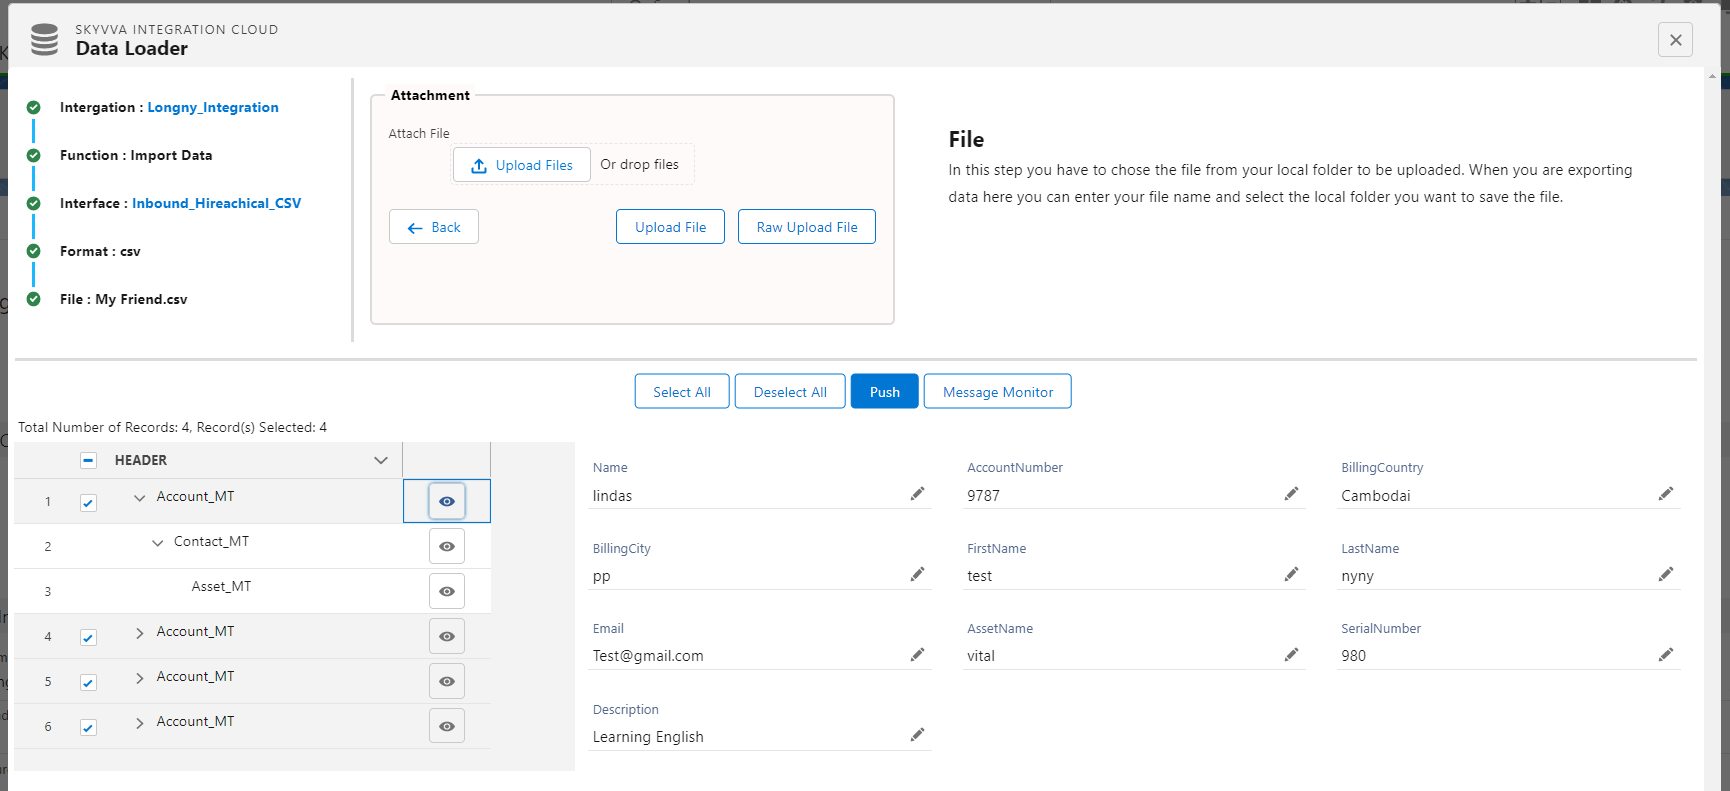
- Here’s the Payload.
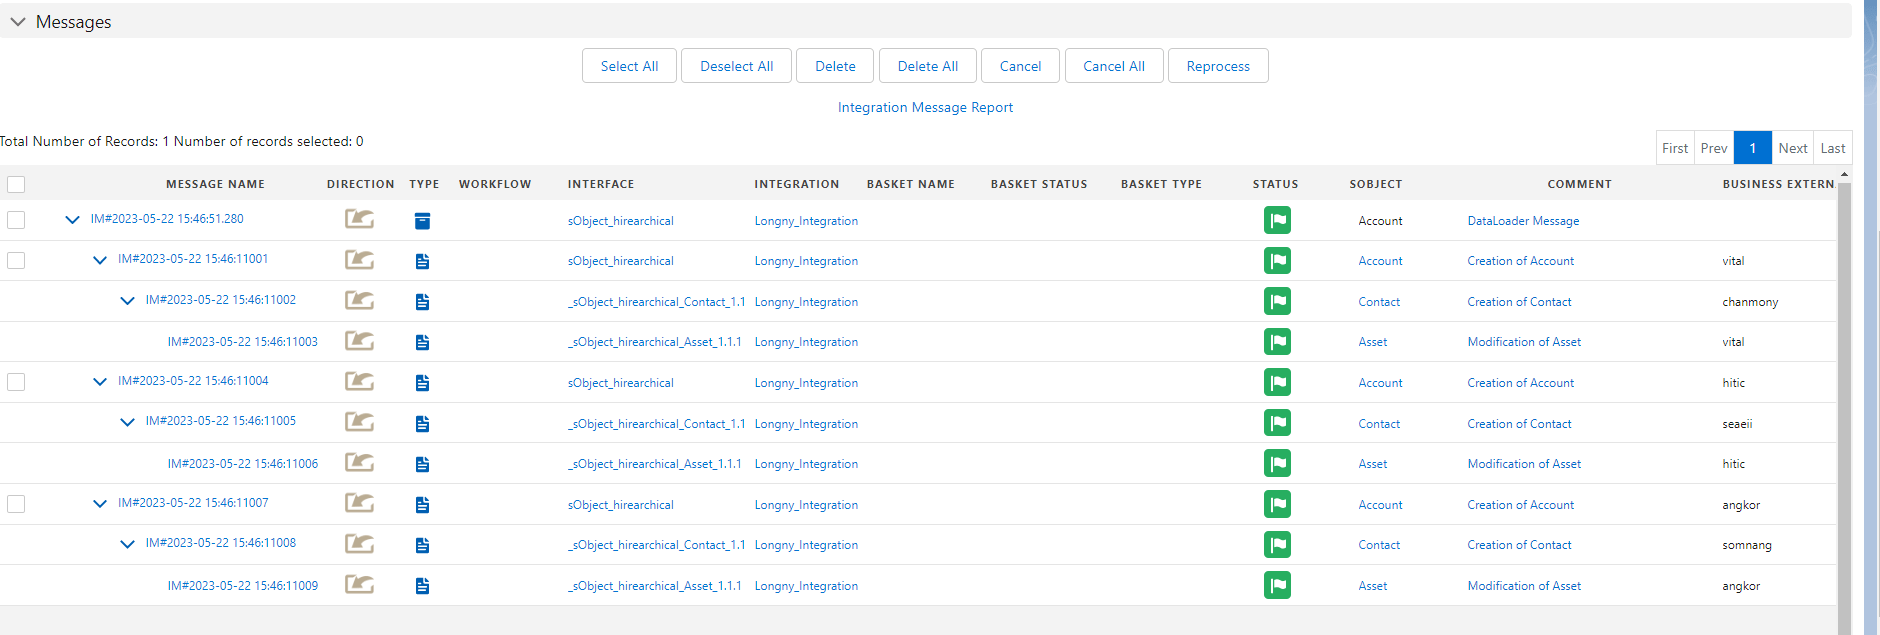
- Here’s the Result on the message monitor.
3. Import Hierarchical CSV file with sObject Hierarchical without Message Type. #
Pre-requisite #
- Create Integration.
- Create Inbound Interface.
- Upload or Create a Message Type.
- Do mapping.
Here are the steps to import a Hierarchical CSV file with sObject hierarchical
Step 1: Create Integration.
Step 2: Create an Inbound Interface.
- Fill Name
- Select Delopyed Status
- Select Account Source Name
- Select Inbound Direction
- Select V3 Interface API Version
- Click Save Button
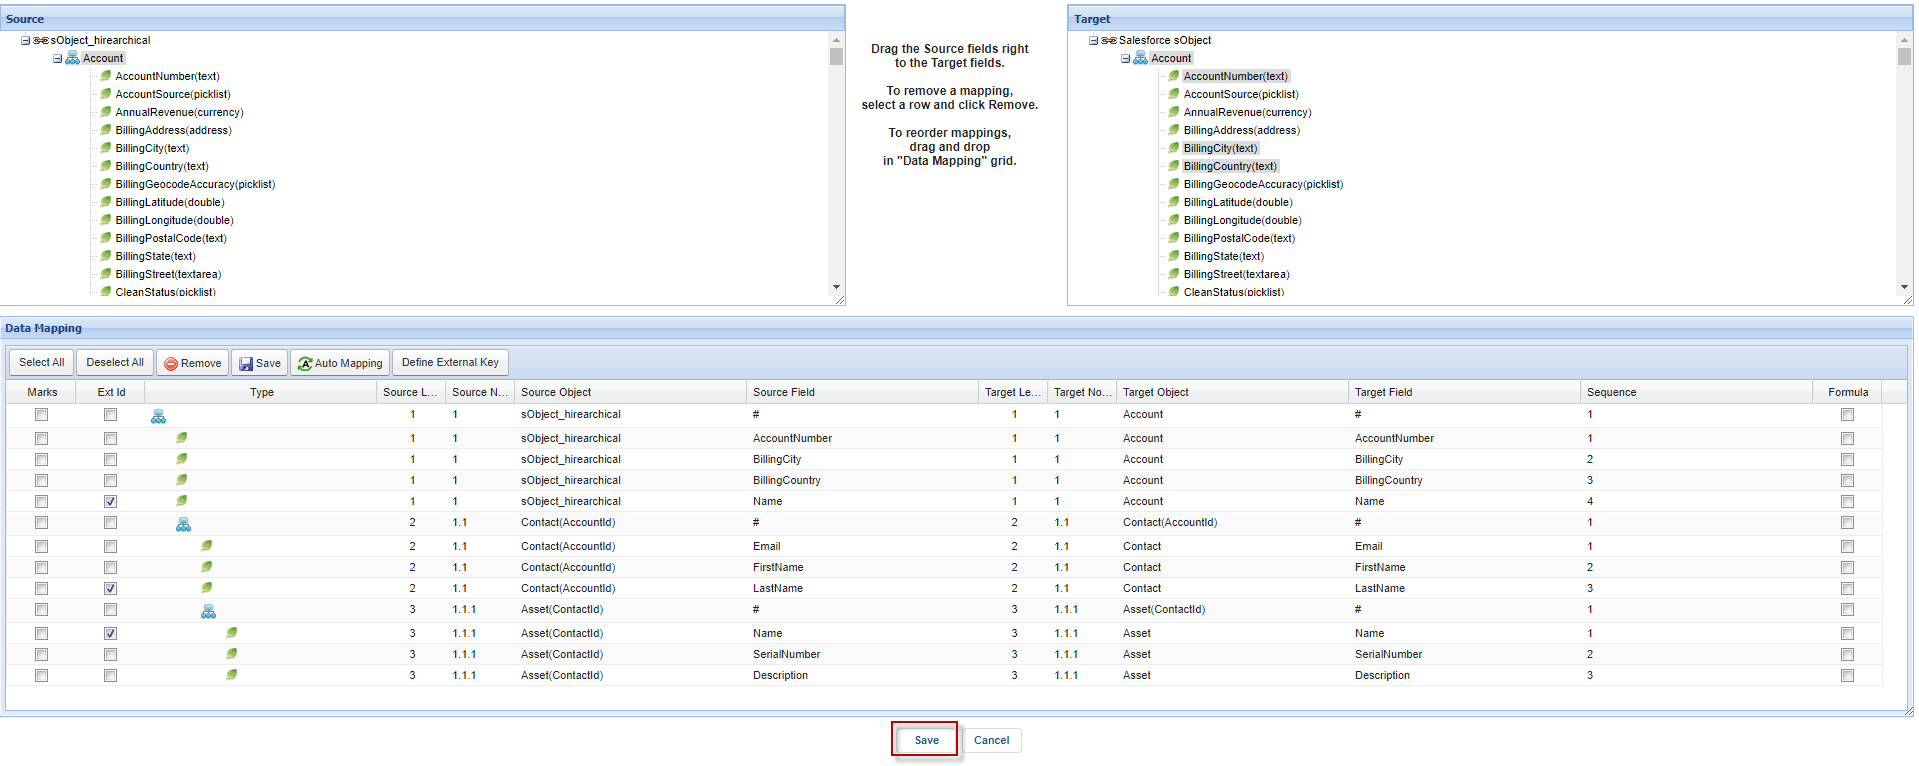
Step 2: Do mapping.
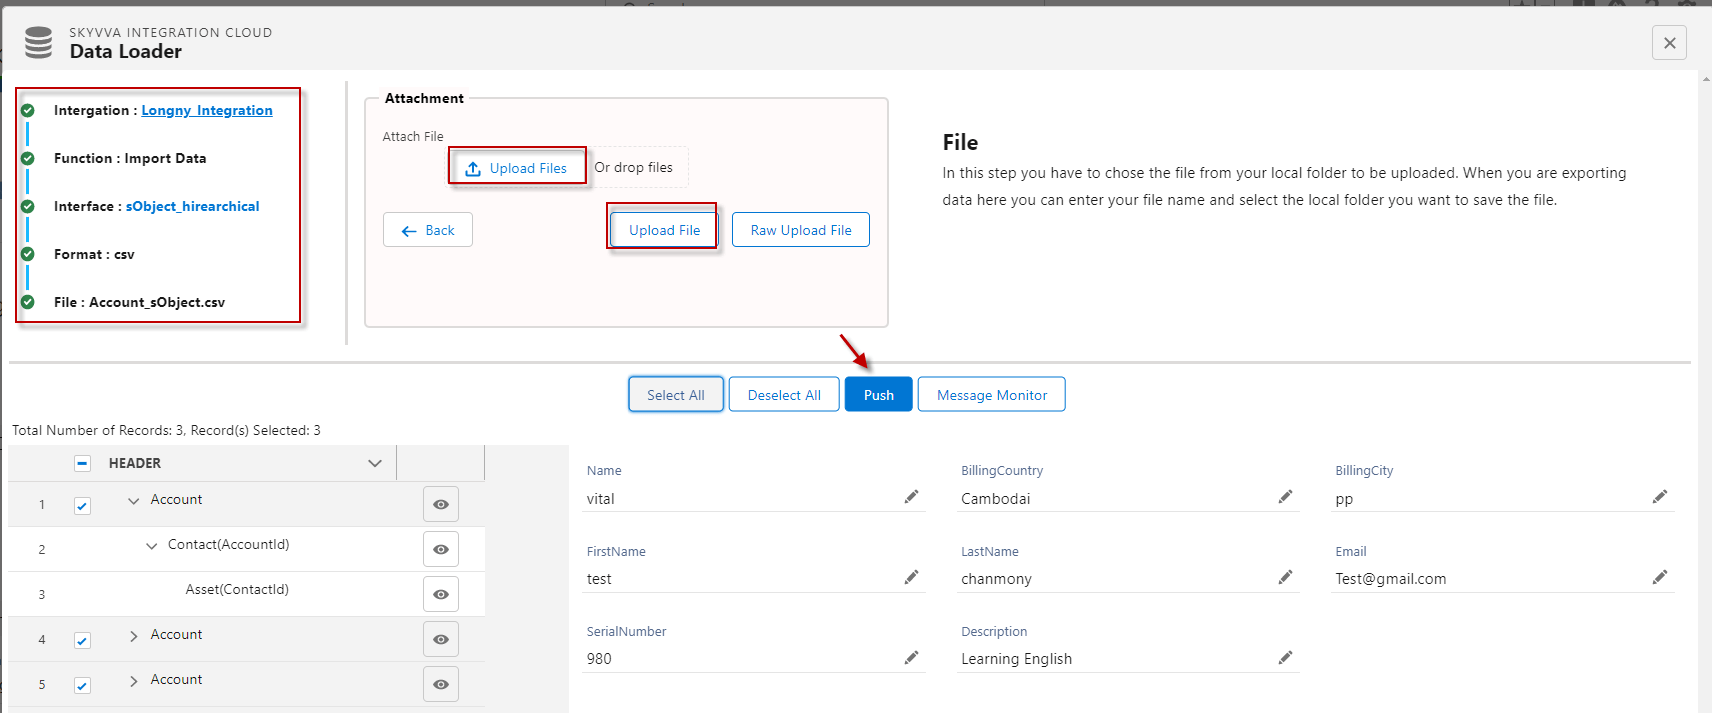
Step 3: Go to Integration -> Click Details page ->Click Data Loader.
- Choose Import Data Function and click the next button.
- Select Interface and click the next button.
- Format data type CSV, separate Comma, and click the next button.
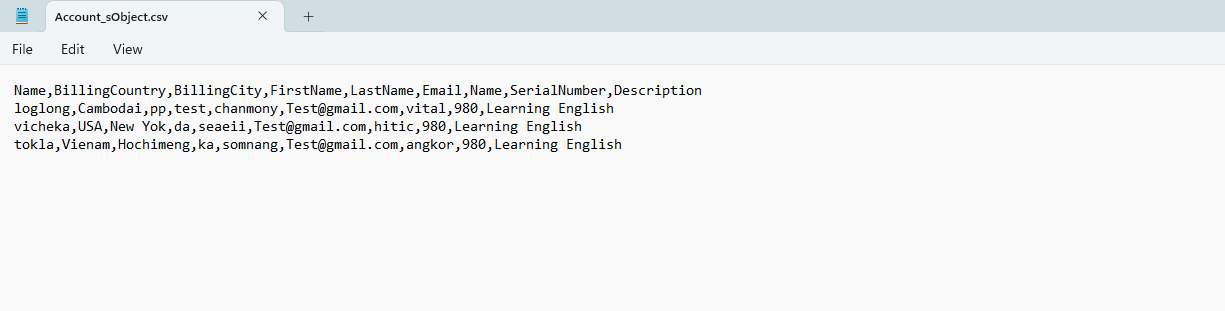
- Click on the Upload File button to choose a file and click the upload file button.
- Select all and click the push button.
- Here’s the Payload.
- Here’s the Result on the message monitor.