
Introduction #
Amazon EFS provides file storage in the AWS Cloud. With Amazon EFS, you can create a file system, mount the file system on an Amazon EC2 instance, and then read and write data to and from your file system. You can mount an Amazon EFS file system in your VPC, through the Network File System versions 4.0 and 4.1 (NFSv4) protocol. We recommend using a current-generation Linux NFSv4.1 client, such as those found in the latest Amazon Linux, Redhat, and Ubuntu AMIs, in conjunction with the Amazon EFS Mount Helper. For instructions, see Using the amazon-efs-utils Tools…
For a list of Amazon EC2 Linux Amazon Machine Images (AMIs) that support this protocol, see NFS Support. For some AMIs, you’ll need to install an NFS client to mount your file system on your Amazon EC2 instance. For instructions, see Installing the NFS Client.
You can access your Amazon EFS file system concurrently from multiple NFS clients, so applications that scale beyond a single connection can access a file system. Amazon EC2 instances running in multiple Availability Zones within the same AWS Region can access the file system so that many users can access and share a common data source.
For a list of AWS Regions where you can create an Amazon EFS file system, see the Amazon Web Services General Reference.
What is Amazon EC2 Instance? #
An EC2 instance is nothing but a virtual server in Amazon Web Services terminology. It stands for Elastic Compute Cloud. It is a web service where an AWS subscriber can request and provision a compute server in the AWS cloud.
An on-demand EC2 instance is an offering from AWS where the subscriber/user can rent the virtual server per hour and use it to deploy his/her own applications.
The instance will be charged per hour with different rates based on the type of the instance chosen. AWS provides multiple instance types for the respective business needs of the user.
Thus, you can rent an instance based on your own CPU and memory requirements and use it as long as you want. You can terminate the instance when it’s no more used and save on costs. This is the most striking advantage of an on-demand instance- you can drastically save on your CAPEX.
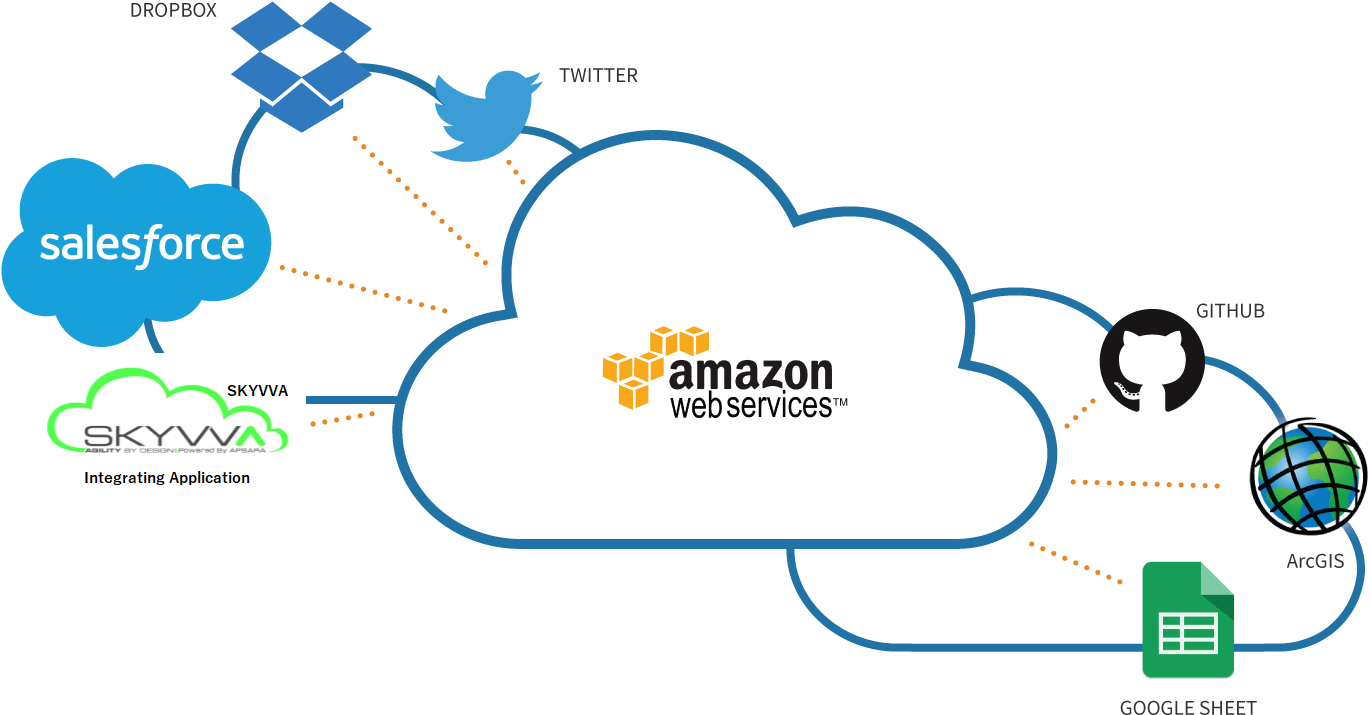
So what is Apache Camel? #
Camel Integration Framework really useful for development and support Connecting different system are easy using Camel Salesforce integration are pretty easy to develop SKYVVA is a very good hosting platform for Camel based integration.
Apache Camel offers you the interfaces for the EIPs, the base objects, commonly needed implementations, debugging tools, a configuration system, and many other helpers which will save you a ton of time when you want to implement your solution to follow the EIPs.
Take MVC. MVC is pretty simple in theory and we could implement it without any framework help. But good MVC frameworks provide us with the structure ready-to-use and have gone the extra mile and thought out all the other “side” things you need when you create a large MVC project and that’s why we use them most of the time.
That’s exactly what Apache Camel is for EIPs. It’s a complete production-ready framework for people who want to implement their solution to follow the EIPs.
AWS Configuration? #
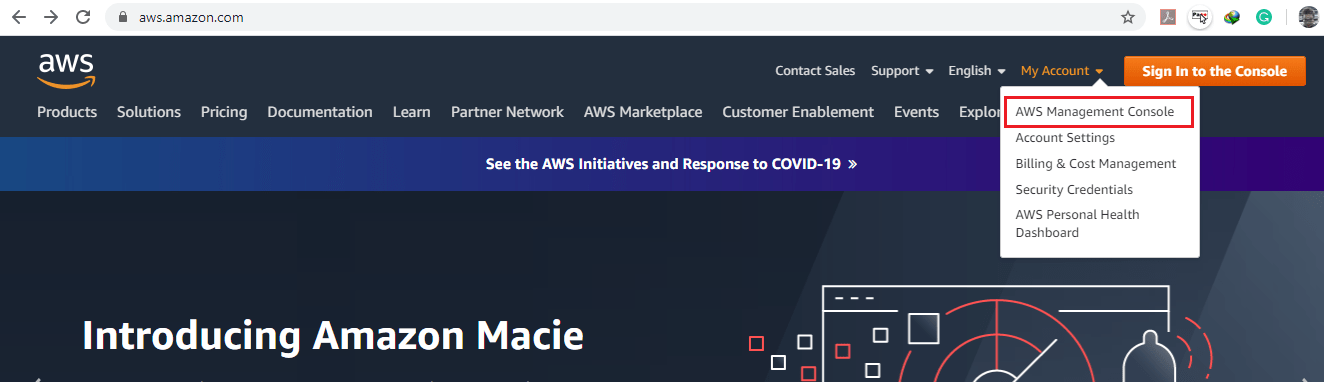
Step 1 Hit this link AWS. Click on AWS Management Console
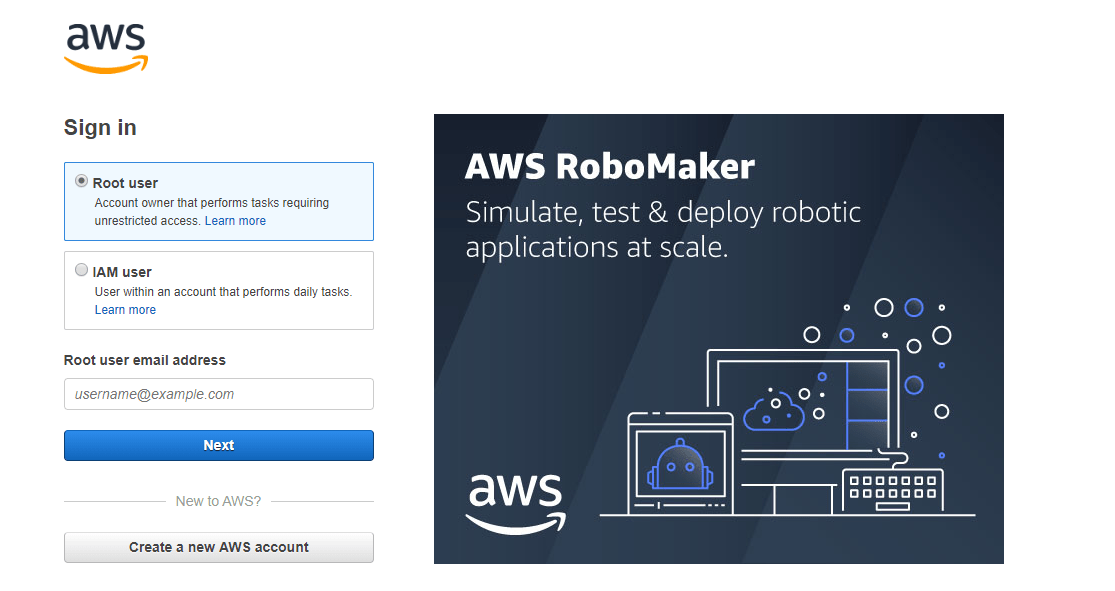
- Select Root user
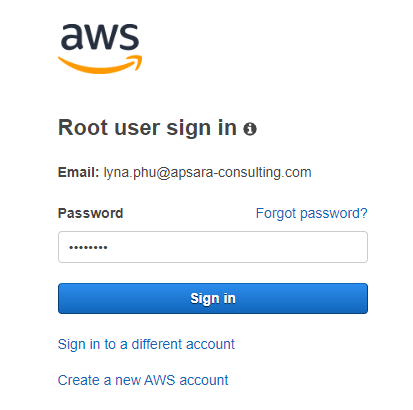
- Provide your credentials Root user email address & password
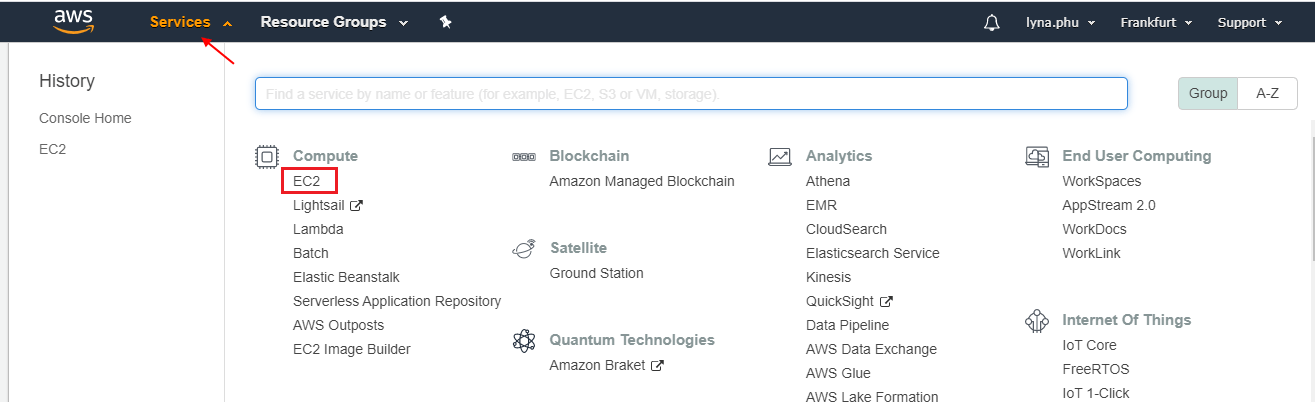
- Click on Services dropdown
- Select EC2 under Compute section
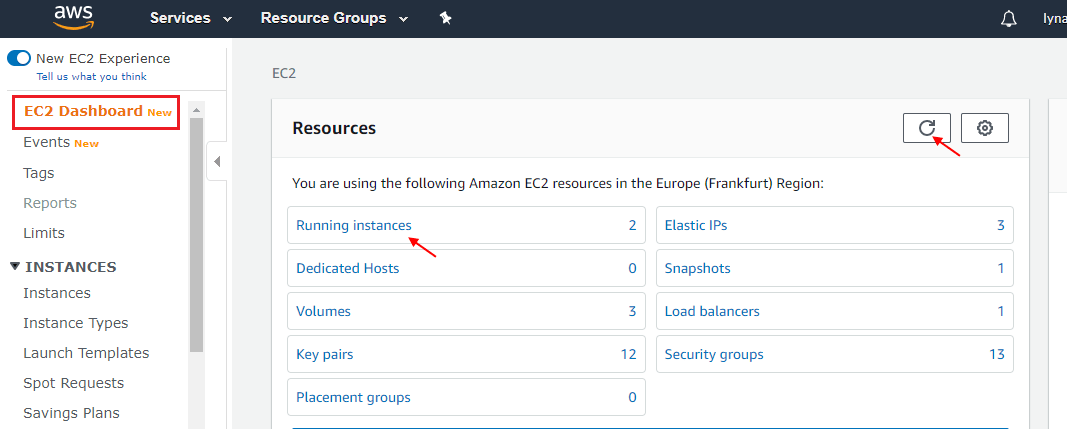
- Great EC2 Dashboard showing now
- Click on refresh button
- And click on Running instances option under Resources section
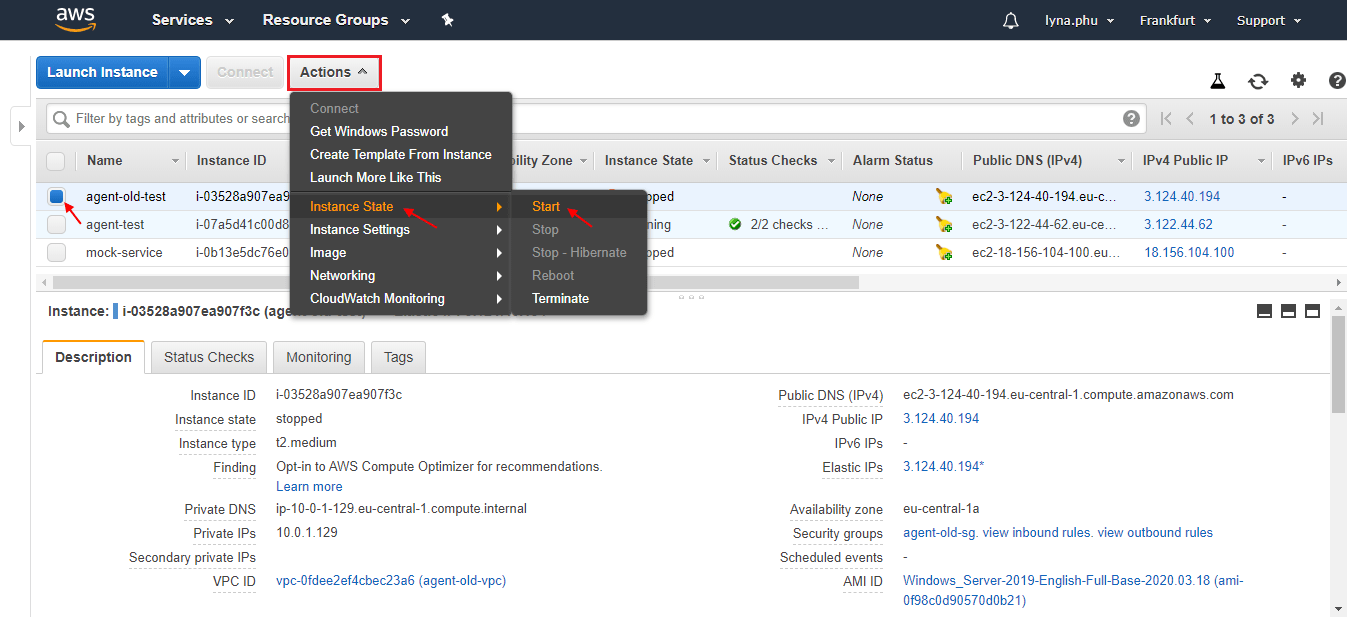
- Now user can see all instances easily
- First, select your instance
- Go to Action dropdown & select Instance State picklist
- Then click on Start
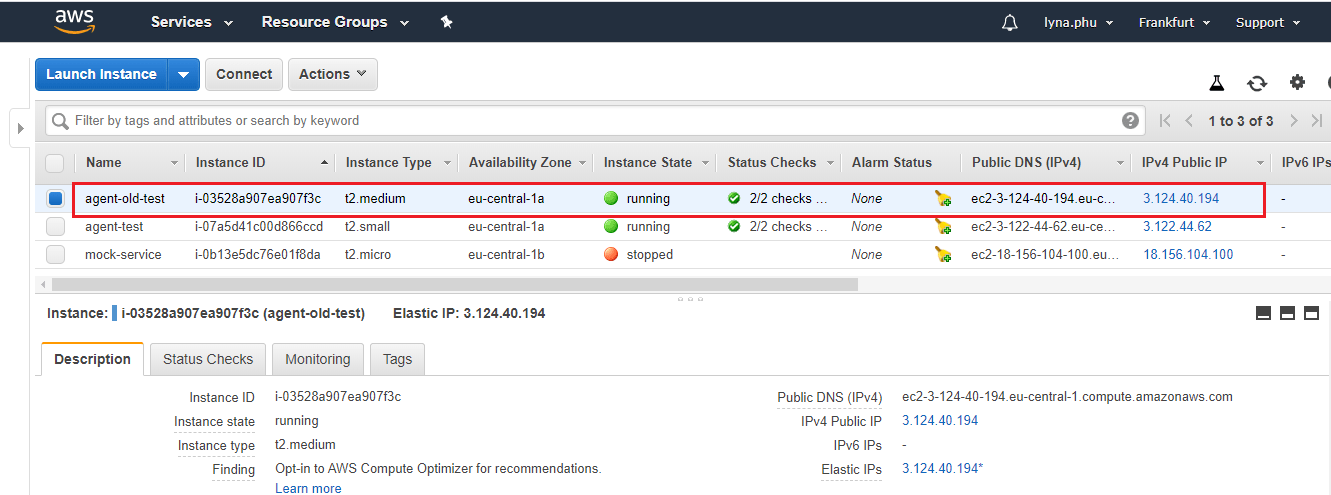
- Great our instance is running now
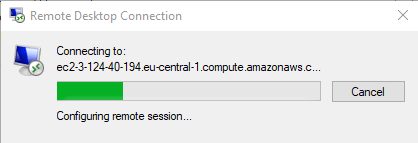
Step 2 Now the user has to create a Remote Desktop Connection
Amazon Elastic Compute Cloud (Amazon EC2) is a web service that provides secure, resizable compute capacity in the cloud. It is designed to make web-scale cloud computing easier for developers. Amazon EC2’s simple web service interface allows you to obtain and configure capacity with minimal friction. It provides you with complete control of your computing resources and lets you run on Amazon’s proven computing environment.
- Download the .rdp file and create a connection.
- Great the user creates Remote Desktop Connection successfully.
Go to your Salesforce Org.
- Click on setup
- Write Remote Site on the Search box
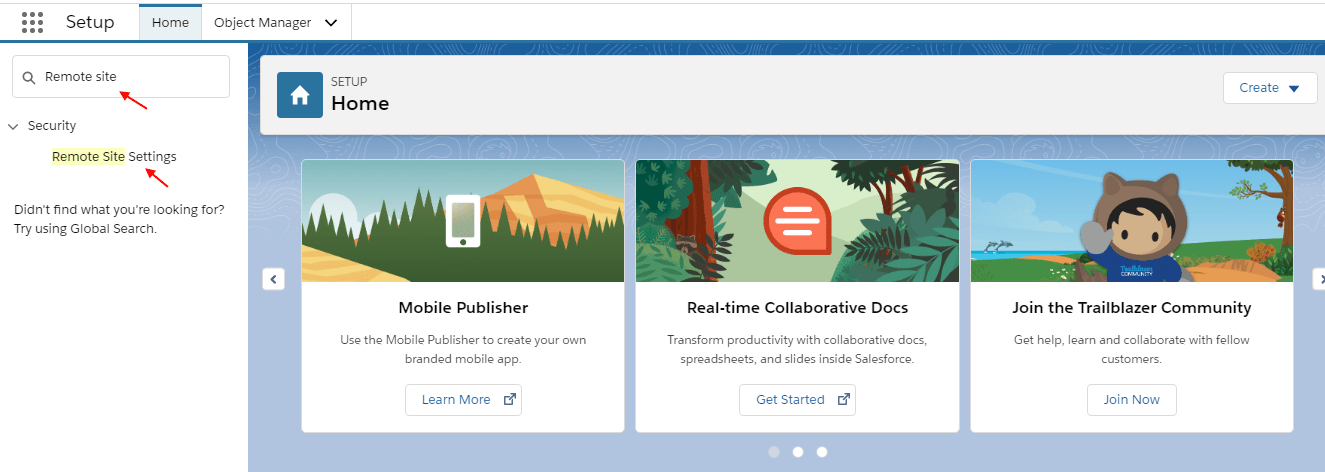
- Click on New Remote Site button
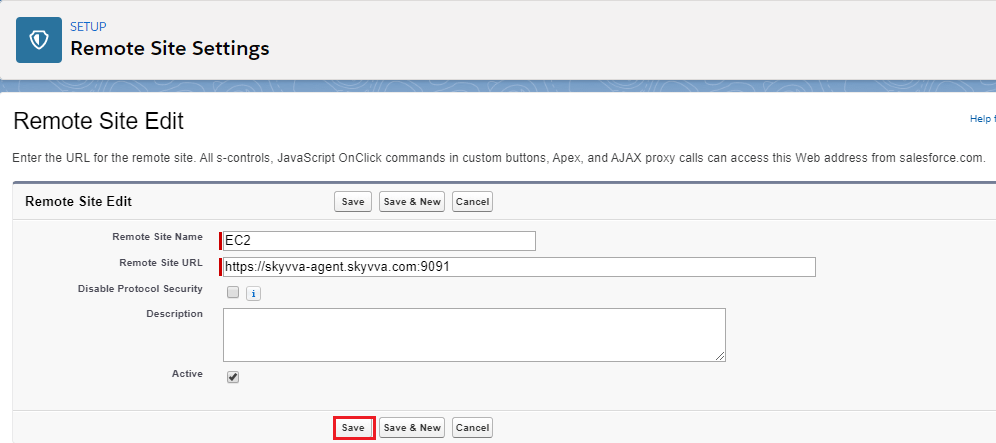
- Great user-created New Remote site successfully
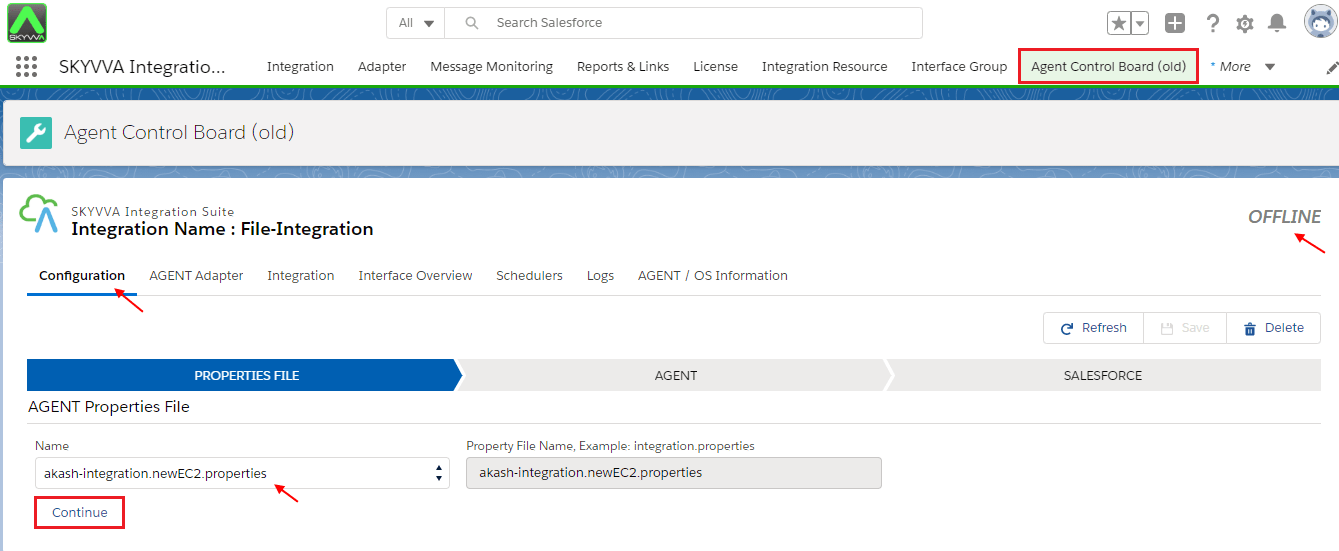
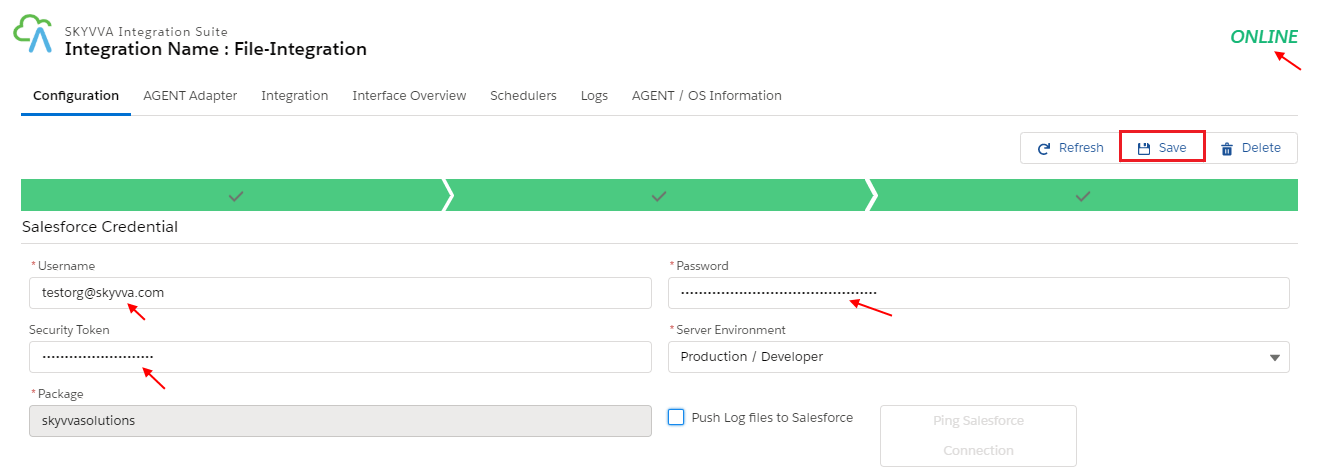
Go to Agent Control Board Tab
- Click on your AGENT Properties File under Configuration Tab
- See Status is OFFLINE
- Click on the continue button
- Users can see now AGENT properties file import the Salesforce Credential successfully
- Username, Security token, Password and also status ONLINE
- Click on Save button now

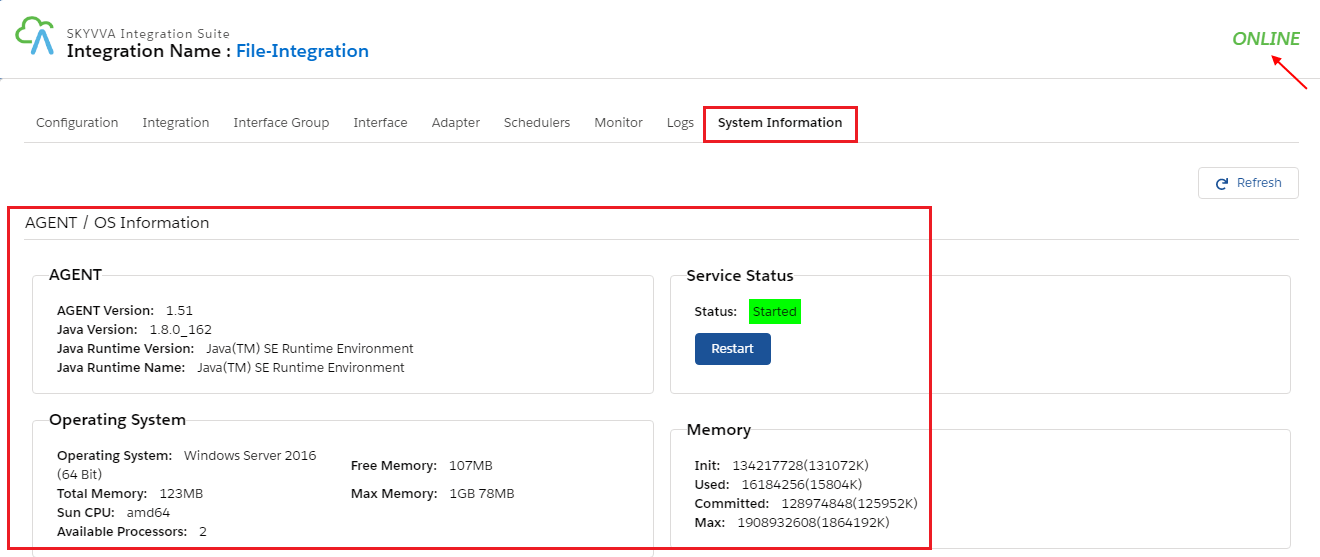
- Provide Hostname/Public IP
- Provide Port/Port forwarding
- Click on Ping Agent Connection button
- Click on System Information
- AGENT / OS Information reflects all details of users OS
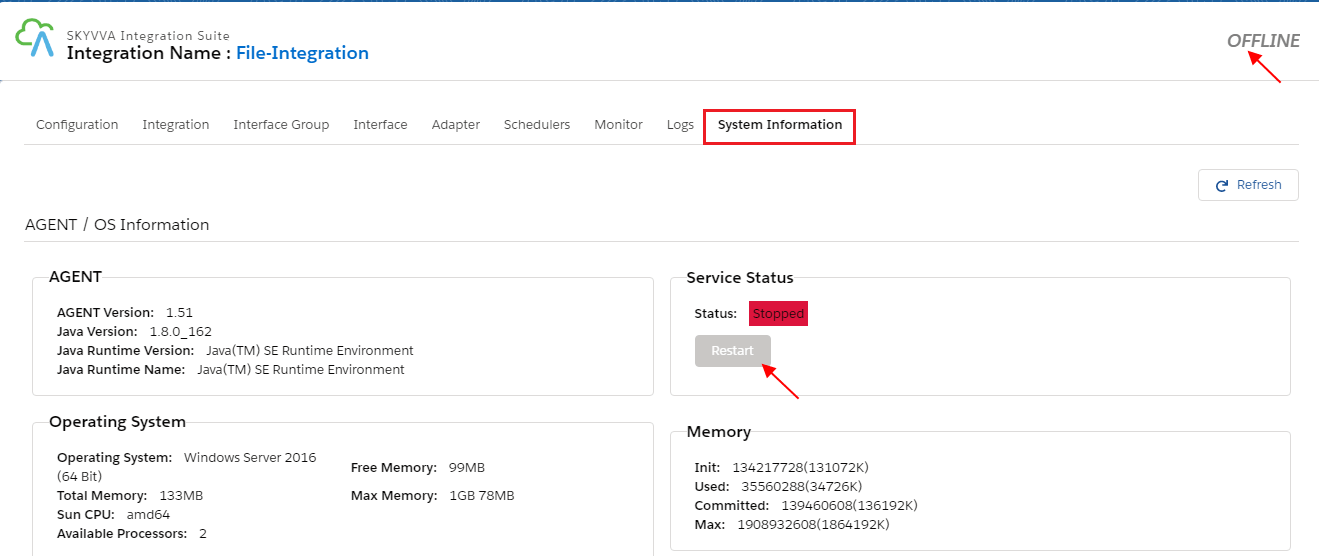
The feature where we need to Restart Agent service from the agent control board
Service
- Open Service on your device and find SKYVVA Integration Agent
- Click Restart Button.
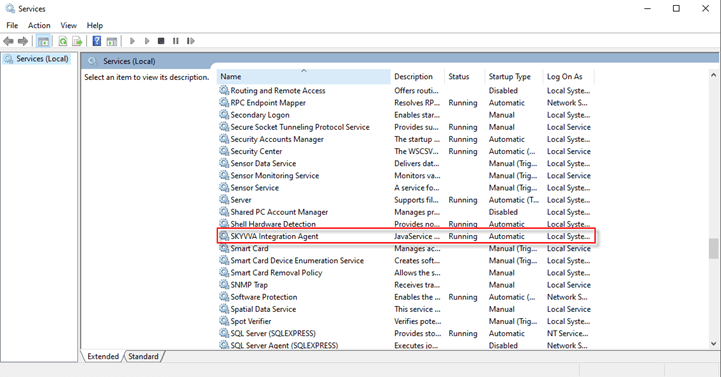
- After Click Restart Button
It’s working normally


