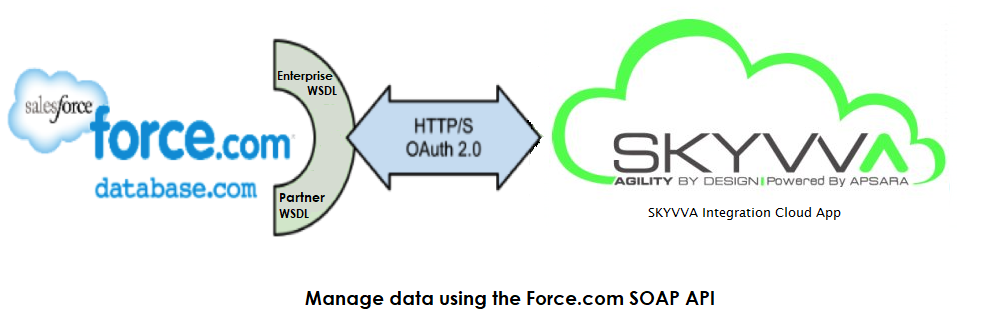
SOAP API #
SOAP is a standard communication protocol system that permits processes using different operating systems like Linux and Windows to communicate via HTTP and its XML. SOAP-based APIs have designed to create, recover, update and delete records like accounts, passwords, leads, and custom objects. These offers over twenty different kinds of calls that make it easy for the API developers to maintain their accounts perform accurate searches and much more.
These can use with all those languages that support web services. SOAP APIs take the advantages of making web-based protocols such as HTTP and its XML that are already operating the all operating systems that are why its developers can easily manipulate web services and get responses without caring about language and platforms at all.
How to integrate SOAP-UI to SKYVVA #
To be able to integrate SOAP-UI to SKYVVA you can follow the steps below:
- Go to your Salesforce Organization and click on API under Integration
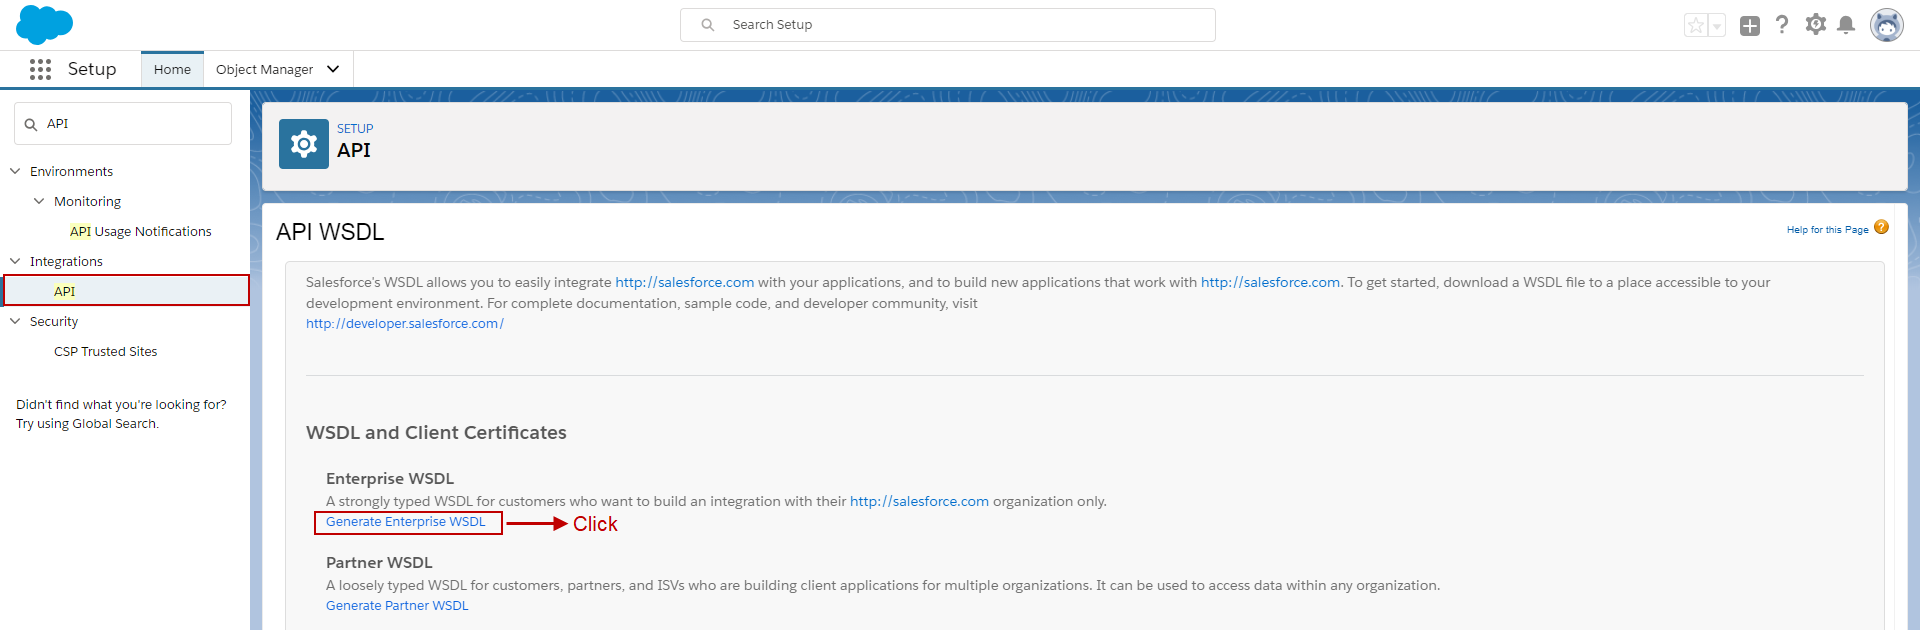
- Click on Generate Enterprise WSDL
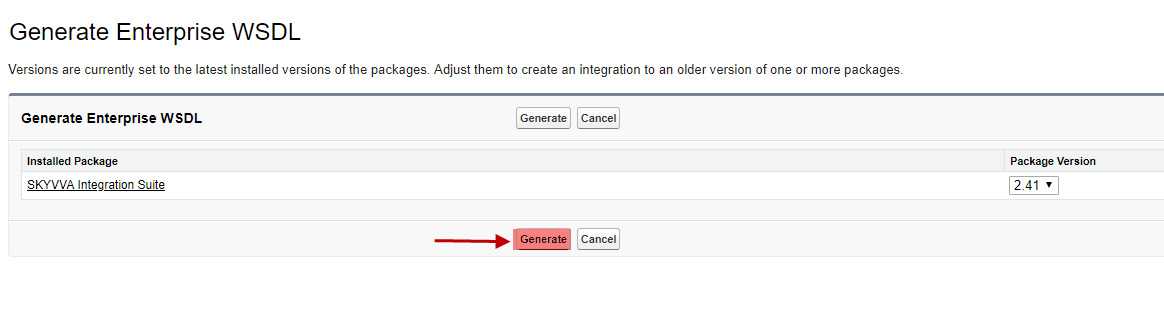
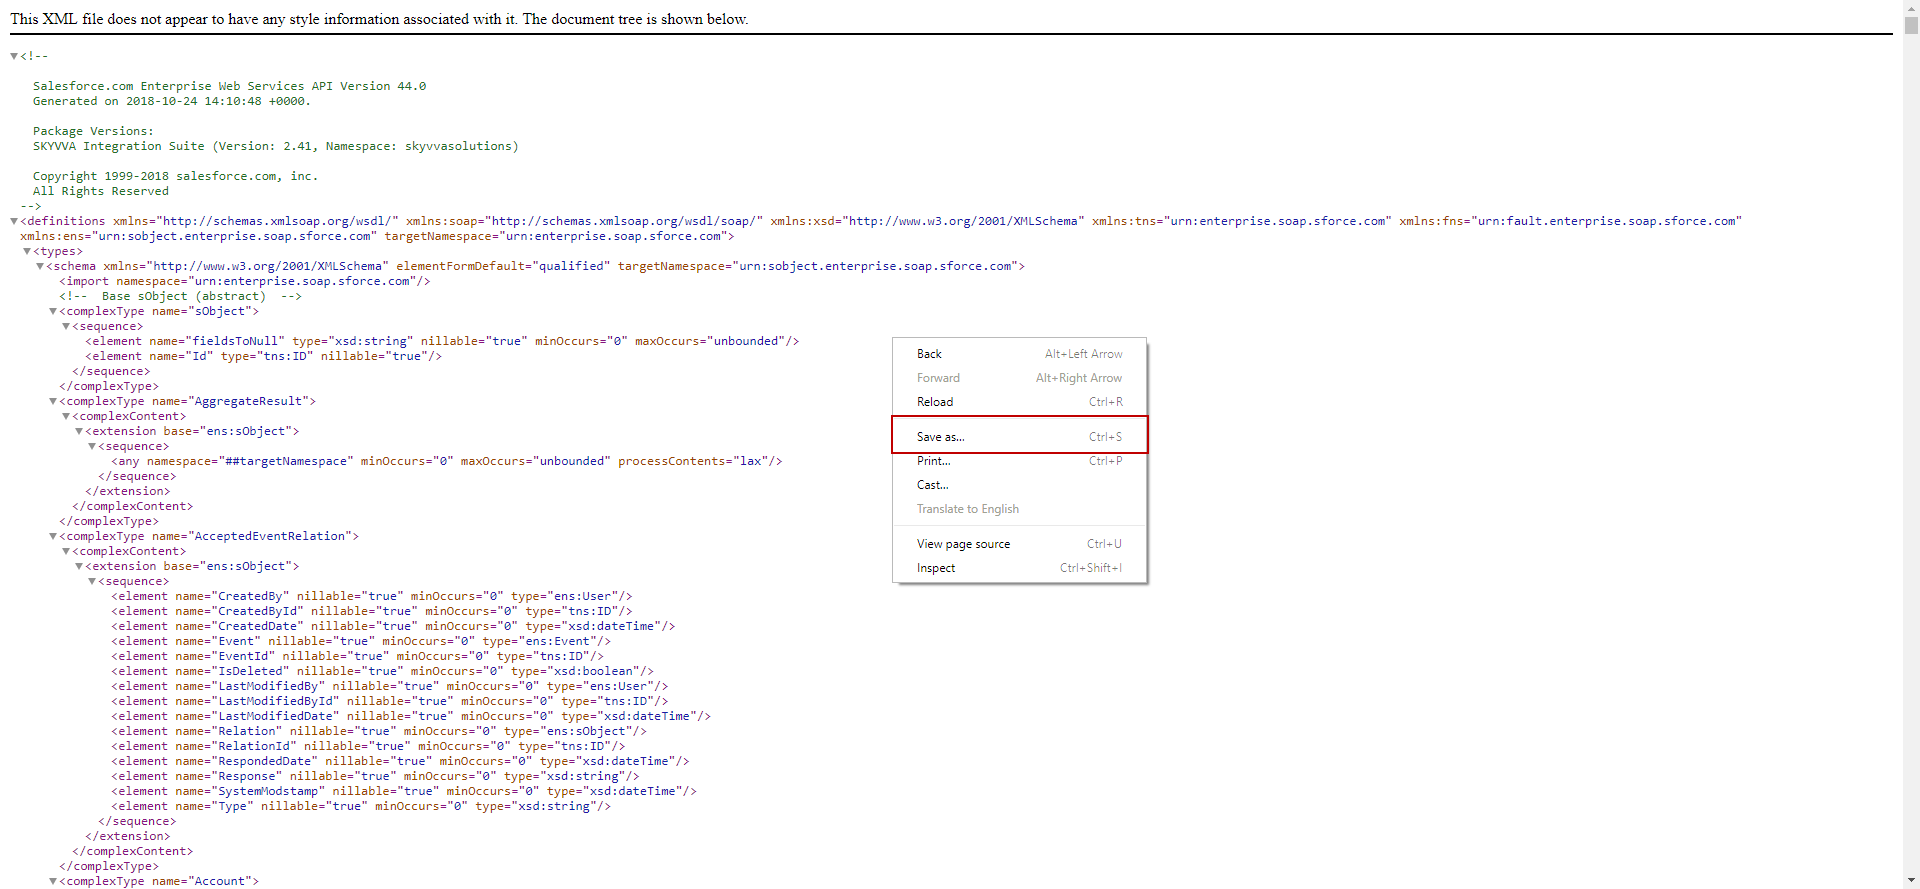
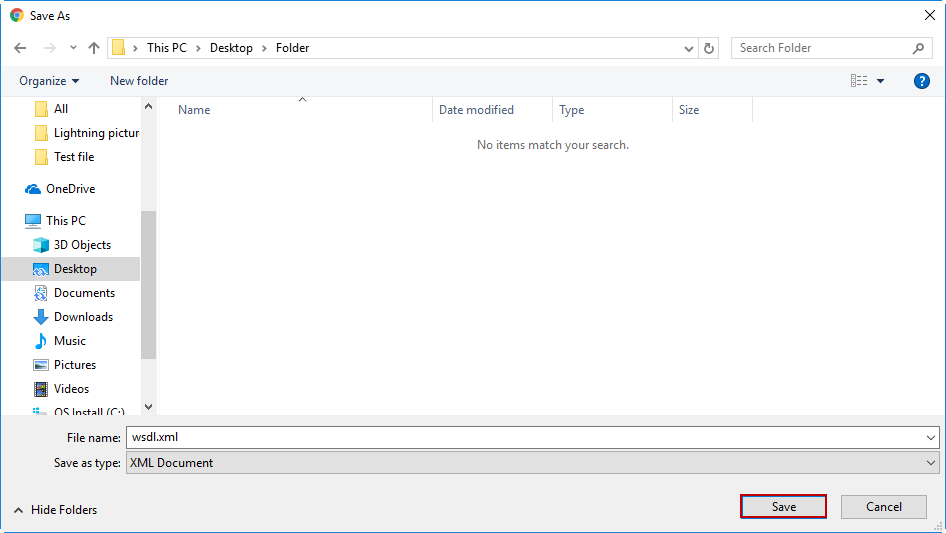
- Save
- SoapUI is an open source
- The user can easily download from Google.com
- SoapUI 5.3.0 version
- Follow easy steps of installation

- Right-click & open
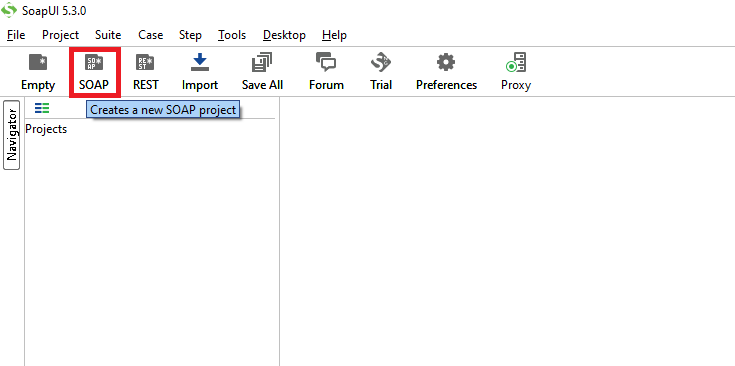
- Click & create a new SOAP project
- Write your Project name
- Browse Initial WSDL XML file

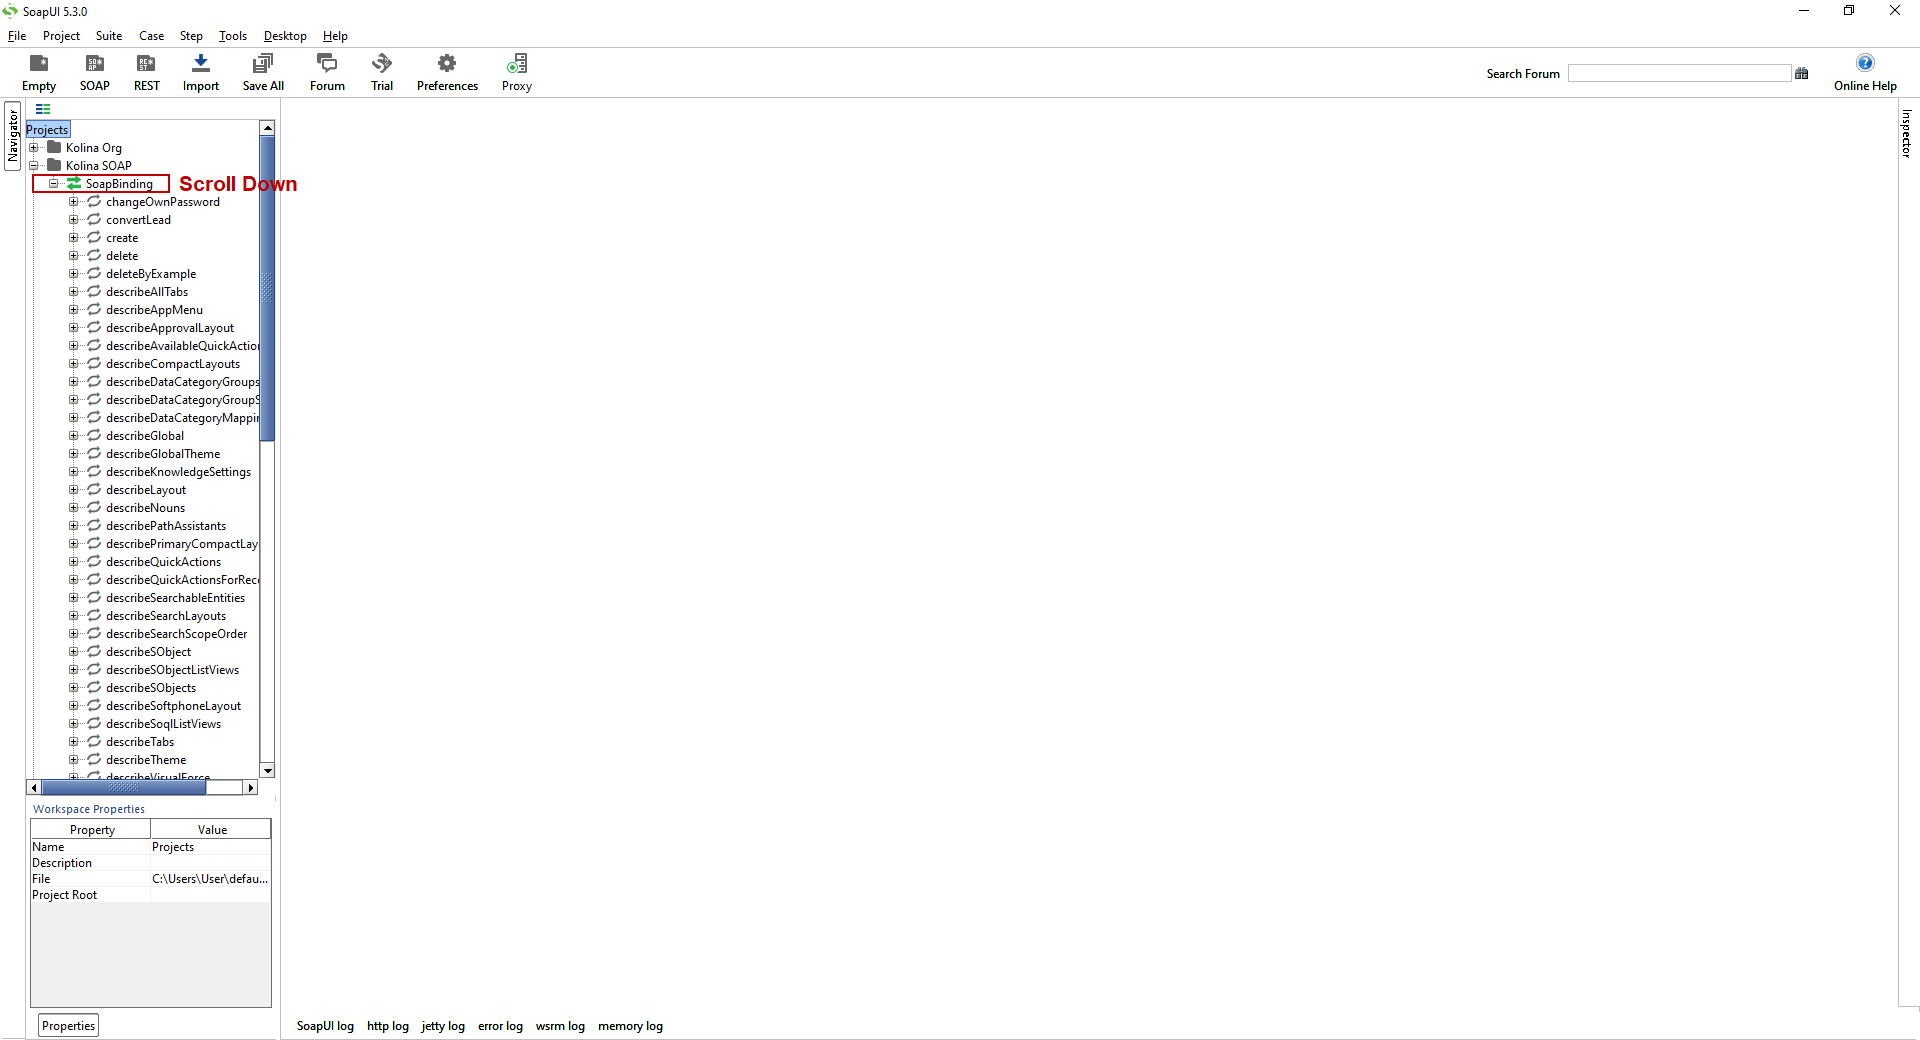
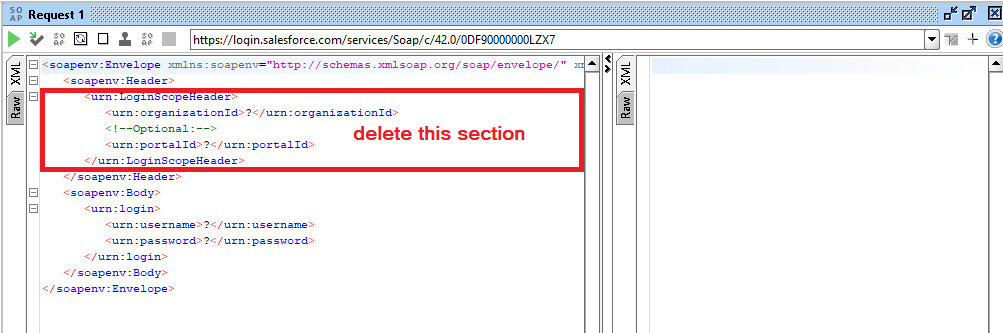
- Expand login & click “Request 1“

- Delete this section it’s not un-useable
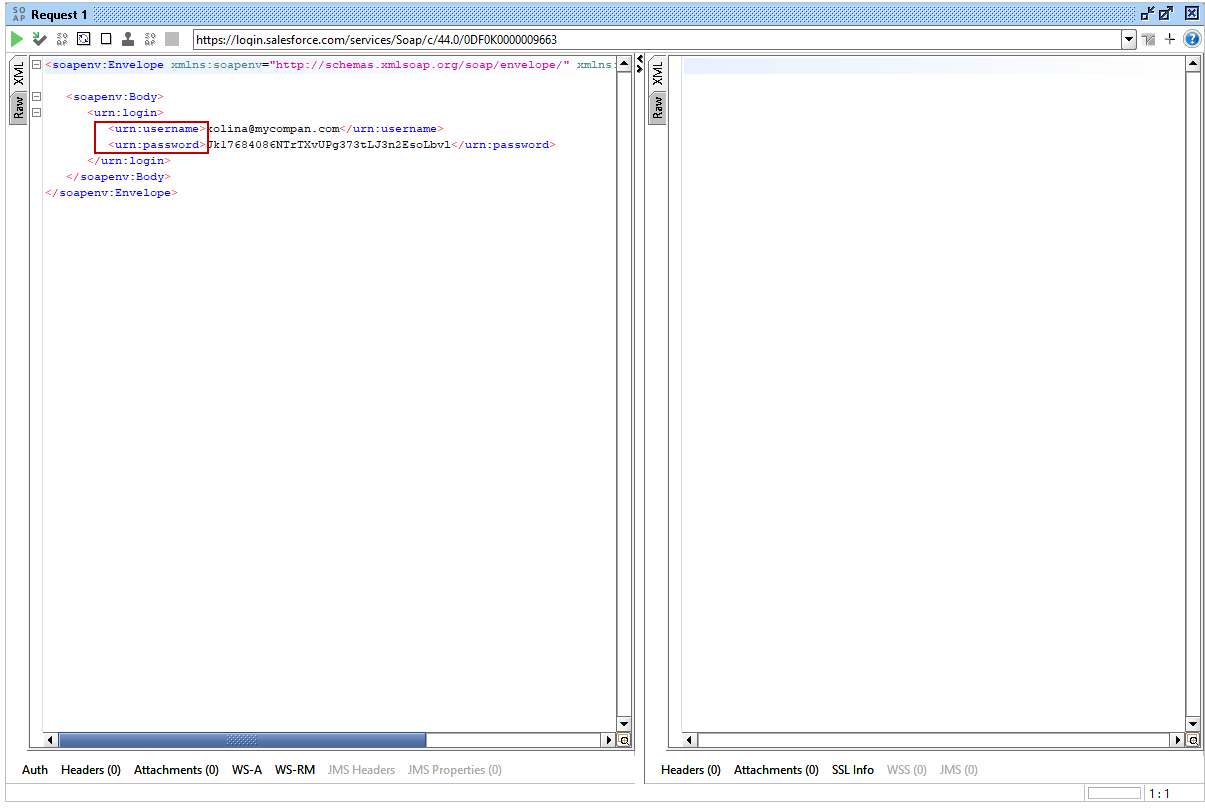
- Enter your Org credentials
- Username
- Password + Security Token
- Click on Play button
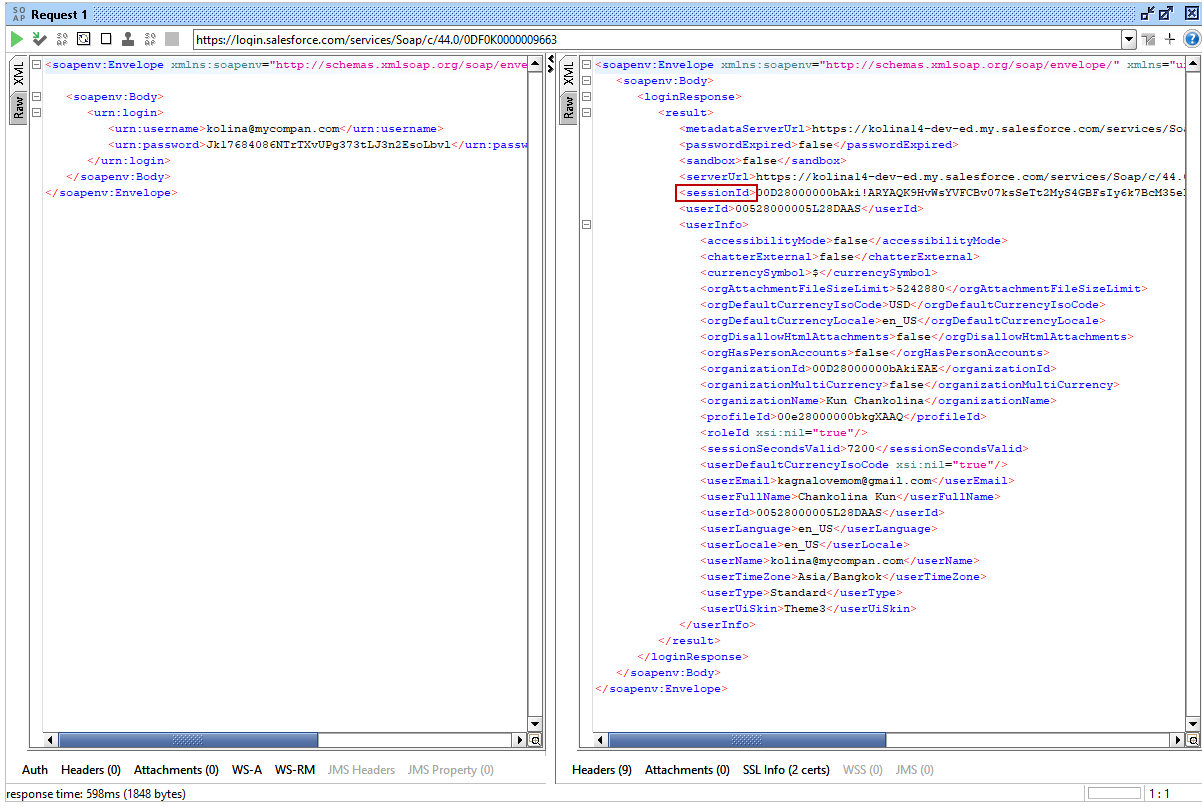
- Great you Generated sessionId successfully
Now repeat almost same steps but this time download SKYVVA WSDL
- Go to salesforce setup & Apex Classes in a search box
- Click Apex Classes
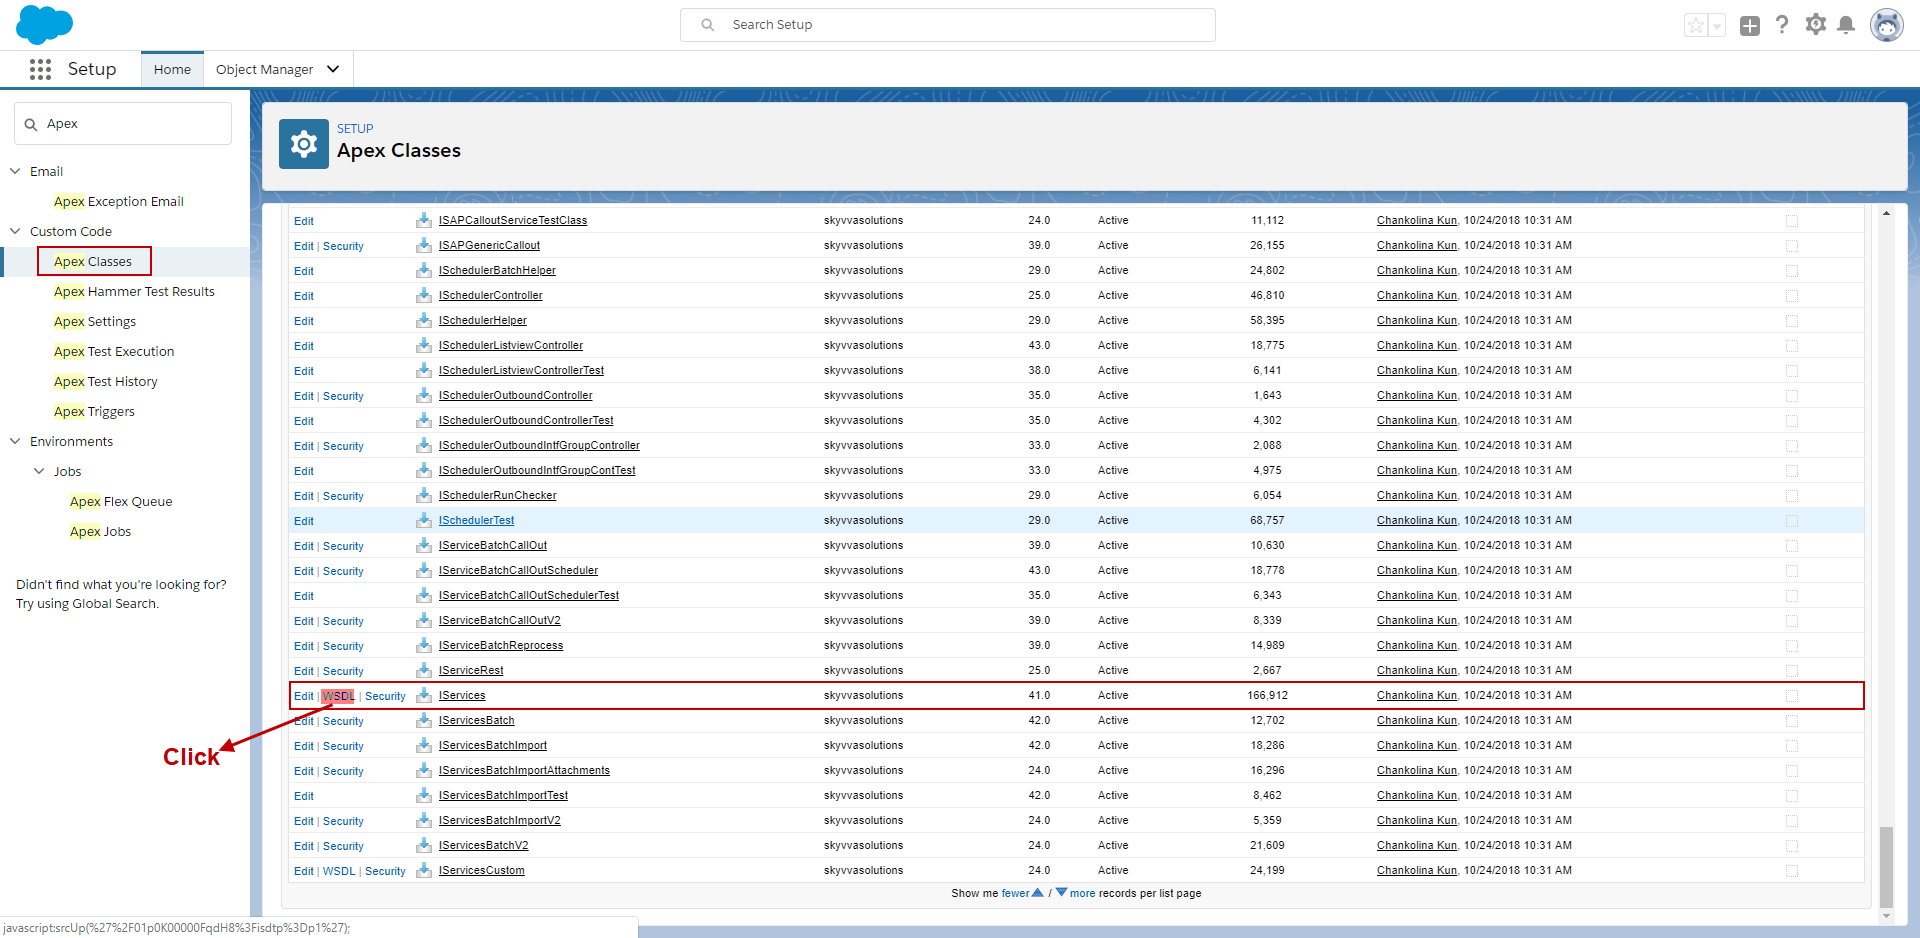
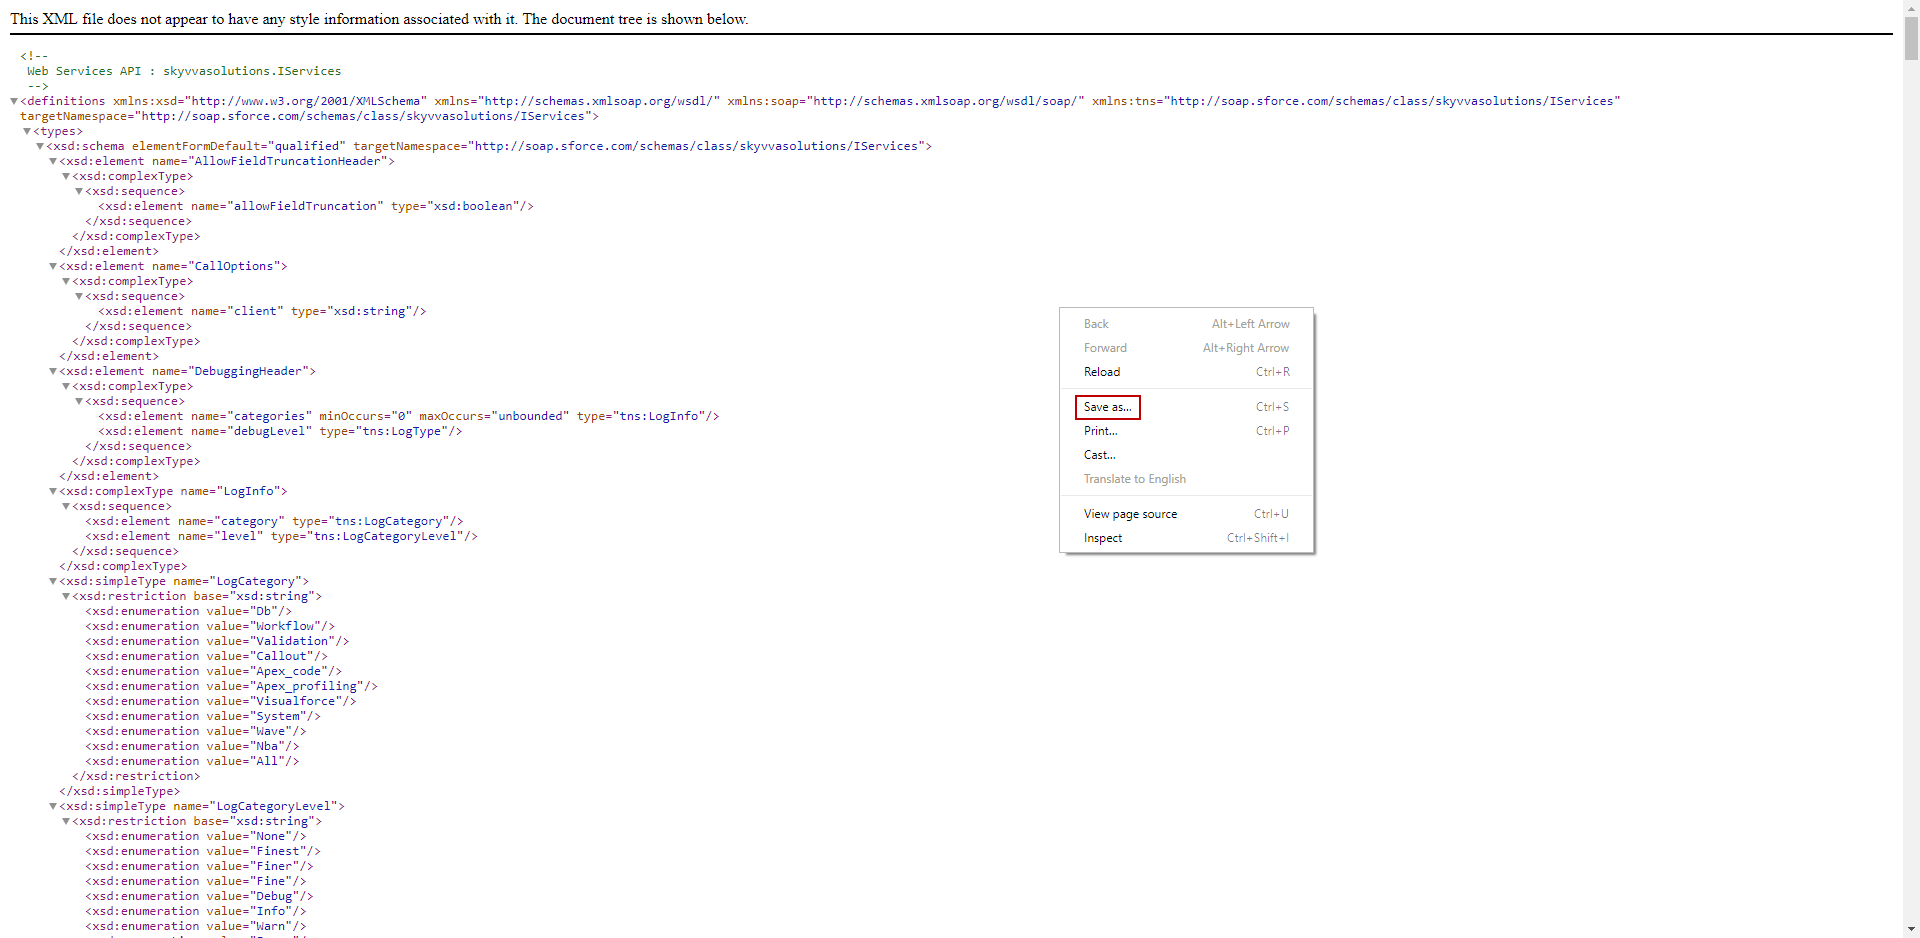
- Click on Save
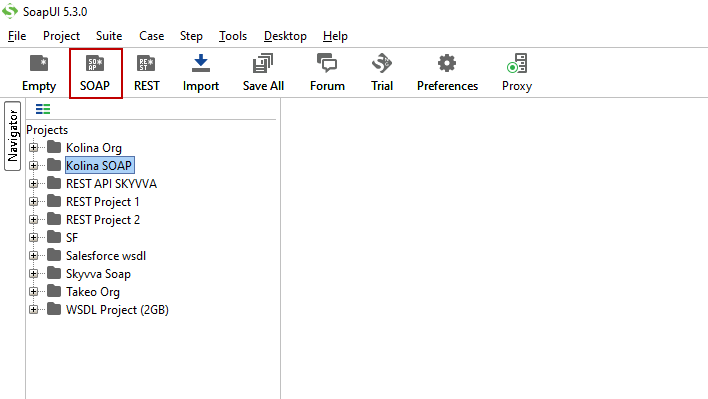
- Go to SoapUI
- Click on SOAP
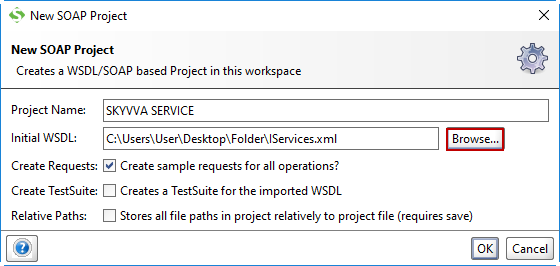
- Create a new SOAP project
- Type Project Name
- Browse your Initial WSDL XML file
- Click ok
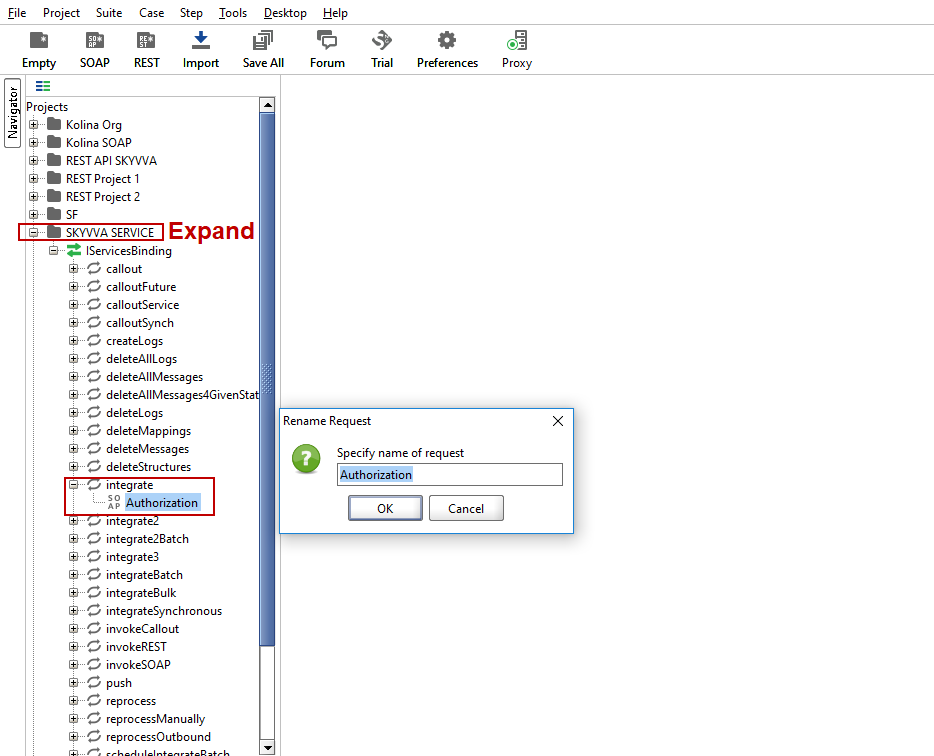
- Expand SkyvvaIServices
- Go to integrate
- Rename it to Authorization
- Go back to your Org
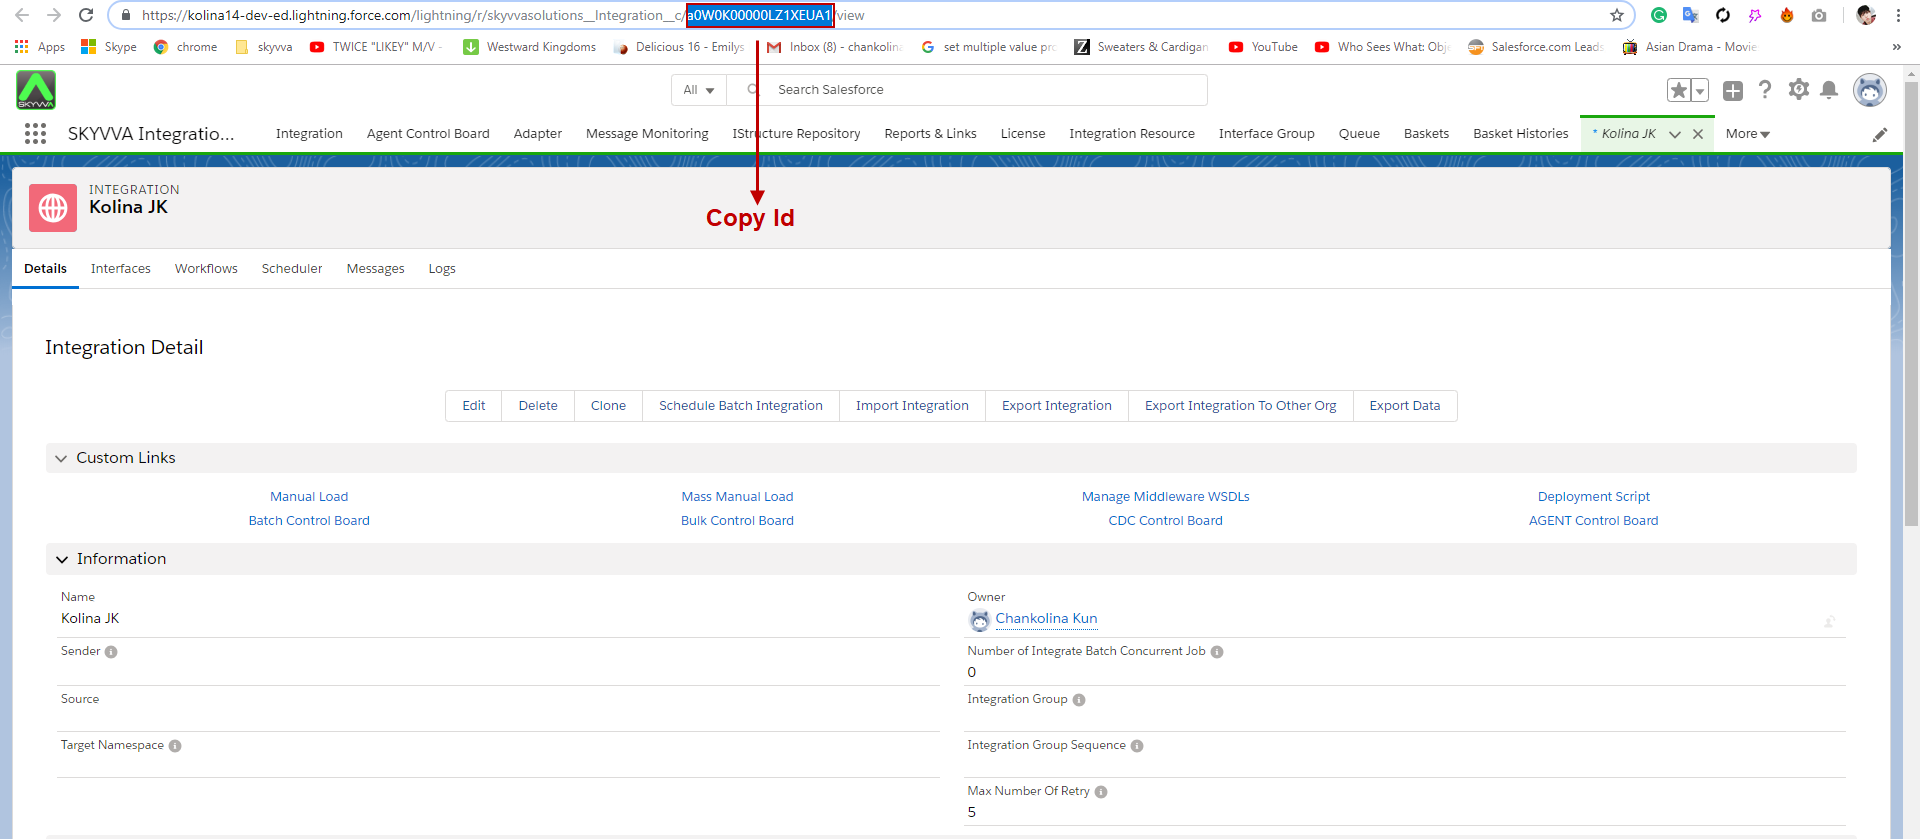
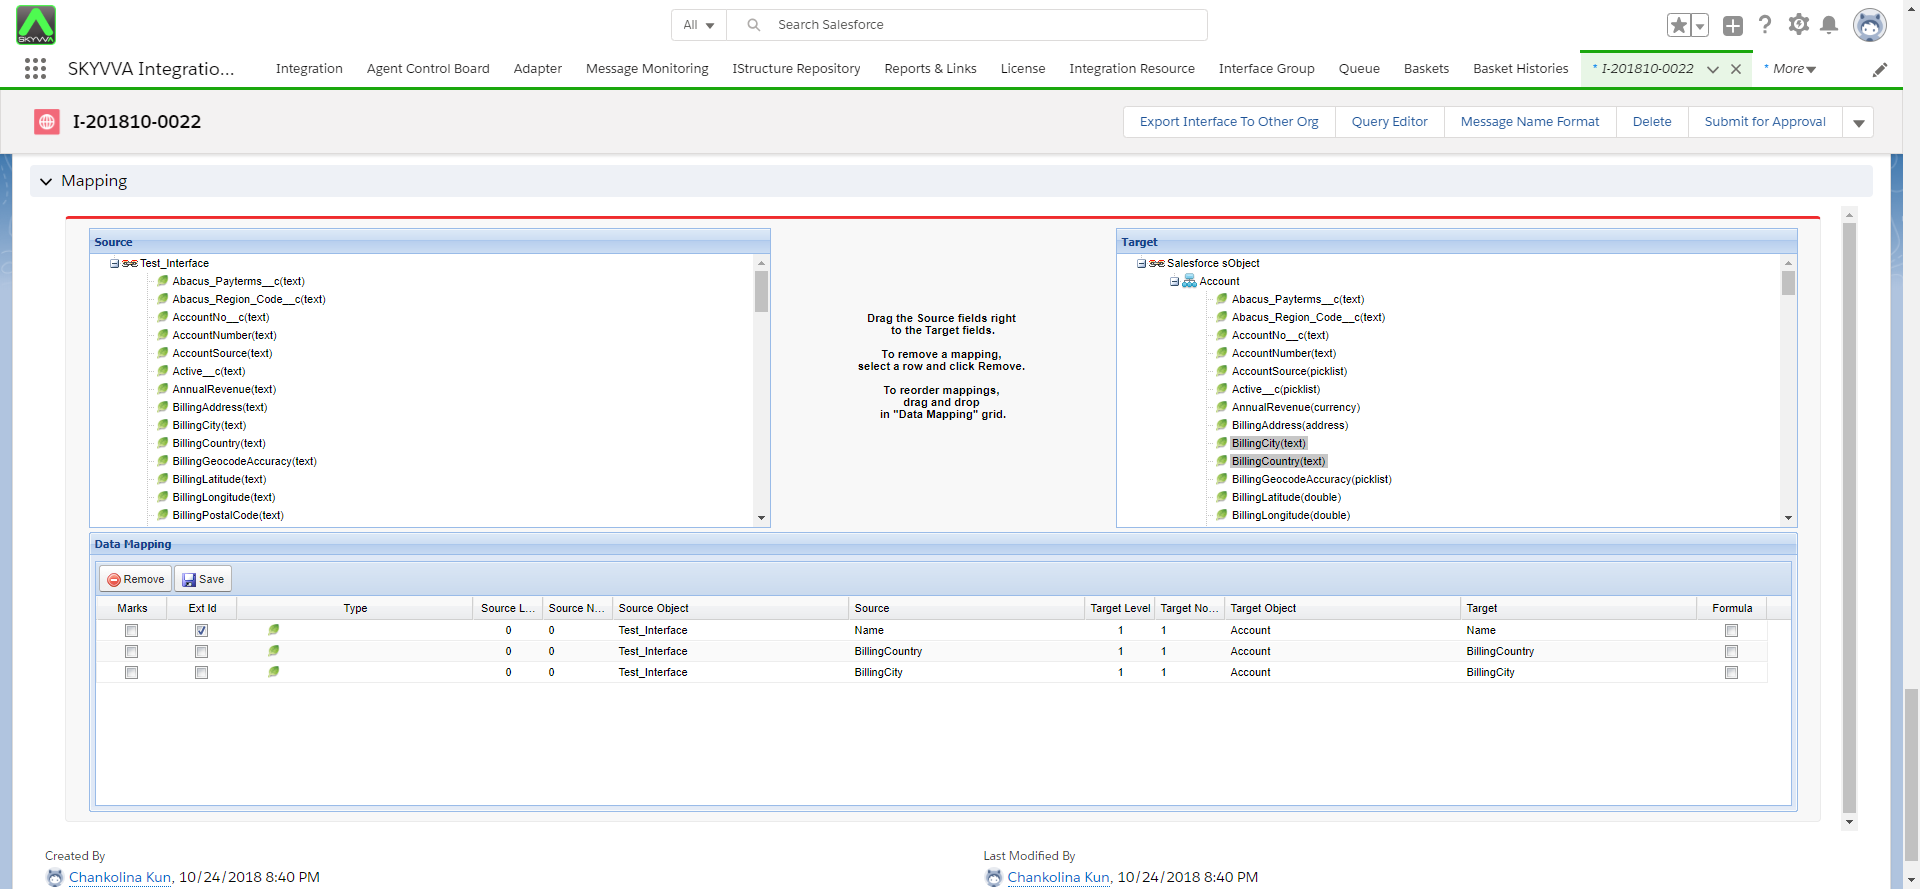
- Create Integration & copy IntegrationID
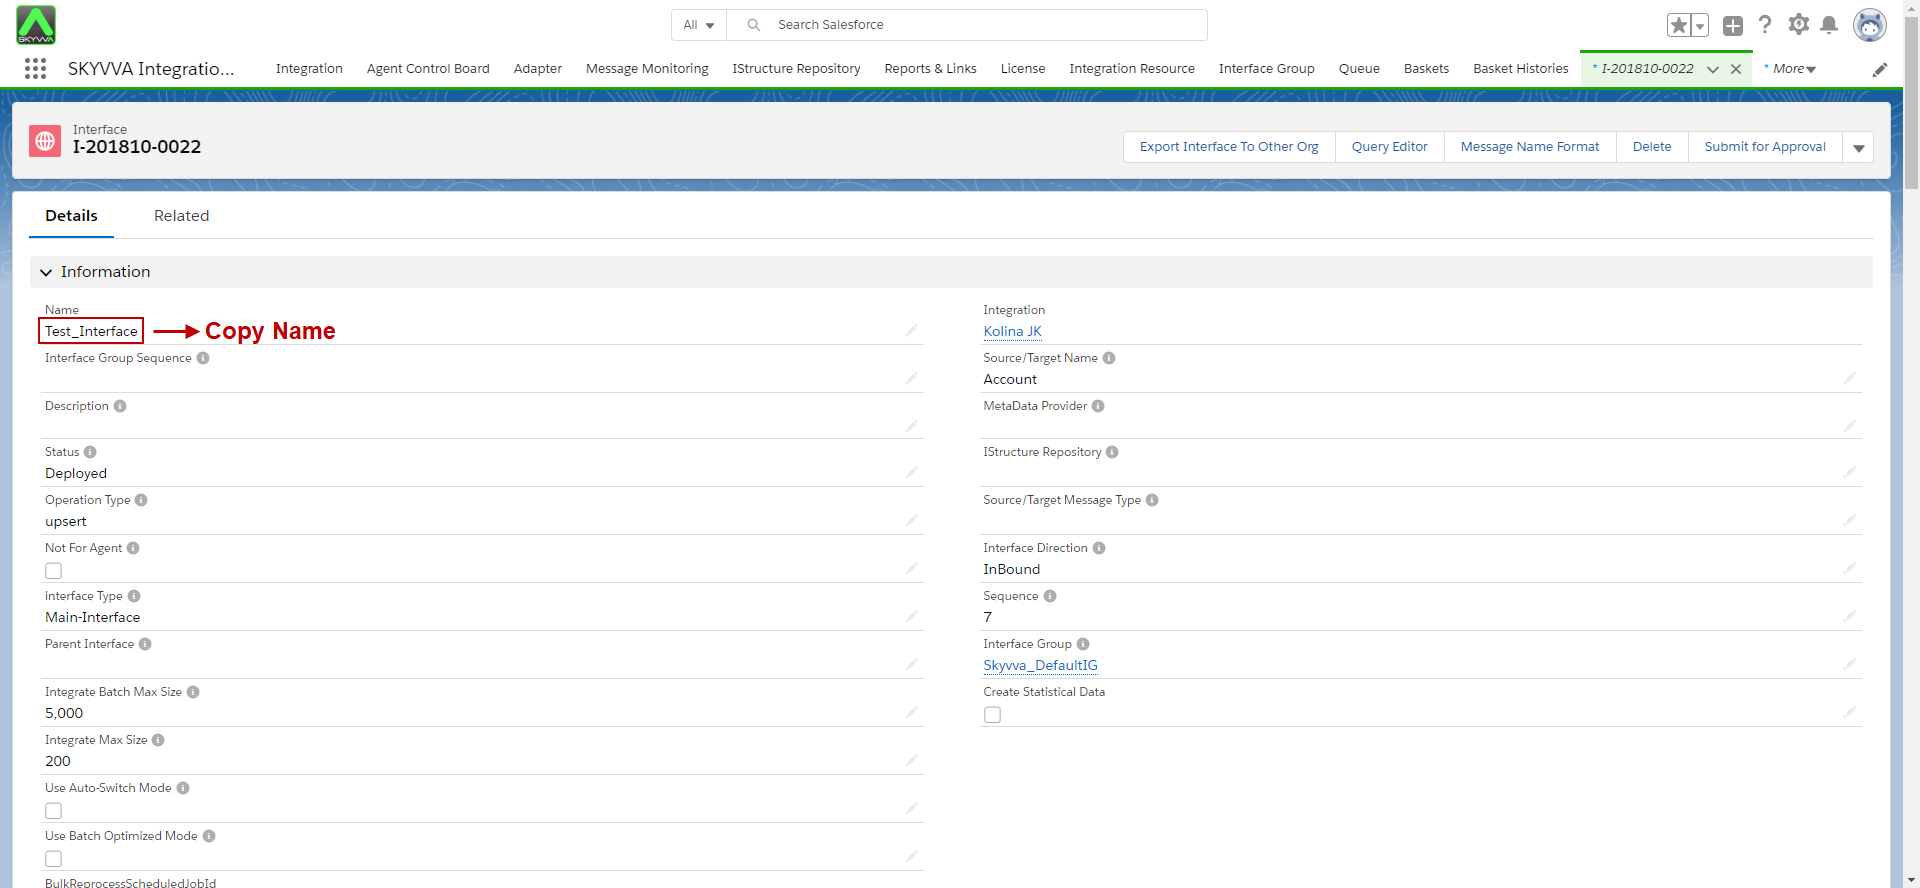
- Create Interface & copy Interface Name
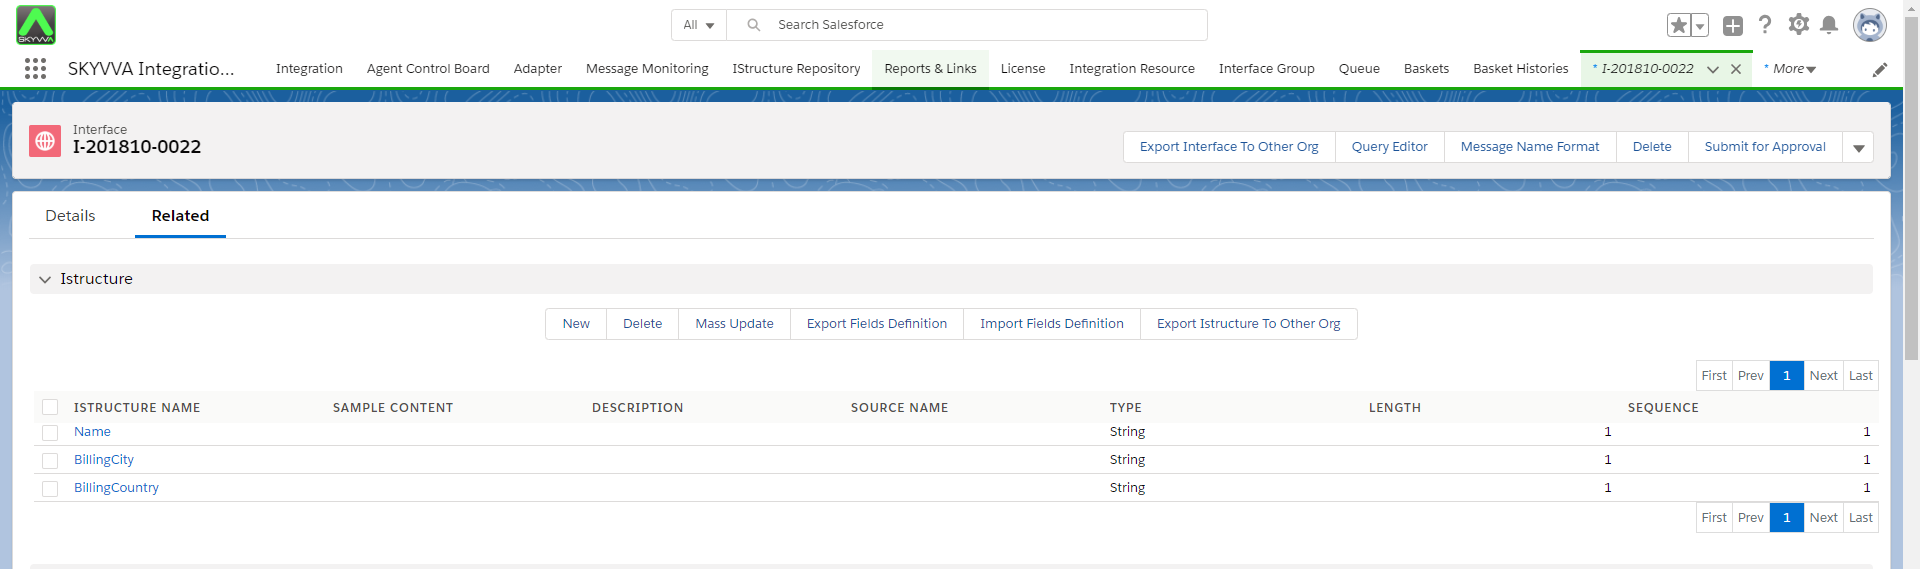
Scroll down to Istructure & create
- Name
- BillingCity
- BillingCountry
- Go to mapping section select ExtId & save
- Go to SoapUI
- Paste this code
<soapenv:Header>
<iser:SessionHeader>
<iser:sessionId>00D900000010dpg!ARcAQHp3fce3MLEVc3ihiOjek80SuTWZL2ZNbuCTMnh5voXpN13MzyumRsllnfJ8q7eGOH.3frqdGv2NLLbhSmZlsgUBtZhg</iser:sessionId>
</iser:SessionHeader>
</soapenv:Header>
<soapenv:Body>
<iser:integrate>
<iser:integration>
<!–Optional:–>
<iser:fromSystem>a0M9000000JMIoj</iser:fromSystem>
<iser:targetObject>Interface_akash</iser:targetObject>
<!–Zero or more repetitions:–>
<iser:records>
<!–Zero or more repetitions:–>
<iser:oneRecord>
<iser:name>Name</iser:name>
<!–Optional:–>
<iser:value>Test</iser:value>
</iser:oneRecord>
<iser:oneRecord>
<iser:name>BillingCity</iser:name>
<!–Optional:–>
<iser:value>Mumbai</iser:value>
</iser:oneRecord>
<iser:oneRecord>
<iser:name>BillingCountry</iser:name>
<!–Optional:–>
<iser:value>India</iser:value>
</iser:oneRecord>
</iser:records>
<!–Optional:–>
</iser:integration>
</iser:integrate>
</soapenv:Body>
</soapenv:Envelope>
[/aux_code]
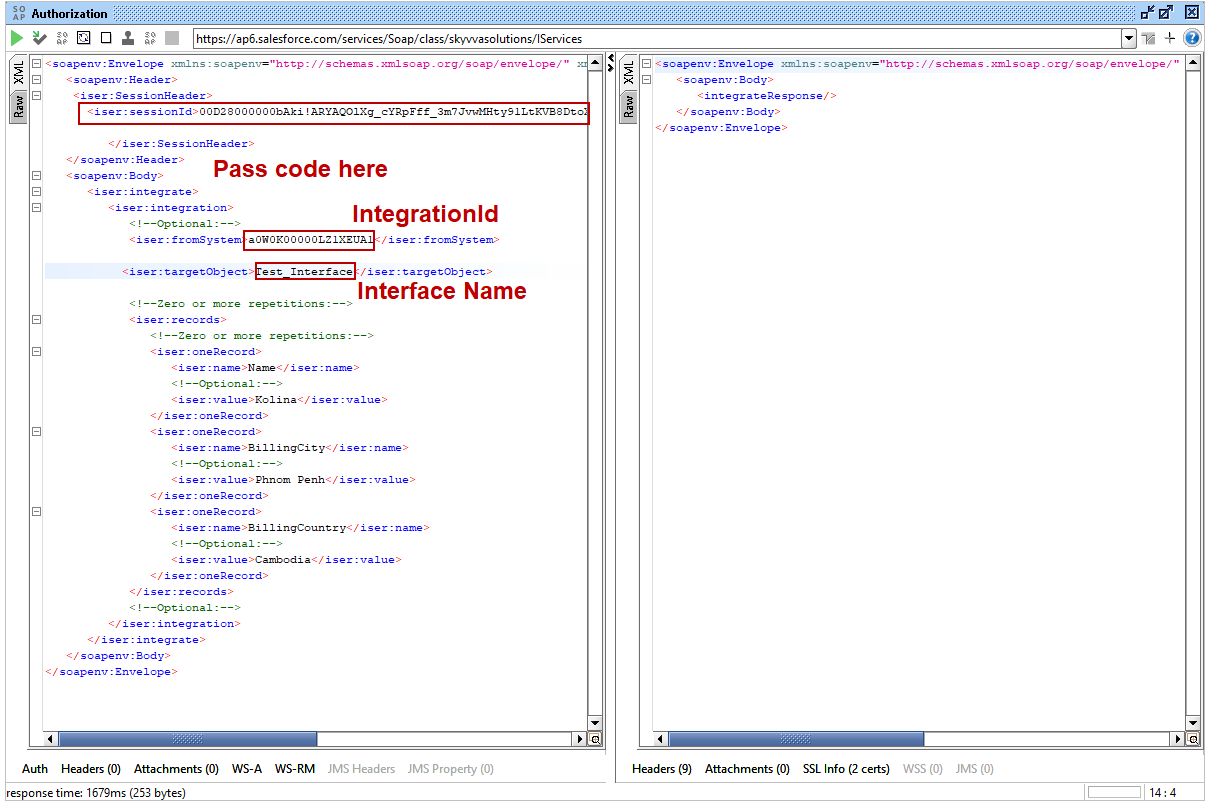
- Submit
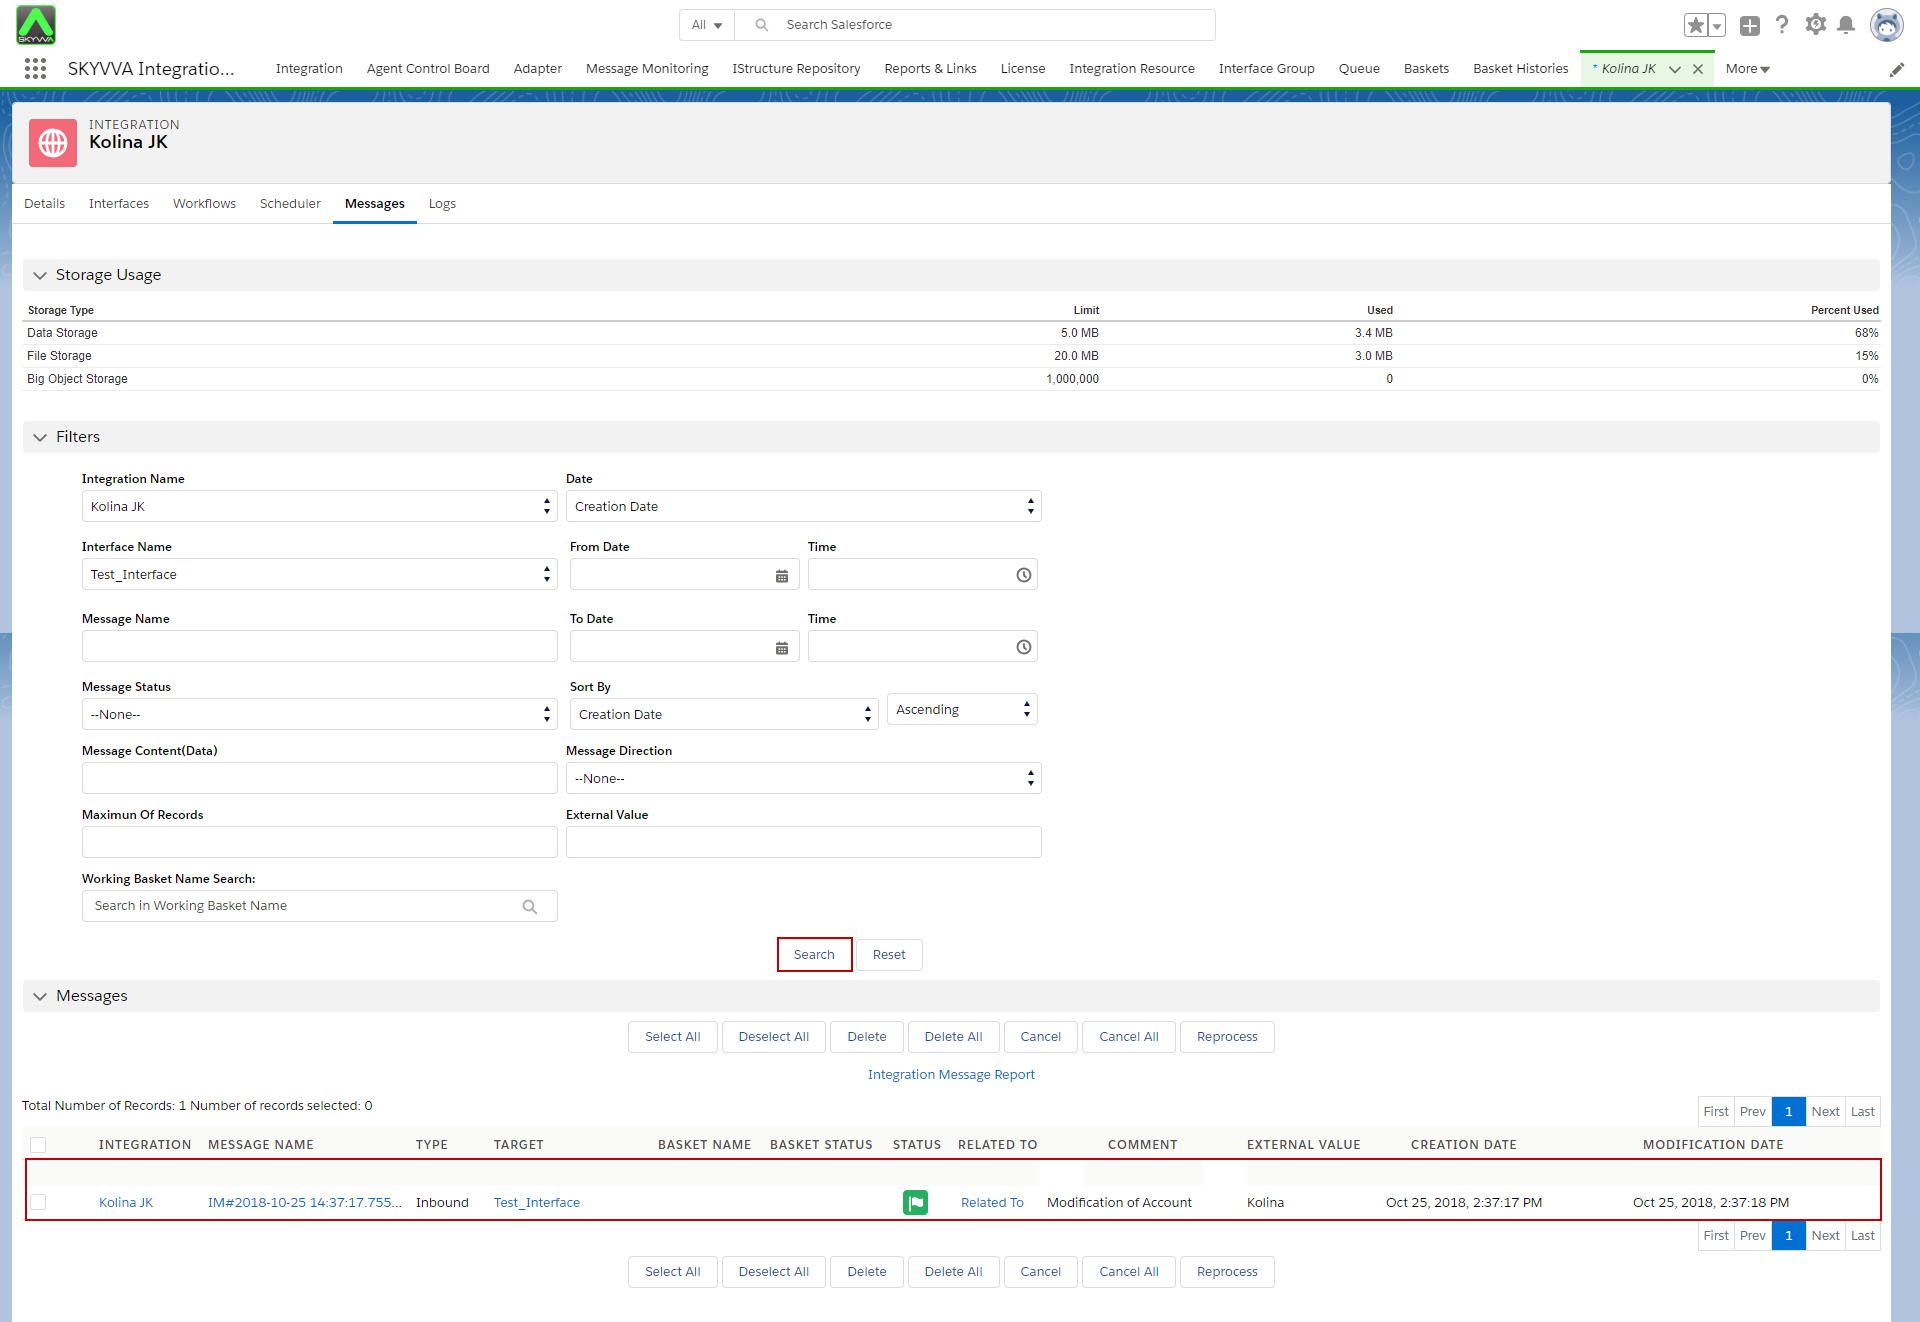
Great, you pass your code to Salesforce Org.
- Go to your Salesforce org
- Go to your Integration
- Click on Message Board & press search button