
In this unit, we will see how we can transport integration or interface. So basically, we have two options one is Backup & Restore, and another one is using the Transport routes. Both the functionality have their advantages.
- Backup & Restore:
- Advantages:
- Simplicity: Backup & Restore is often a straightforward process.
- Quick Recovery: In case of failures or issues, the user can quickly restore the system to a known good state.
- Suitable for smaller setups or scenarios where data consistency is critical.
- Considerations:
- Downtime: Depending on the size of the backup and the complexity of the org, restoring may require downtime.
- Advantages:
- Transport Routes:
- Advantages:
- Transport routes allow for more control over the objects being transported.
- Better suited for large-scale and complex integration landscapes.
- Transport routes often involve version control, helping to manage changes systematically
- Advantages:
SKYVVA Integration Application:
- SKYVVA is known for providing integration solutions on the Salesforce platform.
- It often involves the exchange of data between Salesforce and other systems.
- The choice between Backup & Restore and Transport routes may depend on the specific requirements and the scale of the integration project.
Restore and Backup of an integration #
- Firstly, we will understand that when we need to restore and backup an integration for example in the case of setting up a test or production instance from your development instance. When you restore and backup on the integration level every object belonging to an Integration will be restored and backup e.g. all interfaces, adapters, etc. If you do not want the whole objects but for example, only some interfaces, you have to do Restore and backup on the interface level.
- We do not recommend restoring, or backup the outbound adapter since the physical data like URL, user, and password is different, and therefore it makes no sense. On the test and production instance, you will have a different URL, user, and password.
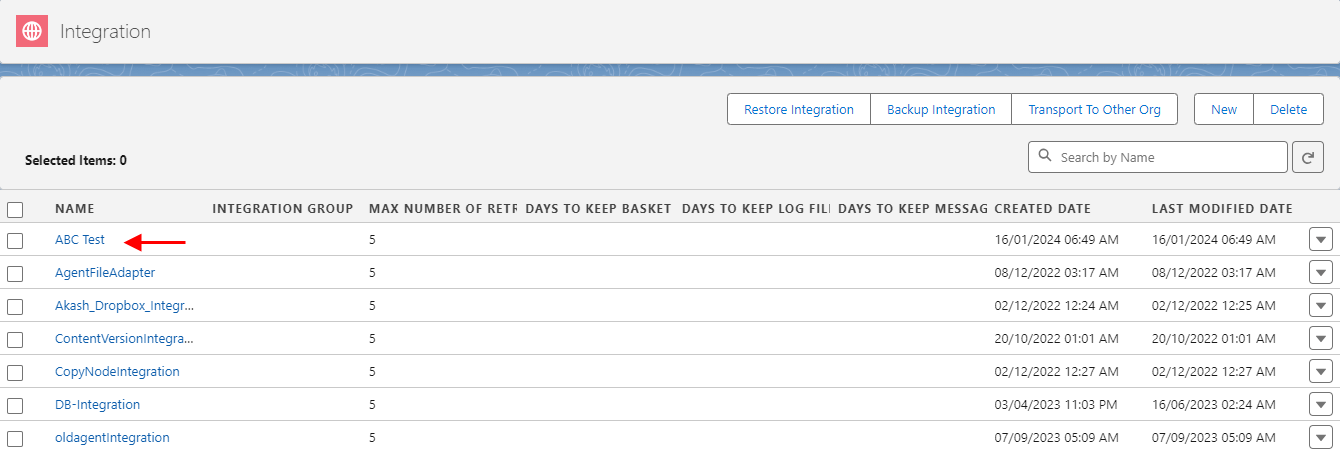
Backup an integration - Navigate to the tab “Integration” and select the integration you want to restore e.g. “Account”.
- Click on the button “Backup Integration”.
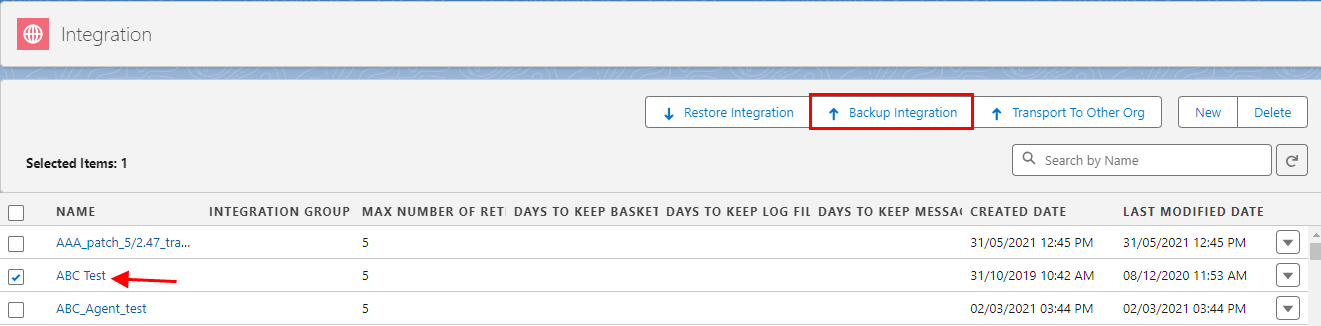
- We can save the exported file. As shown below.
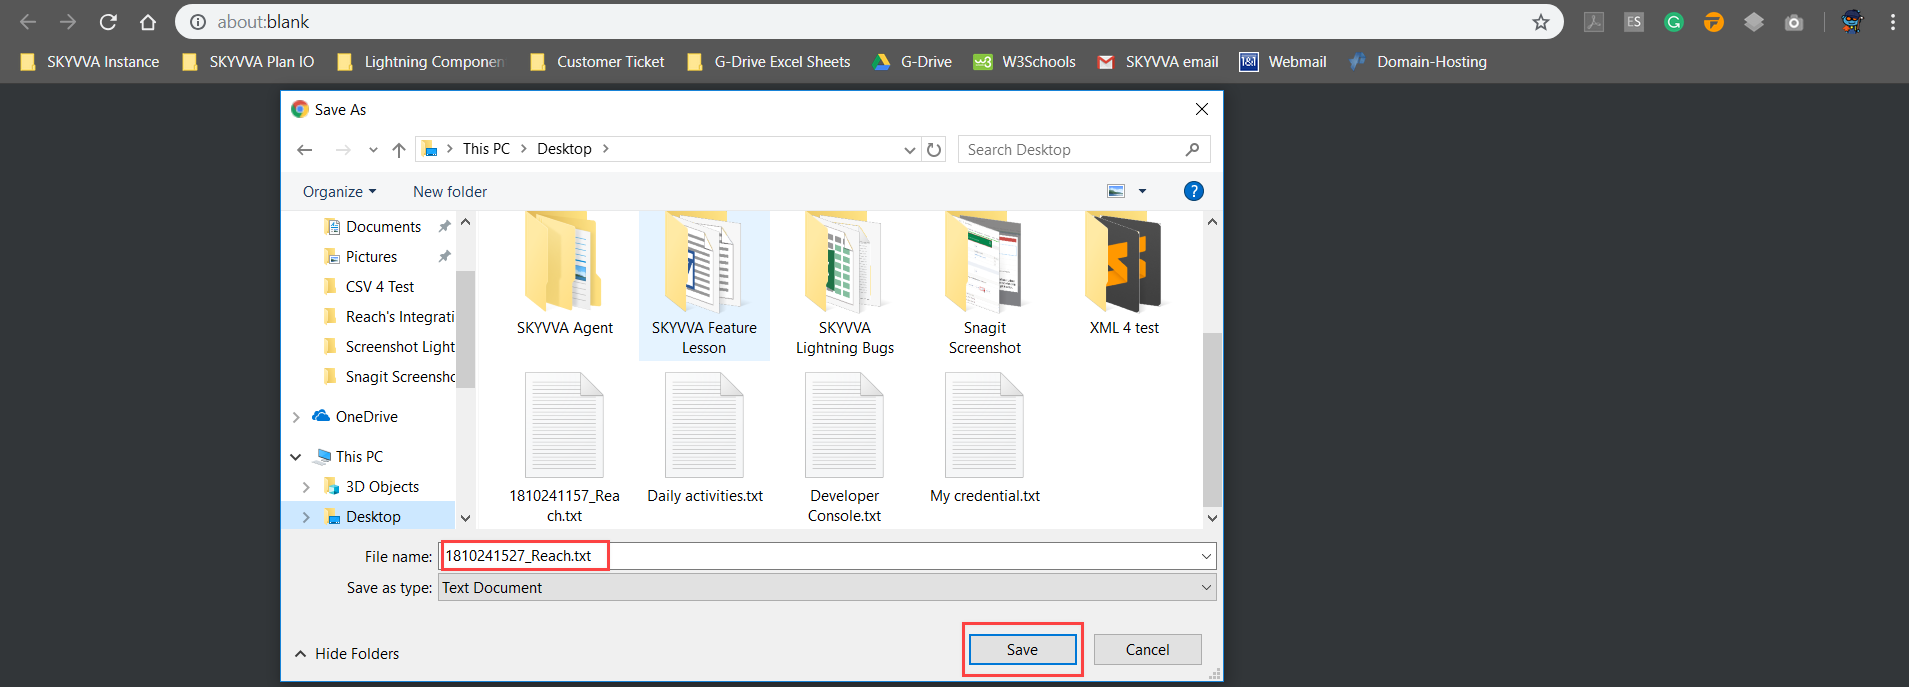
- Click on the button “Save” to save the Backup file to your local PC.
- Now you can restore this file into a new integration.
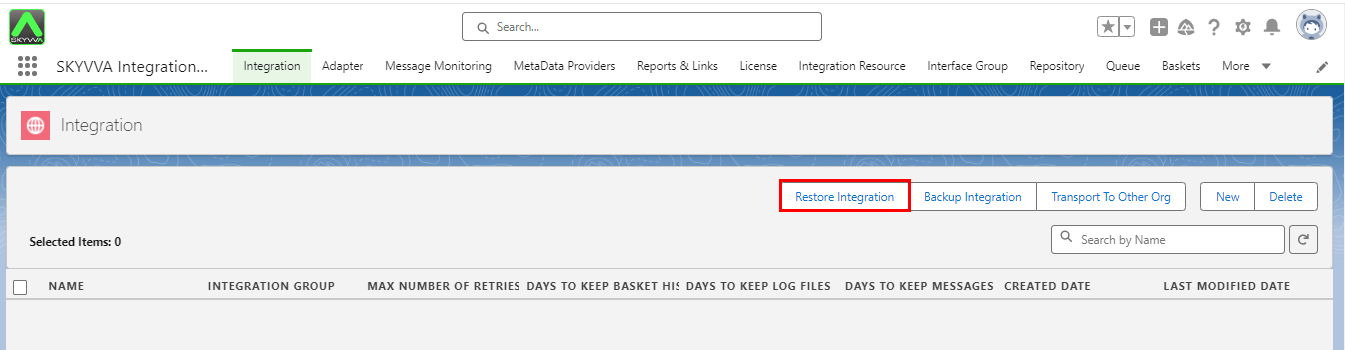
Restore an integration
- In your target instance, open the tab “Integration” and click on “Restore Integration”.
- Click on the button “Upload Files” to restore the integration you have exported before.
- Browse your file and open it.
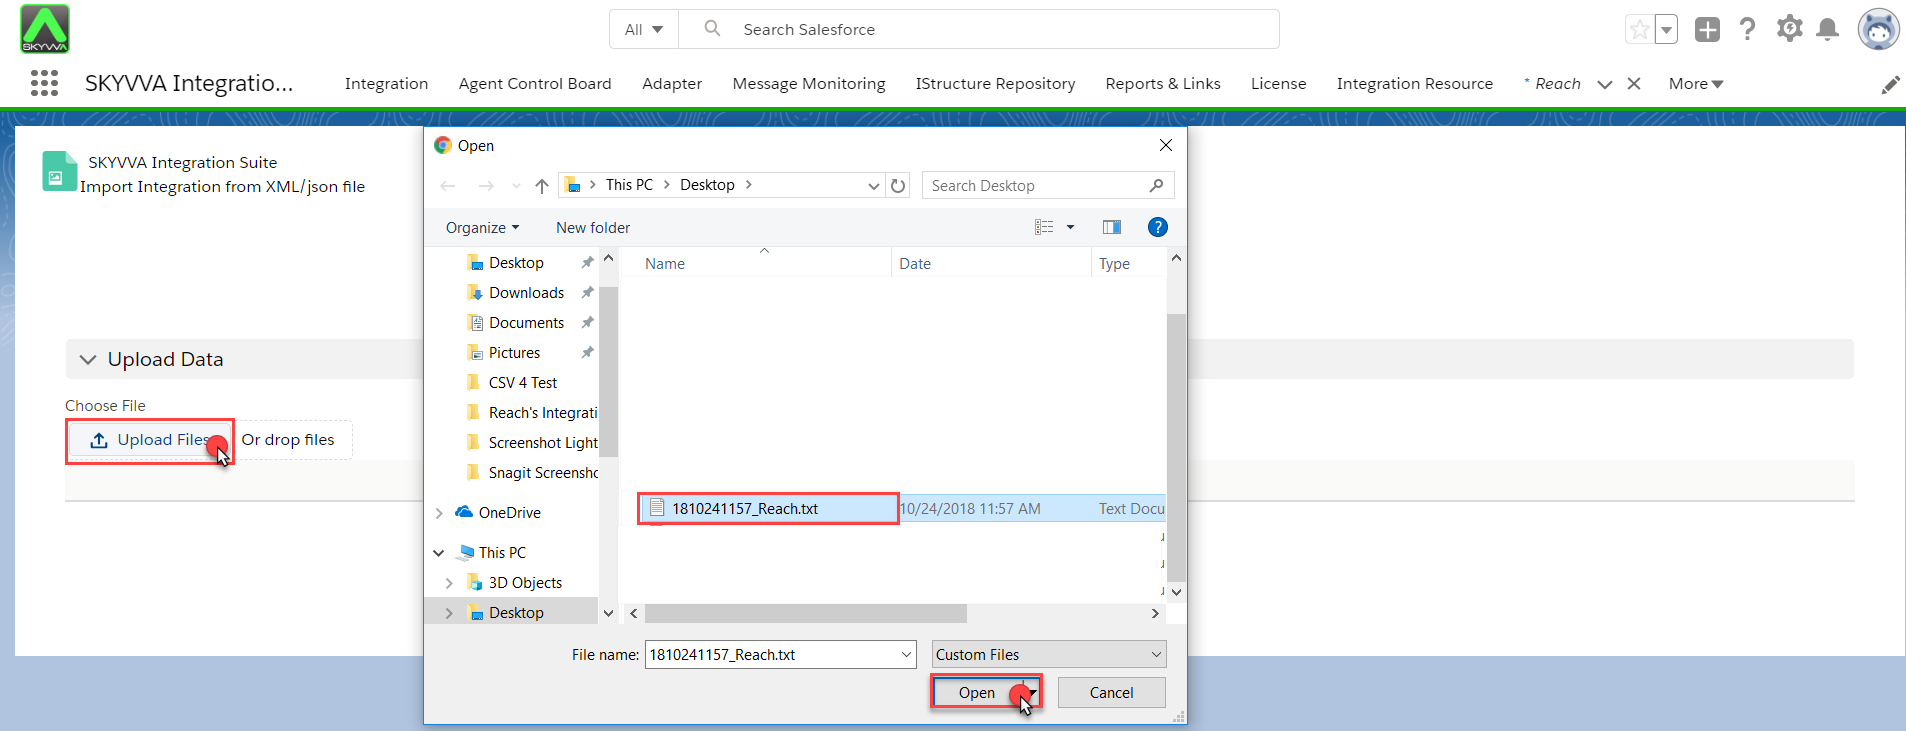
- Now click on the button “Upload” then select your Integration and click on “Import”.

- The import process is running asynchronously in the background. Just wait for a few seconds and open again the tab “Integration Admin”

- To monitor the progress of the import you can look into the apex job monitor. If the import has been done successfully, you will see this line in the apex job monitor.

Advantage: #
The advantage of having backup and restore integration files is that we can easily reuse those files. It’s like a backup. So whenever we need that integration we can import it in our org.
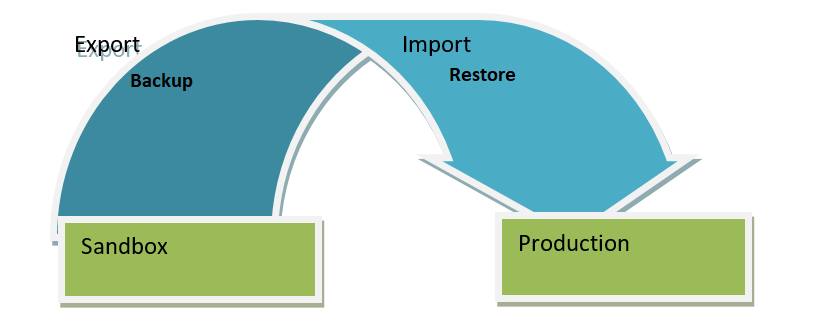
Transport to other org directly using Transport Route #
In the picture given below, we will backup the integration of ‘Accounts’ from one org to another.
As we can see here we have export integration from the sandbox org and import it into production org directly using the transport route.
Steps to be followed to achieve backup-restore functionality(Export to other org)
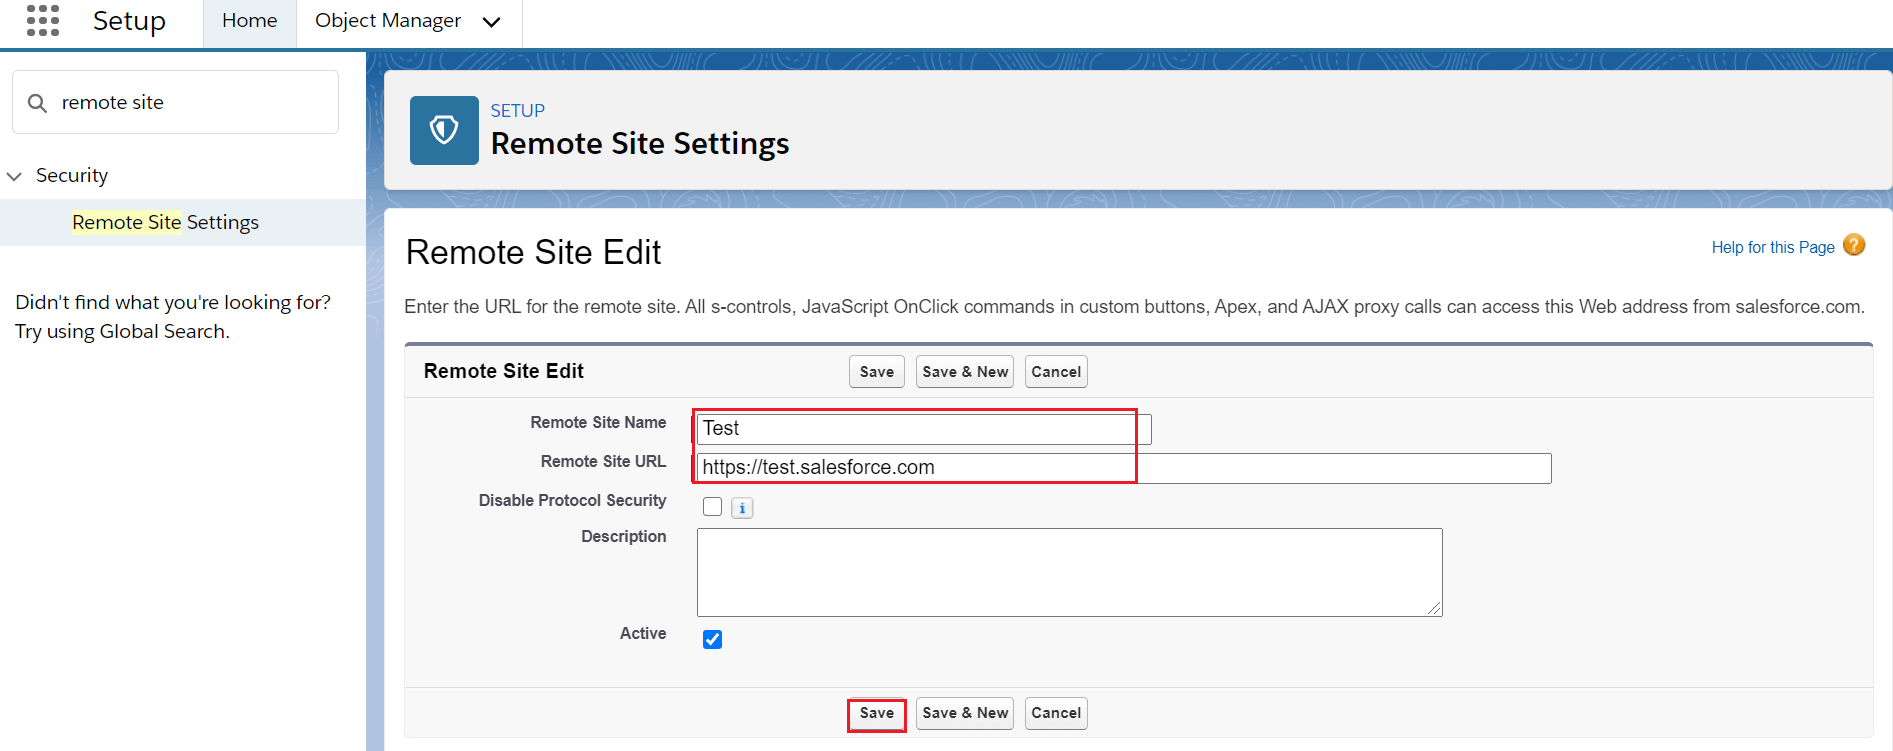
Step 1: Create a Remote Site Setting in the source Organisation. (SendersOrg)
- Go to Setup
- Enter remote site settings in the quick-find box
- There are 2 remote site settings to create.
- Login Url: https://login.salesforce.com (Production) or https://test.salesforce.com (sandbox)
- Target Org Url: https://ap5.salesforce.com (sample) (Classic URL)
- Remote site settings for Login Url. Check the picture given below.
- Remote site settings for Target Org Url(Classic URL). Check the picture given below.
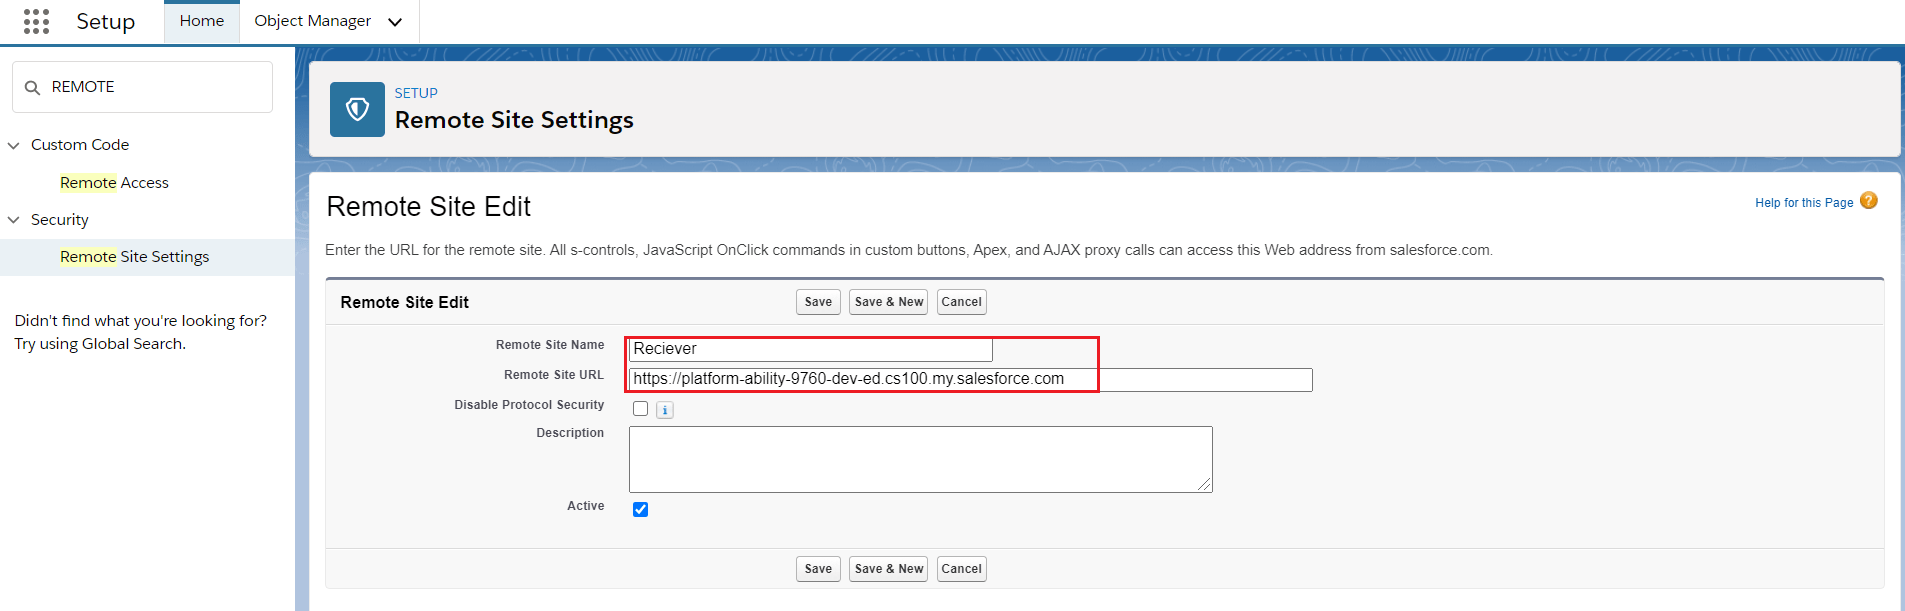
- Hence both the remote site settings are created.
Step 2: Create a Connected App in Source Organization(Receivers org)
- Go to Setup
- Enter App Manager in the quick find box
- Click on New Connected Apps
![]()
- Please, add Full Access to Selected Oath Scopes.
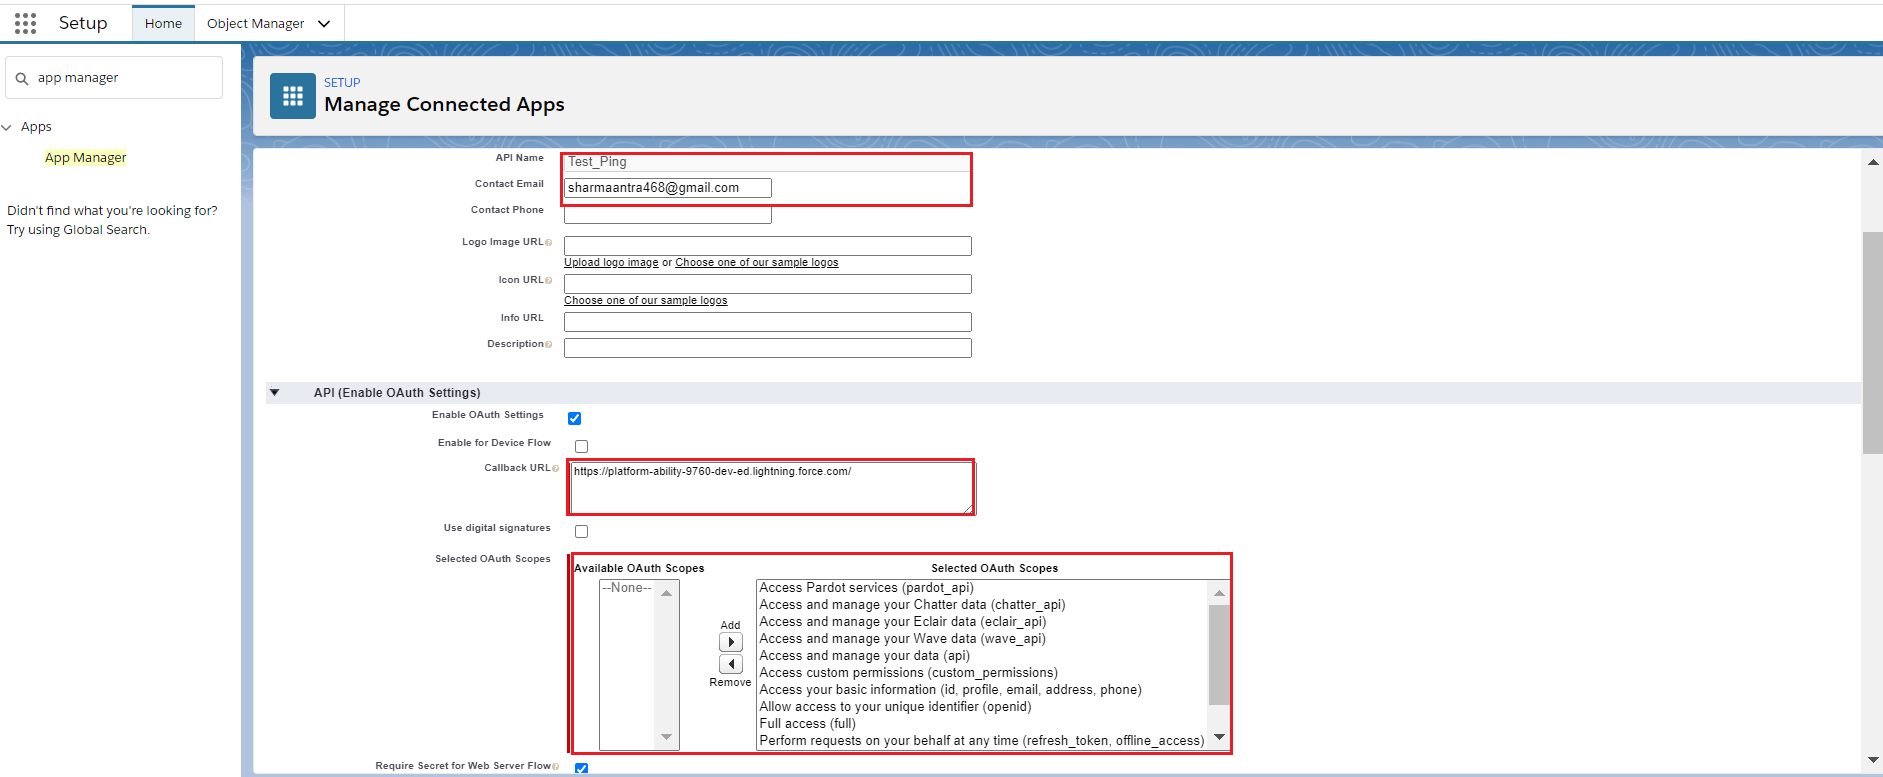
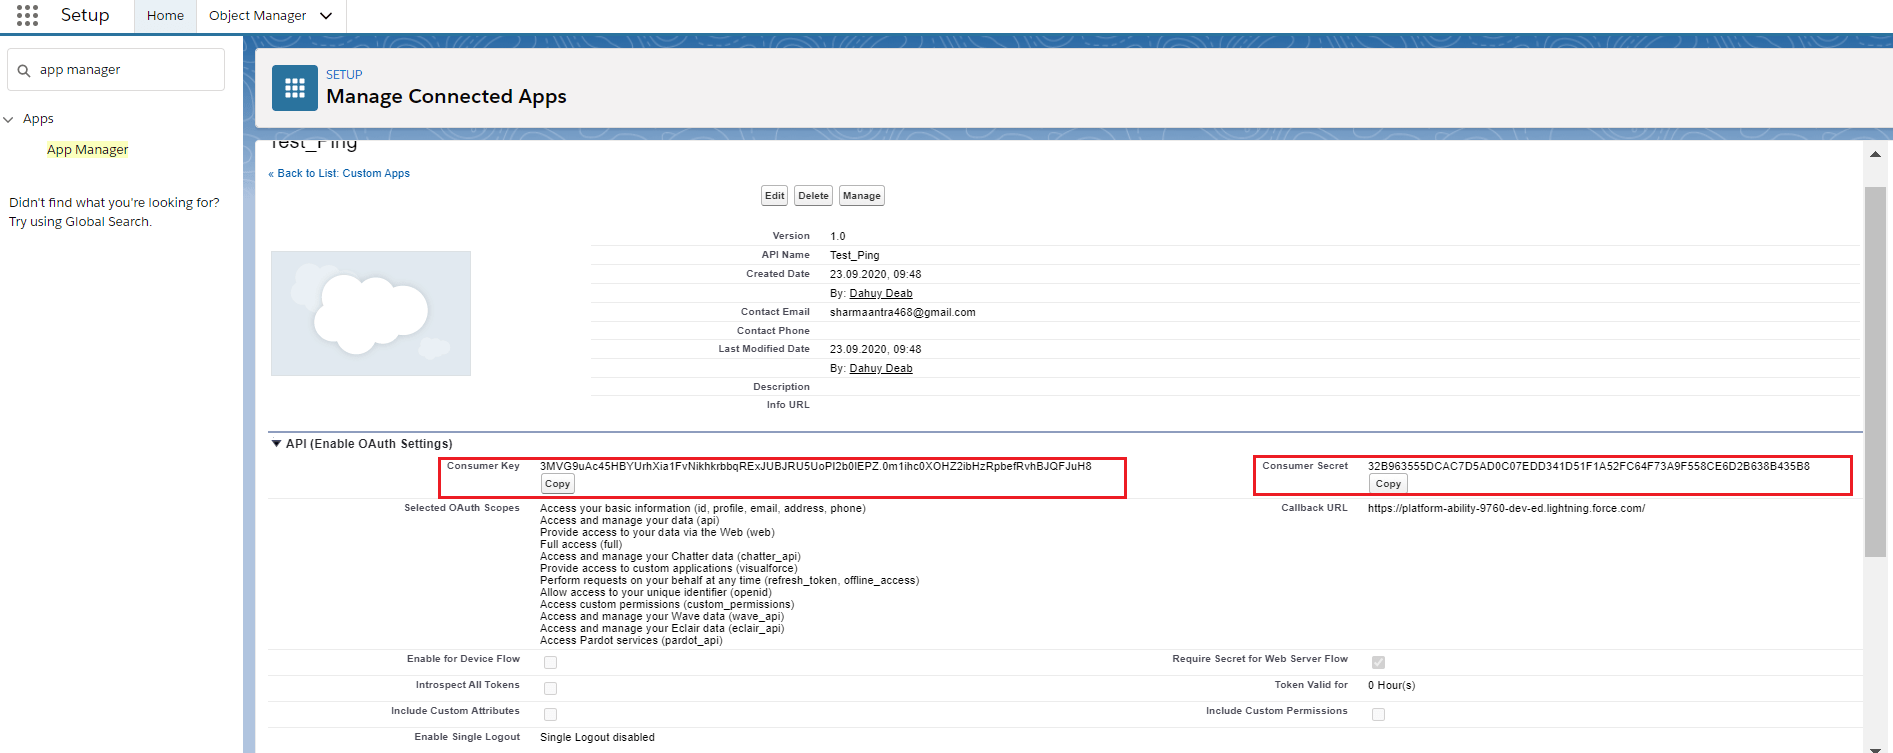
- In the connected app, you will get the Consumer Key And Consumer Secret. And use these values to create a Transport Route.
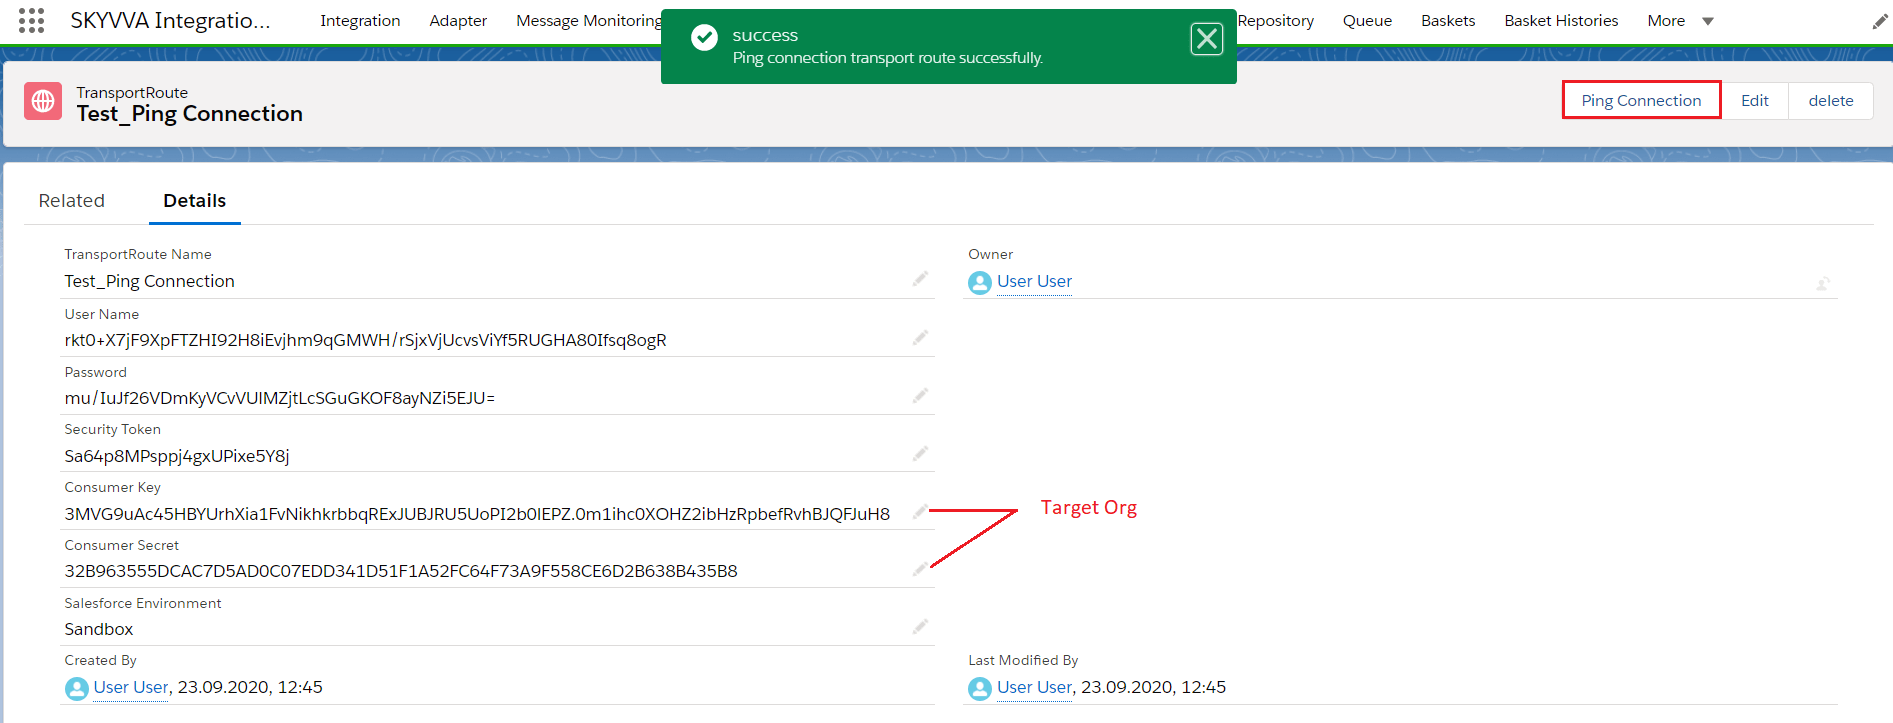
Step 3: Create a Transport Route(Senders org)
- Click on the Integration Cloud Tab
- Open Transport Route
- Click on New
- Fill all the fields
- Enter Consumer Key and Consumer Secret of Target org.
- Check the details page as shown below.
- Username, password, and security token we will enter of target org. Check the picture given below.
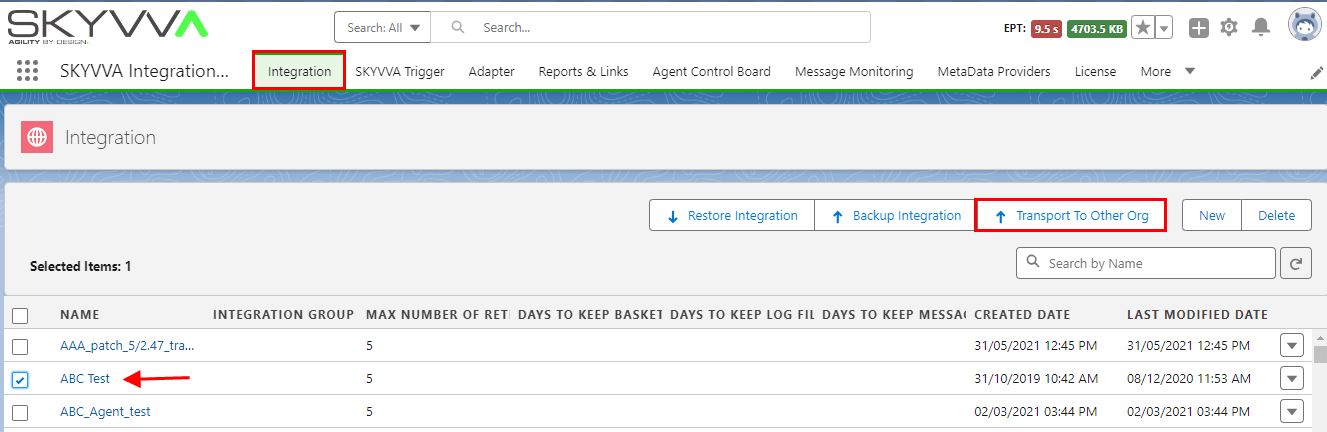
Step4: Transport Route
- Go to the Integration Cloud Tab
- Integration
- Select the Integration that we want to export
- Click Transport To Other Org.
- Choose Transport Route and Click Transport.
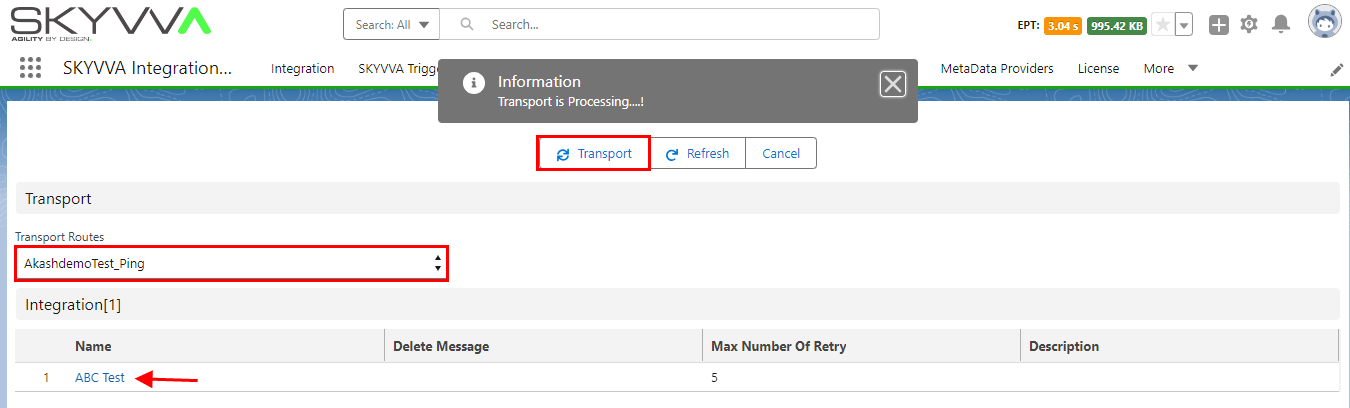
- In the Target Organization, there is the same Integration.
Advantage: #
The advantage of using the Transport route is that we can send more than one integration at a time. And most importantly we can directly send it to the other org.


