
System Requirements #

Approach #
- User/Admin has bought a valid SSL certificate from the trusted vendors of Salesforce.
– Outbound Messaging SSL CA Certificates - User/Admin has got the deployment package and transferred it to the deployment server.
Installation Procedure #
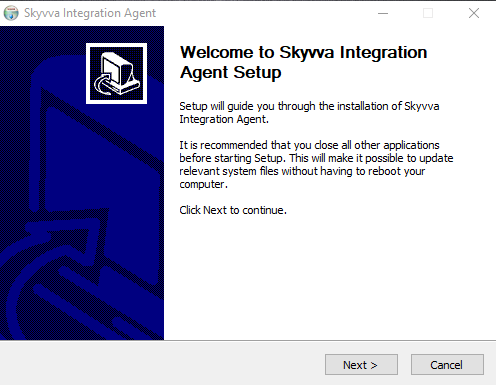
1. Once we have the Skyvva Integration Agent setup file available. We can execute it by double-clicking on it.
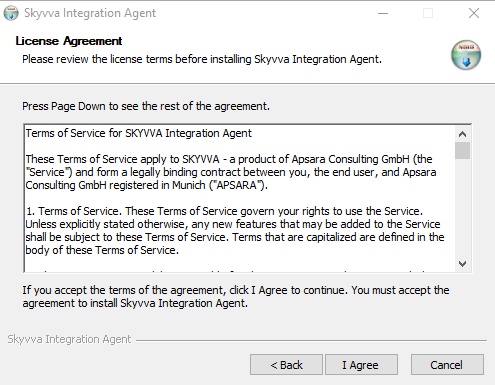
2. Hit Next, it will ask you to accept the License Agreement. Read the agreement and accept it. This is mandatory to proceed further with the installation.
3. Hit I Agree, it will take you to Choose the installation directory. By default, it will be
C:\Program Files\Skyvva Integration Agent\
You can update it or leave it as is.
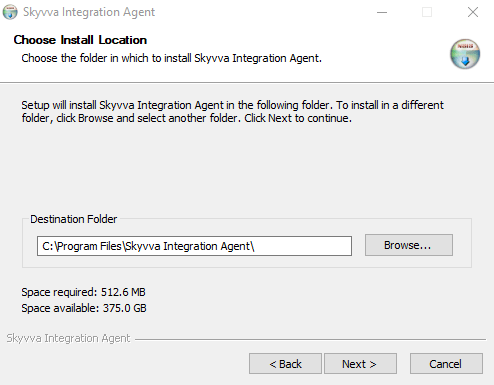
Then click Next.
4. It will take you to choose the Start Menu Folder name, by default it will be Skyvva Integration Agent. Again you can change the name or leave it as is.
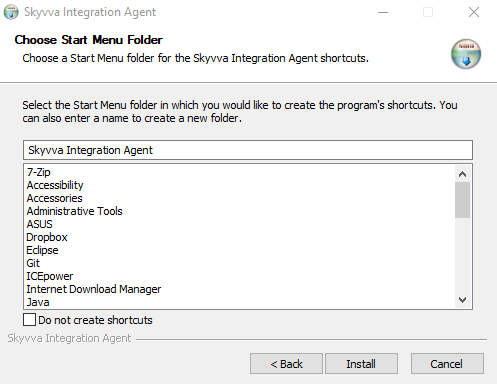
Then click Install.
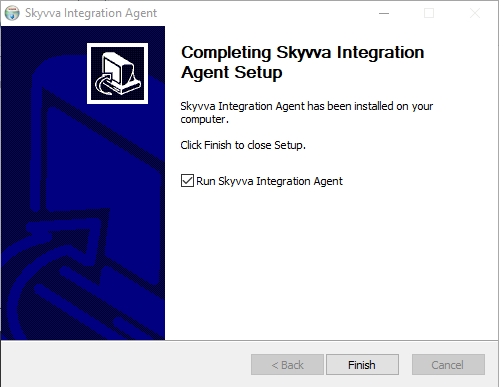
5. Once you click Finish, it will install the Agent as service and start it.
6. We can find out the installed artifacts in the installation directory.
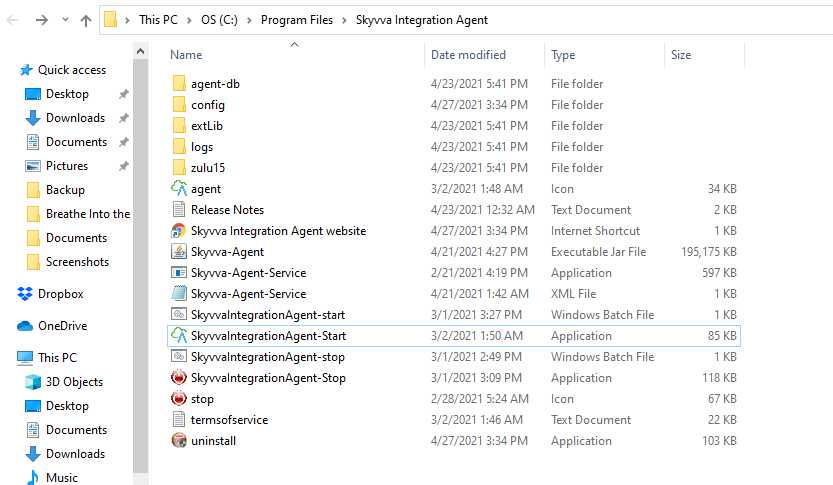
In the installation directory, we will have a few executables, out of which we can use 2 namely
SkyvvaIntegrationAgent-Start.exe
SkyvvaIntegrationAgent-Stop.exe
As their names say, they will be used to start or stop the agent. If you had already chosen to run the agent while installing, it will be running right now.
7. In case if we wanted to update the configuration for an agent, we could stop the services by executing the SkyvvaIntegrationAgent-Stop.exe executable and following the procedure described below.
8. Now once we have all the artifacts available and extracted in the deployment directory, we can update the configuration in the config\skyvva_application.properties file.
- server.port=9055
The above property will set the port on which the Skyvva Agent will listen. - skyvva.h2.db.port=9099
The above property will set the port on which the Skyvva Agent Internal database web console will be available. - skyvva.agent.username=skyvva
skyvva.agent.password=skyvva@12! - The above 2 properties will enable the basic authentication on the Skyvva Agent service.
9. Test the agent with our standard URL after installation.
http://localhost:9055/application/systemInfo/getSystemInfo
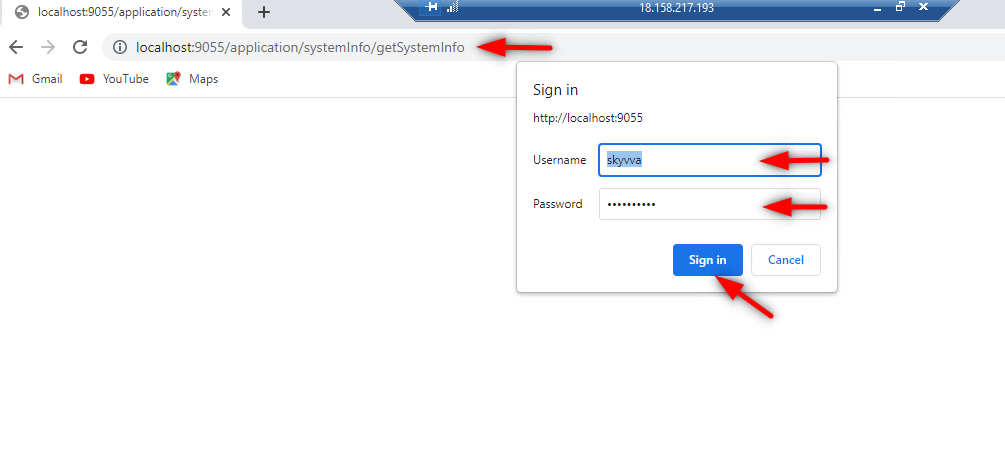
- Username=skyvva
- Password=skyvva@12!
- Click on the Sign button
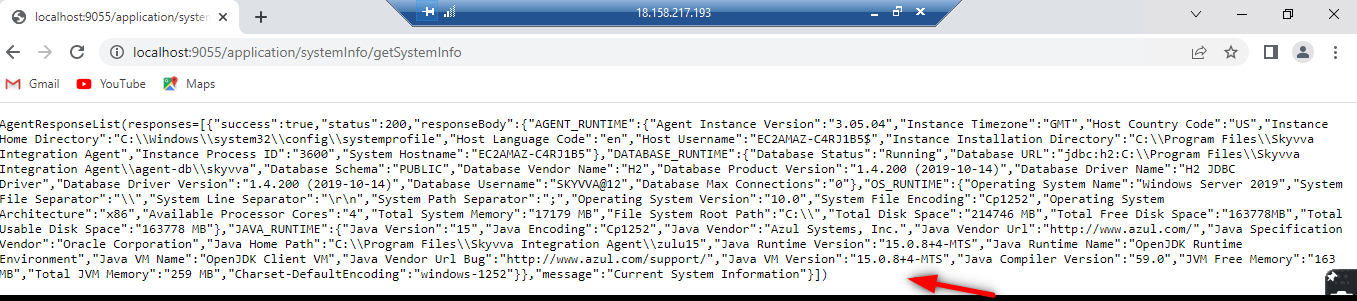
This XML shows Agent installation is installed and running successfully
10. In case the user wants to change the standard password and port
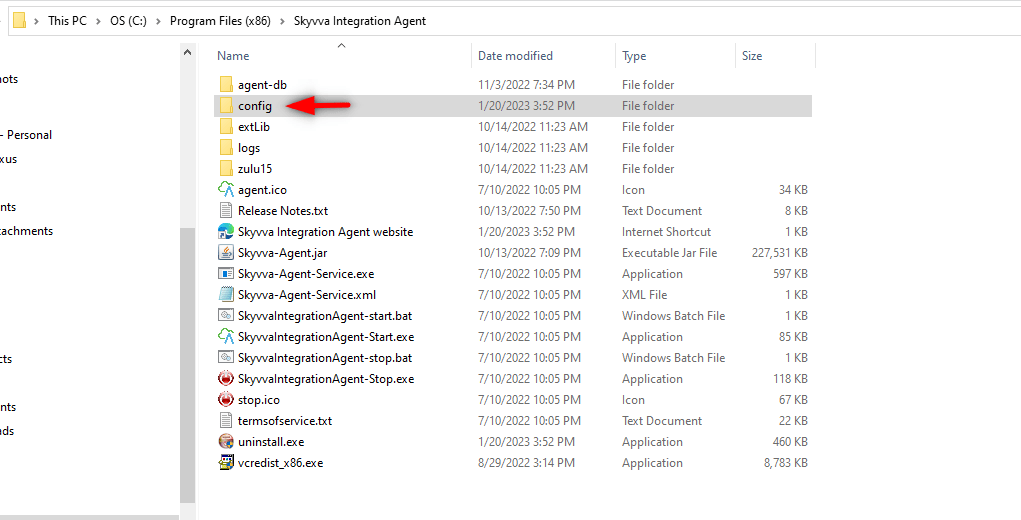
- Go to the SKYVVA Integration Agent Program file
- Click on the config folder
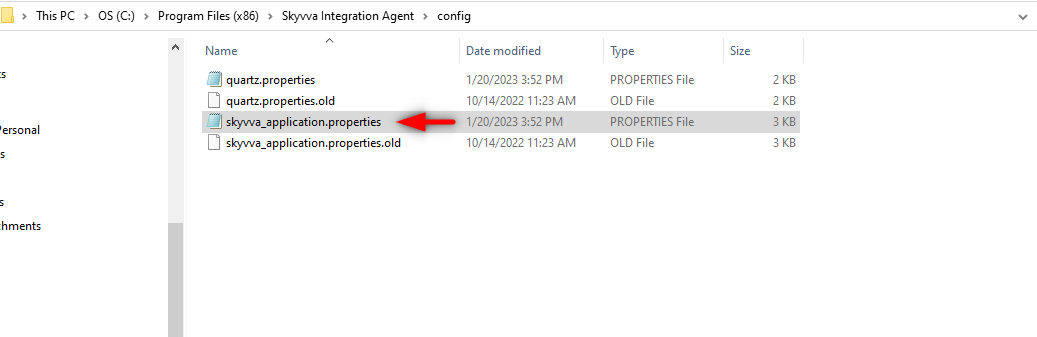
- Further click on skyvva_application.properties
- Users can change their username, password, and port name too as per their convenience
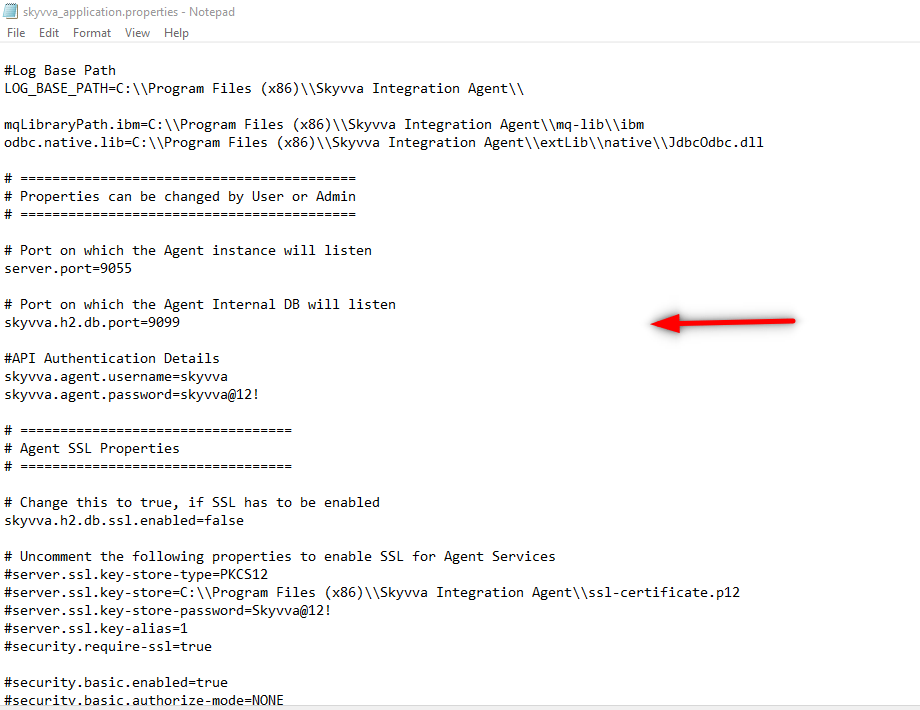
- This will save inside config folder
Upgrade Procedure #
1. In case we want to upgrade Skyvva Integration Agent to a new patch, then all we have to do is just install the new upgrade file.
2. While upgrading, the installer will not touch the database file, so we don’t have to bother about that file at all.
Uninstall Procedure #
1. Go to the installation directory, if it was not changed then it will be as follows
C:\Program Files\Skyvva Integration Agent
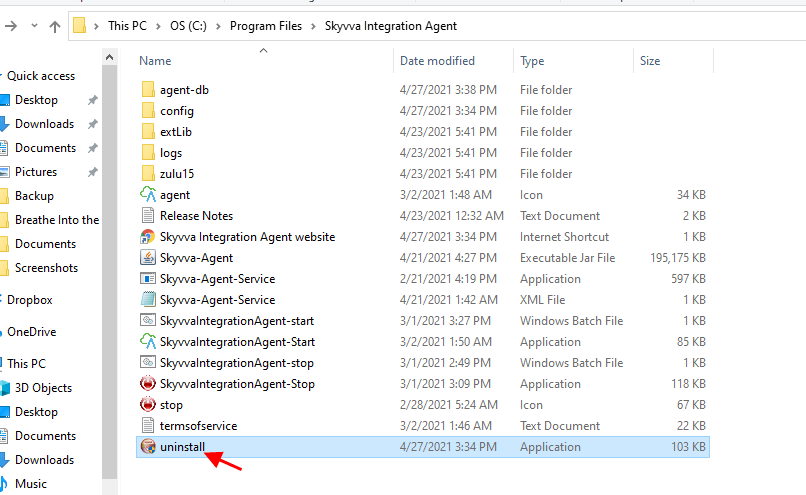
2. Look for the uninstall.exe, and execute it by double-clicking on it.
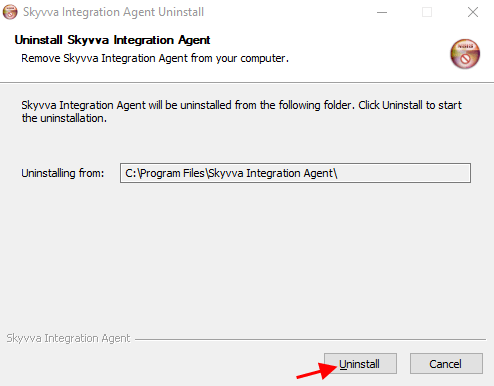
3. Hit Uninstall, this will stop the running service and delete everything from the installation directory.
SSL Setup Procedure #
There are two parts to setting up SSL.
- The first part is where we enable SSL for the Agent instances so that all the services/endpoints exposed by SKYVVA Agent middleware can be access using SSL over http i.e. https protocol.
- In the second part, we need to ensure that SKYVVA Agent middleware can access the Salesforce org using https. In order to do that we will have to trust the Salesforce SSL certificate by adding the Root CA certificate of Salesforce org to Agent’s trusted keystore.
Setup SSL for Agent Instance #
2. Once we have copied the new SSL certificate to the deployment directory, we need to change the property file so that the Agent Instance can pick up the SSL certificate. Open the property file with the name skyvva_application.properties and look for the properties mentioned below.
[aux_code language=”javascript” theme=”tomorrow” title=”” extra_classes=””]# ==================================
# Agent SSL Properties
# ==================================
# Change this to true, if SSL has to be enabled
skyvva.h2.db.ssl.enabled=false
# Uncomment the following properties to enable SSL for Agent Services
#server.ssl.key-store-type=PKCS12
#server.ssl.key-store=C:\\skyvva-agent\\ssl-certificate.p12
#server.ssl.key-store-password=Skyvva@12!
#server.ssl.key-alias=1
#security.require-ssl=true[/aux_code]
3. As we can see above, all the properties except one have been commented out (which means starts with ‘#’). We will have to uncomment them i.e. remove ‘#’ from the starting of the lines. Once done it will look like as shown below.
[aux_code language=”javascript” theme=”tomorrow” title=”” extra_classes=””]# ==================================
# Agent SSL Properties
# ==================================
# Change this to true, if SSL has to be enabled
skyvva.h2.db.ssl.enabled=false
# Uncomment the following properties to enable SSL for Agent Services
server.ssl.key-store-type=PKCS12
server.ssl.key-store=C:\\skyvva-agent\\ssl-certificate.p12
server.ssl.key-store-password=Skyvva@12!
server.ssl.key-alias=1
security.require-ssl=true
[/aux_code]
4. Now we will have to change only 4 properties to enable the SSL for SKYVVA Agent. Those 4 properties are as follows.
[aux_code language=”javascript” theme=”tomorrow” title=”” extra_classes=””]skyvva.h2.db.ssl.enabled=true
server.ssl.key-store=C:\\skyvva-agent\\Add the name of the new SSL certificate file
server.ssl.key-store-password=SSL certificate store password
server.ssl.key-alias=Alias of the SSL certificate
[/aux_code]
Once we have replaced the highlighted values with the right possible values, we can restart the Agent Instance.
Setup SSL for Outbound Flow #
In this section, we will see how to trust a Root CA certificate so that we can connect to any system like Salesforce, Kafka, SAP, etc using SSL through SKYVVA Agent middleware.
Normally all the standard CA certificates are already present in the Trust Store file used by the JDK(which is embedded inside the Agent Deployable Package), but in rare scenarios where it’s not available, we can import it as a trusted certificate.
Procedure #
2. Go to the Agent deployment directory using the command below.
cd C:\skyvva-agent\zulu14\bin\
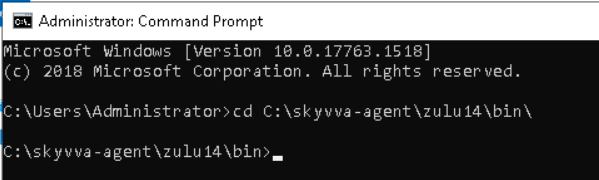
3. Use the command described below to import the certificate file as a trusted certificate.
[aux_code language=”javascript” theme=”tomorrow” title=”” extra_classes=””]keytool.exe -importcert -alias certificate-alias-name -file path_to_certificate_file -keystore C:\skyvvaagent\zulu14\lib\security\cacerts -storepass changeit -trustcacerts
[/aux_code]

Make sure that you replace the highlighted parts with the actual values before executing the above command. Once done, restart the Agent Instance.
Procedure to Download on SSL certificate #
Google Chrome #
Export the SSL certificate of a website using Google Chrome:
1.Click the Secure button (a padlock) in an address bar.
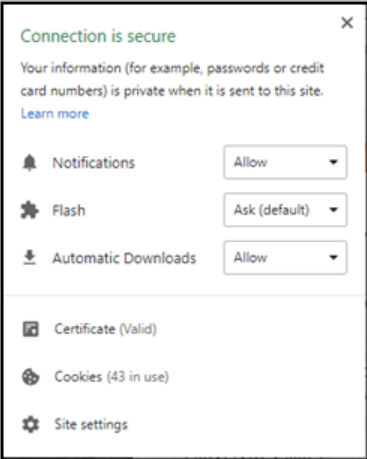
2. Click the Certificate(Valid).
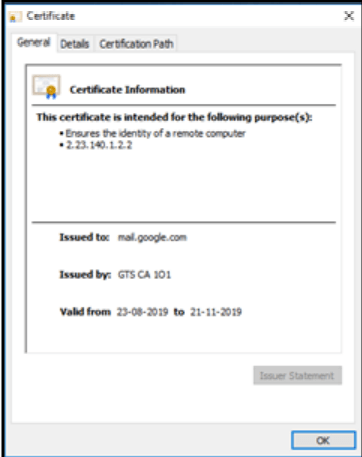
3. Go to the Details tab
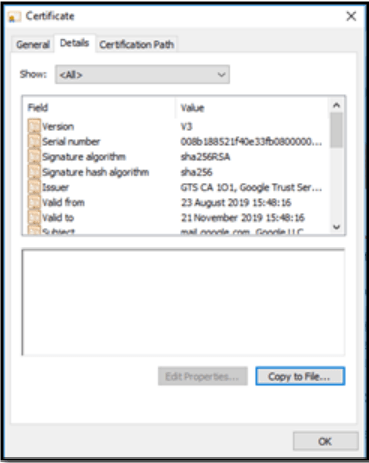
4.Click the Copy to File… button
5.Click the Next button.
6.Select the “Base-64 encoded X.509 (.CER)” format and click the Next button.
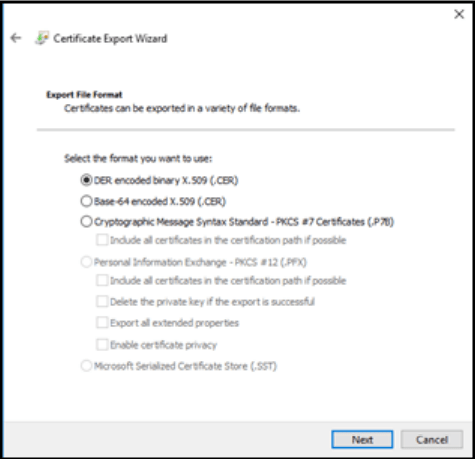
7.Specify the name of the file you want to save the SSL certificate to
8.Click the Next and the Finish button
Mozilla Firefox #
Export the SSL certificate of a website using Mozilla Firefox:
1.Click the Site Identity button (a padlock) in an address bar.
2.Click the Show connection details arrow
3.Click the More Information button
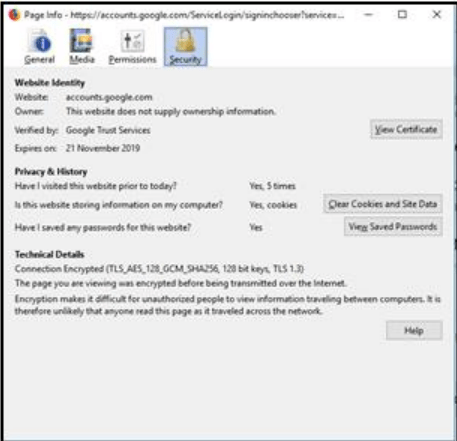
4.Click the View Certificate button
5.Go to the Details tab
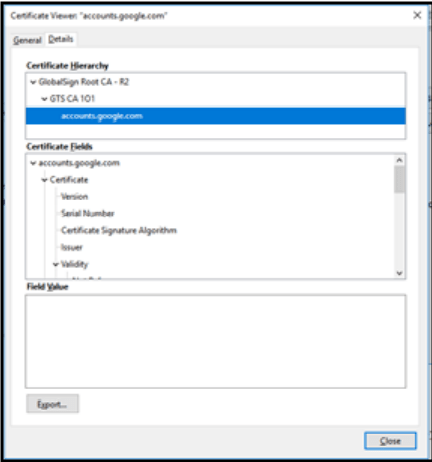
6.Click the Export button
7.Specify the name of the file you want to save the SSL certificate to, keep the “X.509 Certificate (PEM)”
format and click the Save button
Internet Explorer #
Download and save the SSL certificate of a website using Internet Explorer:
1.Click the Security report button (a padlock) in an address bar
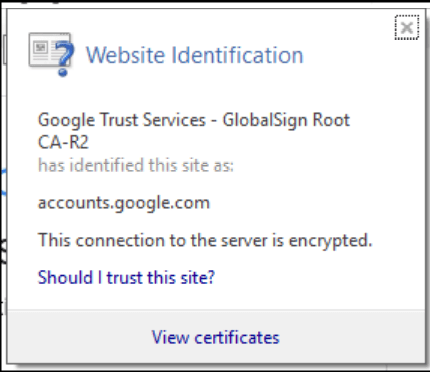
2.Click the View Certificate button
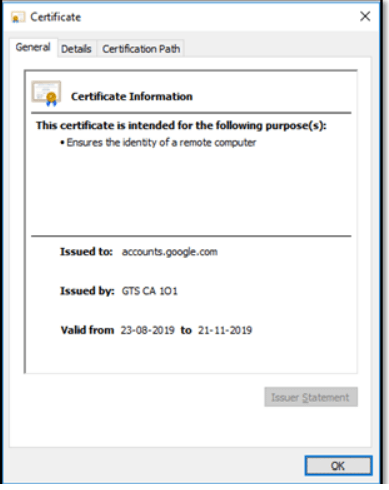
3.Go to the Details tab
4.Click the Copy to File… button
5.Click the Next button
6.Select the “Base-64 encoded X.509 (.CER)” format and click the Next button
7.Specify the name of the file you want to save the SSL certificate to
8.Click the Next and the Finish buttons


