Table of Contents
2.6.1 Integration Scheduling #
- Create Integration
- Click on Interface

- Click on Open Mapping Button
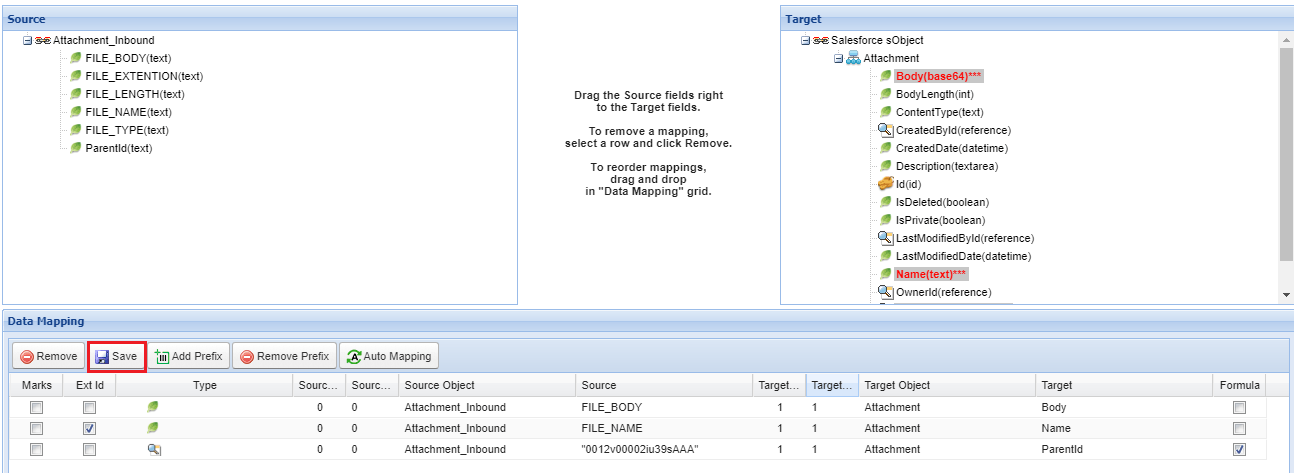
- Select Ext ID
- Save
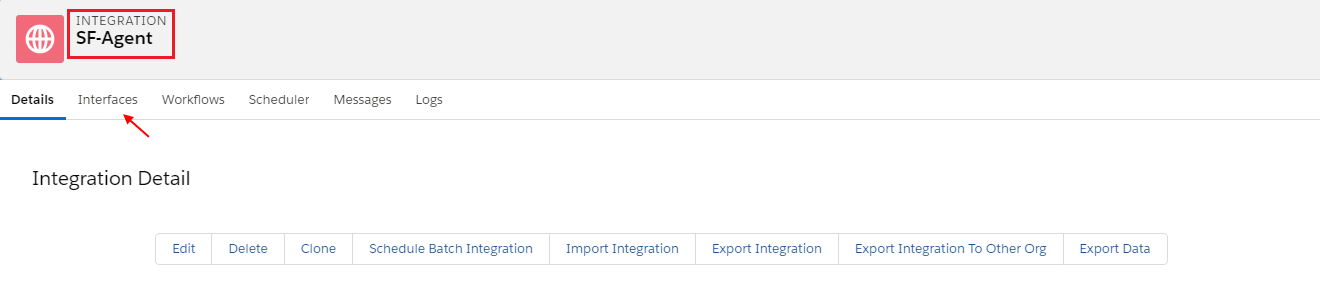
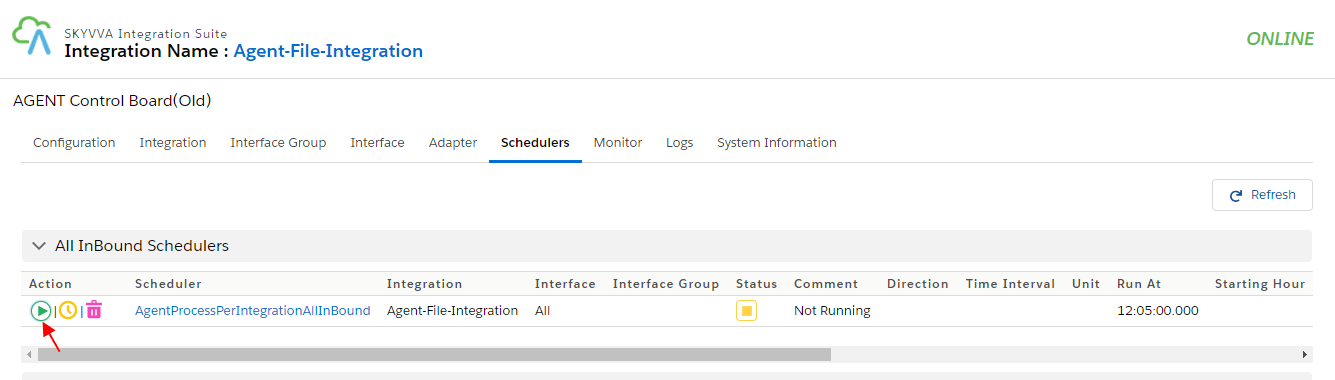
Go to Agent
On the Integration Control Board, click on “Integration Scheduling”:
Choose the integration name, Interface name, and Integration Direction you want to schedule among (“Agent-SF” | “SF-Agent”).
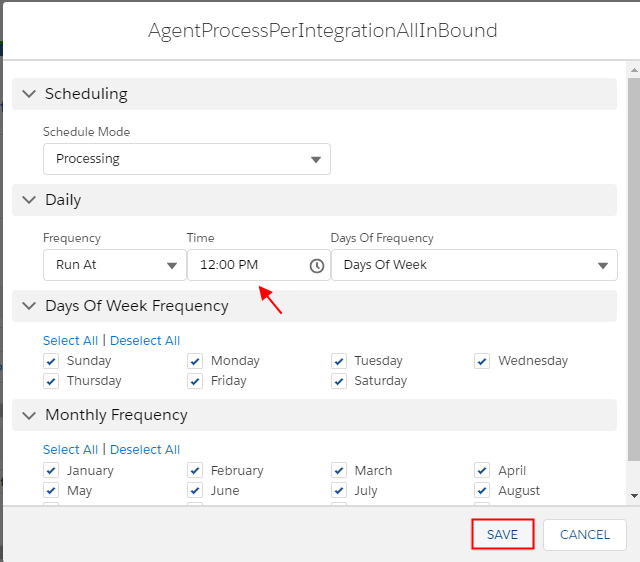
Set the schedule through the screen.
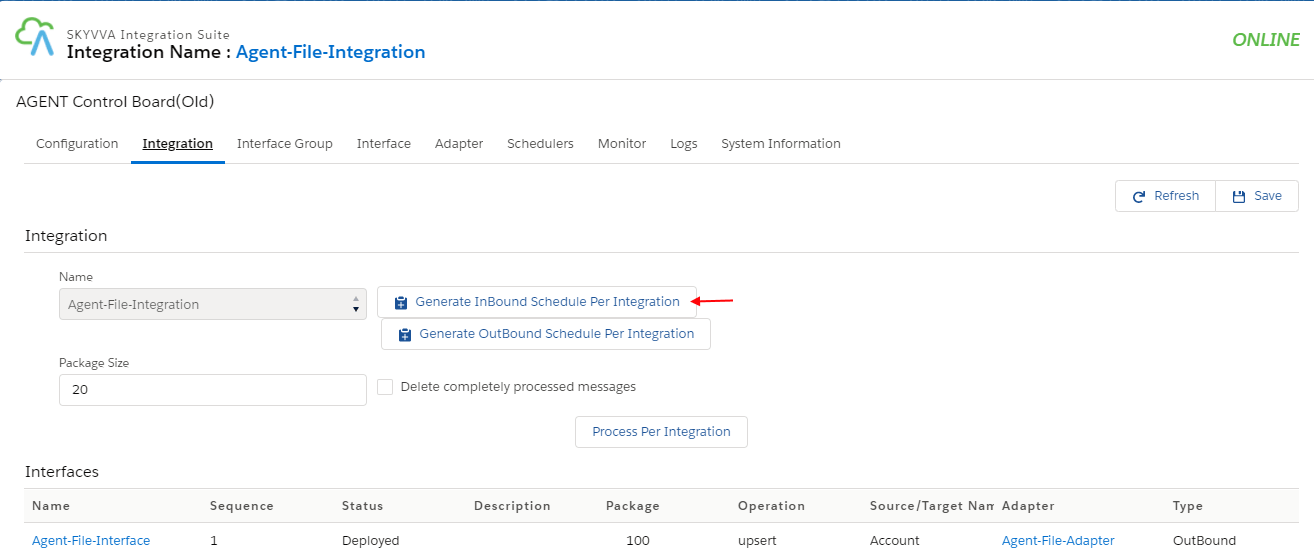
After scheduling the agent, click “Save”. And it will ask to restart the agent service.
Daily Frequency
- Run at: This option allow the user to specify exactly when he wants to Integration Agent running.
- Run every: This option is used for frequency of running schedule. It can be set to every ”Hours” or every ”Minutes” and user can specify
Remark
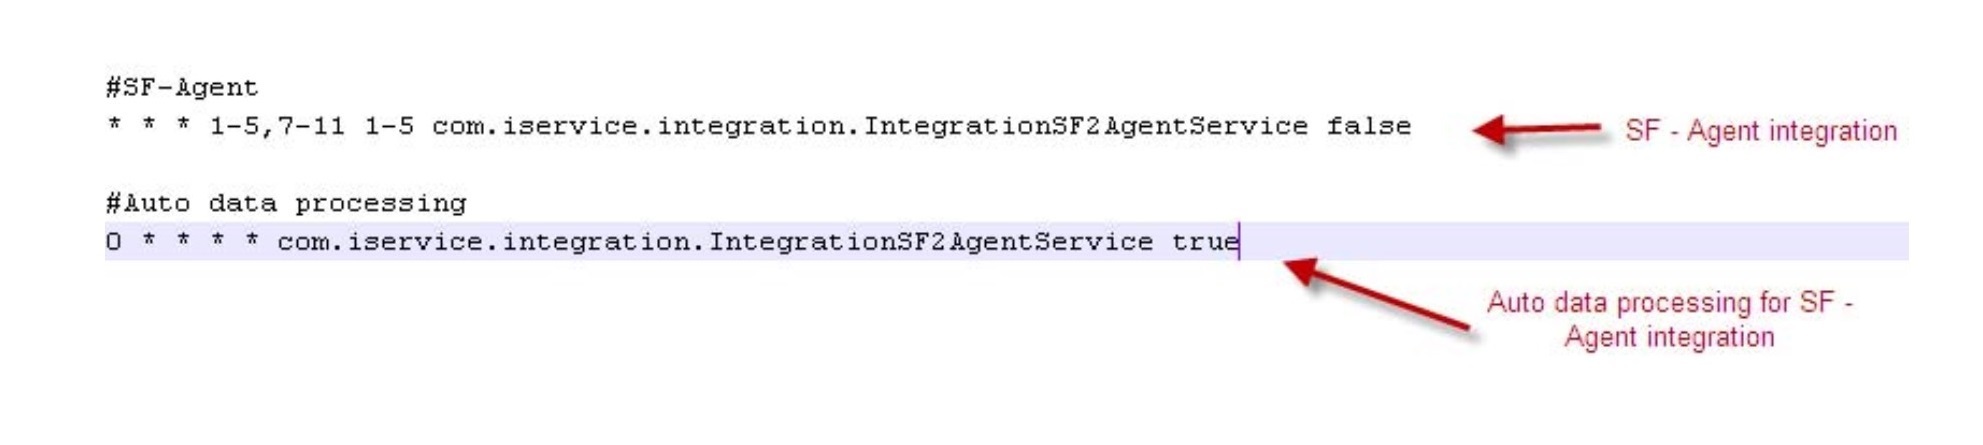
- Do not change the last parts of the SQLite records (“com.iservice.integration.IntegrationOnDemandService”; “com.iservice.integration.IntegrationSF2AgentService false”; “com.iservice.integration.IntegrationSF2AgentService true”)
- It is recommended to change the schedules thru the UI.
- The auto data processing SQLite record is always fixed (scheduled for every hour as like on SF Integration thru the tick of the field “Automatic Data processing”
- How Auto data processing crontab works/is enabled?
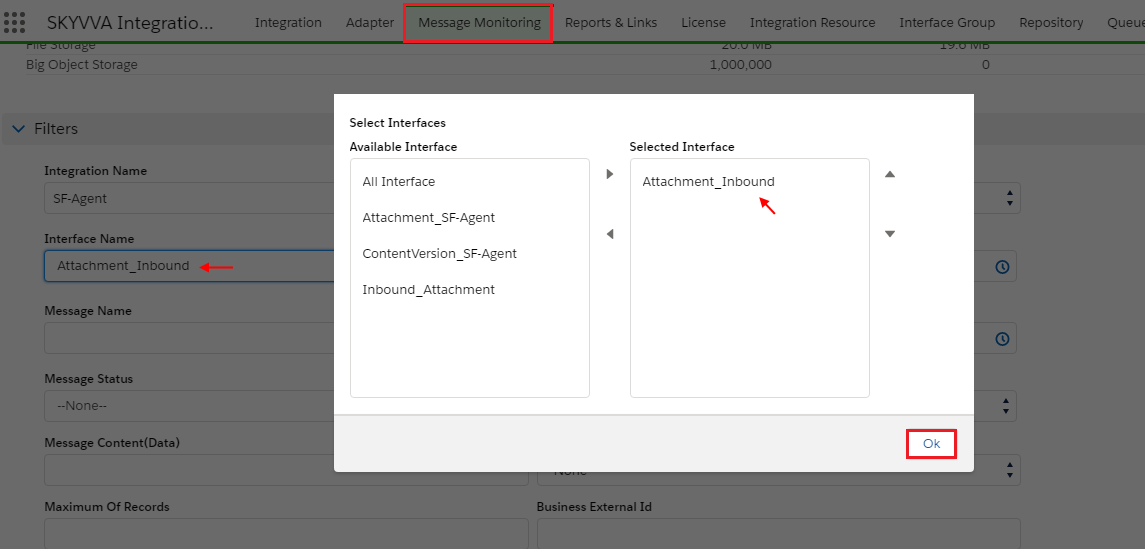
Go to Salesforce Org
- Click on Message Monitoring Tab
- Select Integration Name
- Select Interface Name
- OK
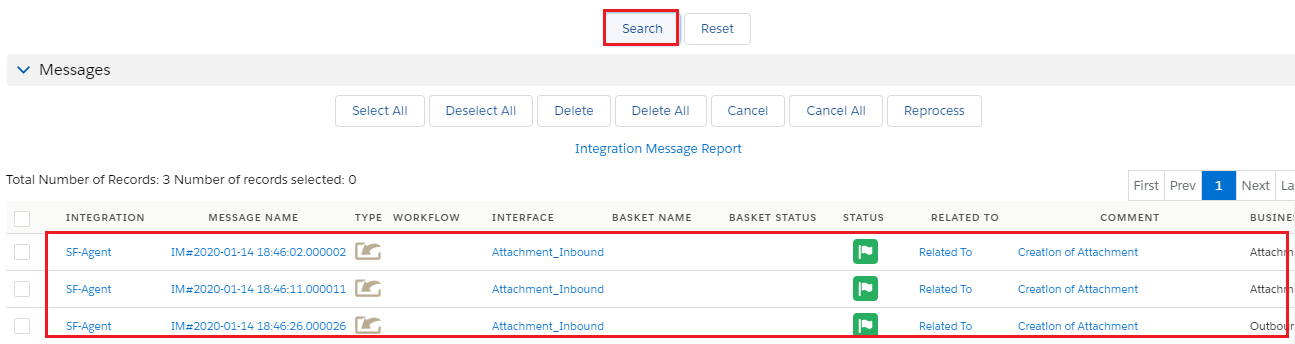
- Scroll down and click on button Search
- See Attachment has been created
In the crontab file, the user will get the following crontab records: