
- Change Data Capture:-
- So here we will learn How to Consume the change events using an apex trigger and do local action e.g. update an account:-
- Check the result on Debug logs:-
- We provide these two modes to our user:-
- When to use which mode:-
- So here we will learn how to consume the event using an apex trigger and sending out data using Invoke callout2.
- Check the result on Message Monitoring:-
In this unit, We will see how we can use Change Events to synchronize changes to the Salesforce records in your ERP(Enterprise resource planning) system. You can subscribe to change events the same way you subscribe to other events, like PushTopic events or platform events. You can use CometD or Apex triggers. CometD is a messaging library that enables listening to events through long polling and simulates push technology. Even we can consume the CDC change event using a process builder.
Change Data Capture:- #
A Change Data Capture event, or change event, is a notification that Salesforce sends when a change to a Salesforce record occurs as part of a create, update, delete, or undelete operation. The notification includes all new and changed fields and header fields that contain information about the change. So we use salesforce CDC when we needed a real-time notification.
So here we will learn How to Consume the change events using an apex trigger and do local action e.g. update an account:- #
How to use it?
Follow the given steps:-
Step 1:- Subscribing to platform events:-
- Set up debug logs for event Subscriptions.
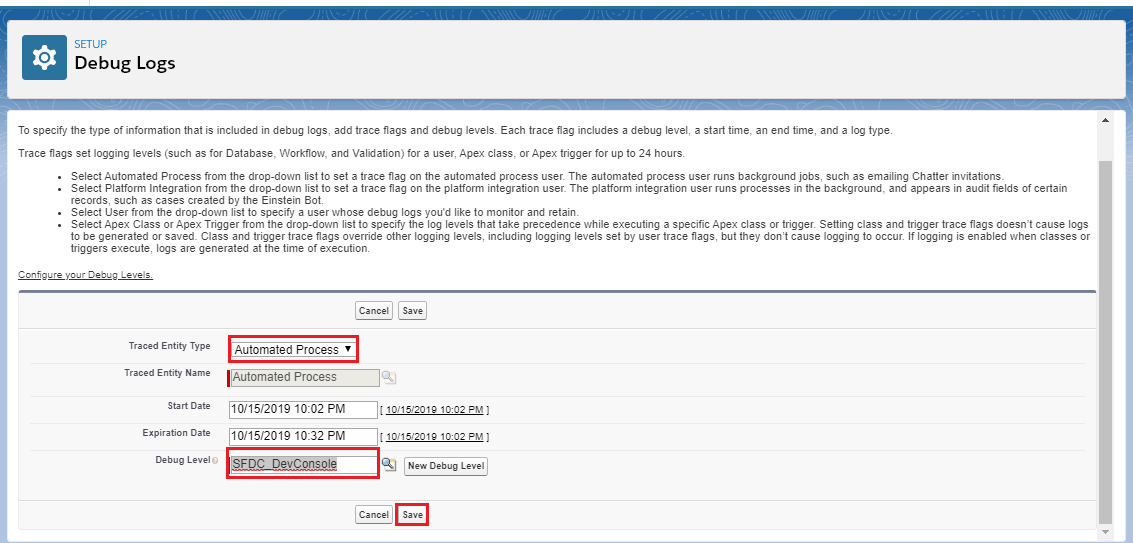
1. From Setup, enter Debug Logs in the Quick Find box, then click Debug Logs.
2. Click New.
3. For Traced Entity Type, select Automated Process.
4. Select the time period to collect logs and the debug level.
5. Click on Save.
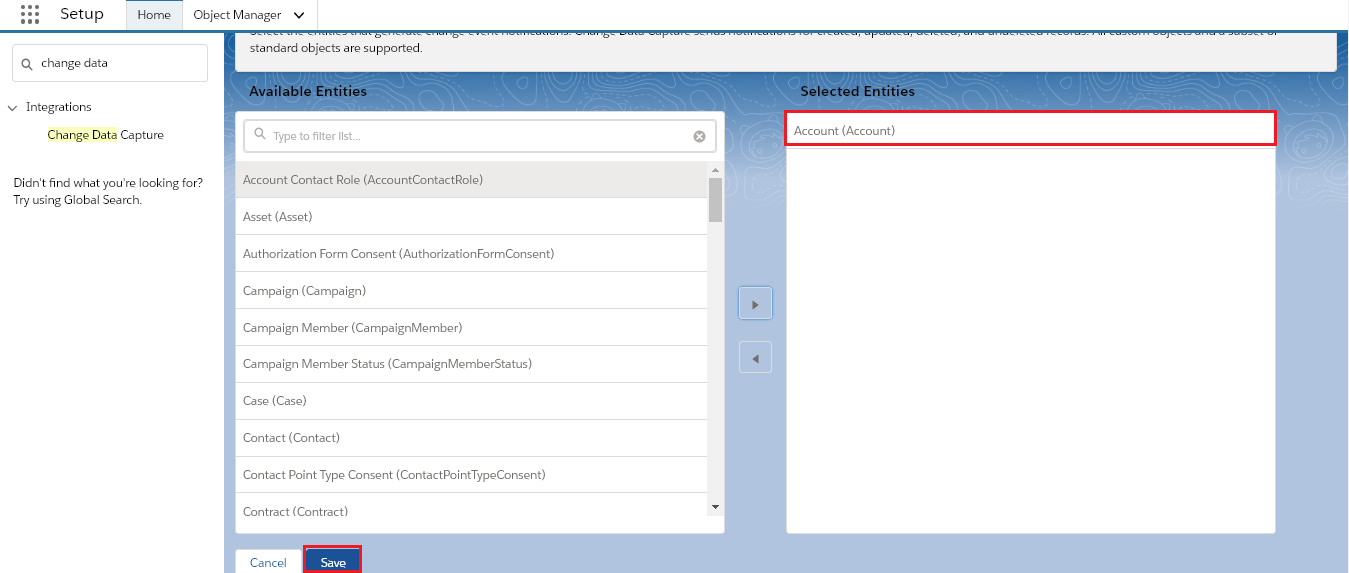
1. From Setup, enter Change data capture in the Quick Find box.
2. Select-Object.
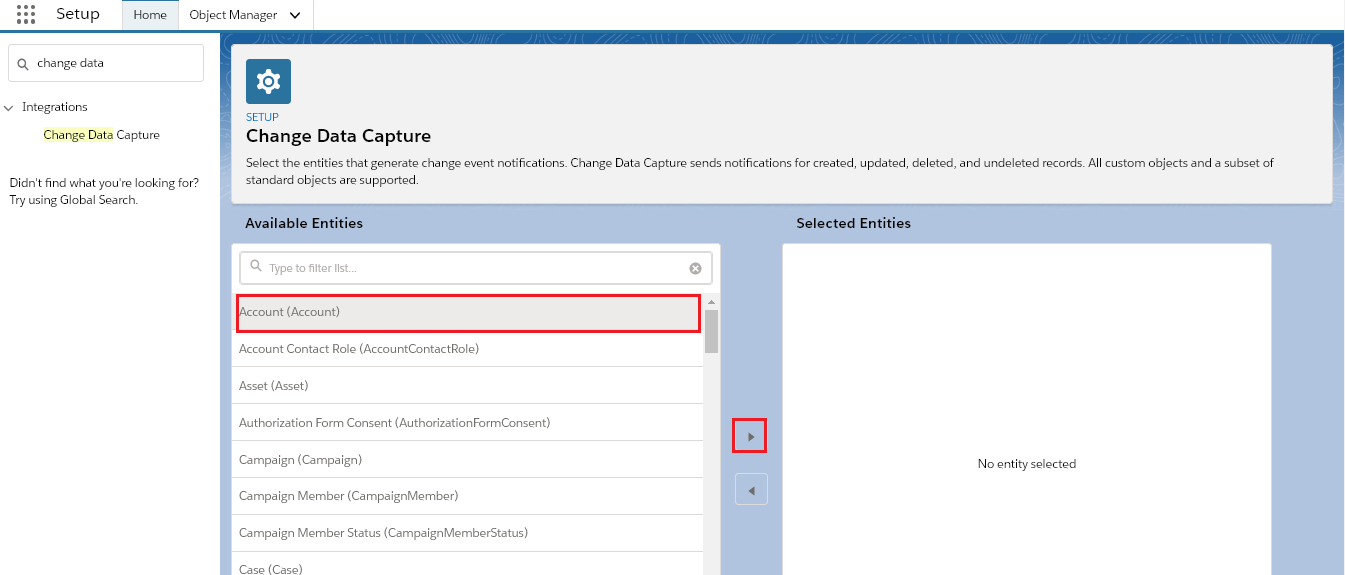
3. Save it.
Step 4:- Create an Apex trigger:-
- Open Developer console.
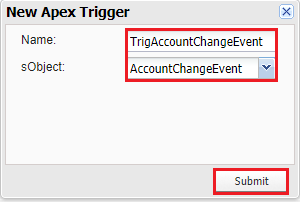
- Click on File=>New=>Apex Trigger.
- Enter Name and sObject as shown in the picture given below.
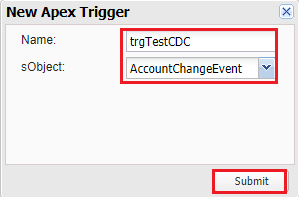
4. Click on the Submit button to generate a header script.
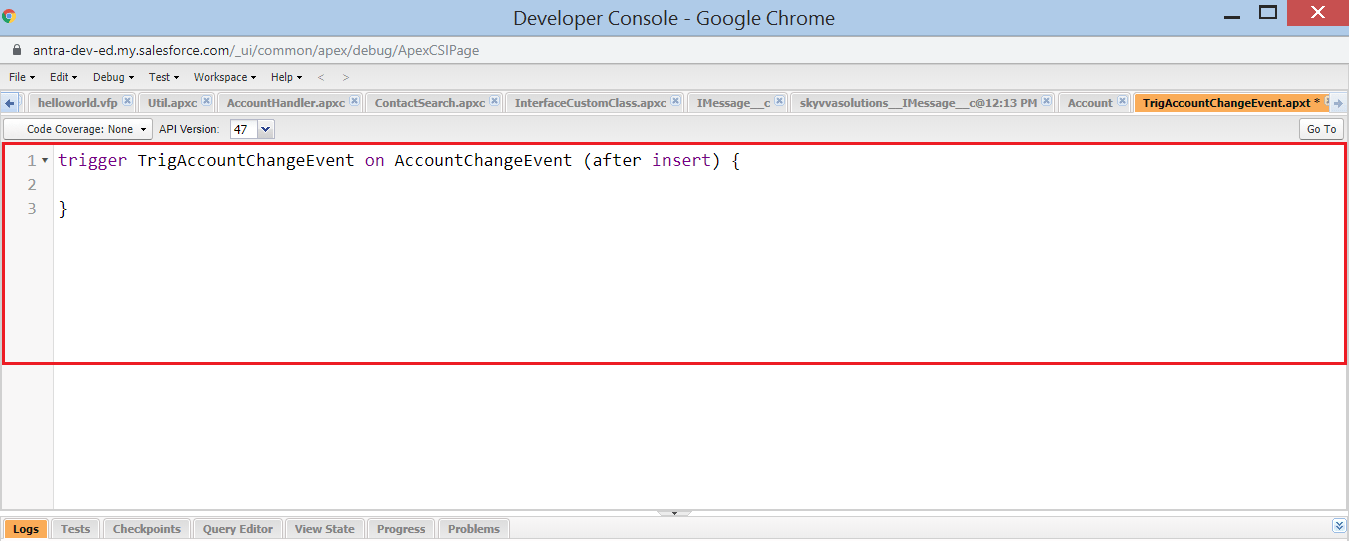
5. After clicking on the submit button.
6. We will add the code as shown in the picture given below.
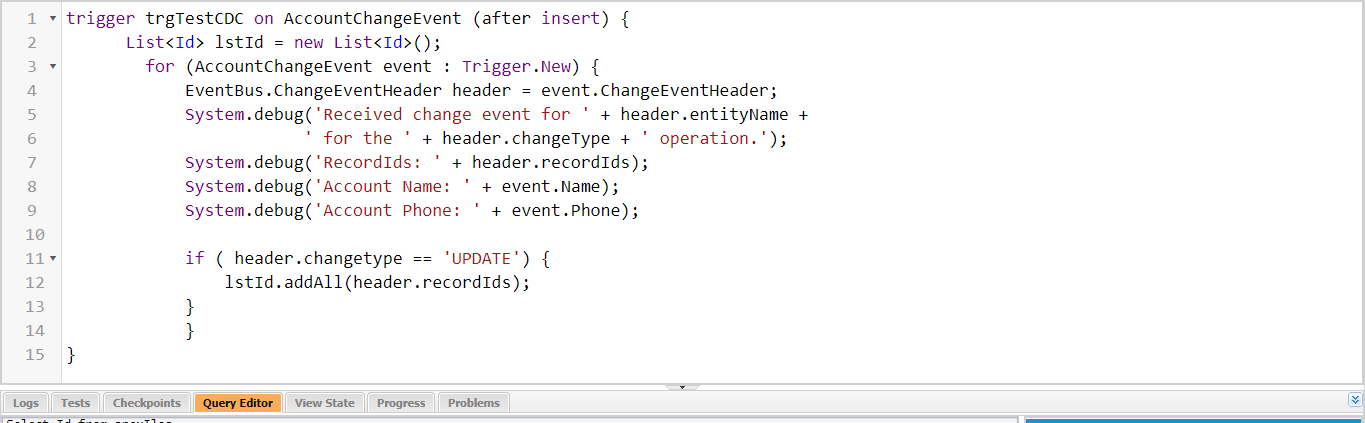
We can use this code:-
[aux_code language=”javascript” theme=”tomorrow” title=”” extra_classes=””]trigger trgTestCDC on AccountChangeEvent (after insert) {
List<Id> lstId = new List<Id>();
for (AccountChangeEvent event : Trigger.New) {
EventBus.ChangeEventHeader header = event.ChangeEventHeader;
System.debug(‘Received change event for ‘ + header.entityName +
‘ for the ‘ + header.changeType + ‘ operation.’);
System.debug(‘RecordIds: ‘ + header.recordIds);
System.debug(‘Account Name: ‘ + event.Name);
System.debug(‘Account Phone: ‘ + event.Phone);
if ( header.changetype == ‘UPDATE’) {
lstId.addAll(header.recordIds);
}
}
}[/aux_code]
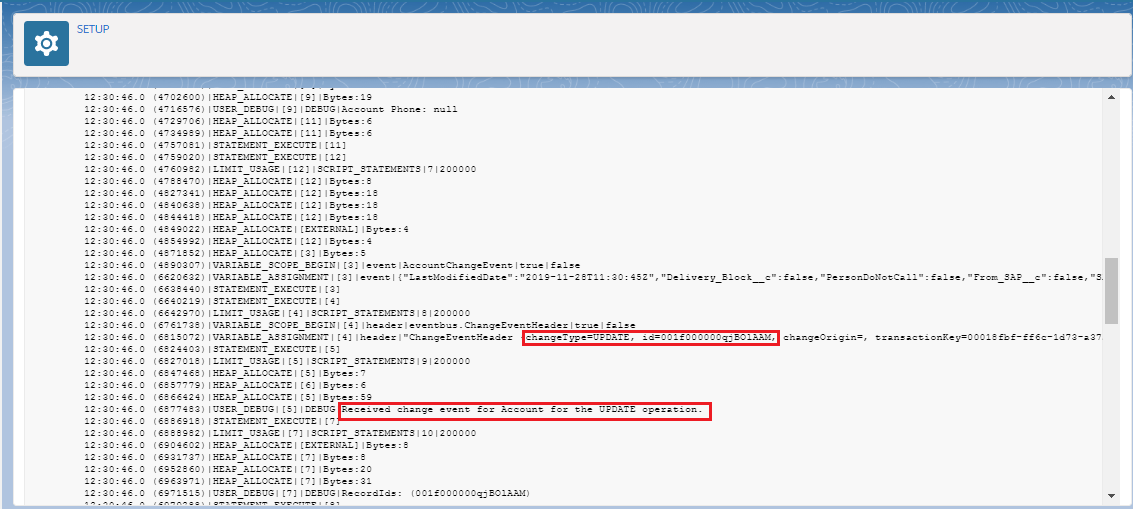
Check the result on Debug logs:- #
1. From Setup, enter Debug Logs in the Quick Find box, then click Debug Logs.
2. We can check results in debug logs.
#
#
#
#
#
#
#
#
Now you might be thinking why our chapter name is “How to use the Salesforce CDC change event to send data out with the SKYVVA API?” So here is the reason. The salesforce CDC change event to send data out with the SKYVVA API means, that we are using a combination of the real-time capability of salesforce change data capture and callout capability of SKYVVA. The callout capability of SKYVVA is best as we have different adapters that connect to many external systems for this our user doesn’t need a programmer. This is the benefit of using SKYVVA invoke Callout2().
We provide these two modes to our user:- #
- Real-time with our invoke callout. The combination of the Salesforce CDC change event and SKYVVA callout.
- Batch processing with our invoke callout. Using SKYVVA CDC with SKYVVA callout.
When to use which mode:- #
- If there is a lot of changes and updations it will impact the system change during real-time. Where we don’t need real-time in some cases, sometimes real-time block the resources. It is a resource-consuming blocking of the connecting systems in terms of integration technology. In this case, SKYVVA CDC with SKYVVA callout is the best option, because of its scheduler.
- The combination of Salesforce CDC and SKYVVA callout is used when we want an updated record in real-time. As the callout capability of SKYVVA is best as we have different adapters that connect to many external systems for this our user doesn’t need a programmer. This is the benefit of using SKYVVA invoke Callout.
So here we will learn how to consume the event using an apex trigger and sending out data using Invoke callout2. #
How to use it?
Pre-requisite:-
- Create Integration.
- Create Interface (Outbound).
Follow the given steps:-
Step 1:- Subscribing to platform events:-
- Set up debug logs for event Subscriptions.
1. From Setup, enter Debug Logs in the Quick Find box, then click Debug Logs.
2. Click New.
3. For Traced Entity Type, select Automated Process.
4. Select the time period to collect logs and the debug level.
5. Click on Save.
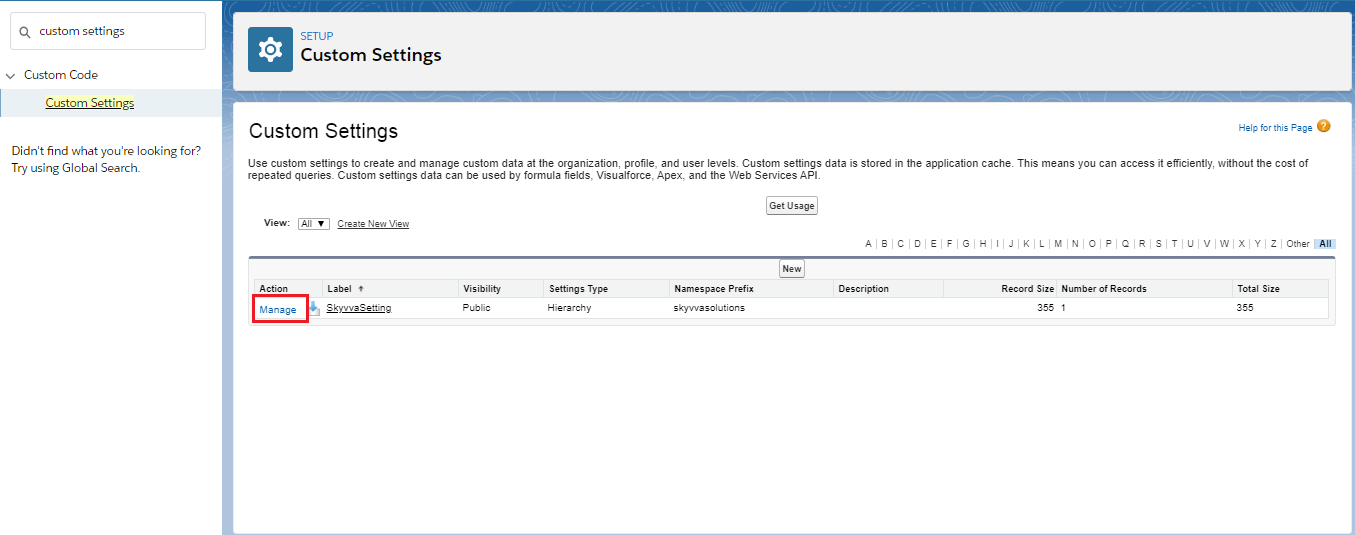
1. From Setup, enter custom settings in the Quick Find box.
2. Click on the Manage option.
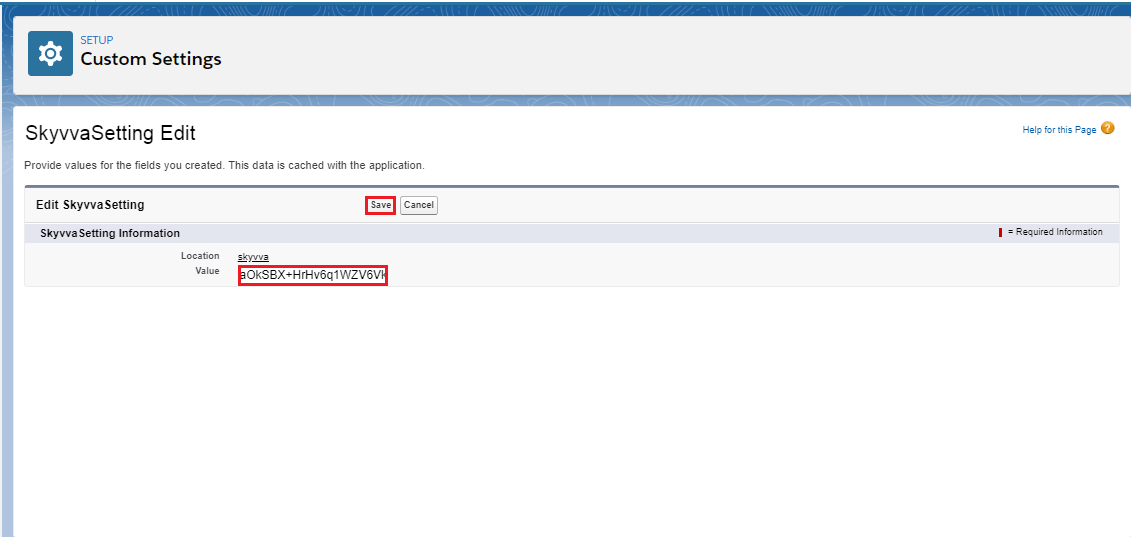
3. Click on the “NEW” button at the top.
4. Enter the SKYVVA license key in the value block.
5. Save it.
Step 3:- Select Object for Change data capture:-
1. From Setup, enter Change data capture in the Quick Find box.
2. Select-Object.
3. Save it.
Step 4:- Create an Apex trigger:-
- Open Developer console.
- Click on File=>New=>Apex Trigger.
- Enter Name and sObject as shown in the picture given below.
4. Click on the Submit button to generate a header script.
5. After clicking on the submit button.
6. It will show the screen as shown in this picture given below.
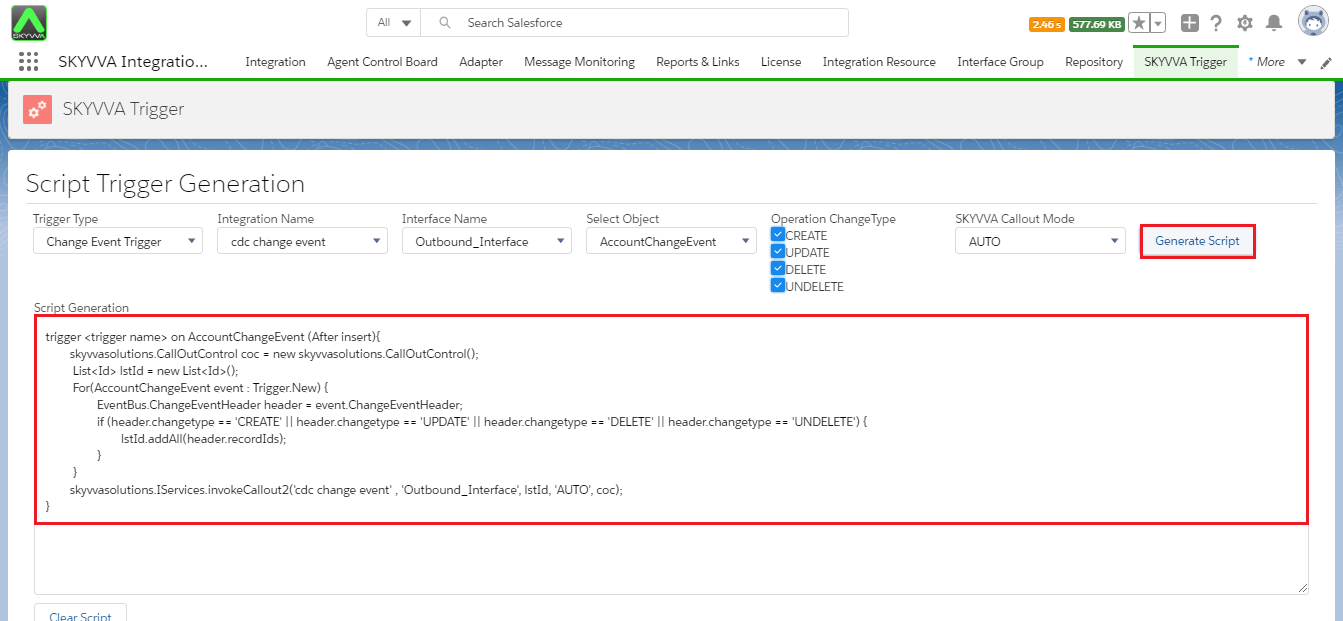
Step 5:- Generate Trigger script by following steps given below:-
- Navigate to the SKYVVA Trigger tab.
- Select Change Event Trigger in Trigger Type picklist.
- Checkbox After insert.
- Select your integration in Integration Name.
- Select your Interface in Interface Name.
- Select object change event in Select Object.
- Select any Mode in Trigger Mode e.g. AUTO.
- Click the Generate Script tab to generate script Trigger.
9. Select and copy the generated script and paste it in the apex trigger which we created in step 4.
10. Do it as shown in the picture given below.
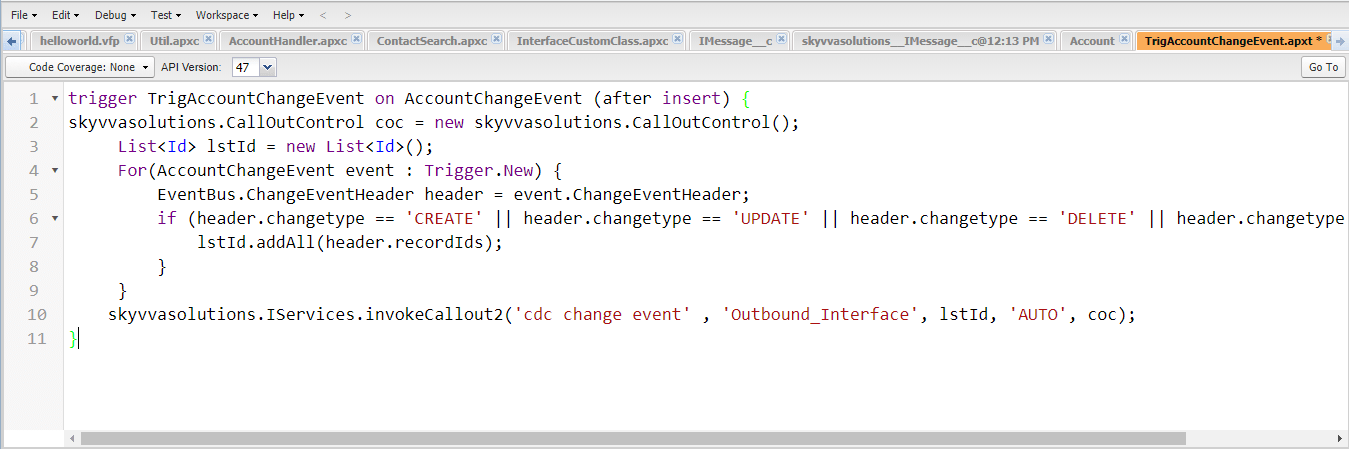
11. Save it.
Check the result on Message Monitoring:- #
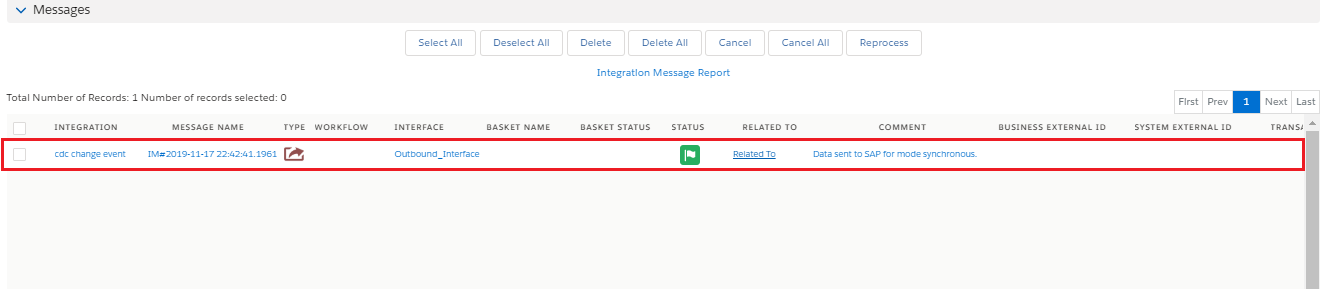
E.g SELECT BillingCity,BillingCountry,Name,Id,Description From Account ALL ROWS


