
This document describes us about how to use the SKYVVA CDC Feature for an outbound interface
Prerequisite for creating an Outbound interface
- The Skyvva solution framework has to be installed into your Salesforce instance.
- An integration instance has been created
- SAP-PO has been installed and set up correctly
- Your workstation needs an internet browser IE or Firefox of the new release.
You start developing outbound interface when you want to send data from Salesforce over PO to SAP-Backend. Of course, you can send data from Salesforce to anywhere not just to SAP-PO. But the focus of this document is sending data from Salesforce over SAP-PO to SAP-Backend e.g. an SAP ECC 6.0.
We are having three test cases to use this CDC Feature
- CDD/CDT
- Process Builder
- Apex Trigger
- CDD/CDT:
Creating an outbound adapter in Salesforce.
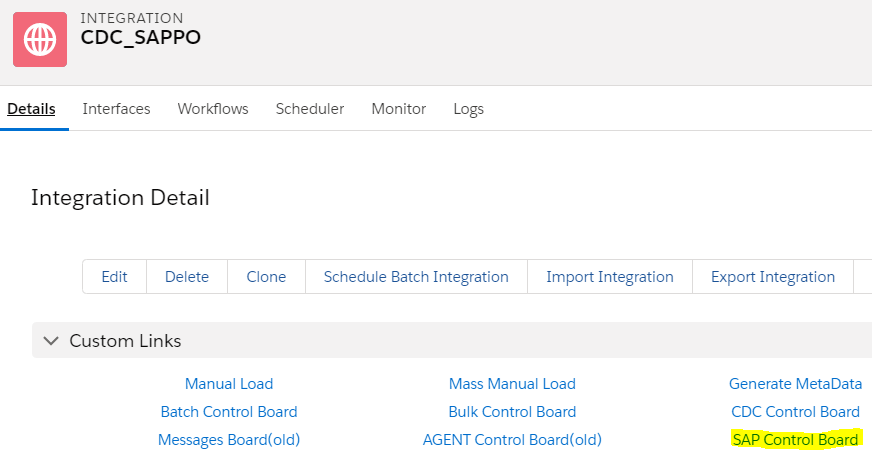
To Create an Adapter in Salesforce. Go to Integration tab and the select “SAP Control Board” as shown below.
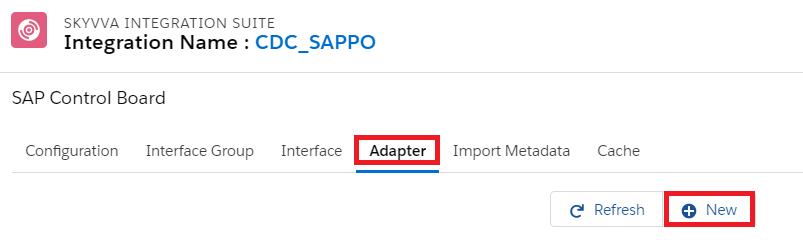
Go to Adapter tab and click on new

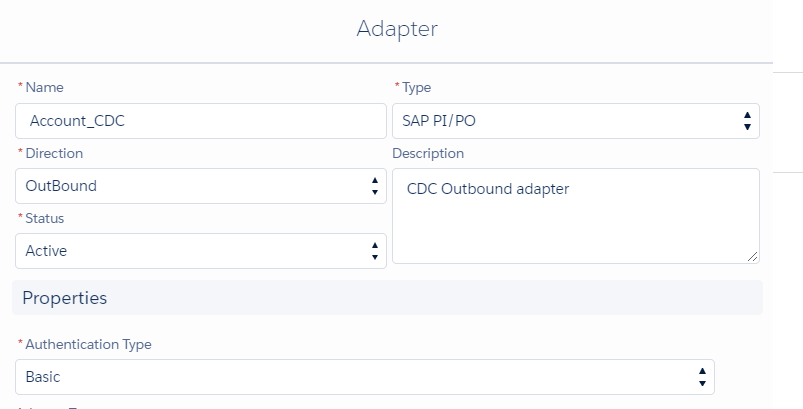
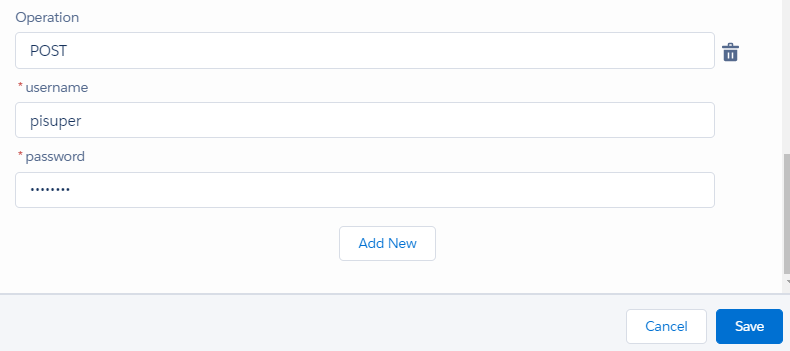
Now specify the Name, description and select the type as SOAP Adapter.
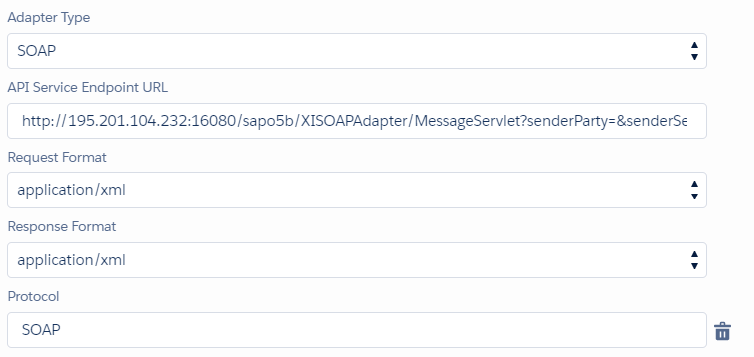
Here in the properties tab specify the endpoint of the receiver system for example here we are sending data to SAP PO. So here we have to specify the endpoint of SAP PO and the username and the password of the PO system.
Since we are using SOAP Adapter. So, we need create message type with SOAP Template
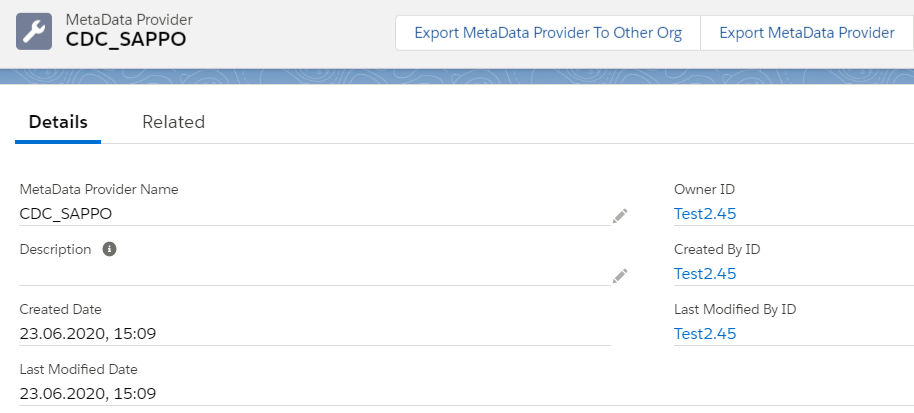
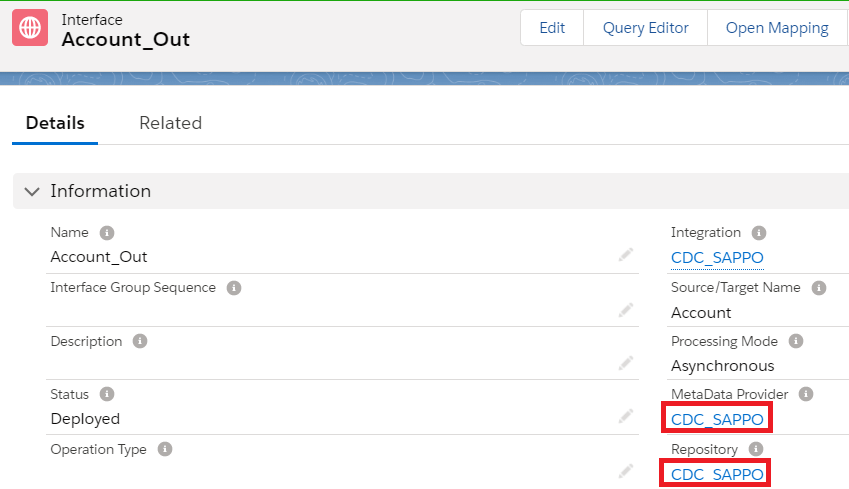
Metadata Provider:
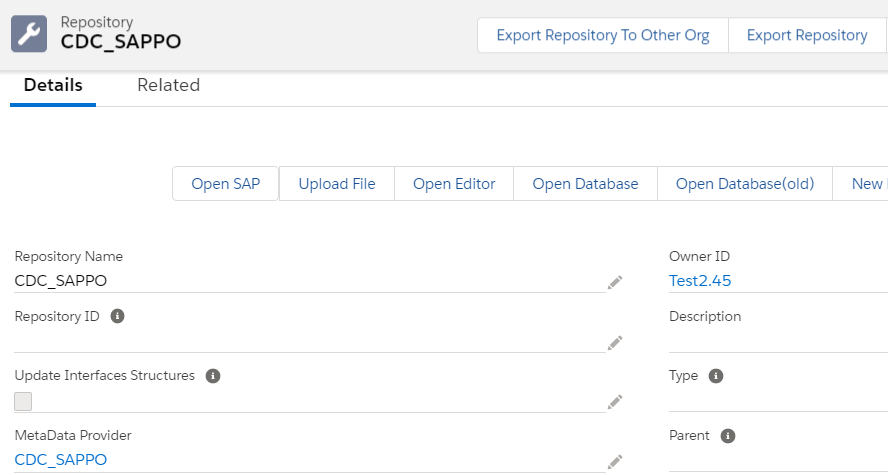
Istructure Repository:
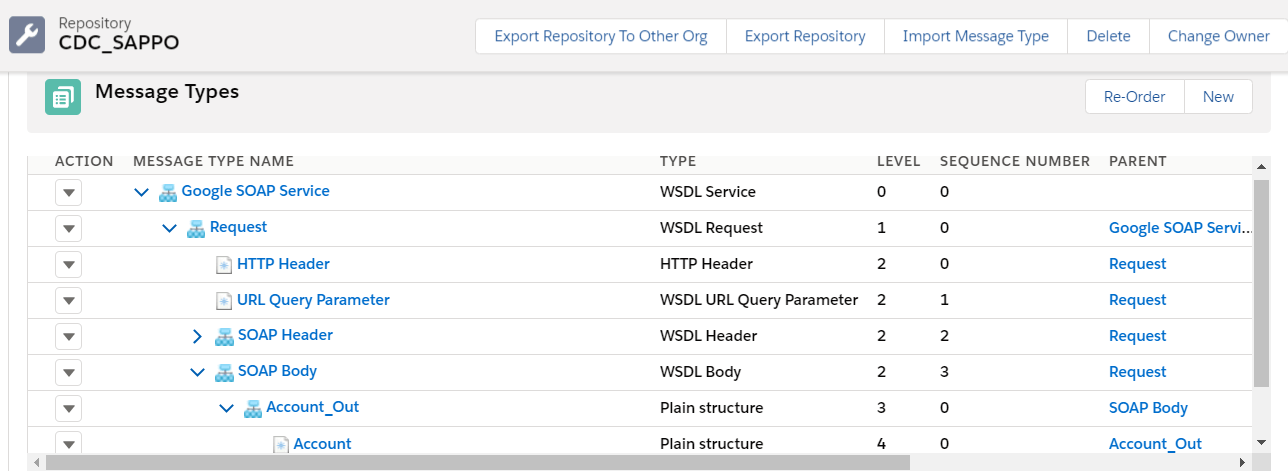
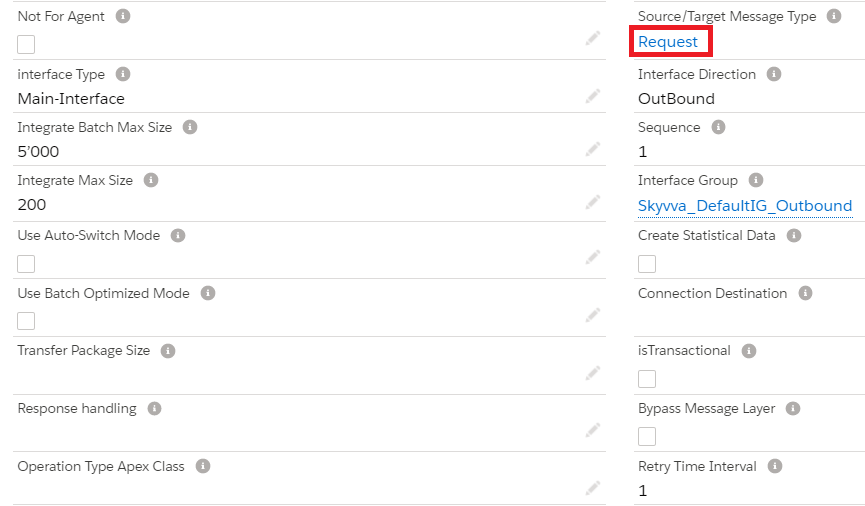
Message Type:
Creating an Outbound Asynchronous interface
Create Outbound interface as “Account_Out” and provide the necessary details.
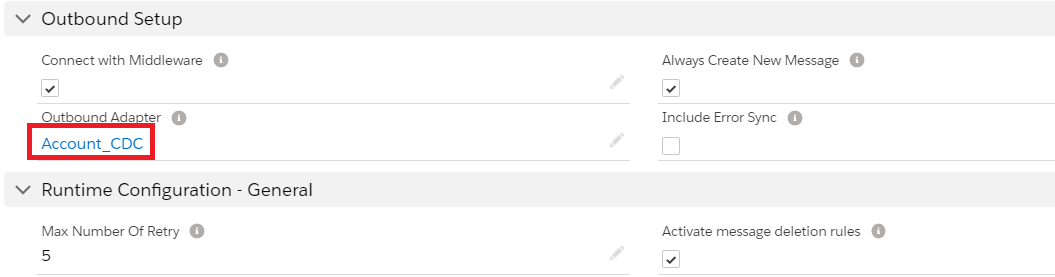
Specify the Outbound adapter as shown below.
To use CDD/CDT outbound scheduler we need to do the below settings in the outbound interface

If we use the CDC Mode as CDD then it will only change the data in the record but it will not transfer to the target system.
If we choose CDT then it will transfer the change to the respective target system.
If we choose none it will run as both modes like change and transfer the data to the target system.
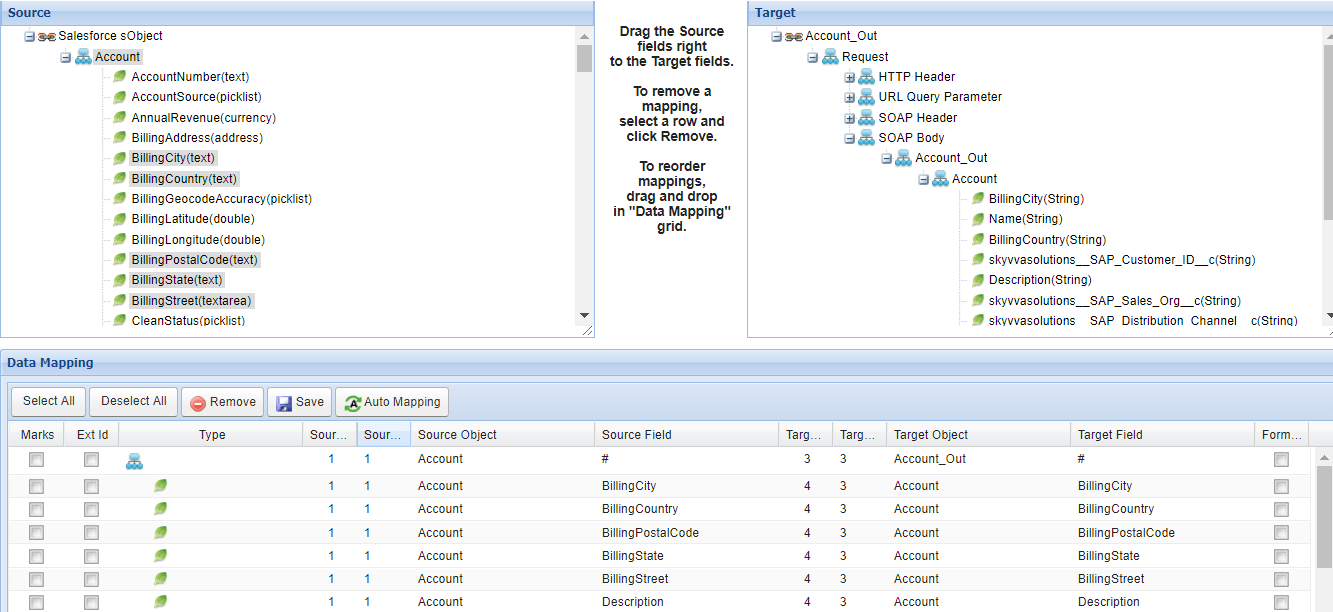
For the outbound interface mapping in skyvva interface is manadatory
Download the WSDL and import it into SAP PO for mapping.
- Designing the objects in ESR
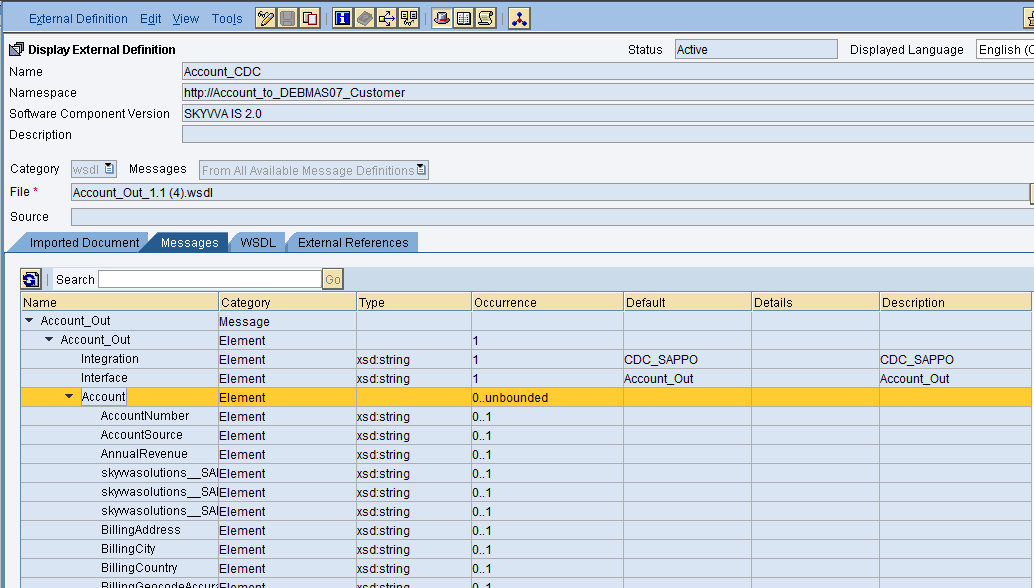
Import the Account WSDL as external definition into ESR and save activate it
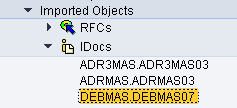
As we sending data to SAP. Here we are using DEBMAS07 Idoc as a target structure. Import Idoc from SAP and activate it.
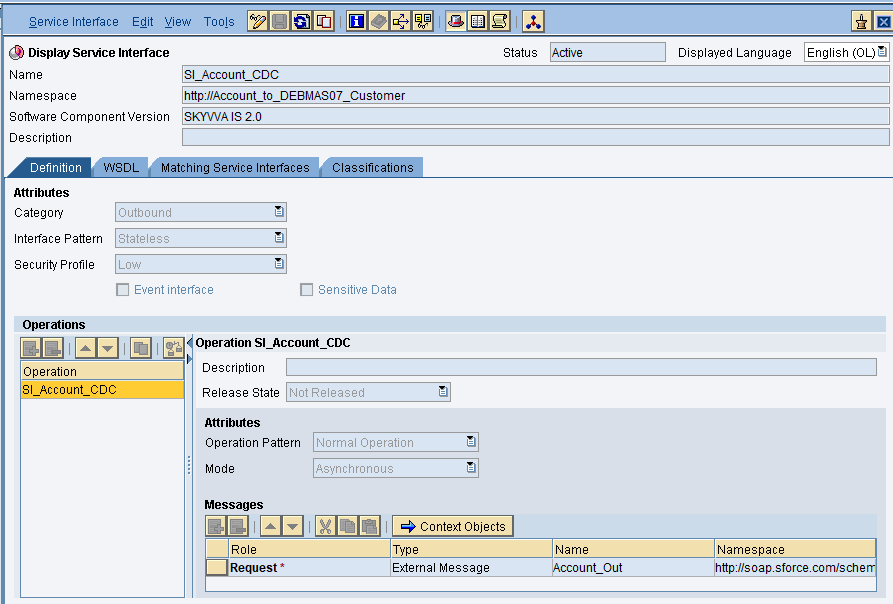
Create outbound service interface as shown below.
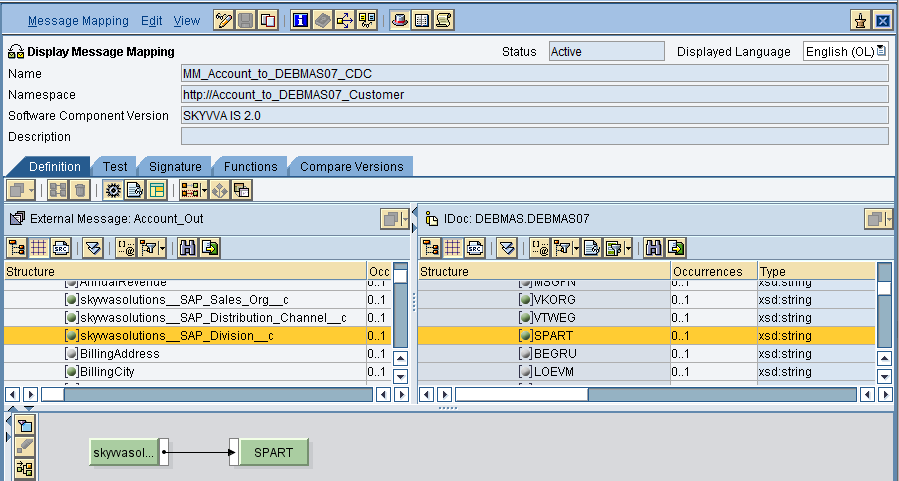
Create message mapping as shown below
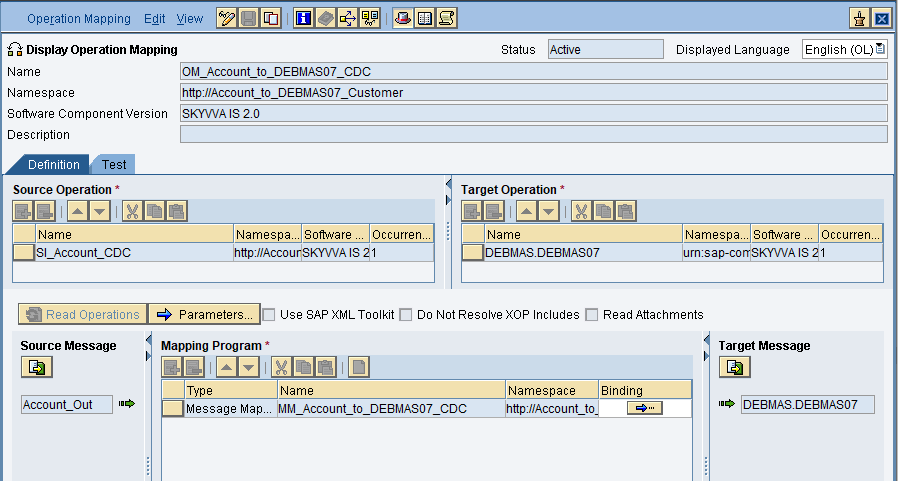
Create Operation mapping as shown below
Creation of Integrated Configuration Objects
After creating the objects in ESR. We have to configure these objects in the integration directory.
First, we have to create Configuration Scenario.
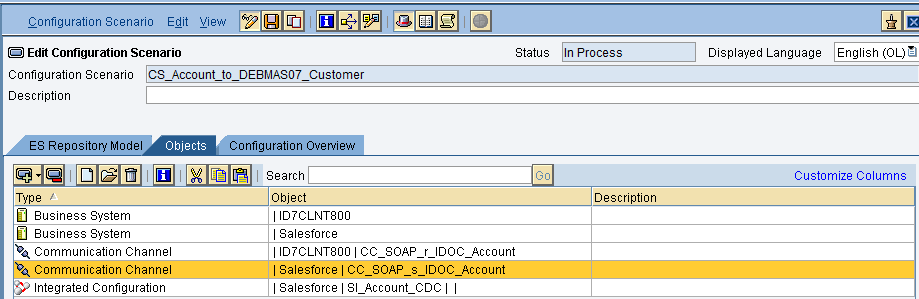
An Integration scenario has the following objects.
- Business System for Sender and Receiver
- Sender and Receiver Communication channel
- Integrated Configuration
We have to define our business system e.g. for the SAP-Backend. For Salesforce you can use our proposal “Salesforce” as the business system. We have to import these business systems from SLD.
Configuring the Sender SOAP communication channel
Create sender communication channel as shown below.
Since we are using Salesforce as a source. So, here we are using SOAP in the sender channel.
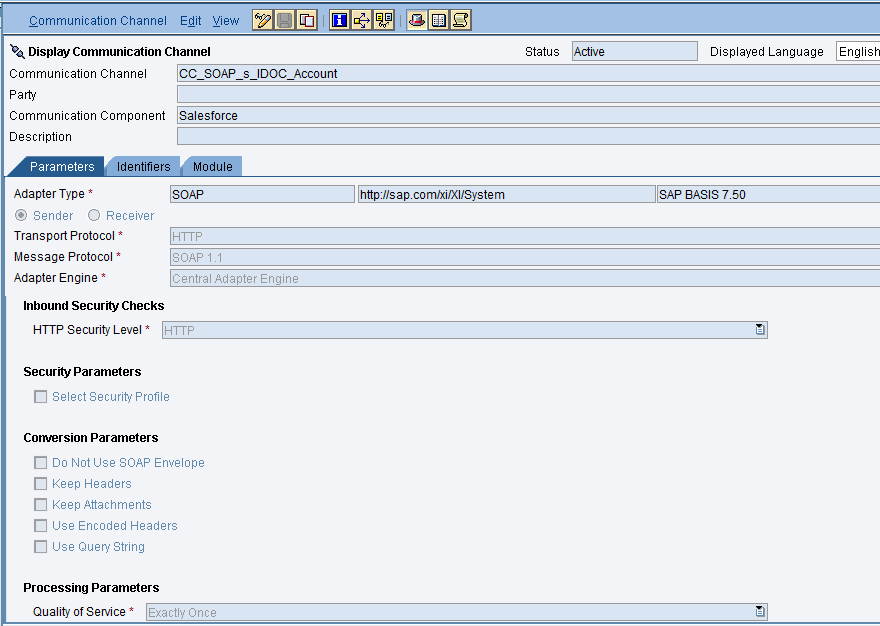
Provide the necessary details as shown and then save and activate the channel.
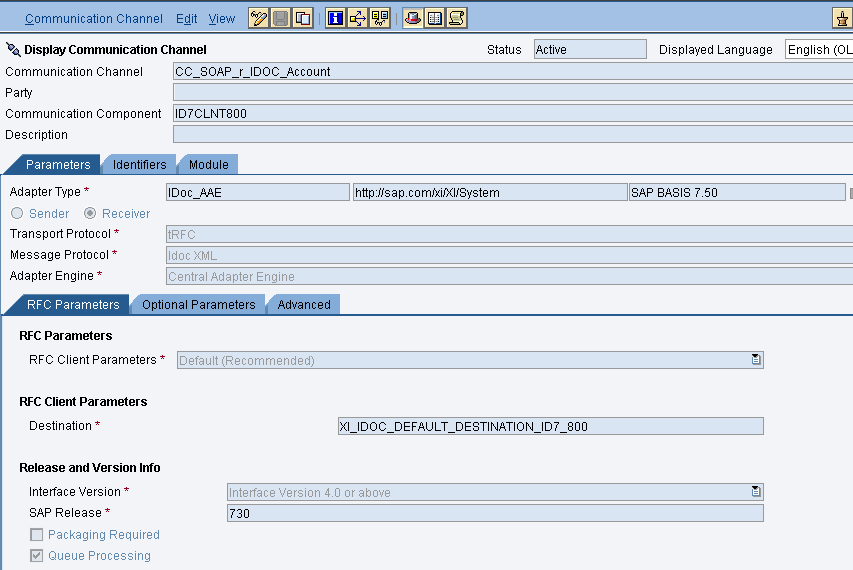
- Configuring the IDOC receiver channel
Integrated Configuration
Create integrated configuration objects as shown below.
Enter the required data e.g. the Communication Component, Interface and Namespace and then click on create button to create an ICO.
Now go through the tabs from left to right to configure the relevant objects. In this first tab “Inbound Processing” here we have to specify the sender communication channel.
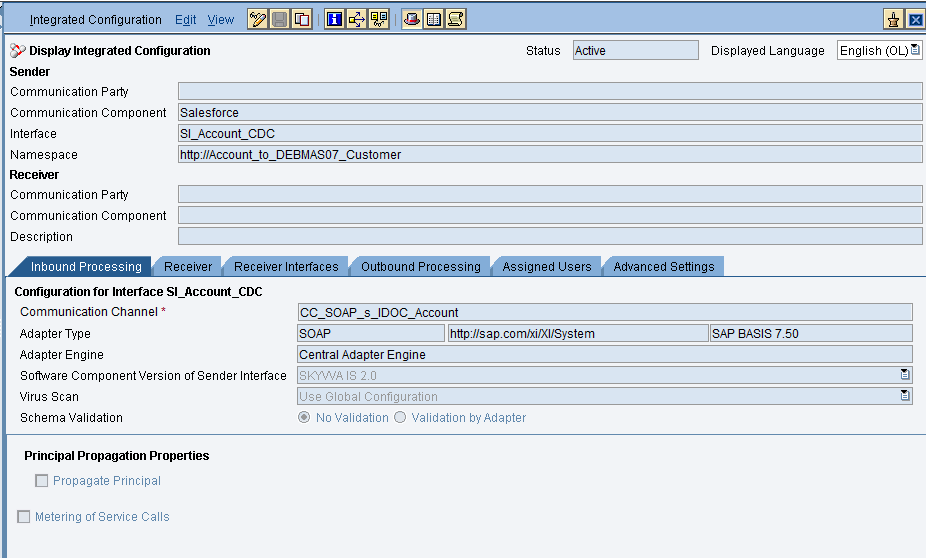
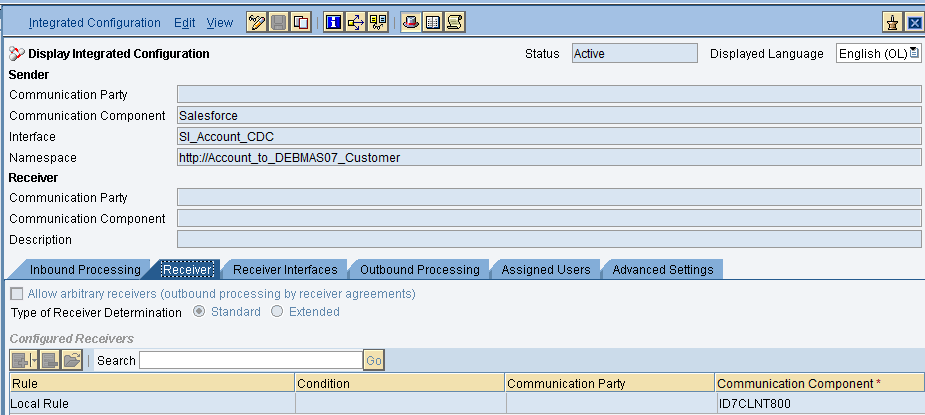
Here in the “Receiver” tab, we have to specify the receiver business system.
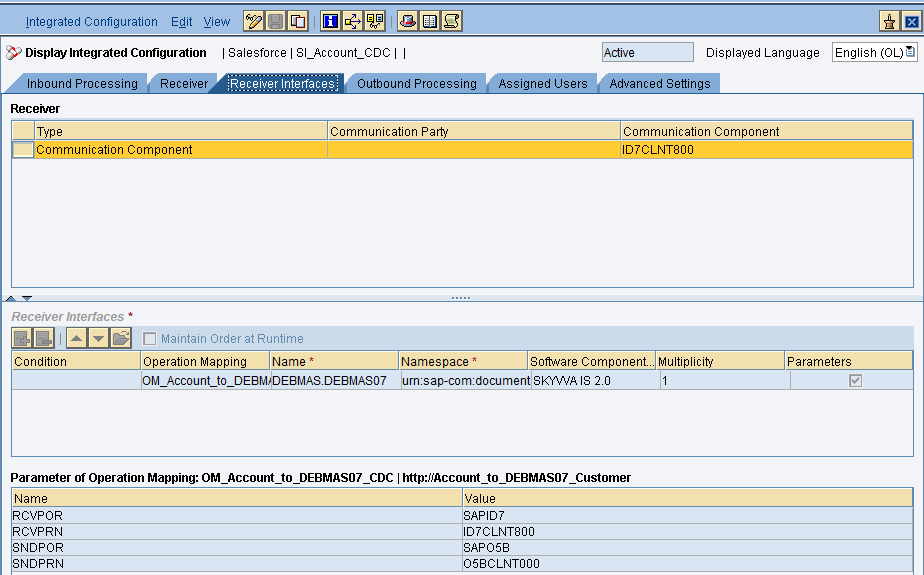
In Receiver interfaces tab specify the operation mapping.
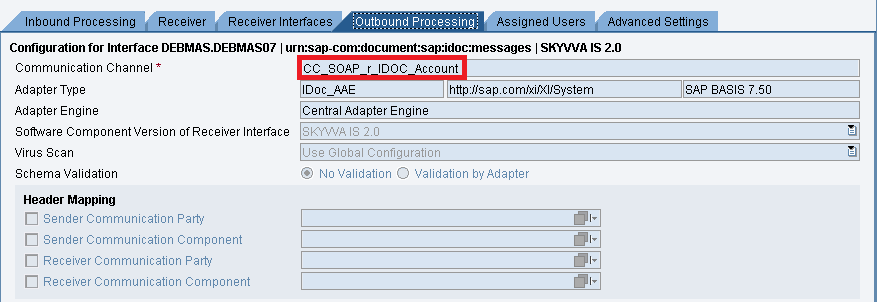
In the “outbound processing” tab, we have to specify the receiver channel.
Test the Outbound Interface with CDC outbound scheduler
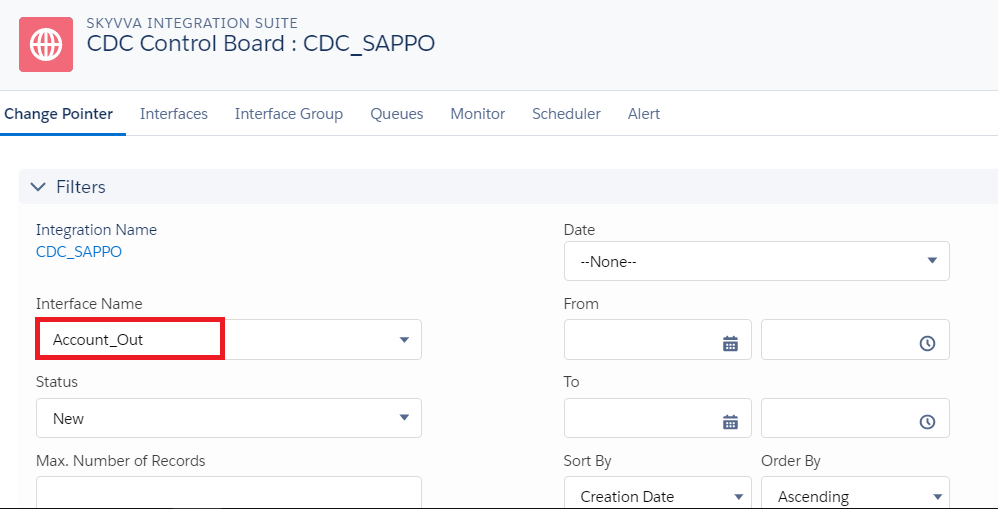
Go to CDC Control Board
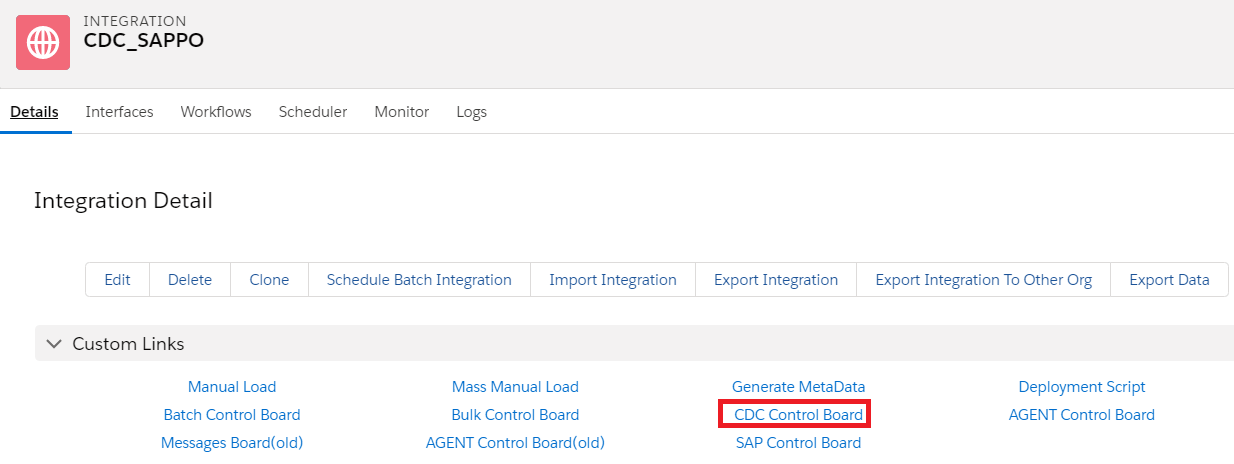
Select the interface name
Now go to scheduler tab to schedule the interface
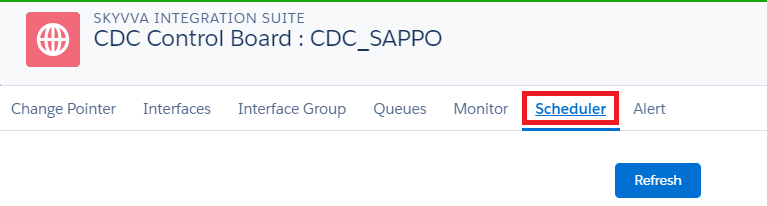
Here we have scheduled like after every record change the message will be processed for every 1 minute for both CDD and CDT.

Now the scheduler is running. we need to change the data in the account object that change will be transfer to SAP system
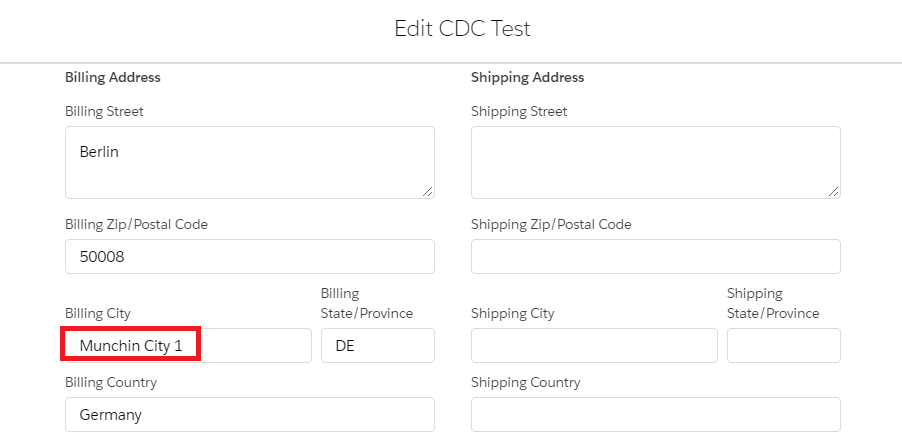
We have changed the Billing City value this change will be reflected into SAP
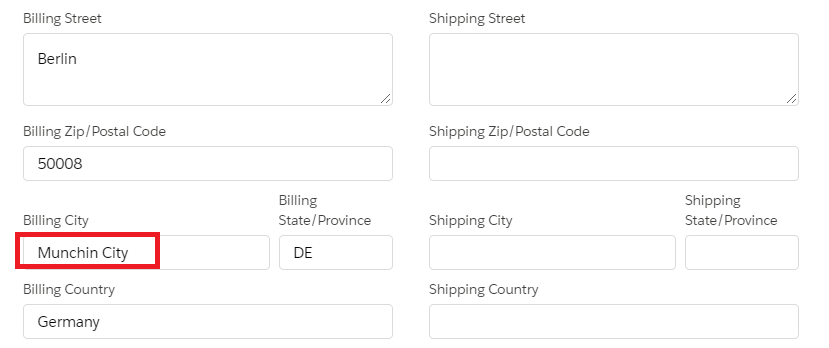
Now we have saved the Munchin City to Munchin City 1
Now we can see the message in the message monitor
![]()


