
Introduction #
In Salesforce, users can access AWS S3 using Named Credentials in both the old way and the new way. The old way typically involves using Named Credentials with a custom endpoint and a remote site setting, while the new way leverages the “Amazon S3” provider for Named Credentials introduced in a Salesforce update.
- The old way of using Named Credentials for AWS S3 involved creating a custom endpoint, storing AWS credentials in Salesforce, and configuring a Remote Site Setting.
- The new way, introduced by Salesforce, uses the “Amazon S3” provider, which leverages IAM roles and eliminates the need to store AWS credentials in Salesforce, making it more secure and straightforward to set up. It is recommended to use the new way whenever possible to enhance security and reduce the risk of credential exposure.
New way #
It would help if you defined an External Credential and a Named Credential. First, create an external credential to specify an authentication protocol and permission set or profile when authenticating to an external system. Second, for External Services to authenticate, create a named credential and specify it as the callout endpoint.
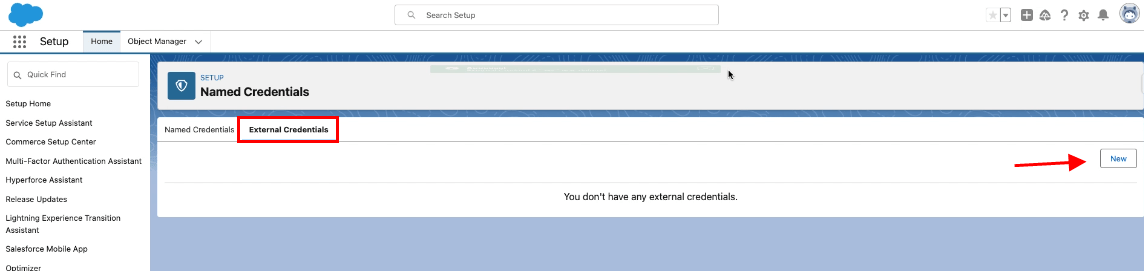
Create the External Credentials #
-
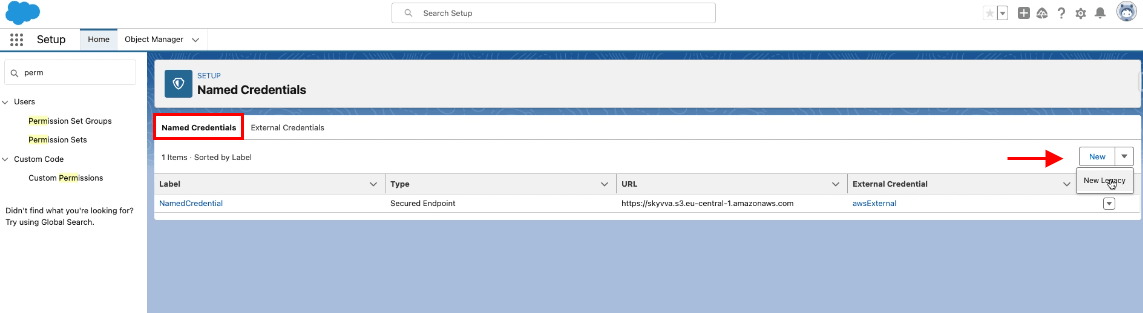
- Enter to setup
- Type Named Credentials on the Quick Find box
- Click New Create Named Credentials
- Click the External Credentials Tab
- Click New button
- Fill Label Name
- Fill Name
- Choose AWS Signature Version 4 on Authentication Protocol
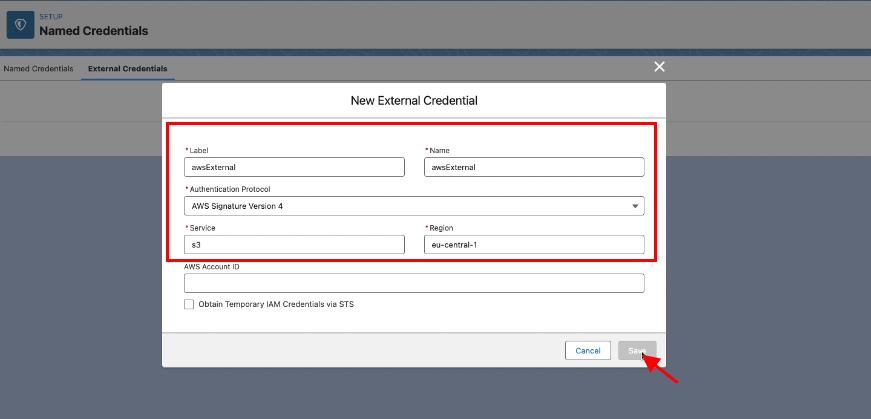
-
- Click Save button
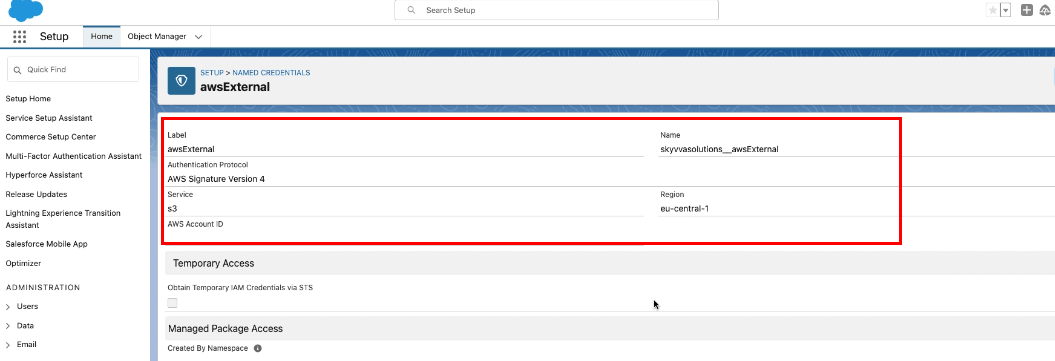
Scroll down to the Principals section
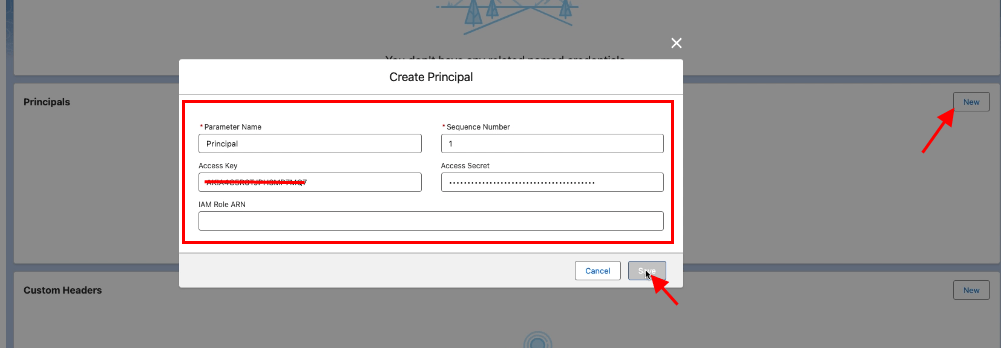
-
- Click on the new button
- Provide Parameter Name
- Access Key
- Access Secret
- Click save button
Create the Named Credentials #
-
- Go Back to Named Credentials
- Click the Named Credentials Tab
- Click the New button
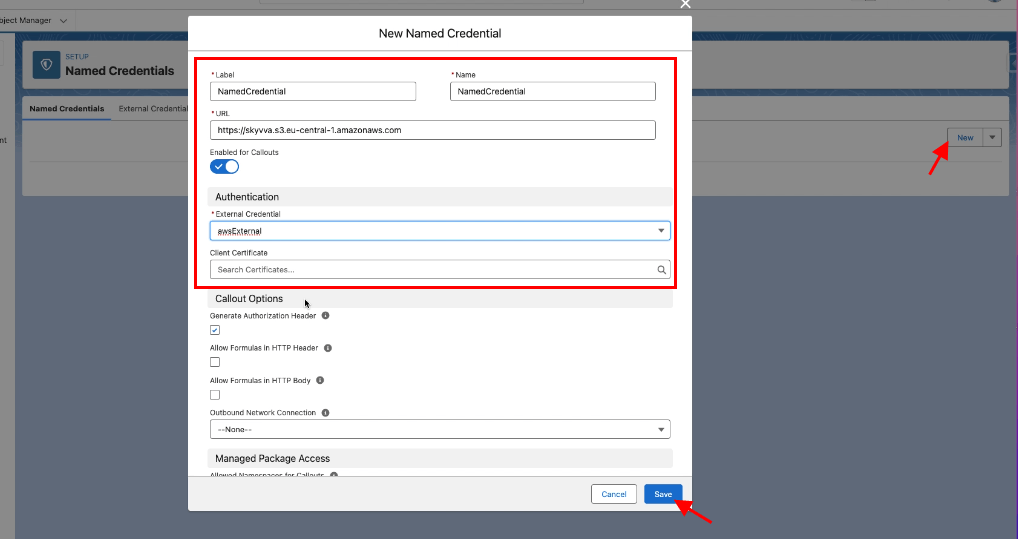
- Fill Label
- Fill Name
- Fill URL => https:// + backetName + .service(ex: s3) + region(ex: eu-central-1 check it on s3 bucket) + .amazonaws.com
- Select the External Credential that we have created above
- Check the Generate Authorization Header
- Save
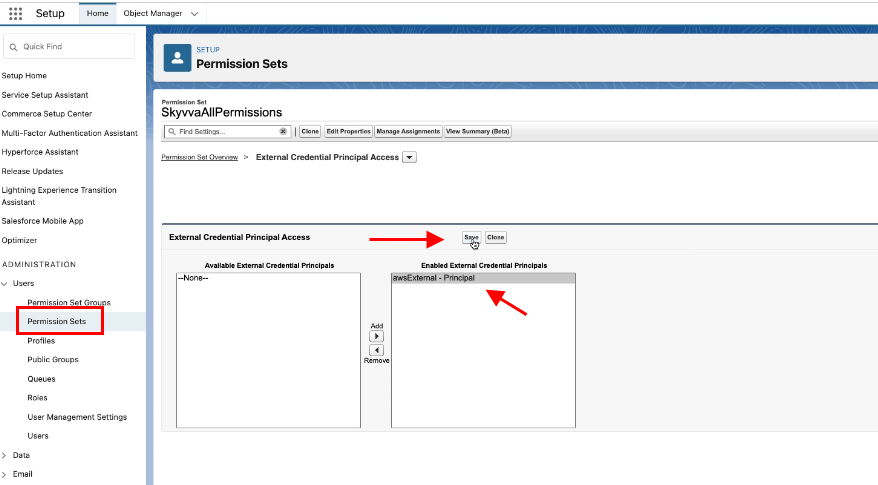
Go to Permission Sets
- Select SkyvvaAllPermissions
- Click on External Credential Principal Access
- Click on the Edit button
- Add and assign awsExternal-Principal access
- Save
Finally, you have created the Named Credentials in a new way.
Old way #
You named Credentials to simplify the process of connecting to external services, including AWS, securely. However, suppose you need to access AWS S3 using the “old way,” without Named Credentials. In that case, you can do so by directly making HTTP requests to the AWS S3 REST API with the appropriate AWS Signature Version 4 authentication.
Create the Named Credentials #
-
- Go Back to Named Credentials
- Click the Named Credentials Tab
- Click the New button
- Name: TestNamedCredential
- URL : https:// + backetName (ex: skyvva)+ .service(ex: s3) + region(ex: eu-central-1 check it on s3 bucket) + .amazonaws.com. Here is an example: https://skyvva.s3.eu-central-1.amazonaws.com
- Identity Type: Named Principal
- Authentication Protocol: AWS Signature Version 4
- AWSAccessKeyId: XXXXXXXXXXXXXXXXXX
- AWSSecretKey: xxxxxxxxxxxxxxxxxxxxxxxx
- AWS Region: eu-central-1
- AWS Service: s3
- Generate Authorization Header: checked
- Save
Finally, you have created the Named Credentials in a old way.
Summary #
- The new way is preferred, especially for enhanced security and to align with AWS best practices. It uses the AWS Signature Version 4 authentication method, which is recommended by AWS for accessing S3 and provides better security compared to storing the AWS Access Key ID and Secret Access Key directly in Salesforce. It is recommended for many AWS use cases, especially for services like EC2 instances.
- The old way of using Named Credentials for AWS S3 involved creating a custom endpoint, storing AWS credentials in Salesforce, and configuring a Remote Site Setting.


