Rabbit MQ differs from Active MQ and other message brokers in a way that we need to post a message to an Exchange provided by it. This Exchange will then forward the message to a queue or topic based on the routing key property.
This adapter supports 3 types of data formats i.e. CSV, XML, and JSON.
Link:http://18.197.54.48:15672/#/queues. Where exchange will be automatically created once you callout code.
UseCase: Agent RabitMQ Adapter for CSV payload. #
Objective: Test rabbitMQ outbound adapter for CSV Format #
Pre-requisite: #
- Create Integration.
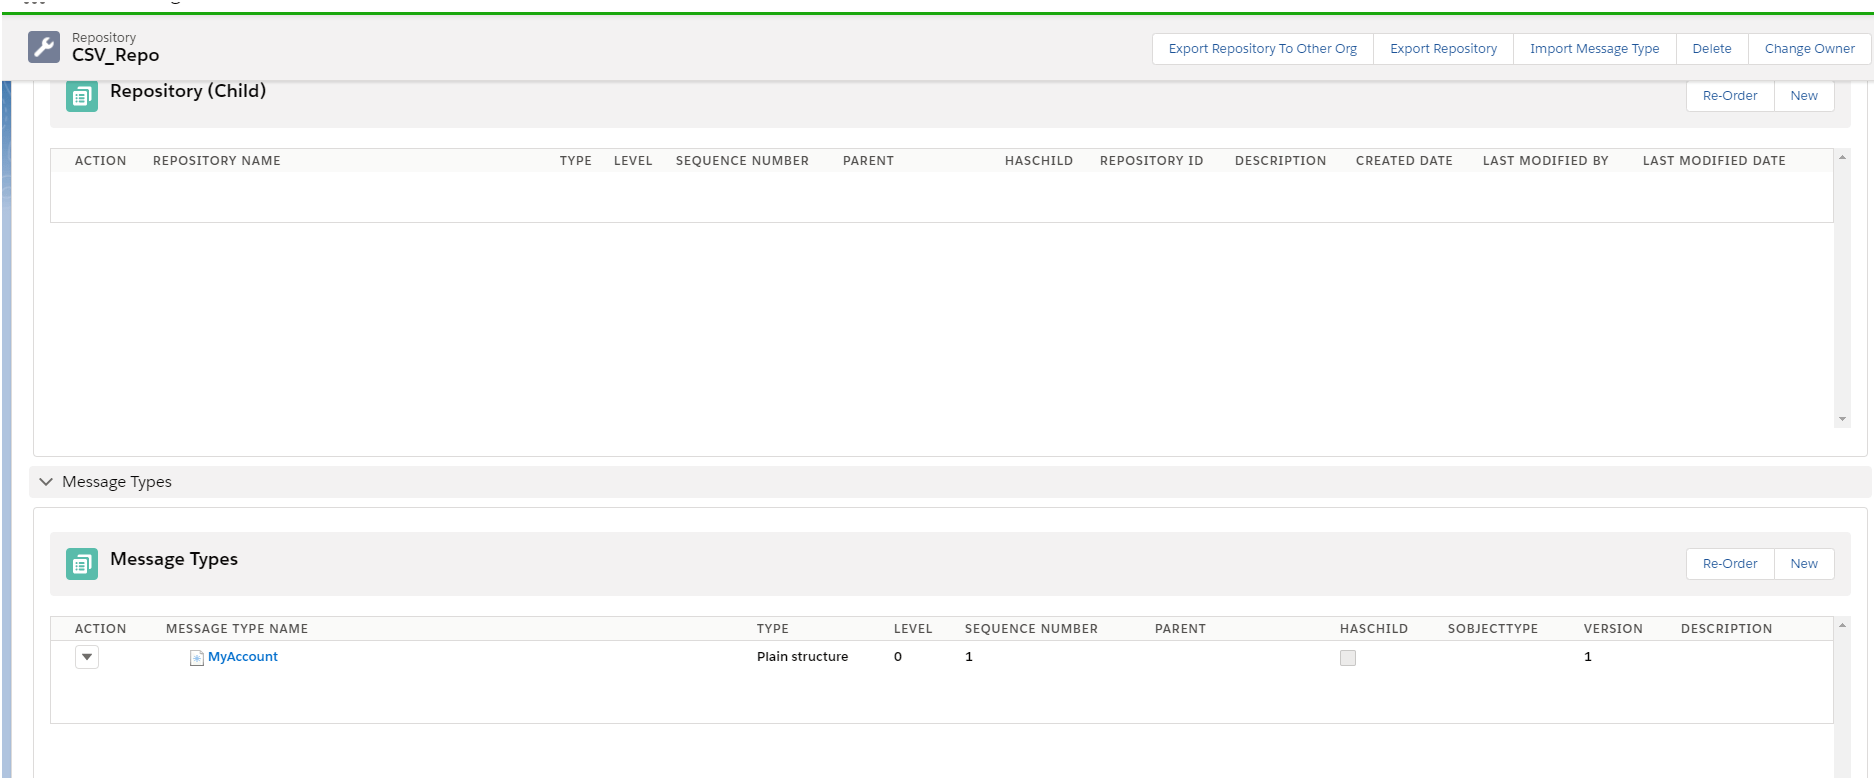
- Create Metadata Provider, IStructure Repository, and Create Flat Message Type.
Example:
- Metadata Provider:Agent_ActiveMQ_RabbitMQ_JMS_Metadata
- IStructure Repository:CSV_Repo
- Message Type:MyAccount
Steps: #
Step1:To Create Agent RabbitMQ CSV Outbound Adapter:
- Go to Integration (Example: Agent_RabbitMQ_Integration)
- Click on link AGENT Control Board.
- Go to Adapter Tab and Click on New Button.
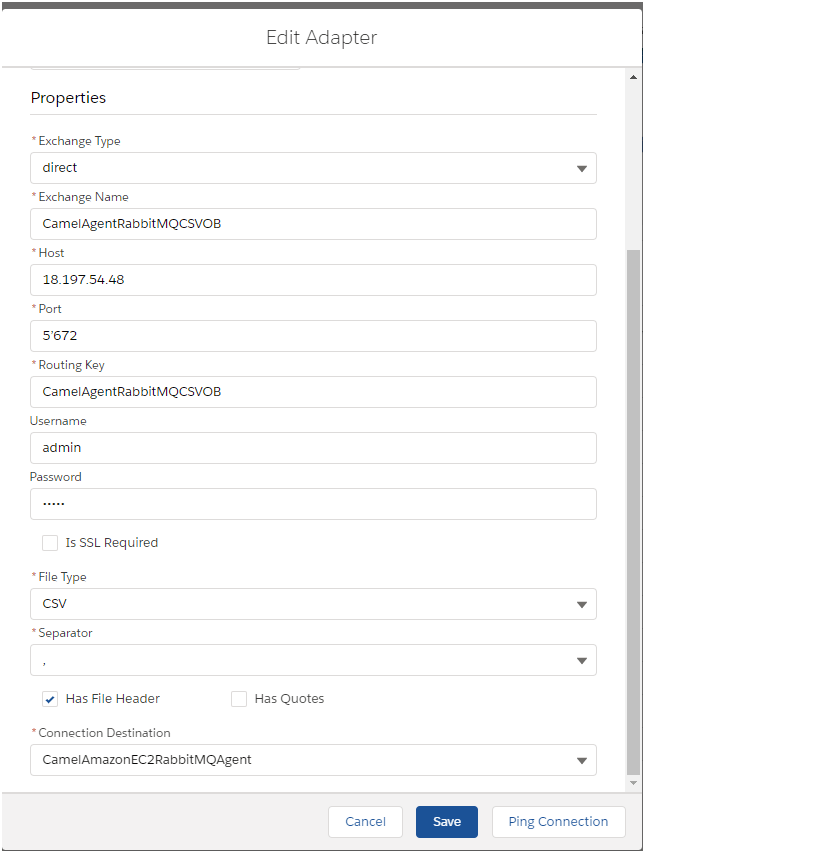
Input values for Mandatory Properties #
- exchangeType – Direct
- exchangeName – It can be anything. For example: CamelA
- host- String type. Denotes the IP address of the Rabbit MQ server.
- port- String type. Denotes the port number of the Rabbit MQ server.
- routingKey – String type. It can be anything.
Configure Agent RabbitMQ CSV Outbound Adapter: you need to enter adapter properties base on system requirement and Select Connection Destination (Example:CamelAmazonEC2RabbitMQAgent).
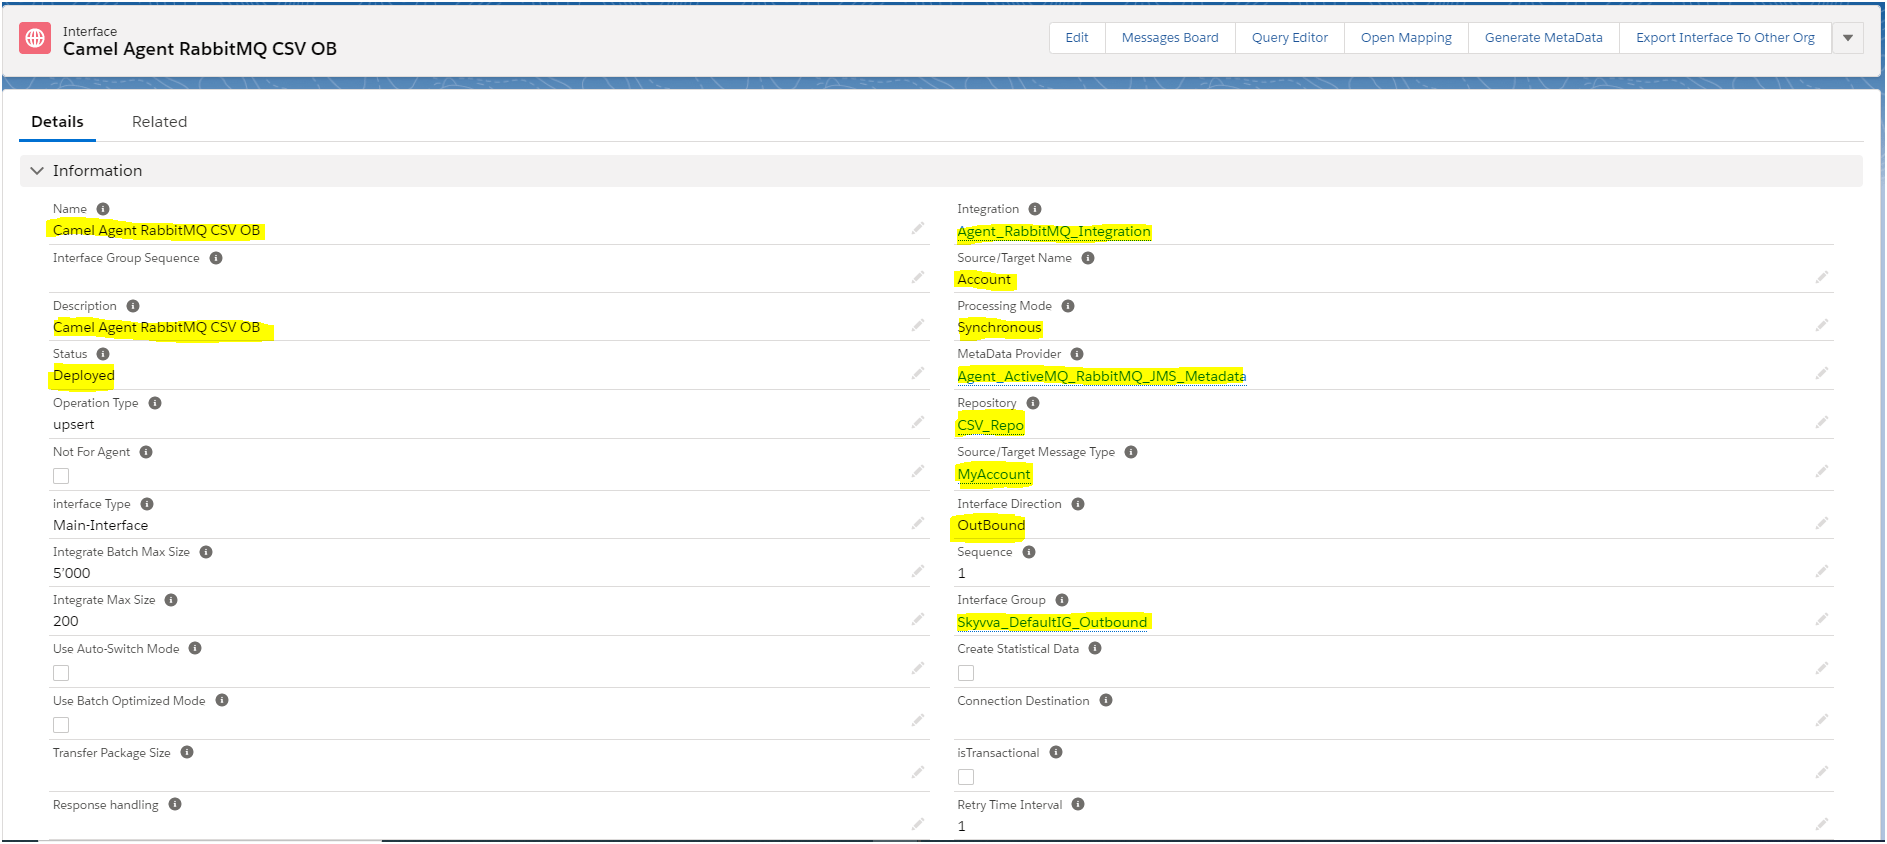
Step2: Create Outbound Interface:
Example:
- Integration: Agent_RabbitMQ_Integration
- Outbound Interface: Camel Agent RabbitMQ CSV OB
step3: Link Outbound Adapter: Camel Agent RabbitMQ CSV OB
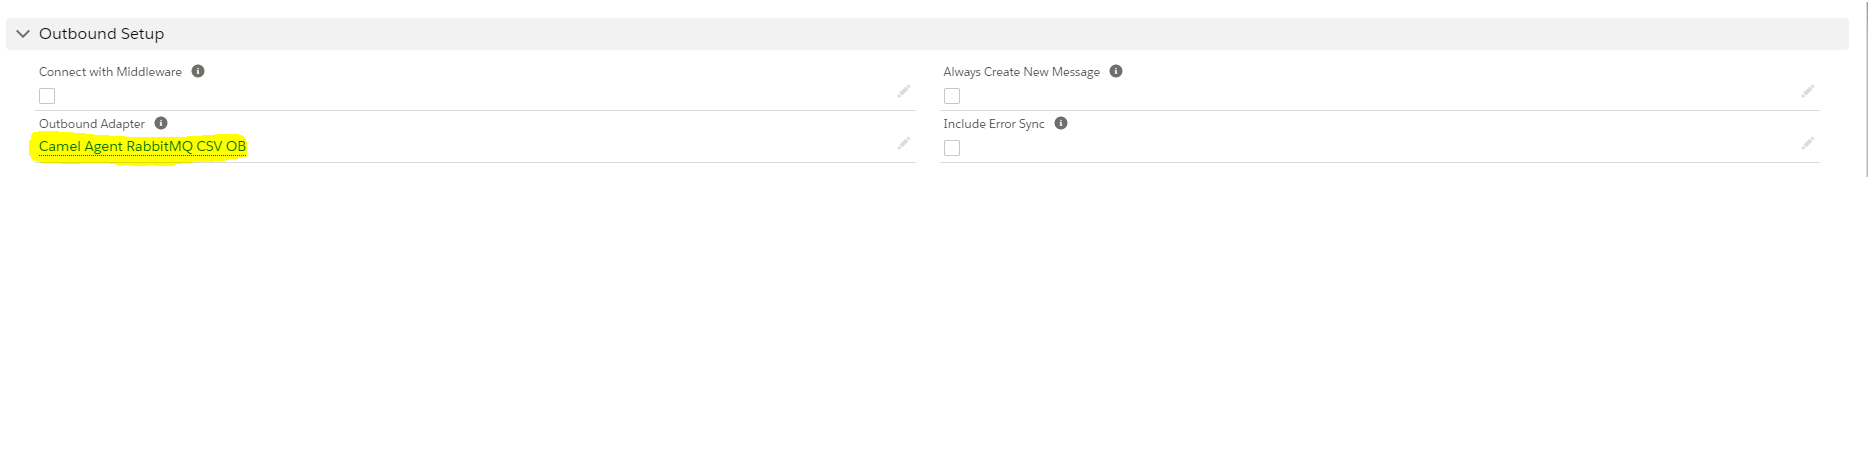
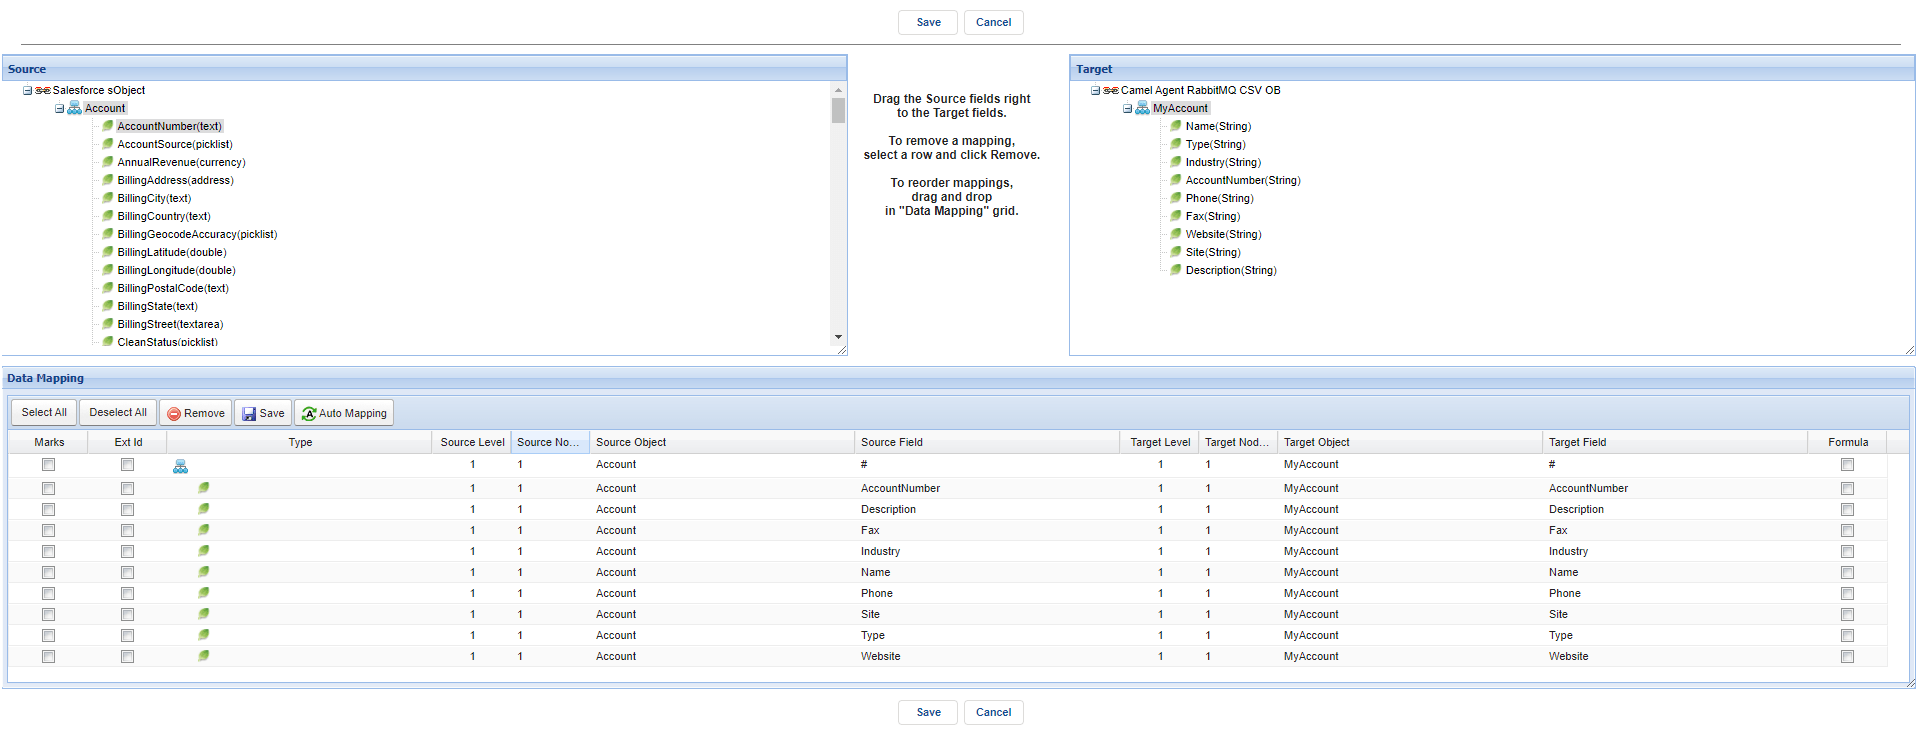
step4: Do mapping and save it.
Step5: Go to Developer console and callout:
Callout:
skyvvasolutions.CallOutControl c = new skyvvasolutions.CallOutControl();
c.returnJSONComplete=true;
c.actionDoIntegrate=false;
c.isCreateMessage=true;
String[] ids= new String[]{‘0011j000011qHW8AAM’,’0011j000011qHW9AAM’};
List<skyvvasolutions.CalloutResponse> result = skyvvasolutions.Iservices.invokeCalloutV3(‘Agent_RabbitMQ_Integration’,’Camel Agent RabbitMQ CSV OB’,ids,’SYNC’,c);
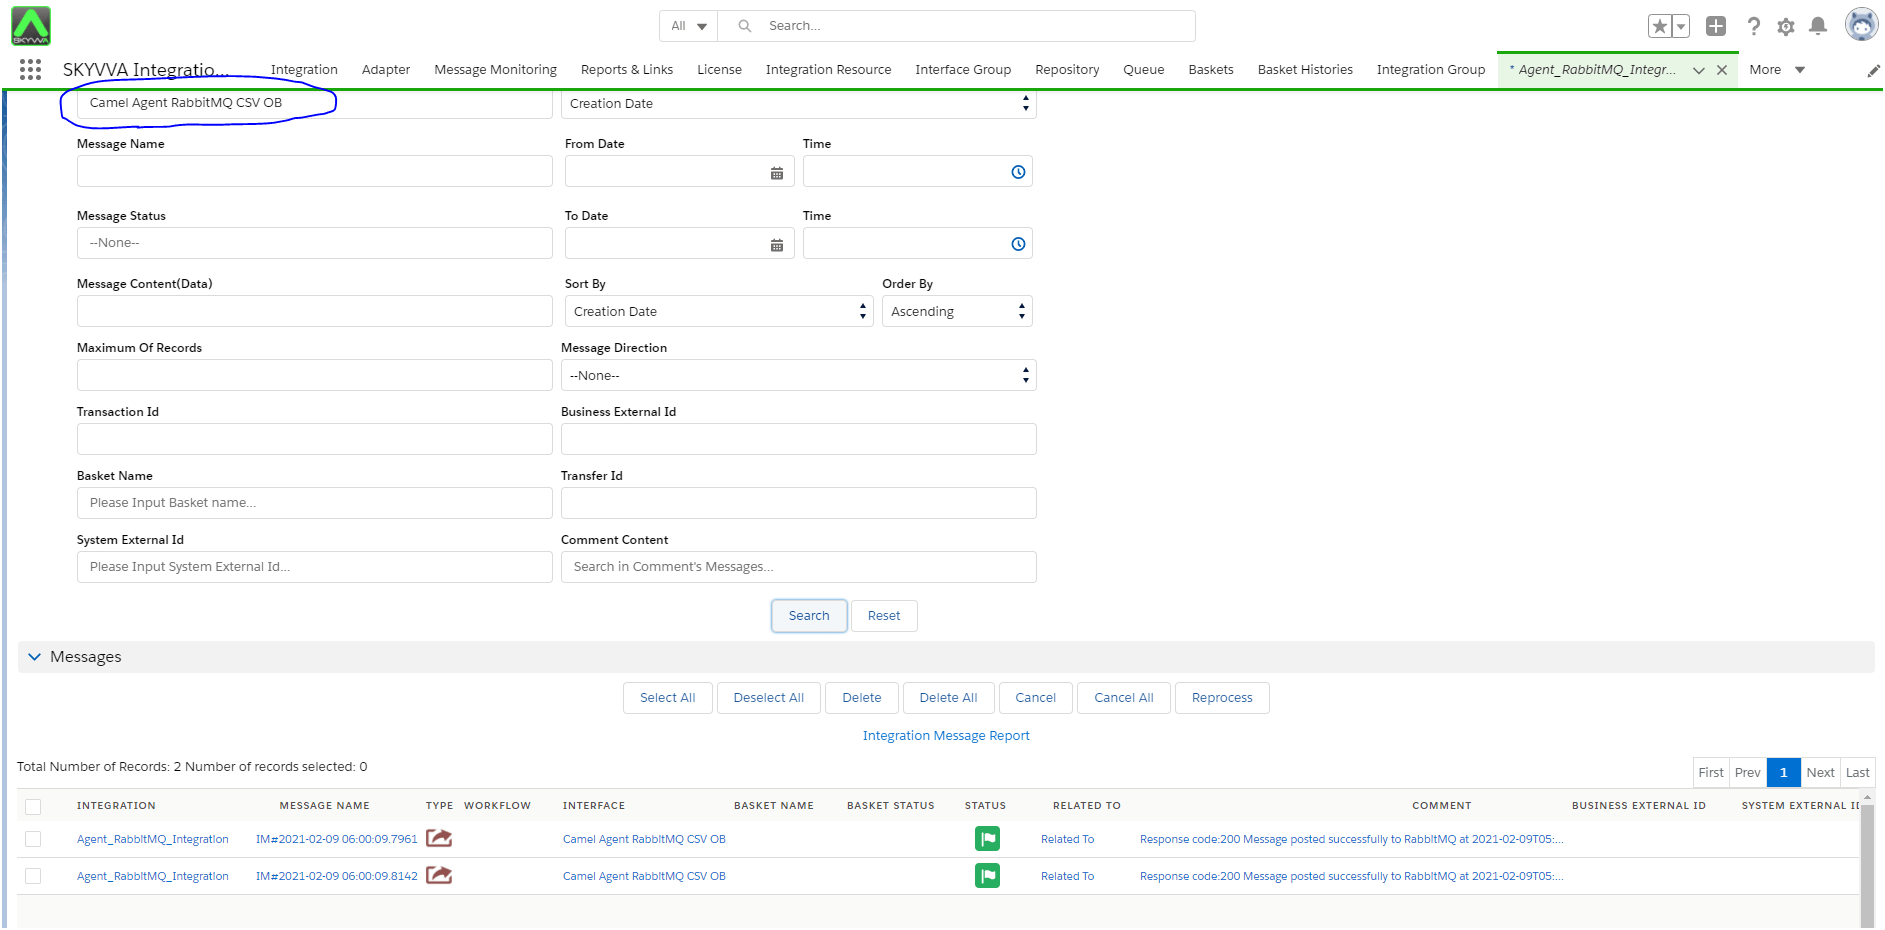
Step5: Check result on Message Monitoring:
RabbitMQ Server: #
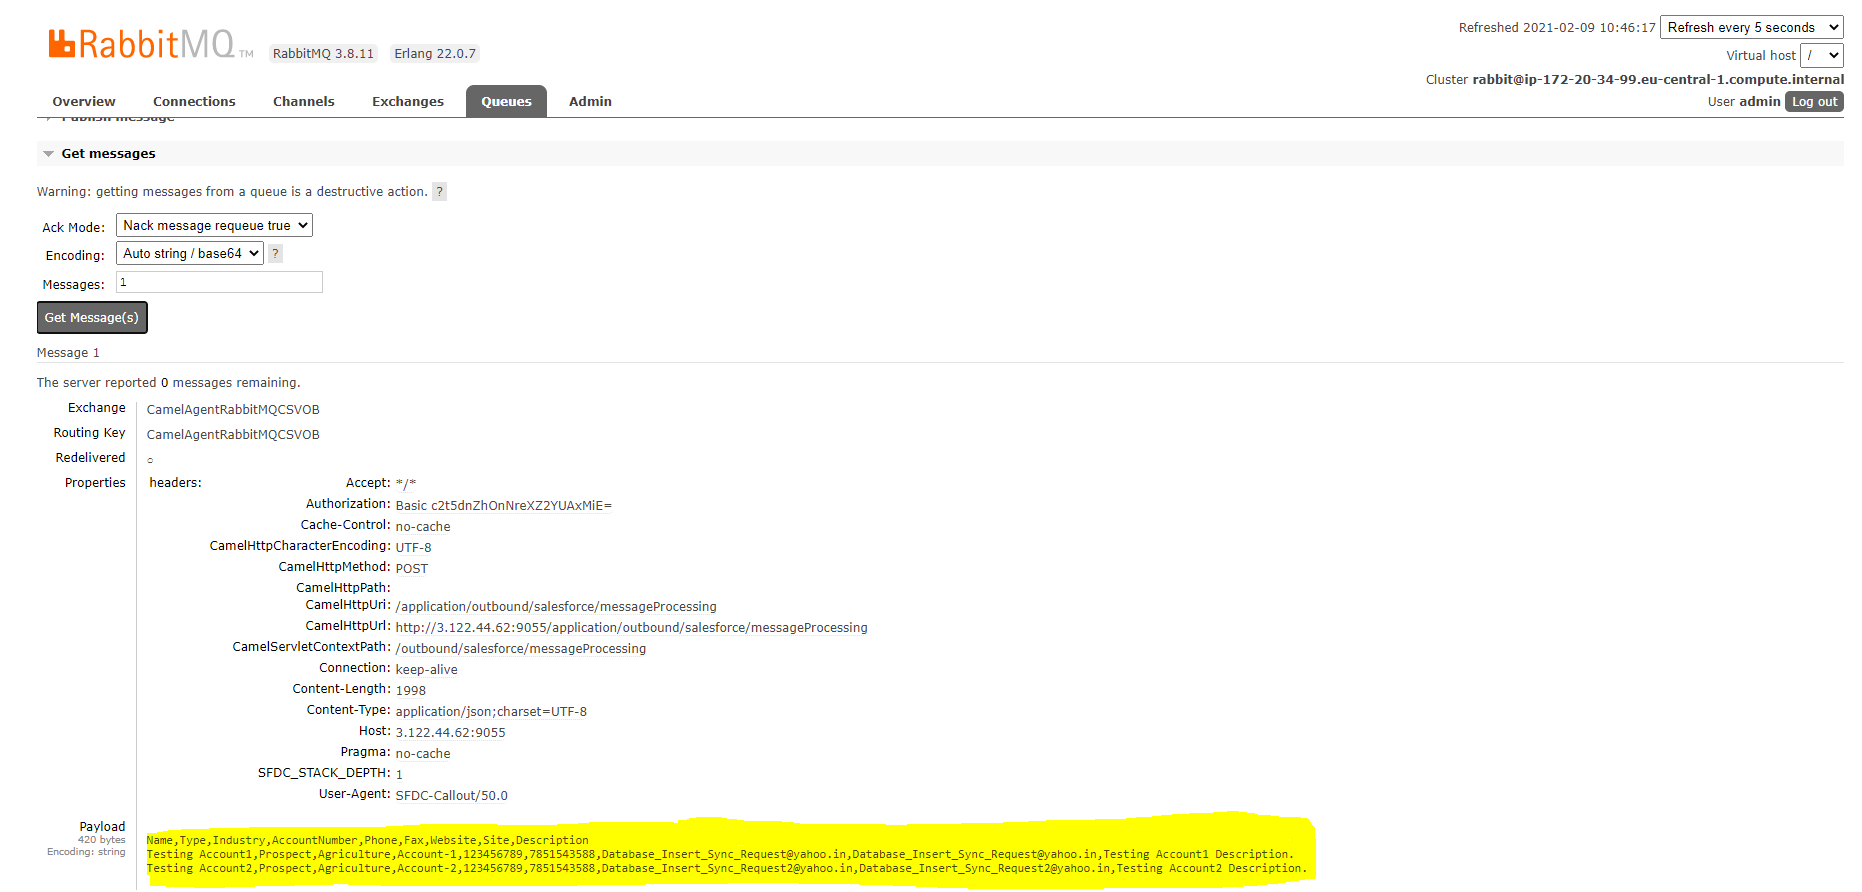
Check CSV Data on RabbitMQ Server:
- Open Link:http://18.197.54.48:15672/#/queues
- Username: admin
- Password: admin
Go to Exchange
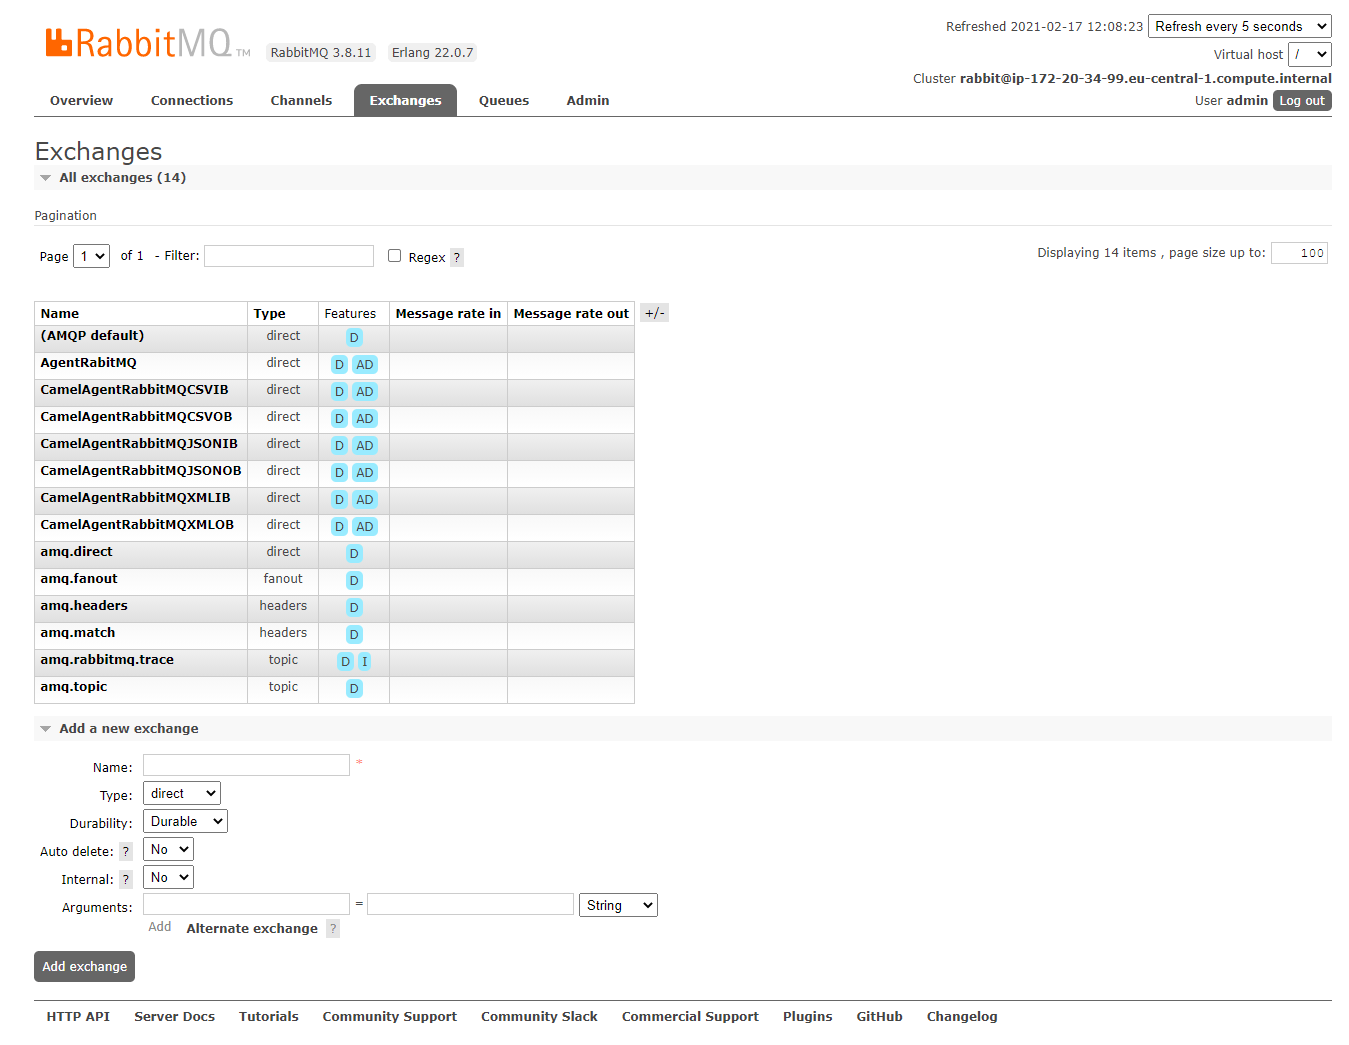
After V3 Callout new Exchange is generated Example: CamelAgentRabbitMQCSVOB
(Note: CamelAgentRabbitMQCSVOBExchange name is coming from adapter configuration)
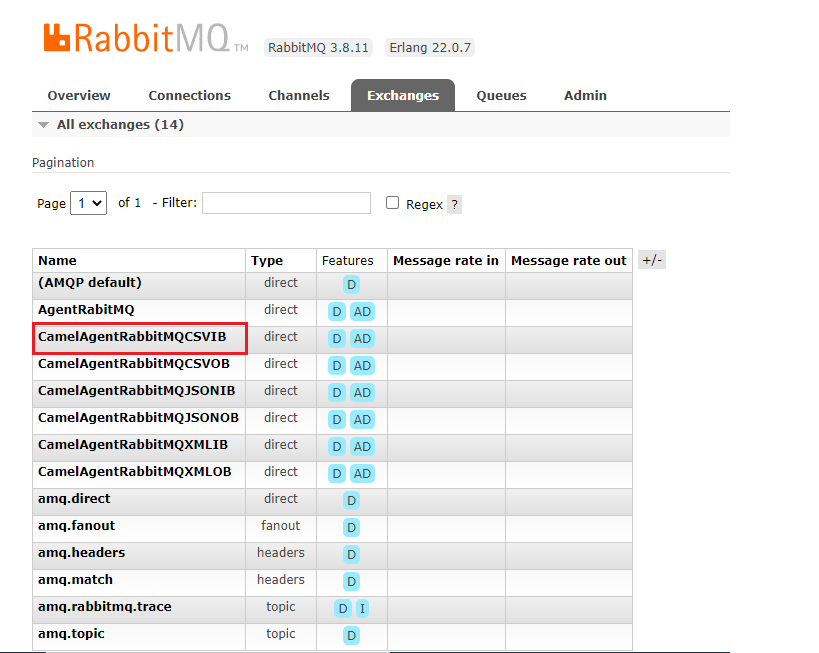
Click on the Exchange name, It will redirect you to the Exchange detail page.
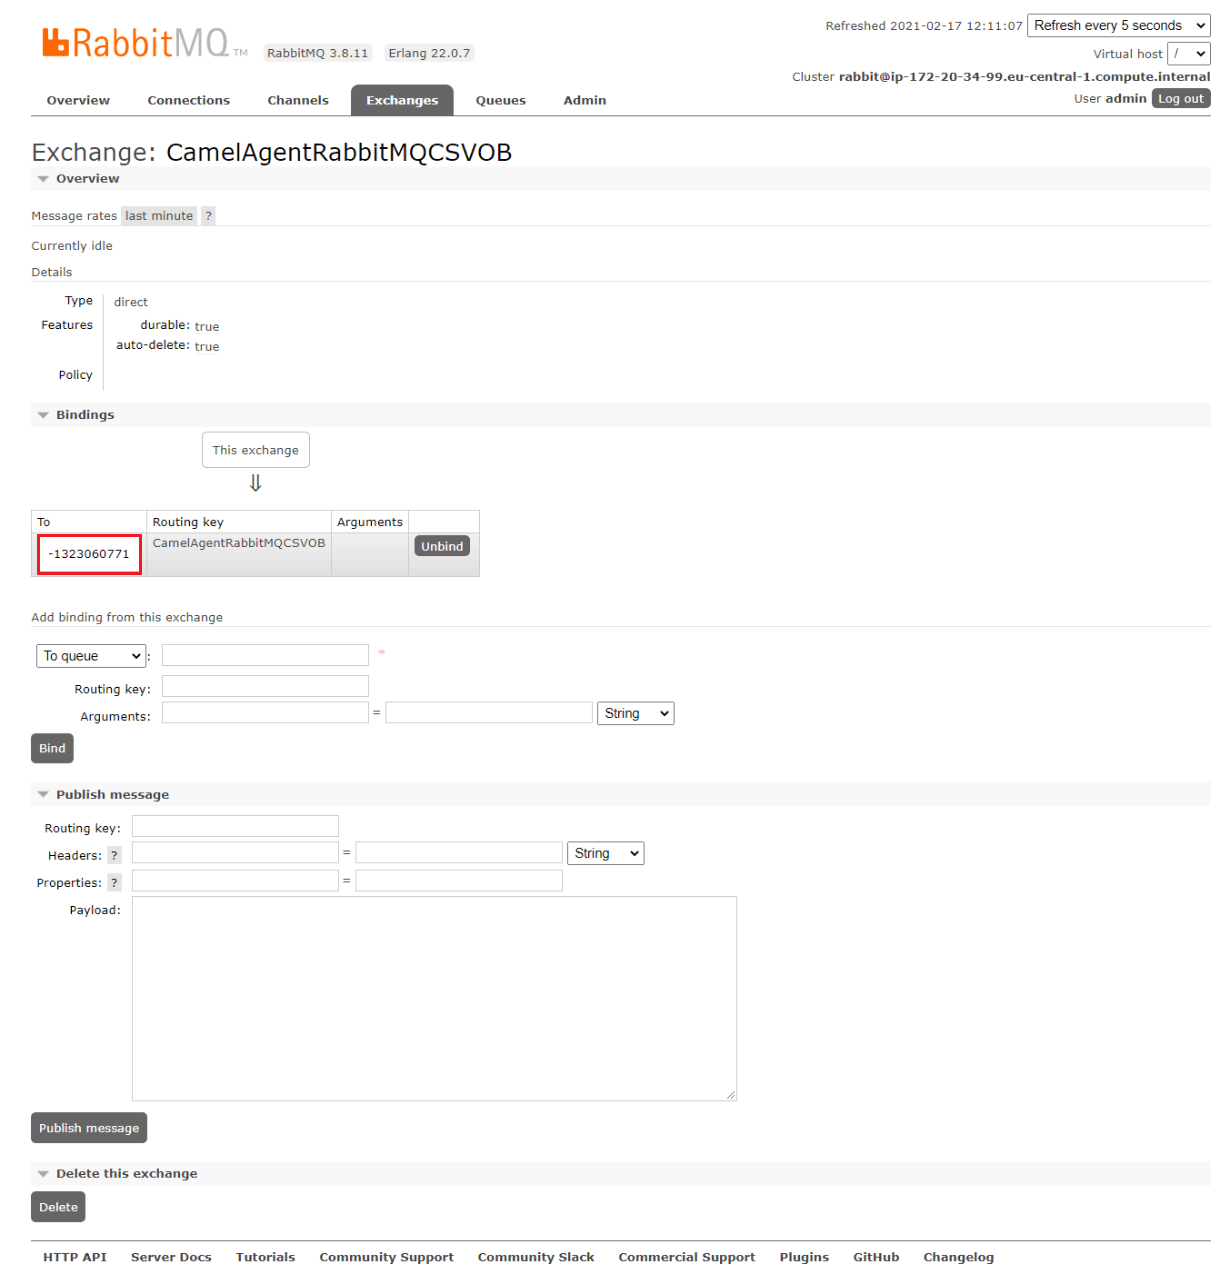
Click on Queue -1323060771 It will navigate to the get the message section.
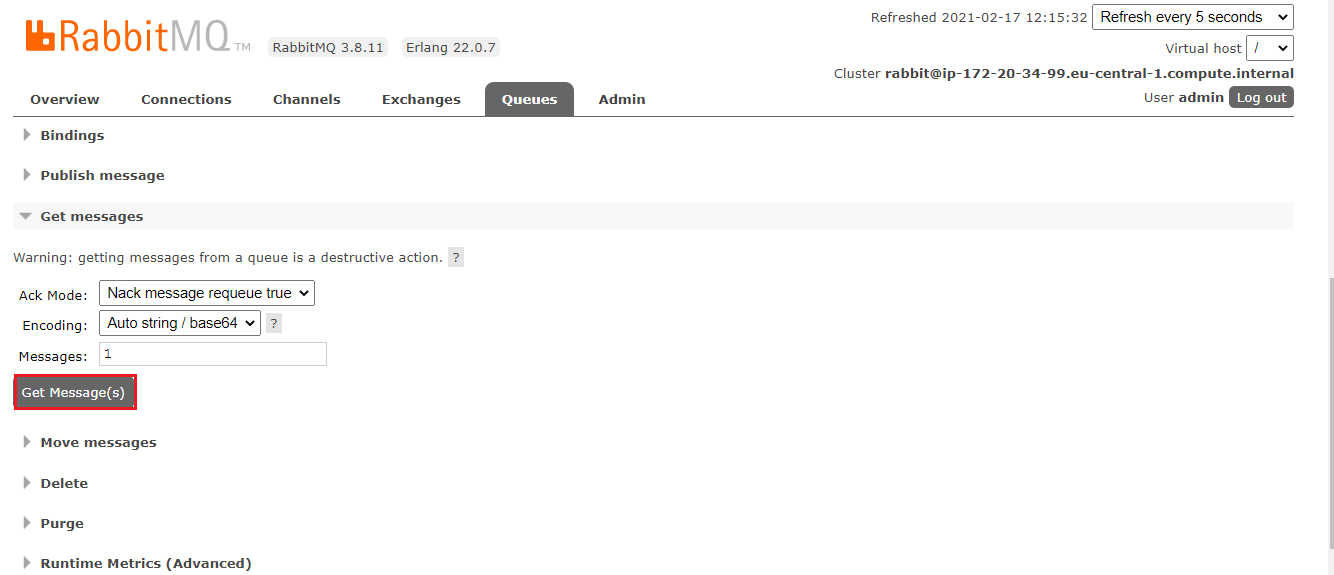
- Go to Get Messages block
- and click on Get Messages button.