Rest adapter is used to call out data from SKYVVA – Salesforce to other SKYVVA Salesforce instance.
The creation of an app #
To be able to call out the data from an instance to another instance, you need to create an app in order to connect. This part of the tutorial will be explained the example of two instances A&B. The following steps will show you how to create an app in instance B:
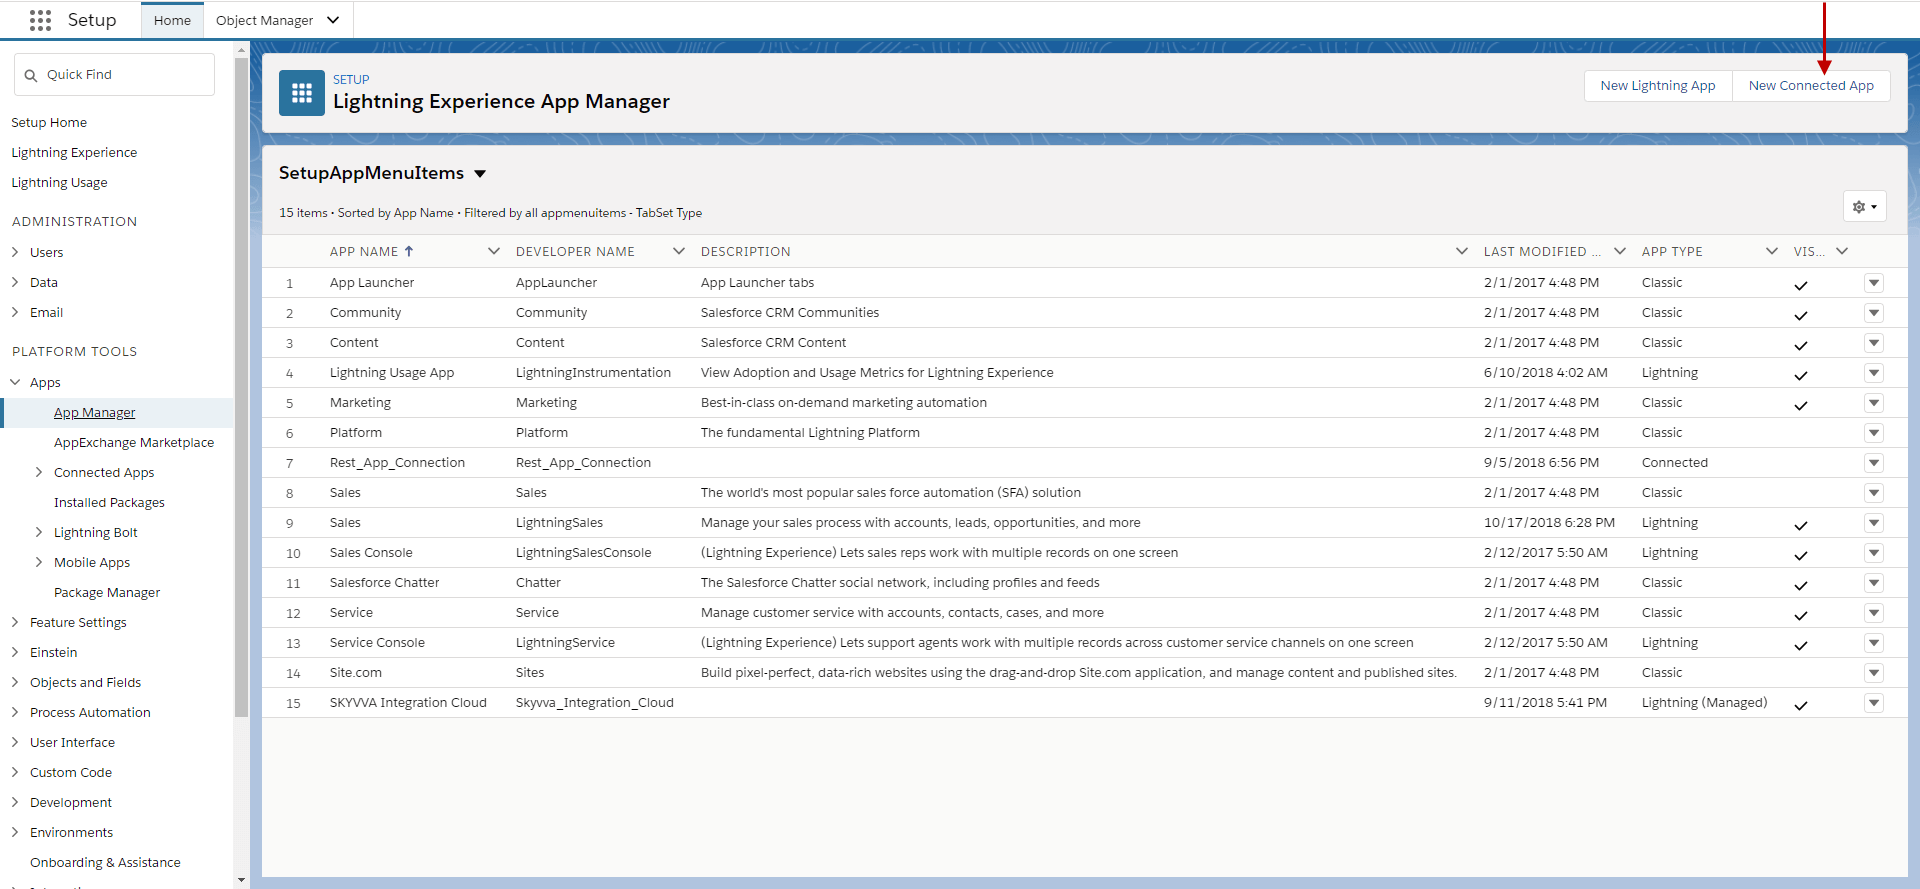
- Go to Setup => Platform Tools => Apps=> App Manager=>Connected Apps => Click New Connected App
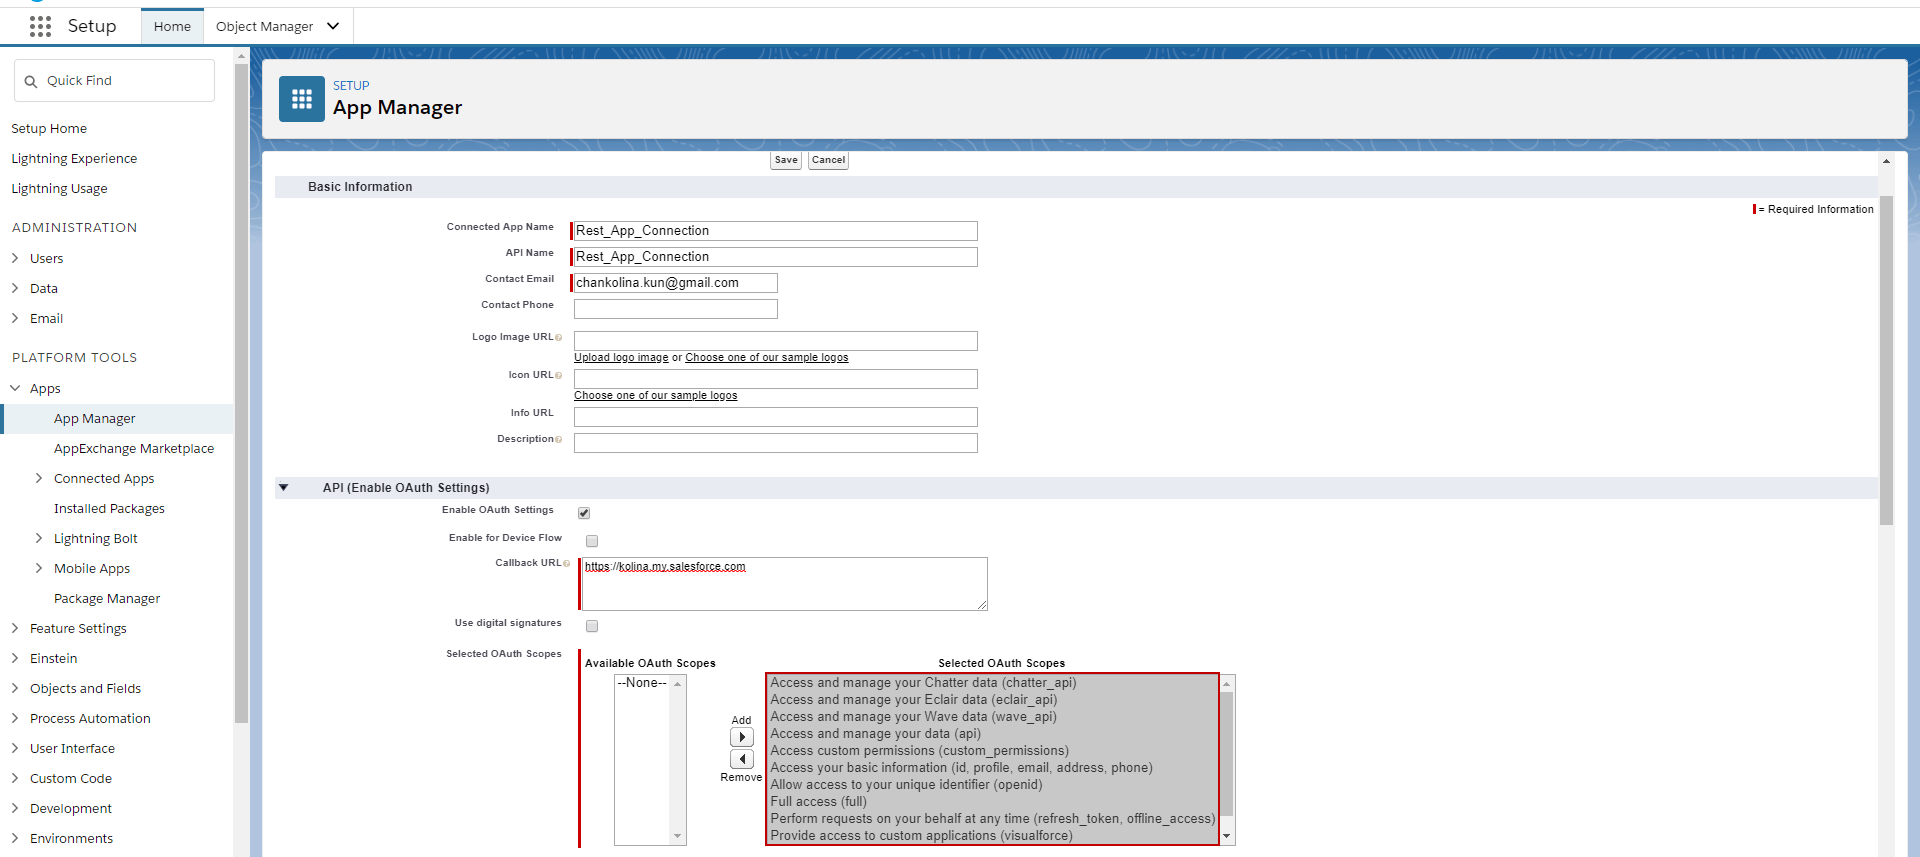
- Fill in the Basic Information section as below
- Connected App Name: Rest_App_Connection
- Contact Email: xxxxxxxxx@gmail.com
- Fill in API (Enable OAuth Settings) section
- Enable checkbox
- Callback URL
- Add Selected OAuth Scopes
- Save
- Click on Continue button
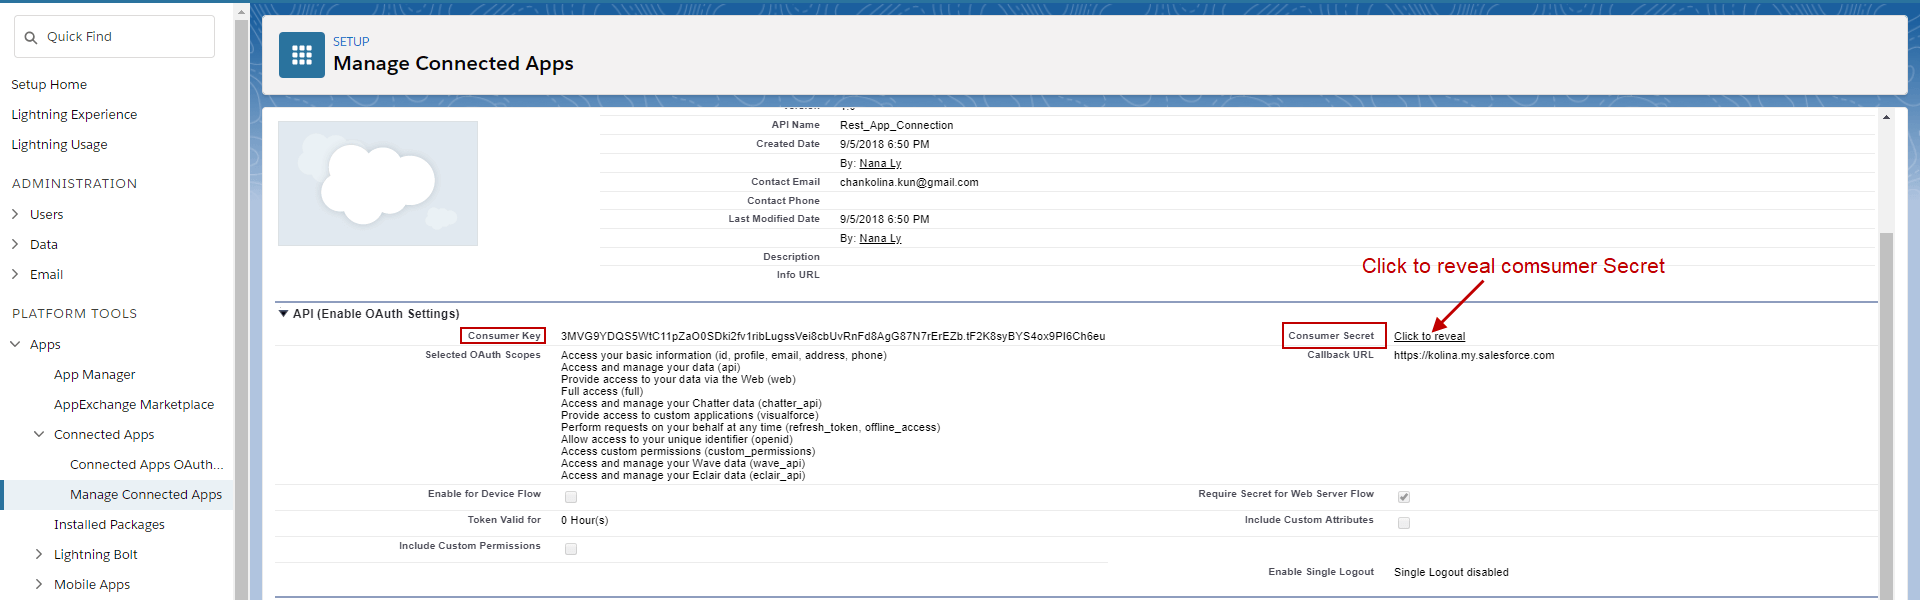
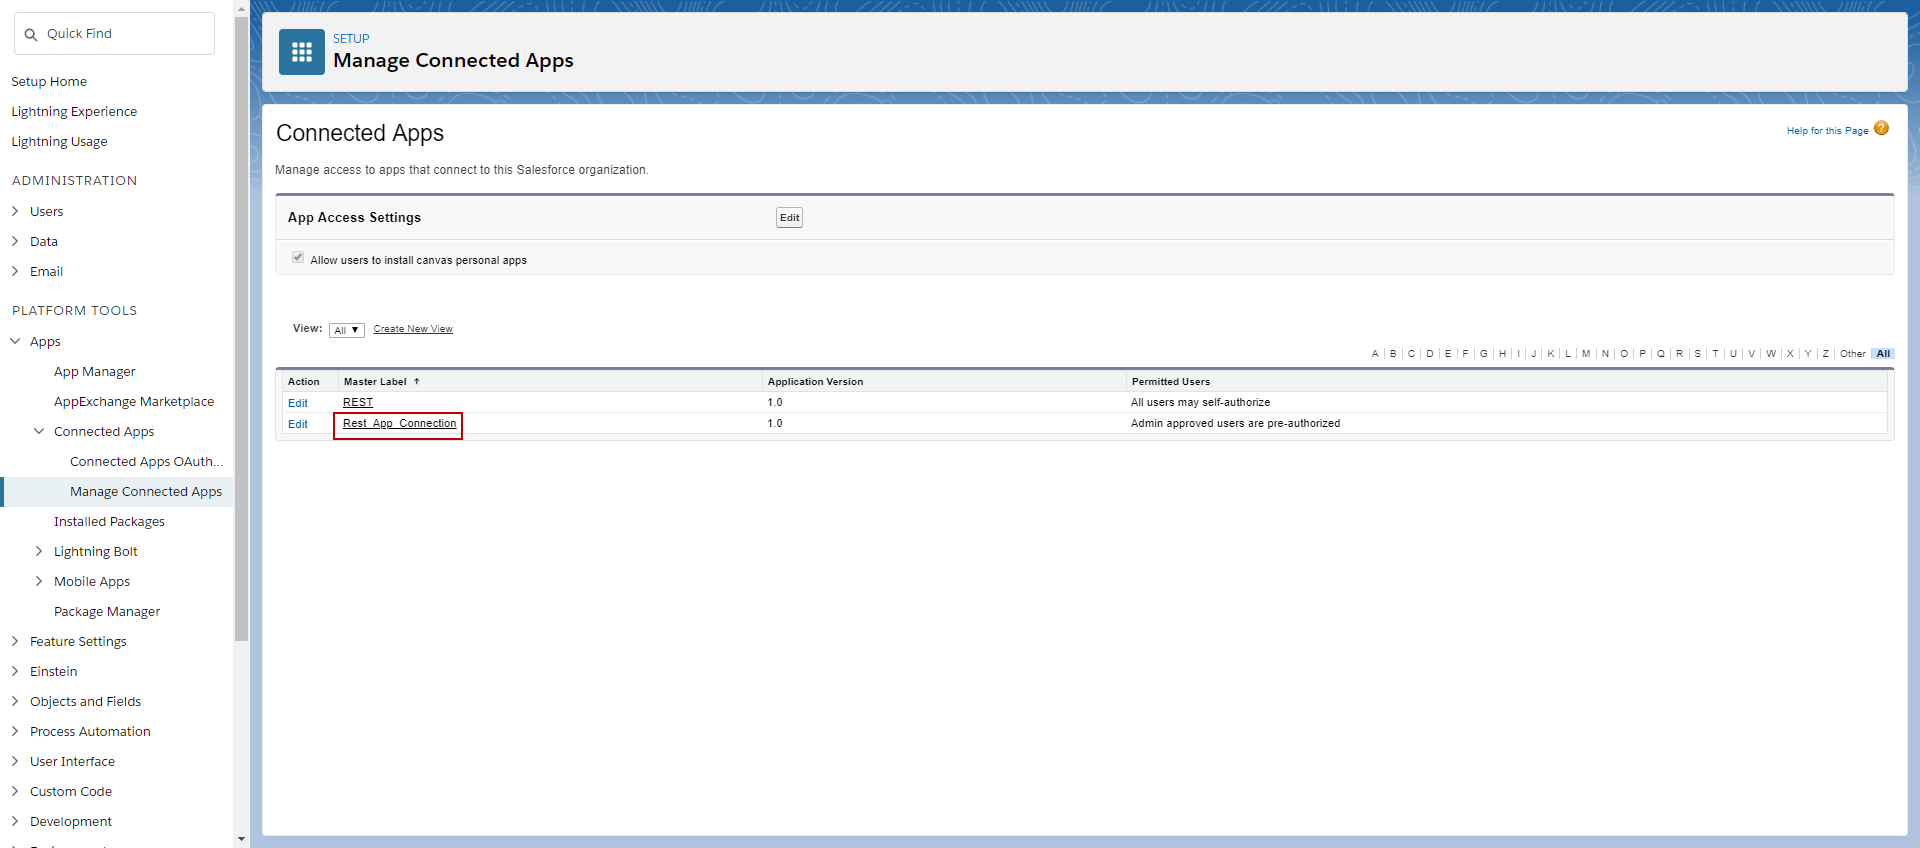
- After you done creating apps, saving both Consumer Key and Consumer Secret please go to back to Setup=>Apps => Connected Apps=> Manage Connected Apps=> Rest App Connection => Click on Edit Policies
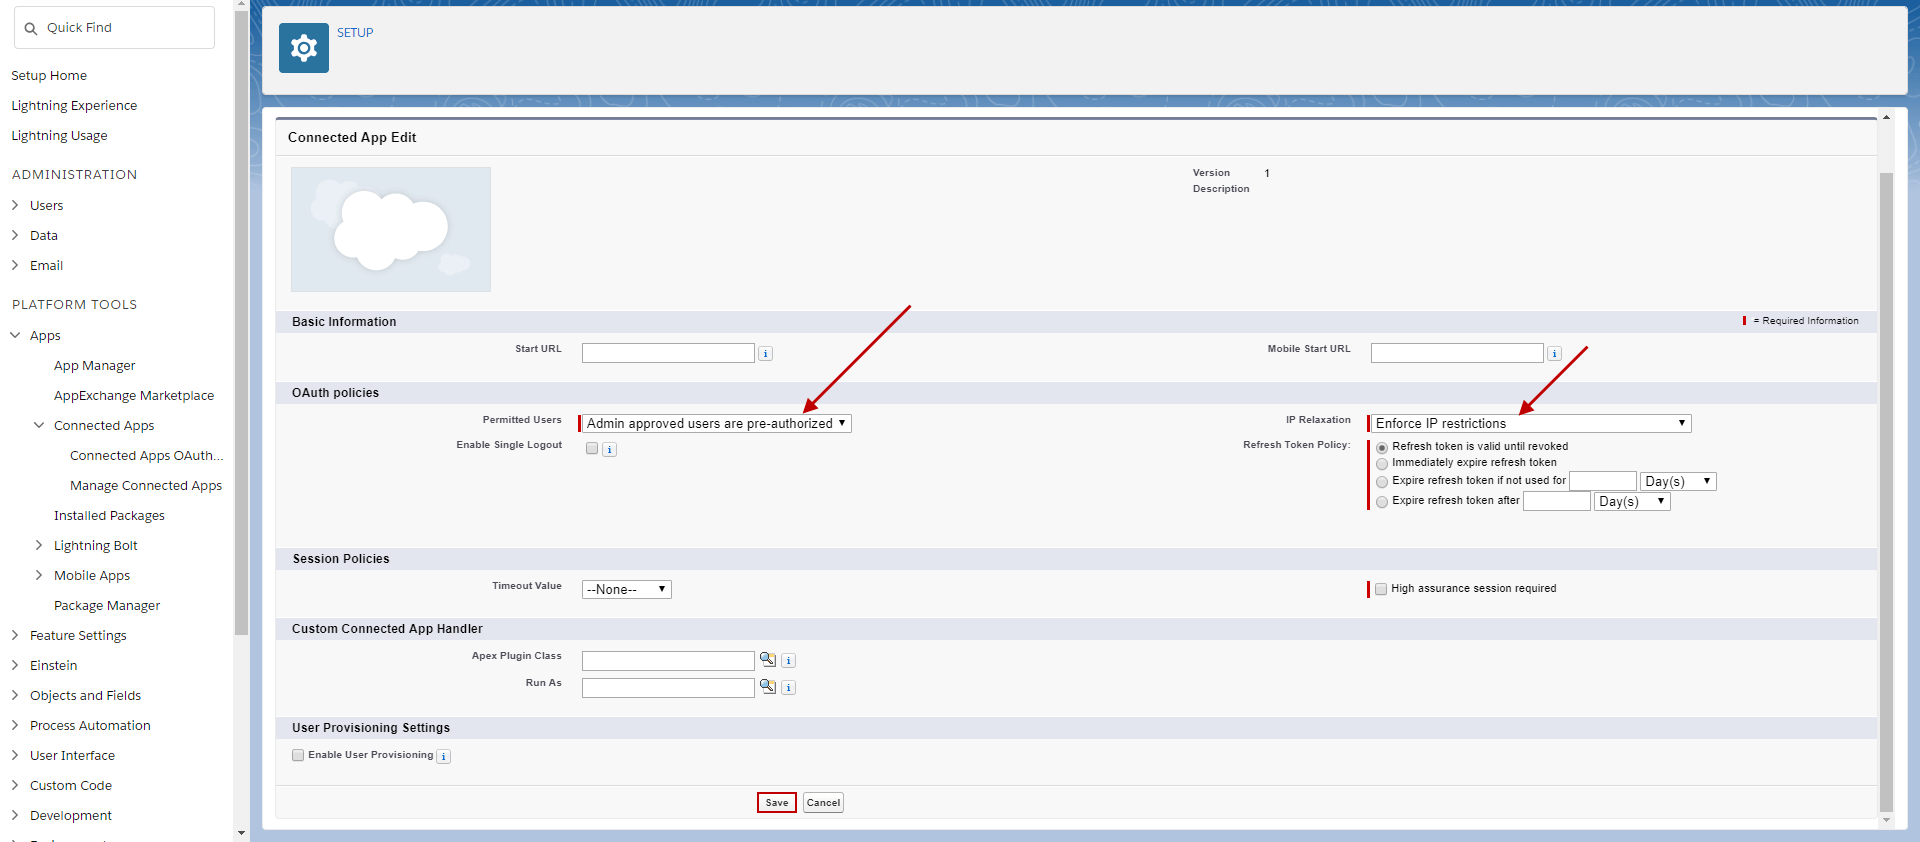
- Scroll down to OAuth policies section then:
- Click on Permitted Users drop-down list then select Admin approved users are pre-authorized.
- Click on the IP Relaxation drop-down list and select Enforce IP restrictions.
- Refresh Token Policy: Select Refresh token is valid until revoked
- Then Save
- Scroll down to Profiles section and click on Manage Profiles => Enable System Administrator Profile => Save
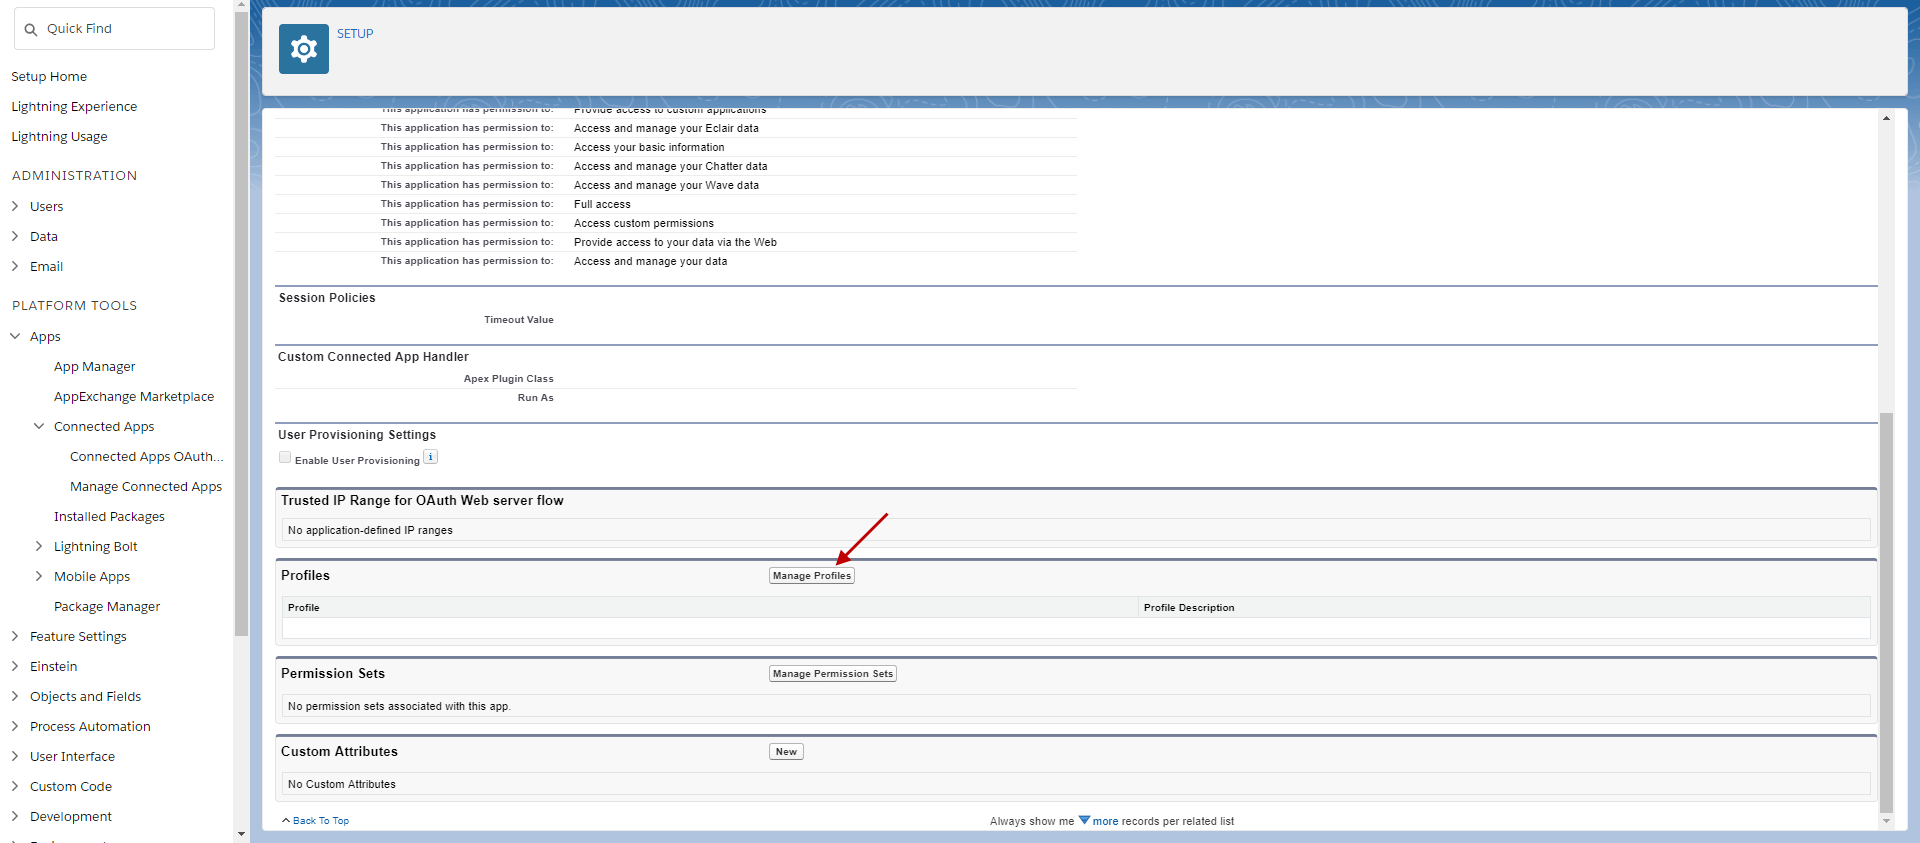
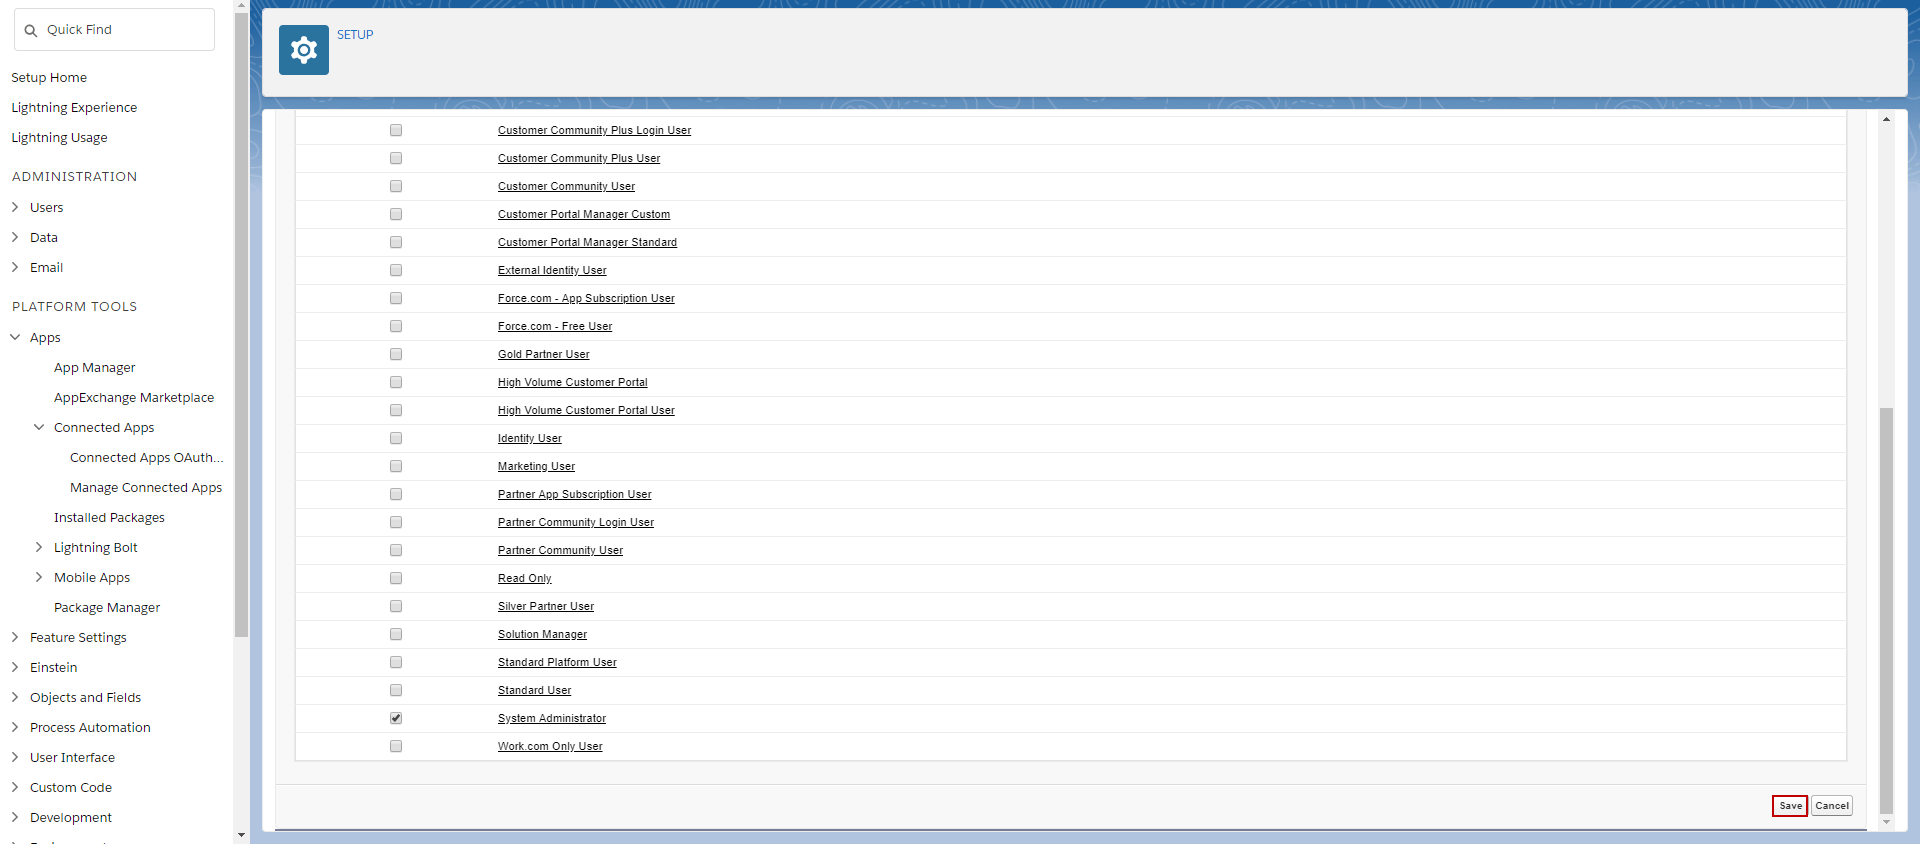
System Administrator Profile is now Associate with Apps.
The creating of REST Adapter #
You have to login access to Instant A in order to create the Adapter for connection to Instance B.
To create REST Adapter, there are steps you must follow:
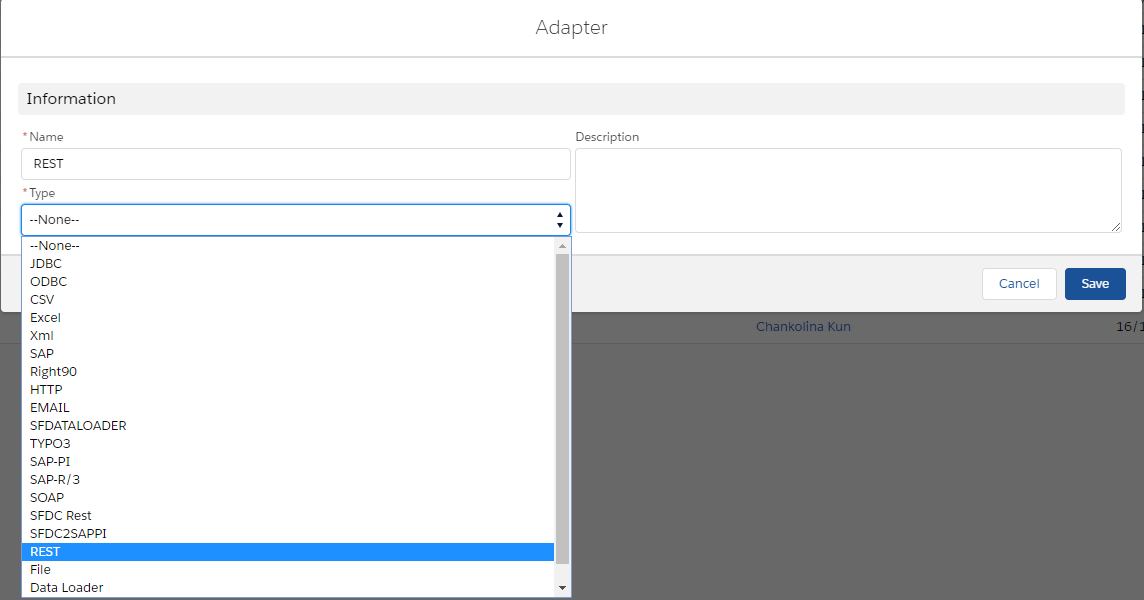
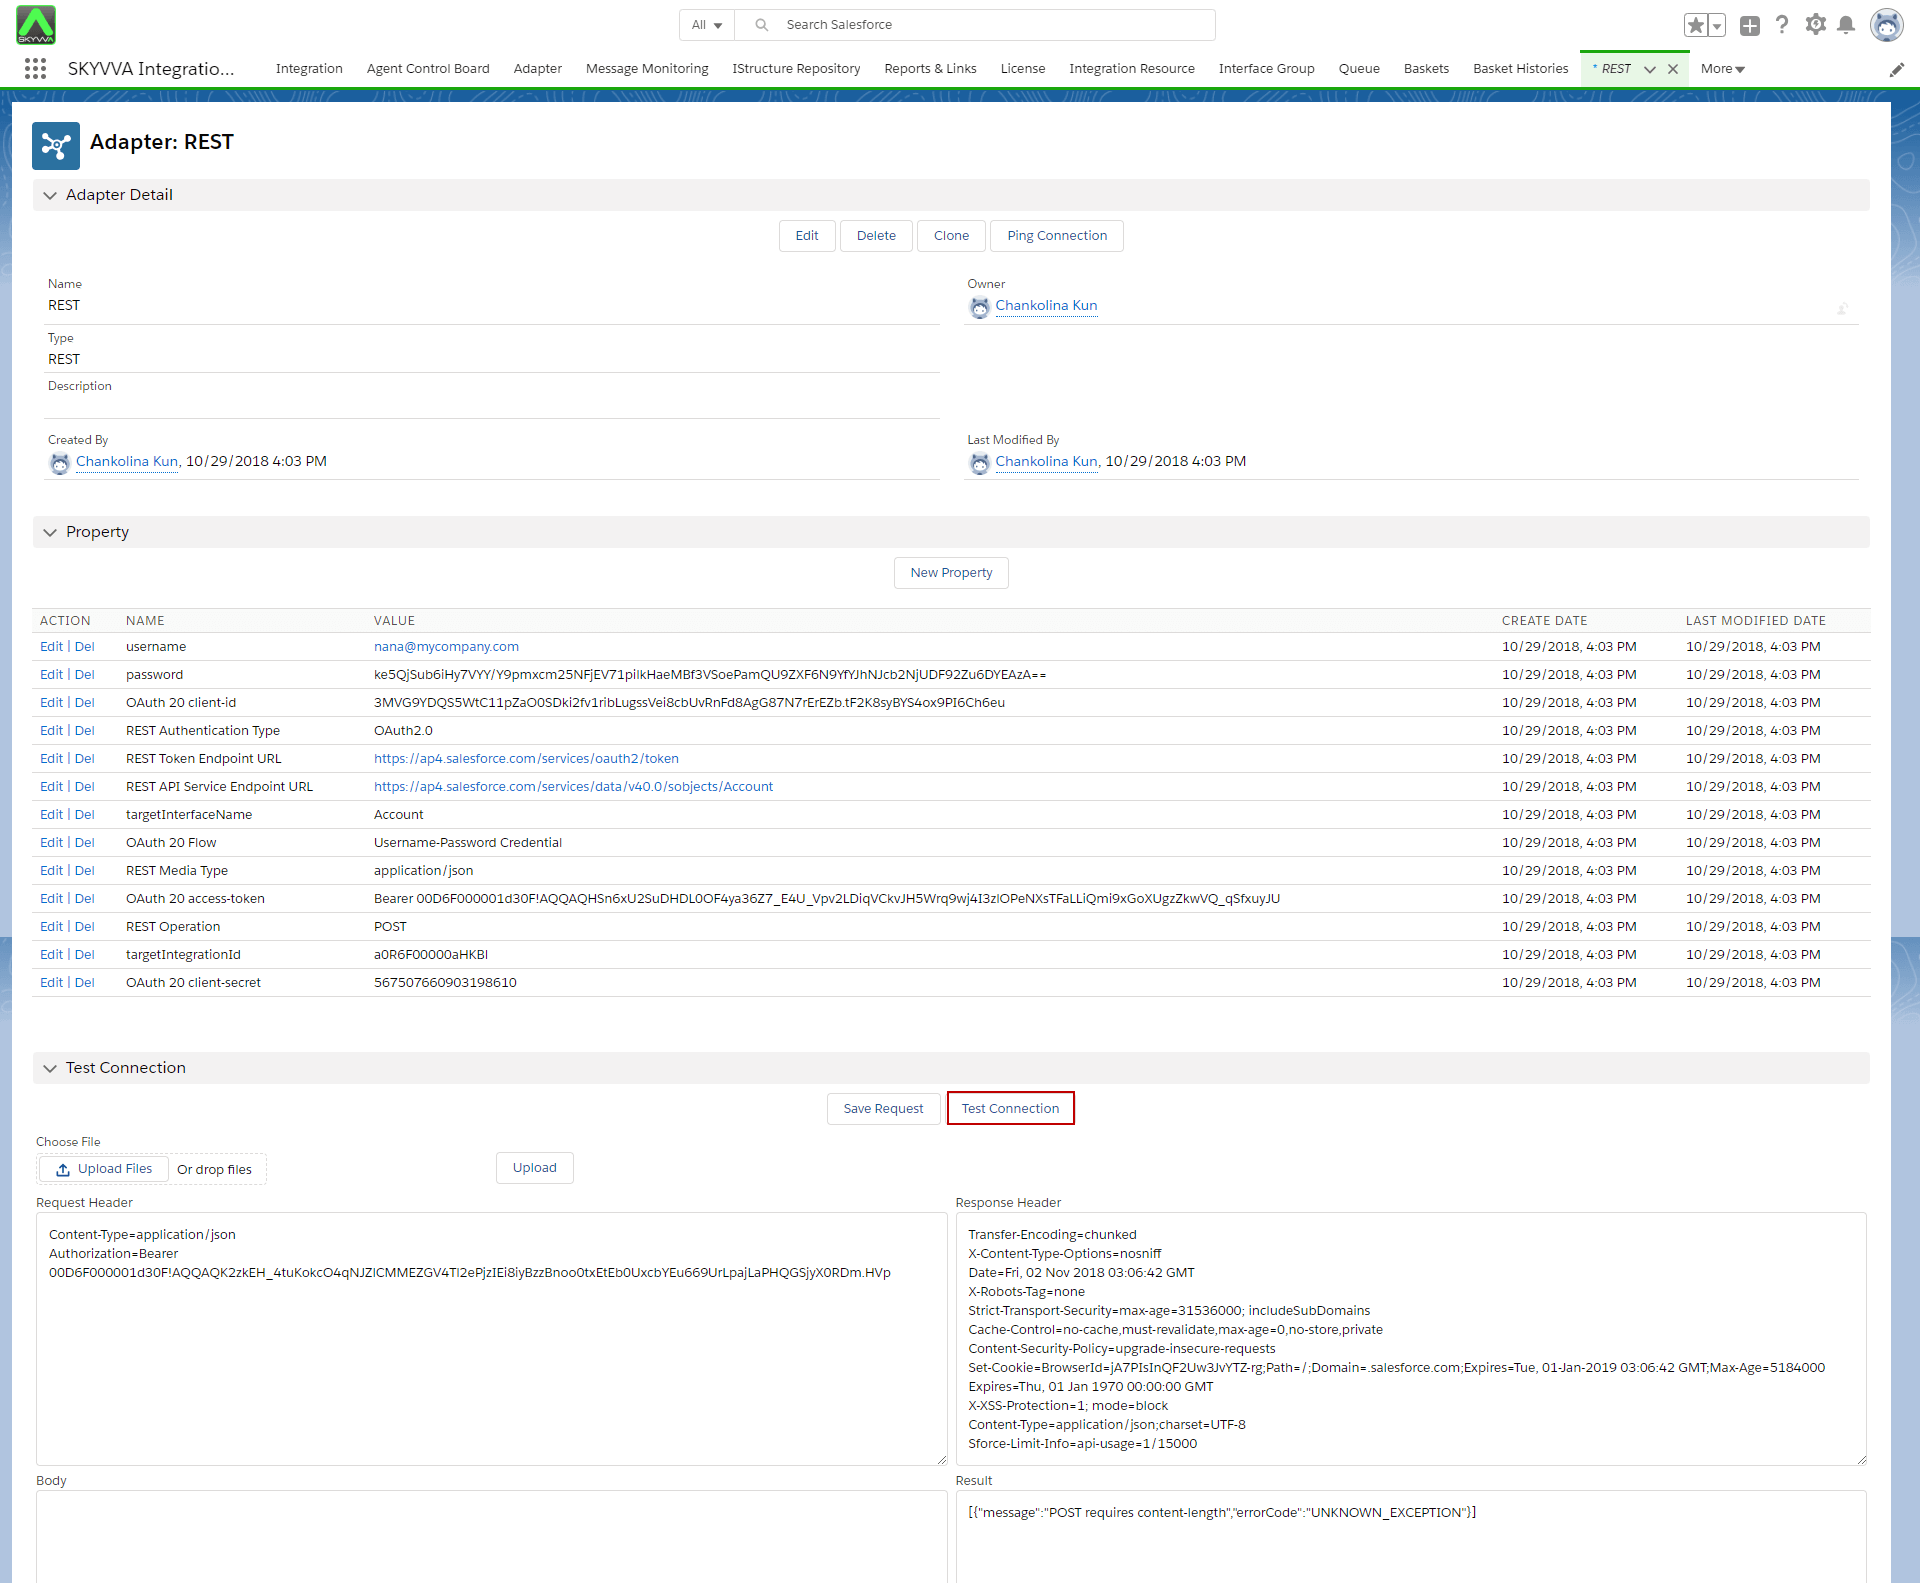
- Enter Adapter Tab => click “New Adapter” => choose Adapter Type=REST => Save
For Property requirement:
1. username
- Name: username
- Value: akash@cba.com
2. Password
- Name: password
- Value: Put Password+Security Token of Instance B
3. OAuth_20_Flow
- Name: Oauth_20_Flow
- Value: Username-Password Credential (Keyword)
4. OAuth 2.0 client-id
- Name: OAuth 2.0 client-id
- Value: Consumer key from connected Apps on client-side’ Instance B‘(copy from notepad as we mentioned earlier)
5. OAuth_2.0_client-Secret
- Name: OAuth_2.0_client-Secret
- Value: Consumer Secret number from client-side’ Instance B‘
6. REST_Token_Endpoint_URL
- Name: REST_Token_Endpoint_URL
- Value: (URL of client side Org B) + /services/oauth2/token
7. REST_API_Service_Endpoint_URL
- Name: REST_API_Service_Endpoint_URL
- Value: (URL of client side Org B) + /services/data/v40.0/sobjects/Account
8. REST_Authentication_Type
- Name: REST_Authentication_Type
- Value: ‘OAuth2.0‘
9. REST_Operation
- Name: REST_Operation
- Value: ‘POST‘
10. TargetIntegrationId
- Name: targetIntegrationId
- Value: (Enter Integration ID, a0R6A000001IvK9UAK)
11. targetInterfaceName
- Name: targetInterfaceName
- Value: ‘Account‘
12. REST_Media_Type
- Name: REST_Media_Type
- Value: ‘application/json‘ (keyword)
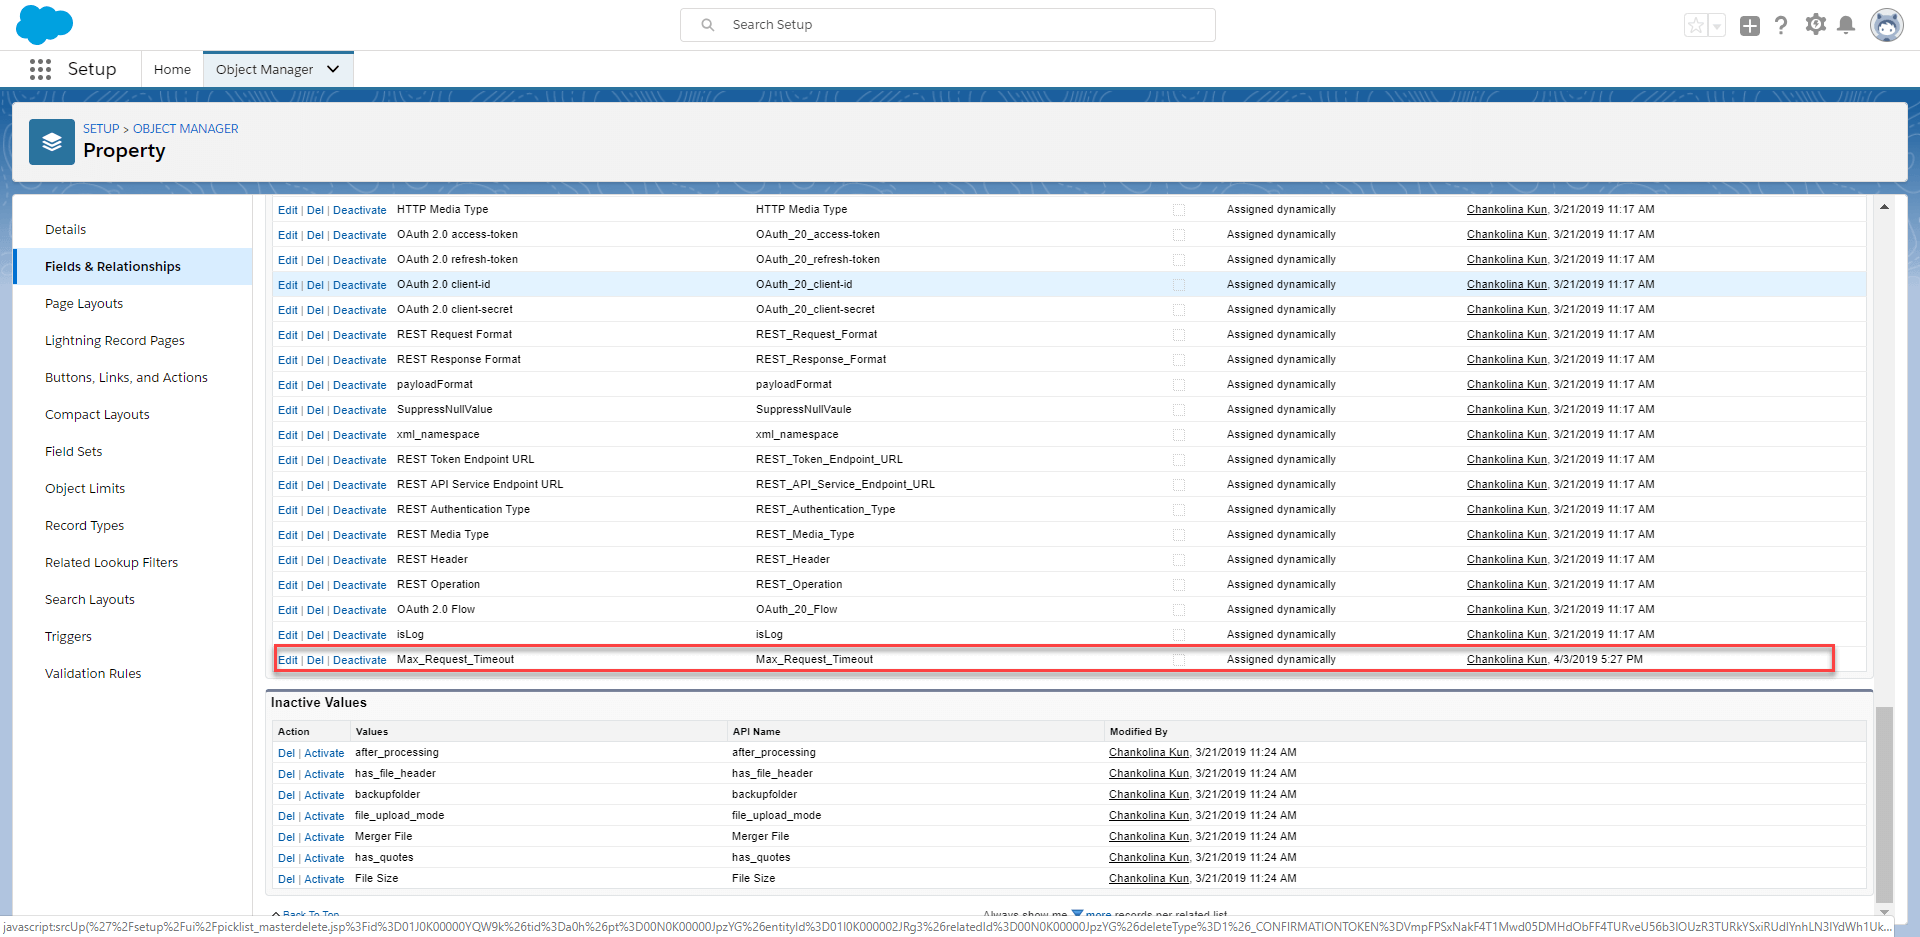
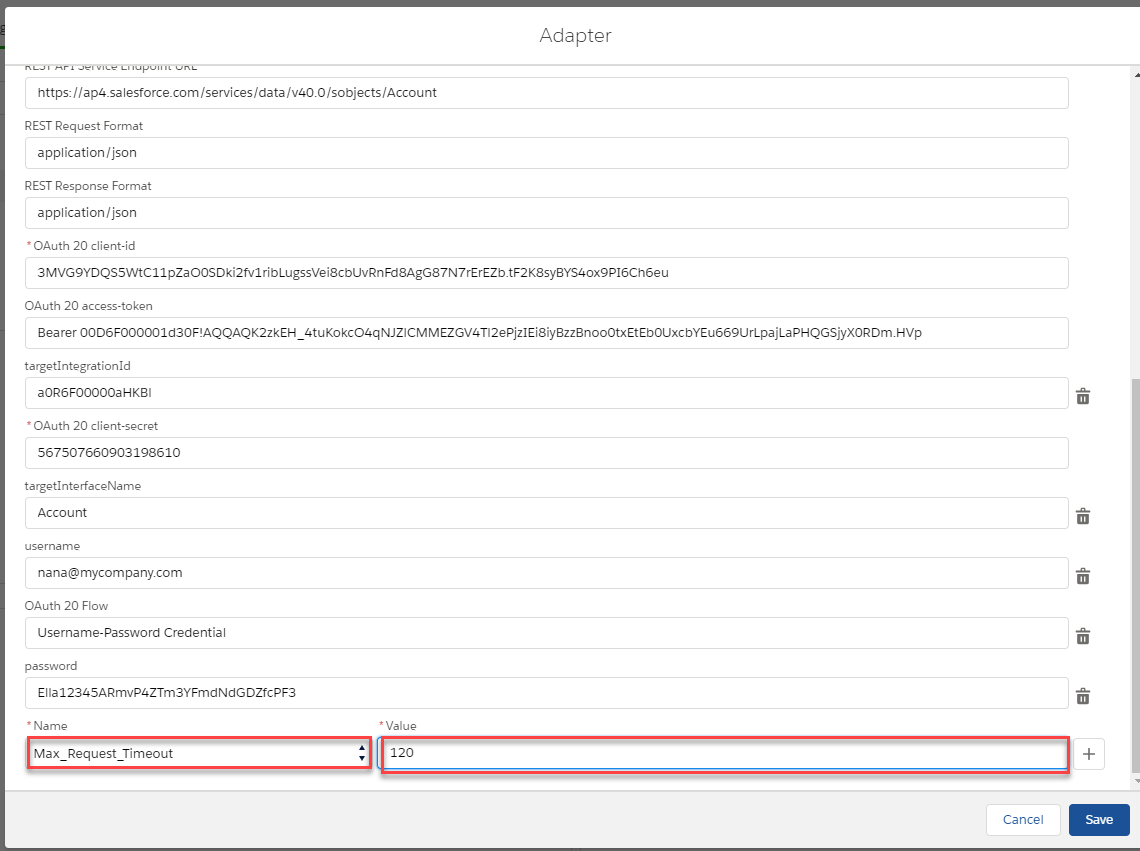
13. Max_Request_Timeout
- Name: Max_Request_Timeout
- Value: 1-120
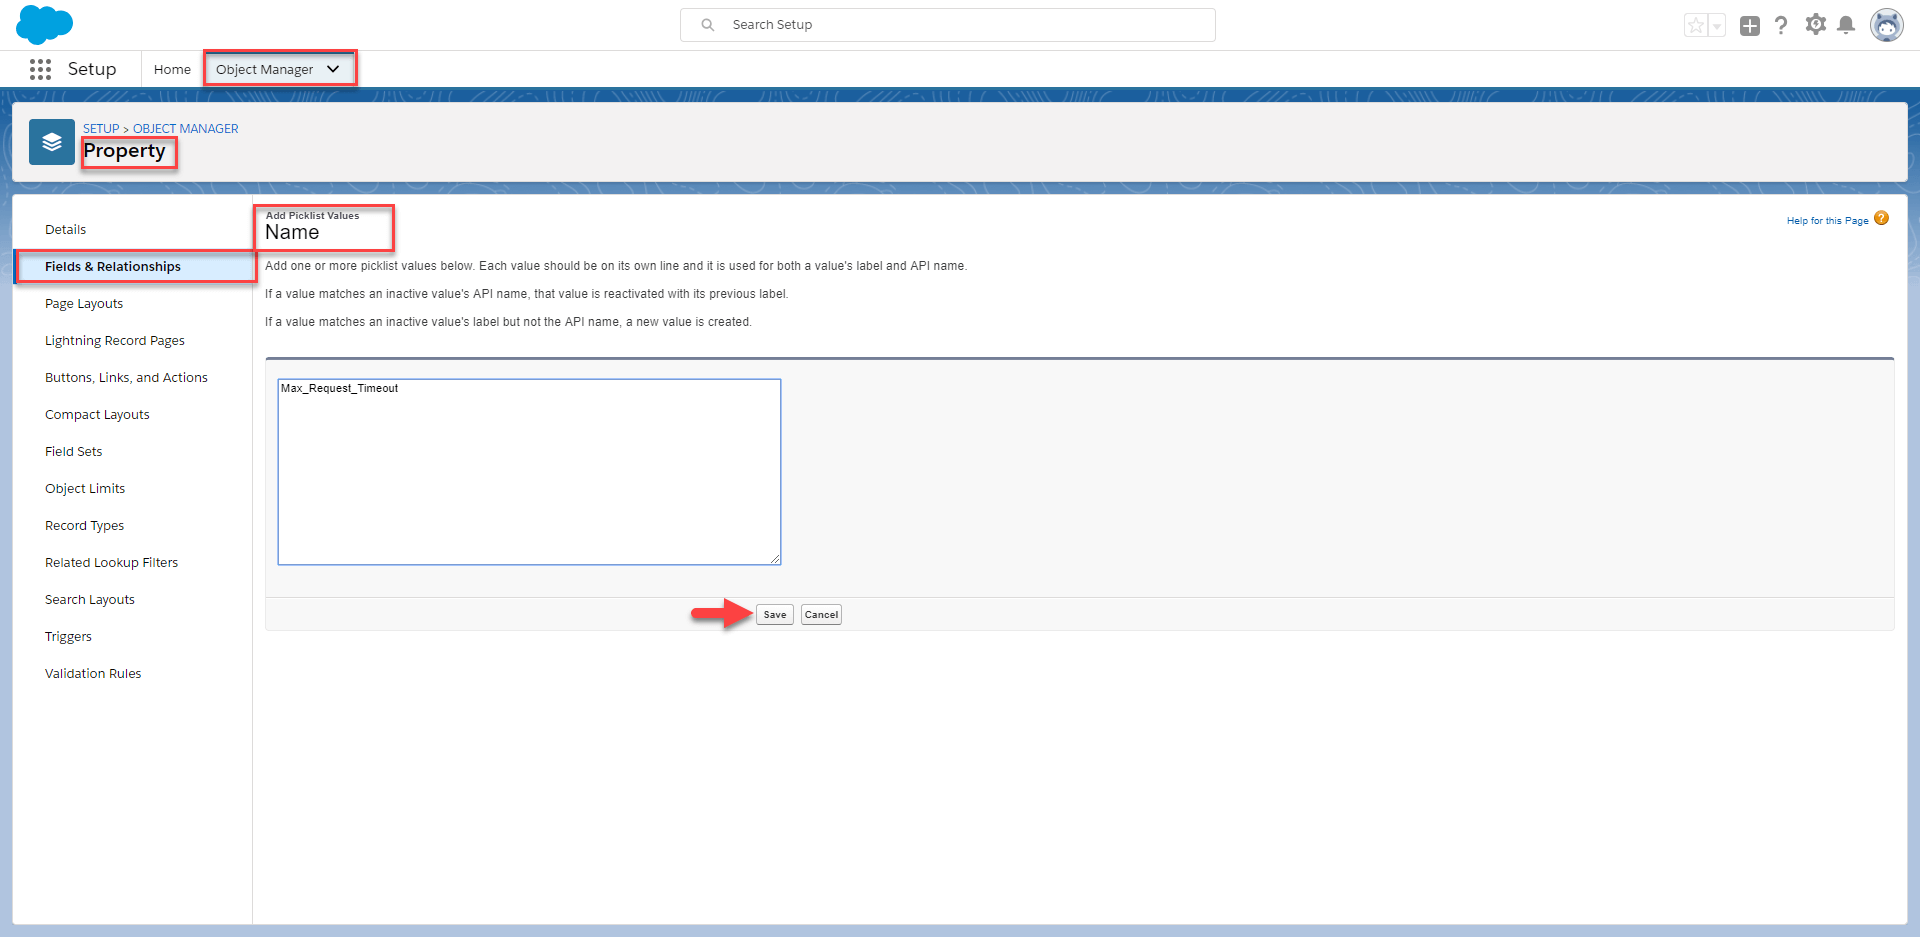
After Save, you will see the value picklist at the bottom.
Just navigate to Adapter then select the existing REST Adapter and click on “New Property” => Select Add New=> Select the property picklist ” Max_Request_Timeout” and complete the value with “120”.
- The last step is to click on Test Connection
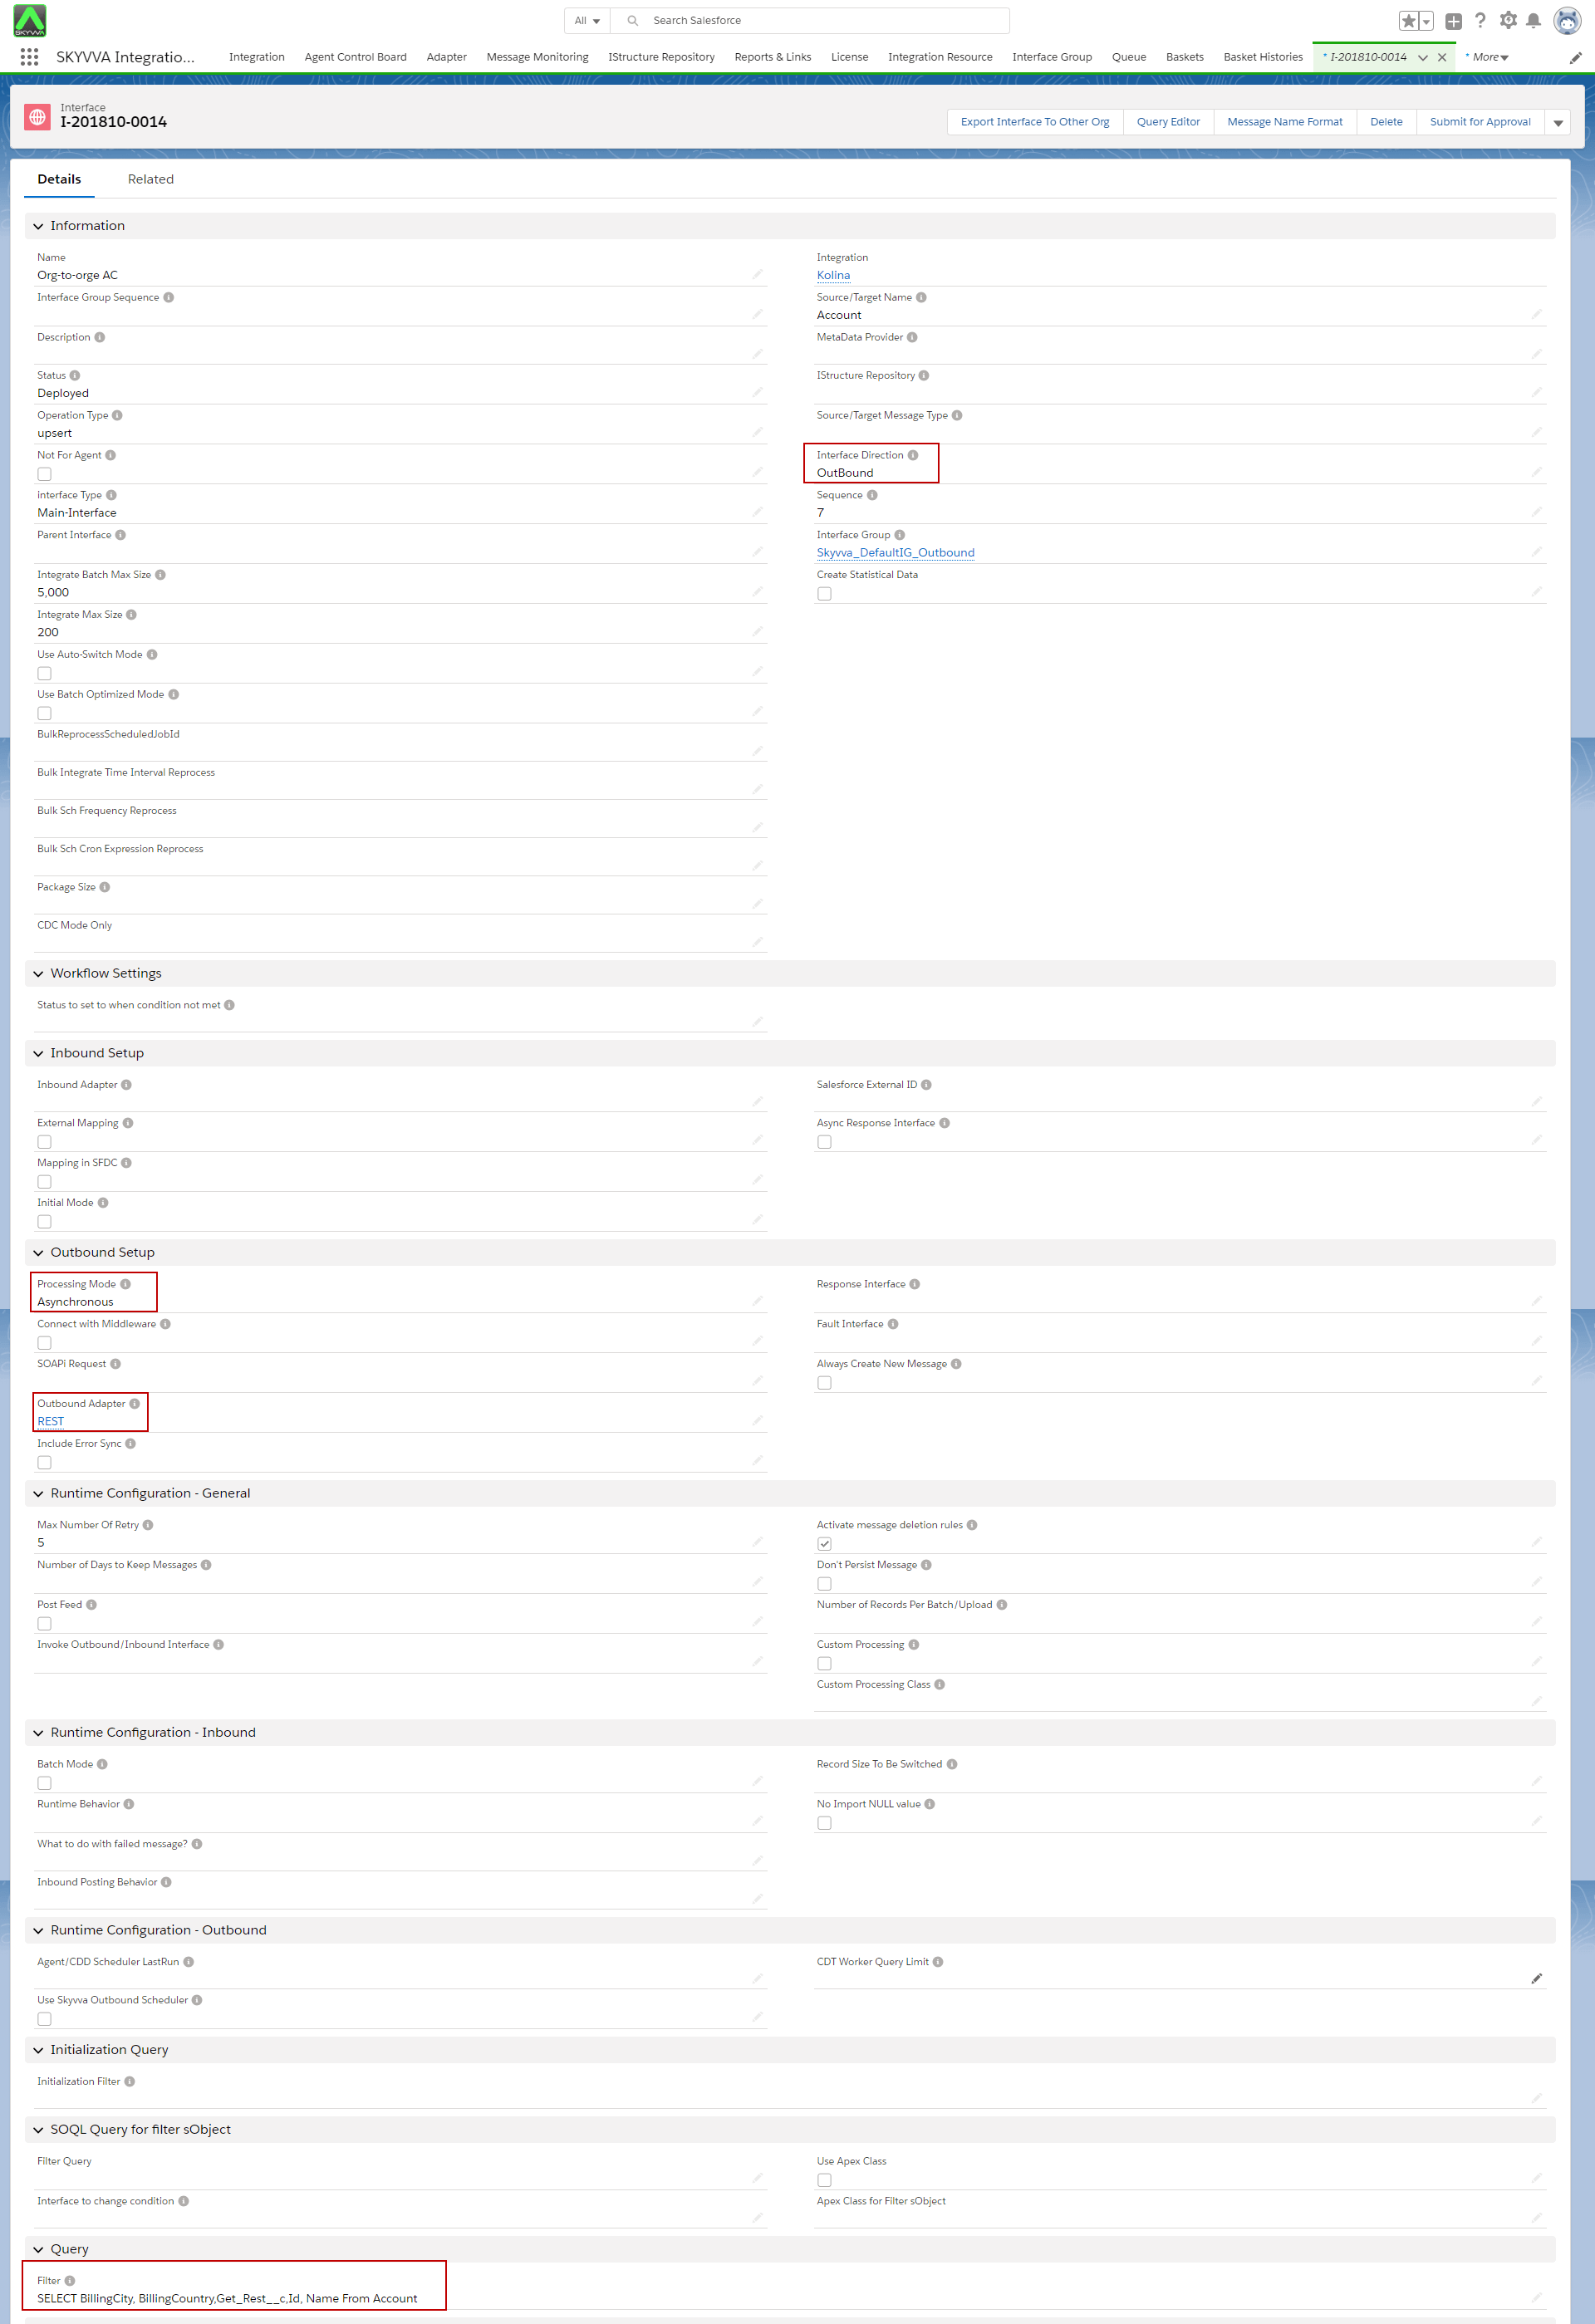
Configure the Integration and Outbound Interface, for Instance, A side #
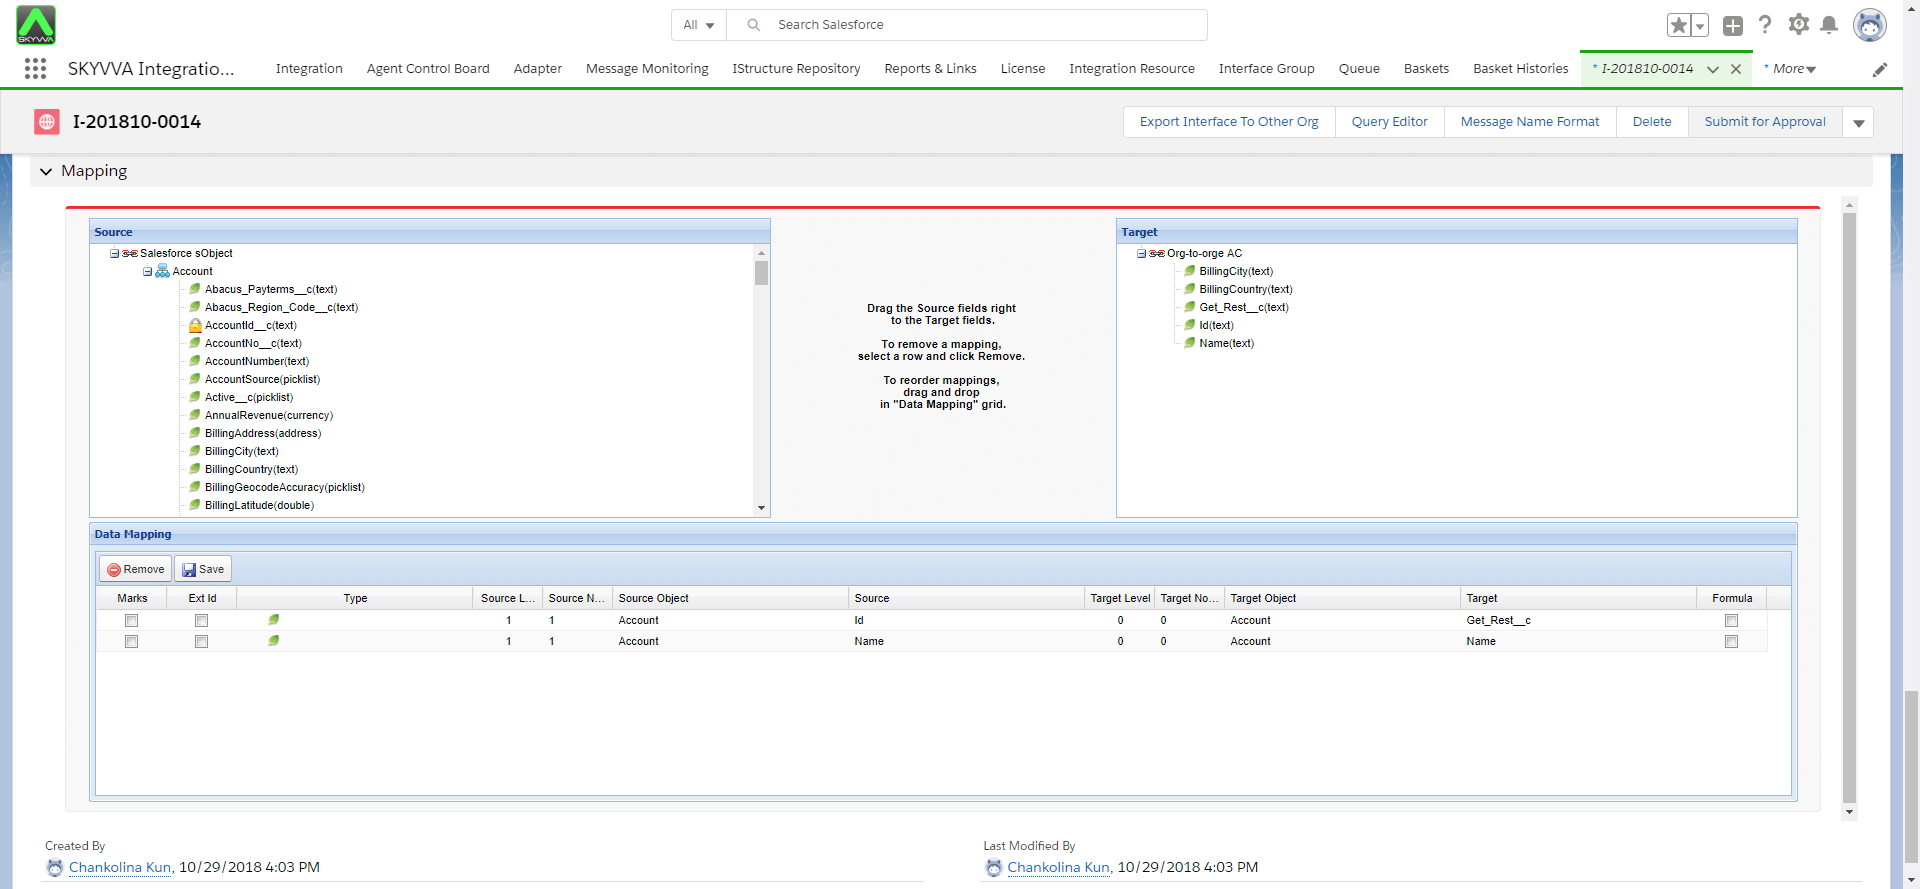
Create an Outbound Interface and input REST Adapter, choose Asynchronous for Processing Mode. Select fields from sObject for Query and do the mapping.
The configuring of invoking callout using Auto mode #
To do invoke callout, the user can follow the steps below:
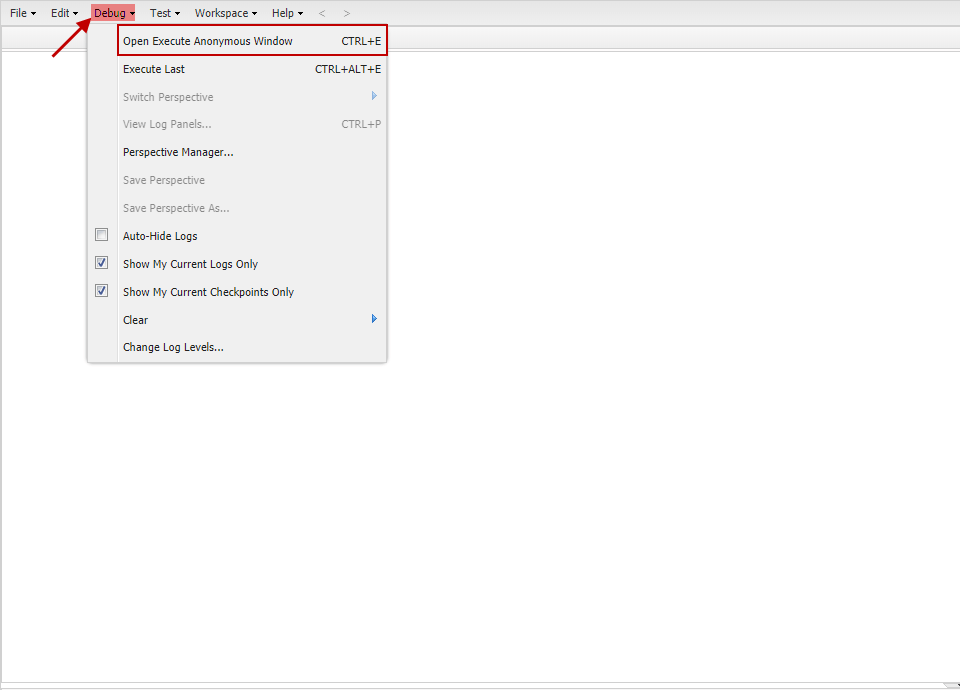
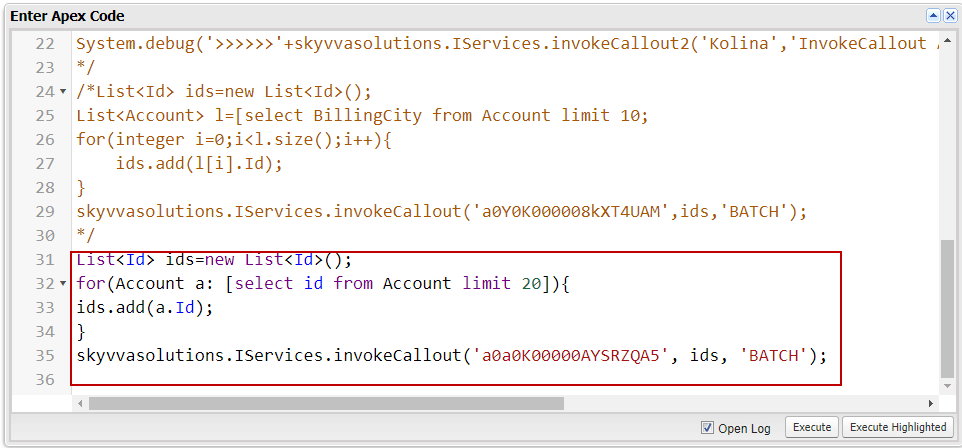
- Log in to Salesforce and enter developer console => click on Debug => open Execute Anonymous Window (CTRL+E)
[aux_code language=”javascript” theme=”tomorrow” title=”” extra_classes=””]
List<Id> ids=new List<Id>();
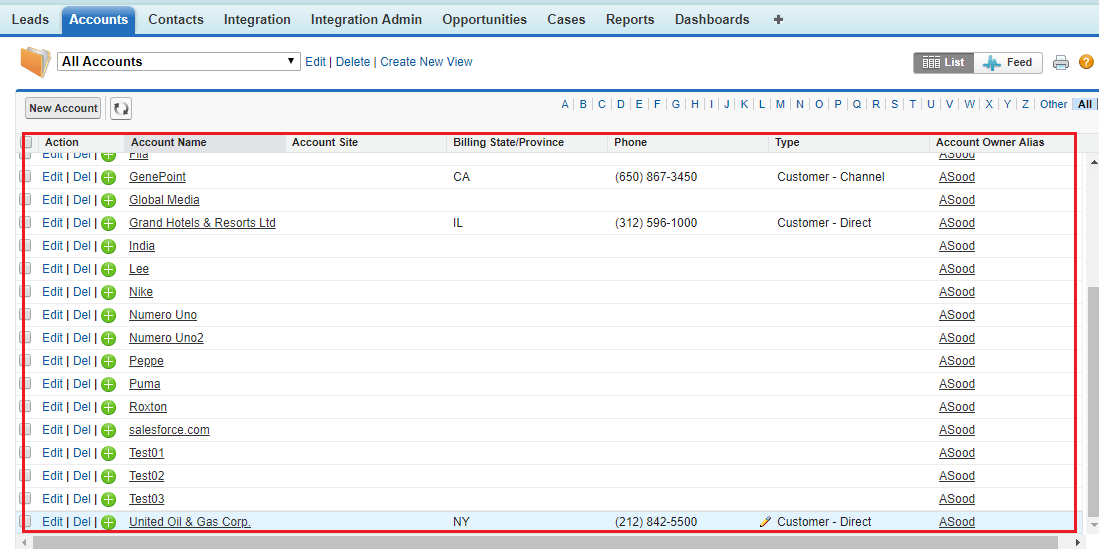
for(Account a: [select id from Account limit 10]){
ids.add(a.Id);
}
skyvvasolutions.IServices.invokeCallout(‘interfaceID’, ids, ‘BATCH’);
[/aux_code]
- Enter Apex code above then Execute the code
- See status Success

- Monitor the messages in the Message Monitoring Board
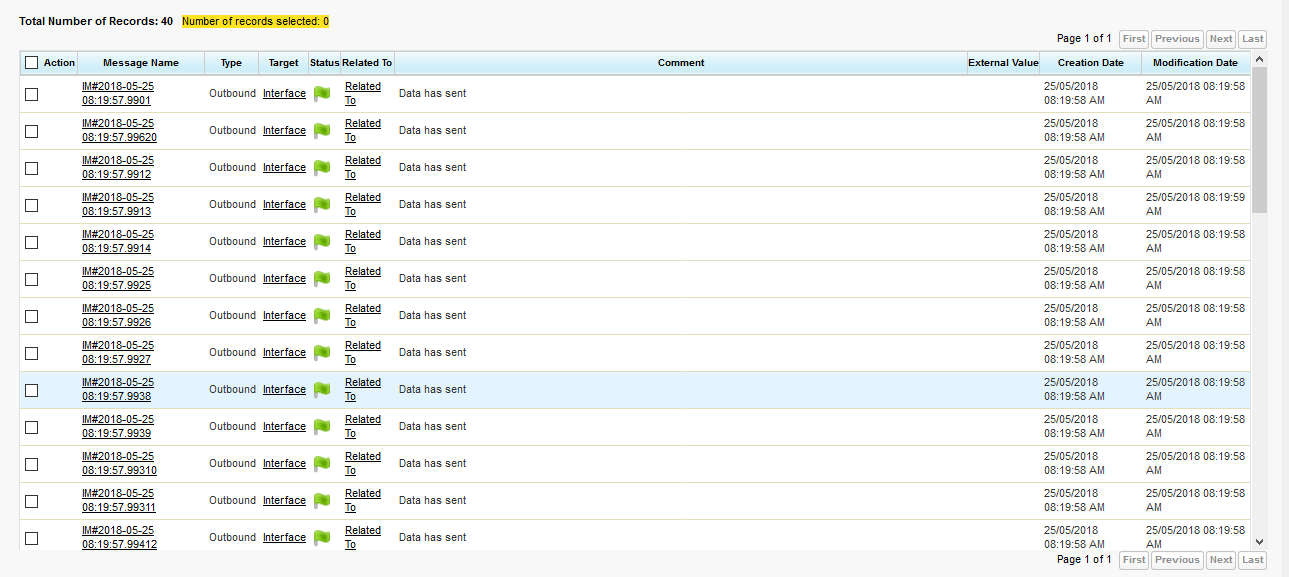
- All Data sent is reflected =>Records are showing