
- 1. Skyvva software landscape and building blocks
- 2. Used Convention
- 3. Prerequisite :
- 4.Creating Inbound Interface
- 5. Overview of the steps to create an inbound Interface.
- 5.3 Export IDoc/BAPI structure from SAP.
- 5.4 Create an Interface.
- 5.5: Import IDoc structure from XML
- 5.5 Query editor
- 5.6: Mapping of fields.
- 5.7 Define Routing to Integration/Interface in SkyvvaConfig
- 6. Testing and Monitoring message
Create Customer in SAP from Salesforce using IDOC (ASYNCHRONOUS call)
Table of Contents…
- Skyvva software landscape and building blocks
- Used Convention
- Prerequisite and requirement for creating an inbound Interface
- Creating Inbound Interface
- Overview of the steps to create an inbound Interface.
- 5.1 Define IDoc/BAPI and fields in the skyvvaconfig.
- 5.2 Define Interface based on IDoc type.
- 5.3 Export IDoc/BAPI structure from SAP.
- 5.4 Create an Interface.
- 5.5 Import IDoc/BAPI structure & Query
- 5.6 Mapping of fields
- 5.7 Define Routing to Integration/Interface in SkyvvaConfig
- 5.7.1 Define routing for IDoc type Interface
- 5.8 Using workflow condition to route to the Interface
- Testing and Monitoring message
1. Skyvva software landscape and building blocks #
Skyvva Integration Suite enables the integration between Salesforce and SAP-Backend with the native ABAP-Adapter sitting inside an SAP Backend e.g. an ECC 6.0 System with less effort and without programming neither in SAP nor in Salesforce. It based on the generation and customized the approach to reduce effort and to accelerate the development of Interfaces between these systems.
To be able to provide such a toolset and framework some component (green) has been developed by Skyvva and has to be deployed on Salesforce and SAP-Backend of the customer.
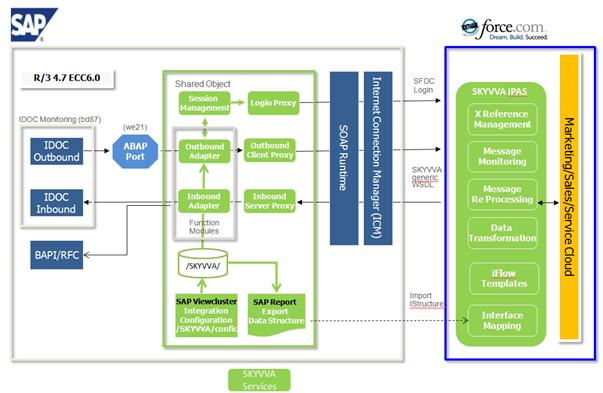
Architecture building blocks #
The creation of an outbound interface is only possible when the Skyvva solution framework is set up correctly. This work has to be done beforehand by an administrator e.g. an ABAP transport has to be imported into the customer SAP-Backend system.
2. Used Convention #
When talking about the direction we have to clearly define the perspective from which platform we are looking for. Since we couple two platforms Salesforce and SAP together we have to clearly define from which view we are referencing when talking about direction outbound.
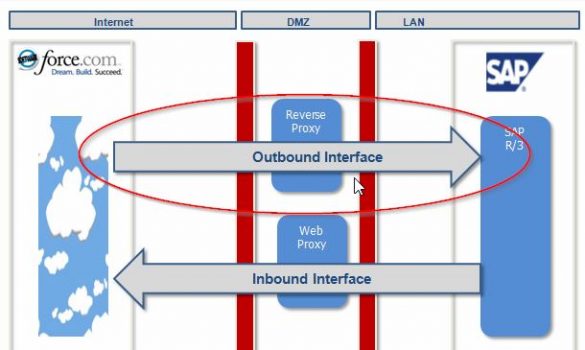
Outbound and Inbound Interface #
The term outbound is used when data is sent out from Salesforce to SAP. Therefore we call interfaces for sending data out of Salesforce to SAP ‘Outbound Interface’. For the other direction, we call interfaces ‘Inbound Interface’ when data comes to Salesforce from SAP. So, the reference point is set to Salesforce.
Purpose: The purpose of this document is to explain the necessary steps required in SAP & Salesforce to Create a Customer in SAP from Salesforce. For creating Customer Using Idoc, we need to use Message Type – DEBMAS and Basic Type – DEBMAS07.
3. Prerequisite : #
- The Skyvva solution framework has to be installed into your Salesforce instance. Refer to our website :
Install Skyvva in Salesforceto carry out this task. - An integration instance has been created. Refer to our website:
What is an integration and how to create it?to carry out this task. - Adapter Configured in Salesforce. Refer to our website:
Create adapter in Salesforceto carry out this task. - Creating logical Port via the SOA Manager. Refer to our website:
Create Enterprise Serviceto carry out this task. - Your workstation needs an internet browser IE or Firefox of the new release.
When this prerequisite is fulfilled you can start creating outbound interfaces with the Skyvva development framework to send data from SAP to Salesforce.
4.Creating Inbound Interface #
To create an interface you call the transaction /skyvva/config.
Run T-code – /n/SKYVVA/CONFIG
This is an SAP interface configuration screen to define the interface for the transfer of data between sap & salesforce through BAPI or Idoc.
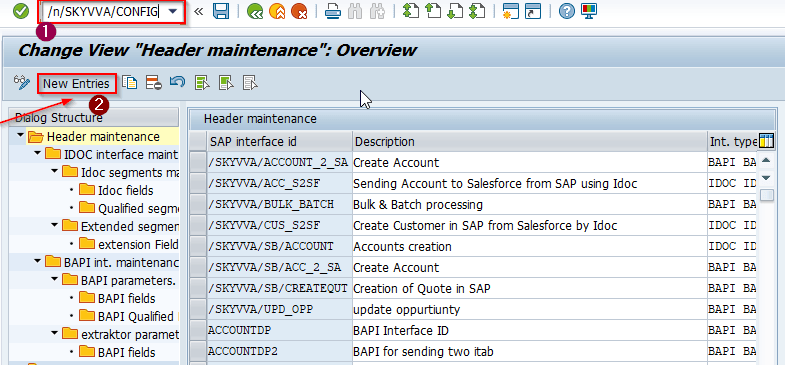
To create an SAP interface, Select New Entry
In this screen, you need to provide a name for the field ‘SAP interface id’ . This will be the name of your interface. Give a meaning full name for your interface. Then choose the value “Idoc maint. interface” for the type.
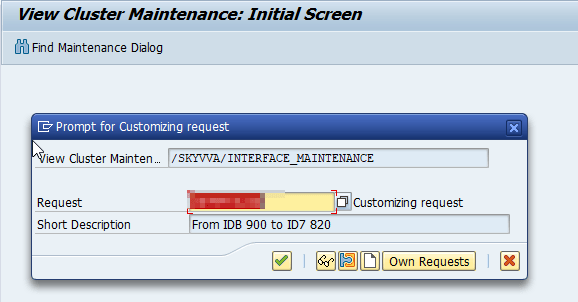
Now, save interface with the save button. You might get a popup screen to record your change for later transport. Here just give a transport number of your choice. If you don’t know the transport number you can create a new one or contact your SAP basis admin and ask him for a valid SAP transport number to use.
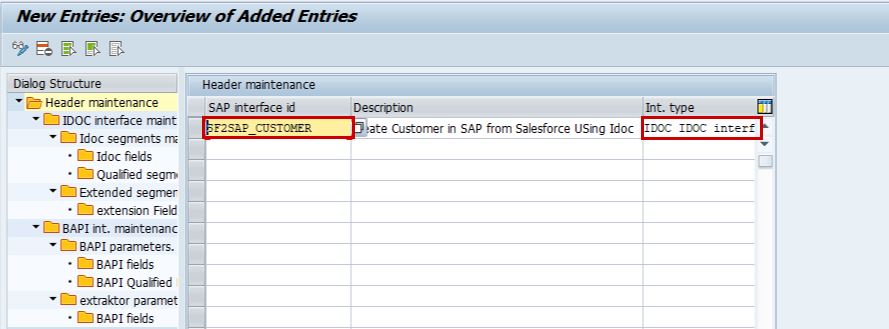
Now, need to Save in Transport request.
5. Overview of the steps to create an inbound Interface. #
5.1: Define Idoc and fields in the skyvva config #
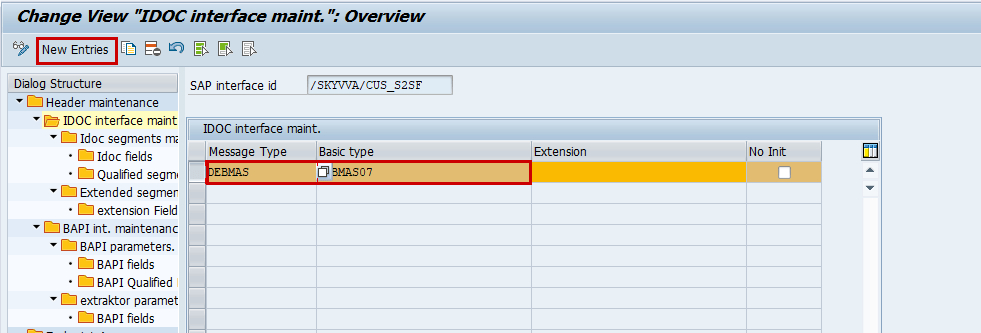
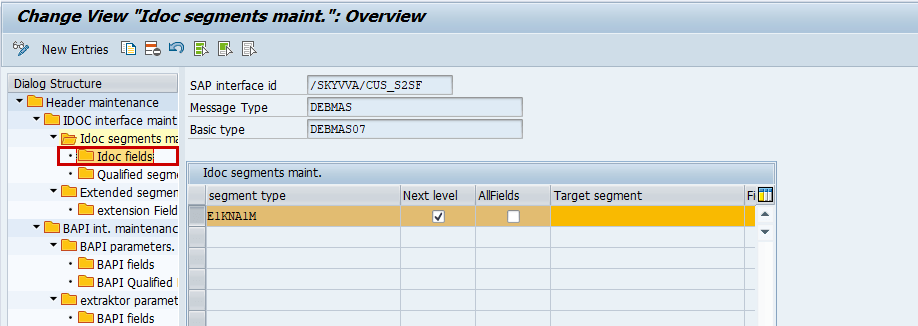
Select the Interface and double click on IDOC interface maint. To provide the Message Type & Basic type.

The Idoc which we provide in SAP interface is responsible for the process and its segments are defined for the exchange of data between two systems.
A second flag you have to check when using function module is the flag “send input”. This flag indicates the runtime of Skyvva that the data should be sent via the function module call and not IDoc.
5.2 Define Interface based on IDoc type. #
Now enter IDoc message type and the basic type.
Note that in this example we use an own message type DEBMAS we have created before in the ALE/IDoc customizing.
As the basic type, we use the SAP standard DEBMAS07. You can use the standard IDoc message type DEBMAS as well or you can also create your message type.
Now save your setting by clicking on the button. As a result, you will get a new line as shown on this screen.
After this step, you have created an interface. Now you need to specify the IDoc segment and fields you want to receive to Salesforce. Because an IDoc can have hundreds of Segment and within a segment hundred of fields you have to select only those segments and fields you want to send out. Otherwise, the structure which will be generated later as XML structure will be too big and can cause Salesforce limitation when trying to import this structure file into Salesforce.
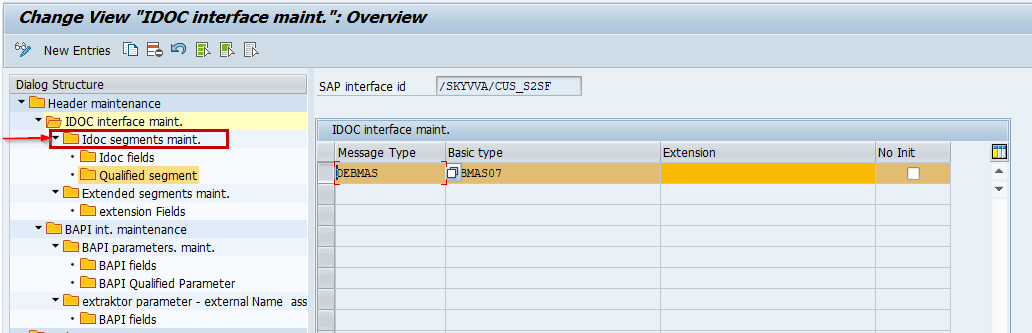
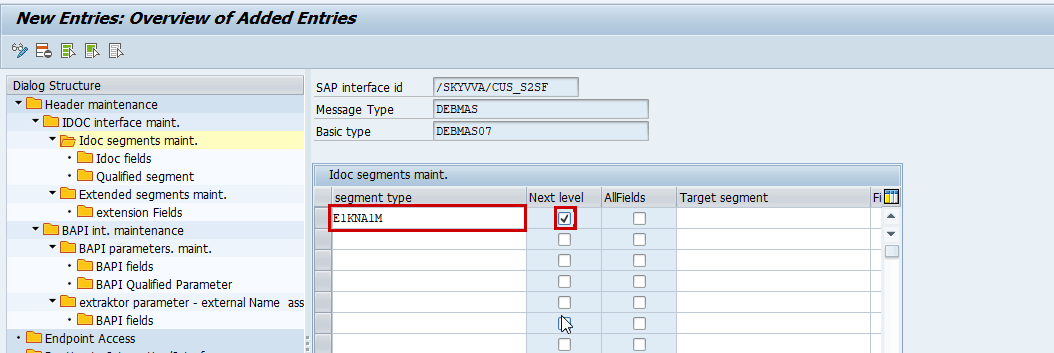
Choose New Entry to add segment. We have to choose the least segments, through which we can create a customer. According to the business requirement, you may need to add multiple segments.
Segment: choose from F4.
Next level: At runtime, a new dataset will be transforming this segment created.
Now save it.
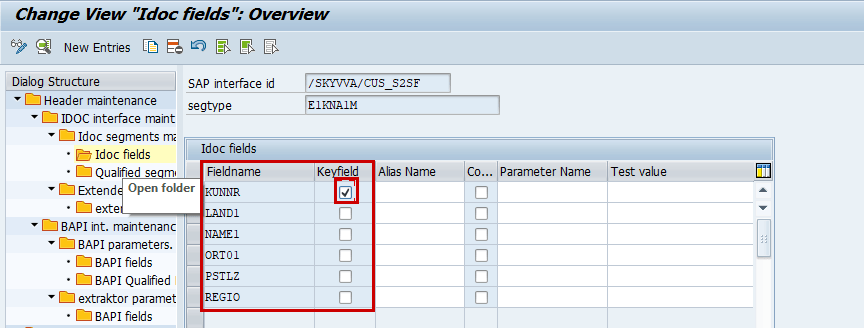
The segment has many numbers of fields, but we need only a few fields to create customer so that need to add here.
Select the segment & double click on Idoc Fields.
To add Idoc fields Click New Entry then add these fields using f4.
5.3 Export IDoc/BAPI structure from SAP. #
The prerequisite to executing this step is that you have defined the IDoc/BAPI structure like described in step 2. You need to export the structure as an XML file to import it into Salesforce in the next step. This structure will represent the SAP structure on the left side in the mapping later on in the skyvva graphical mapping tool in Salesforce.
Use the following transaction.
From the starting Page:
/n/SKYVVA/INTF_EXPORT
From any other Page in SAP:
- /n/ SKYVVA/INTF_EXPORT (opens transaction in the same page)
- /o/ SKYVVA/INTF_EXPORT (opens transaction in another window)
Format: There are 4 different output formats:
D – Deployment Script
U – Format for XML upload
V – Format for XML upload (2)
C – CSV file (not yet supported)
The most commonly used formats of an IStructure to upload to Salesforce are either D or V. they differ in the XML structure and how they are uploaded into the SKYVVA Integration Suite in Salesforce. Structure V offers the possibility to get the SAP field description into the structure.
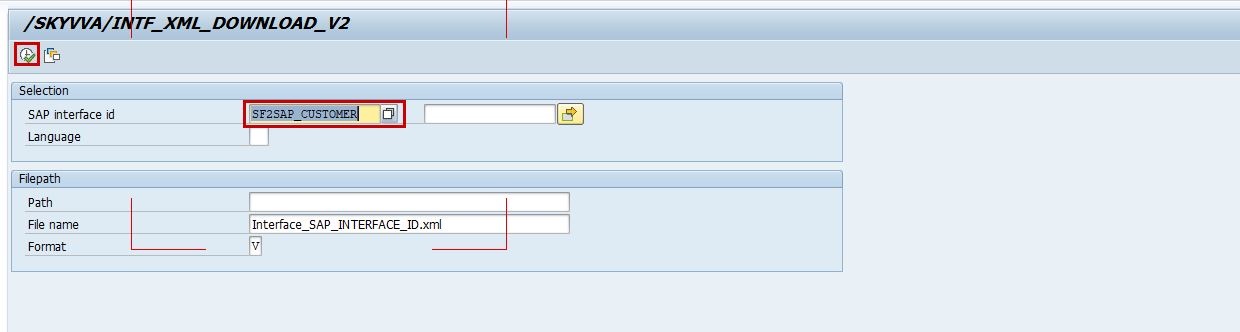
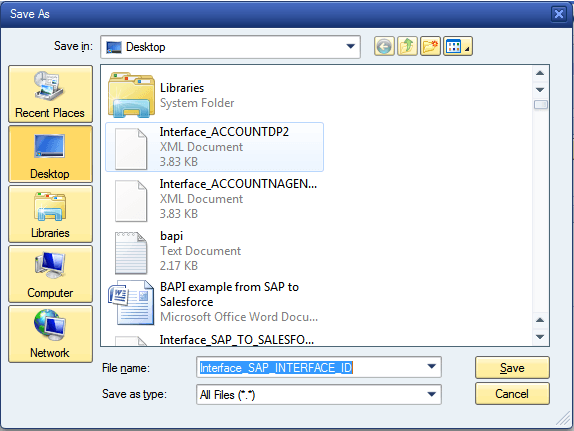
Execute and save the XML file.
After executing this step you have an XML file that contains the SAP structure definition. The next step is to upload this structure into Salesforce.
5.4 Create an Interface. #
Goto salesforce.com>login>skyvva>create new Interface.

Enter the details:
- Name: Salesforce Interface Name
- Status: Deployed
- Adapter: Your created adapter
- Type: Outbound.
- Processing Mode: Asynchronous( Only data will be sent response will not come)
- And then Save.
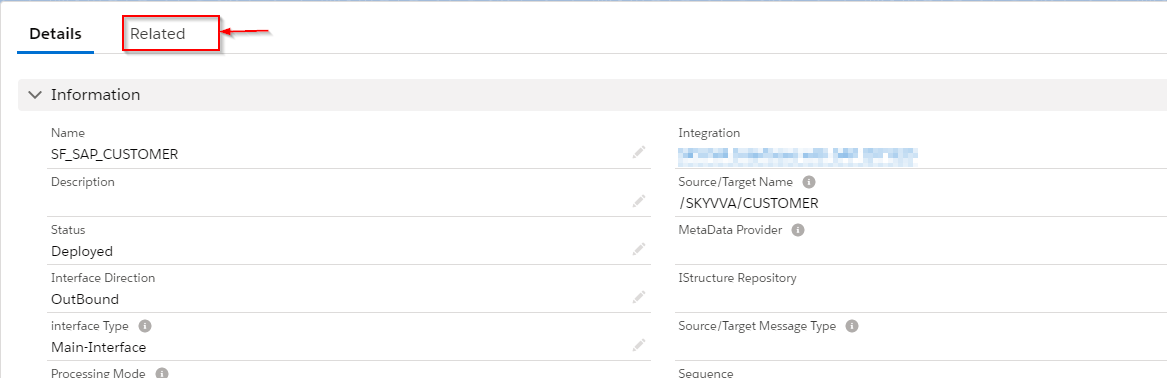
Open the Interface. And Goto Related Tab.
5.5: Import IDoc structure from XML #
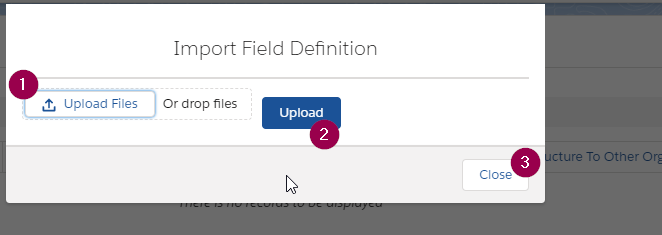
To upload the XML file and query for the selection of data to send.

Need to upload the XML file which we created in step 3 and then click on the upload button and then close the pop-up, the file will be loaded.
Now after loading we can see all the SAP interface fields which we have used from parameters.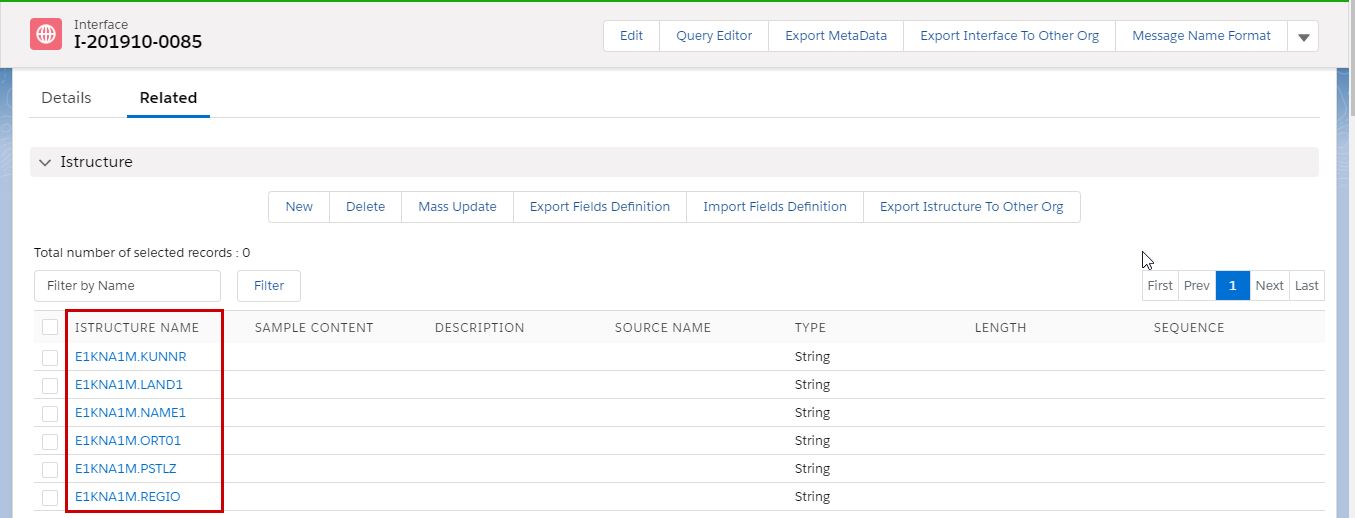
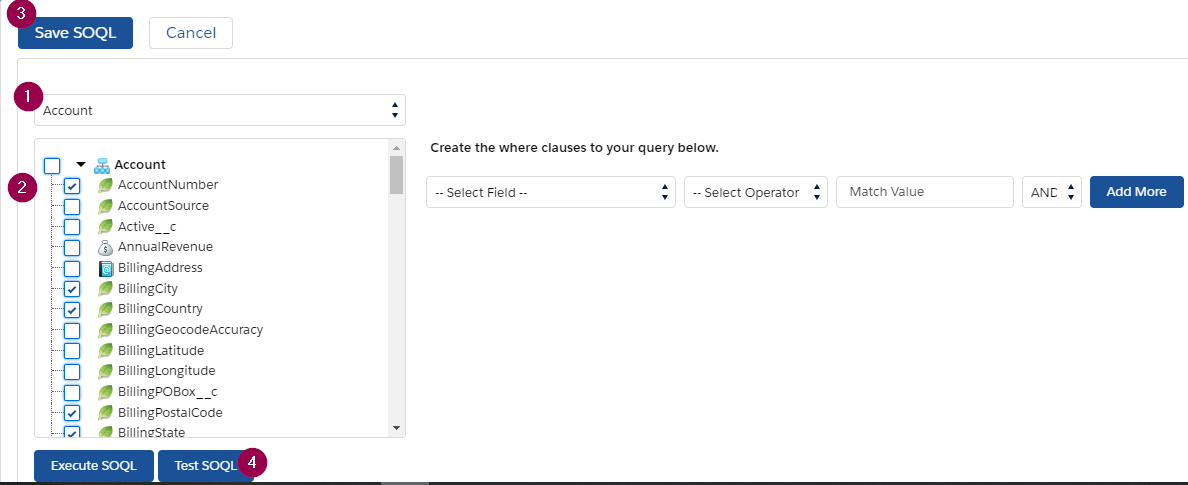
5.5 Query editor #
Now we need to write Select Query for fetching the record that needs to send.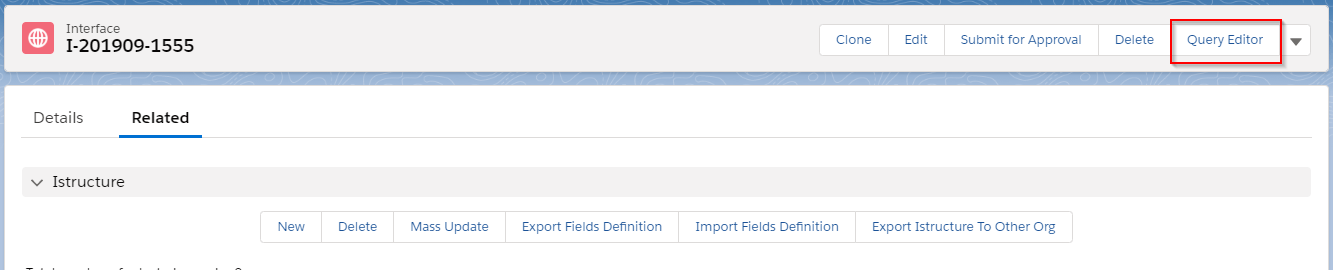 Based on the select field we able to map Salesforce fields with SAP.
So, goto Query Editor.
- Select Objects from where we need to fetch and send data.
- Select the required fields for selection.
- Save and Test.
Here, I have select Account Object
And Query looks like:
SELECT AccountNumber,BillingCity,BillingCountry,BillingState,Name,Fax,Id,Phone,
BillingPostalCode FROM Account
5.6: Mapping of fields. #
Now Refresh the page(F5) and goto Details Tab.
And goto to Mapping Tab and down.
On the left side, the Salesforce field is present and the right side SAP interface field is present.
Now we need to map the field by drag from Account and drop to SF2SAP_IDOC.
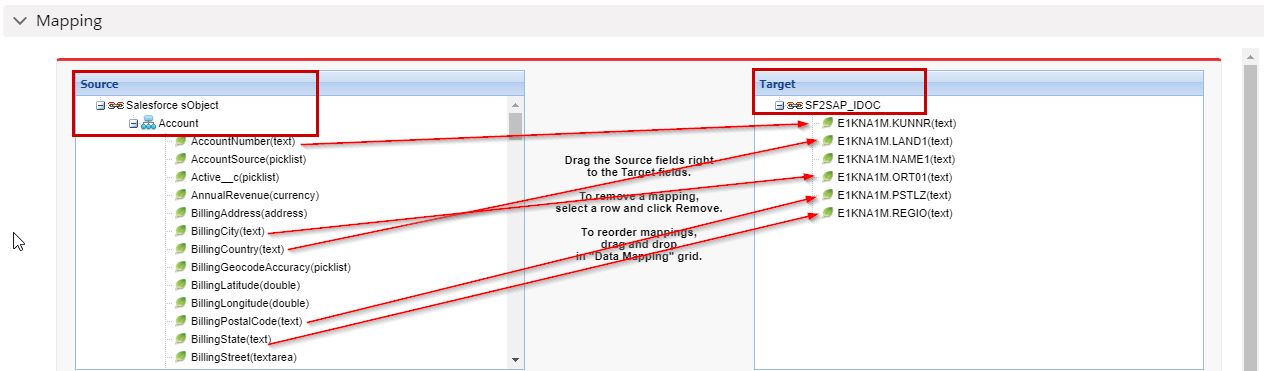
After mapping, You see the mapped fields.SAVE the mapping.
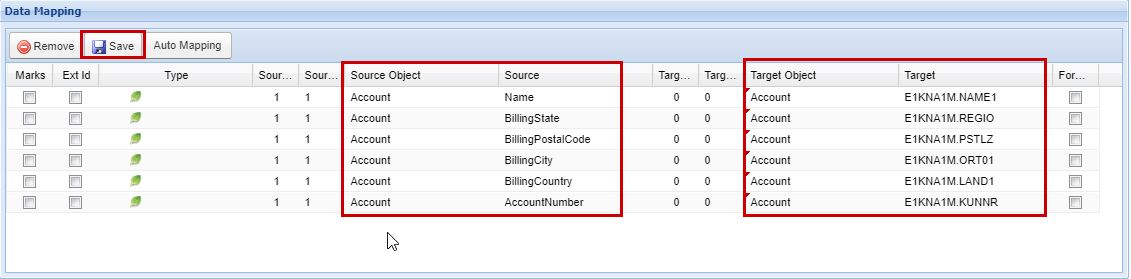
Now, SALESFORCE and SAP interface is ready.
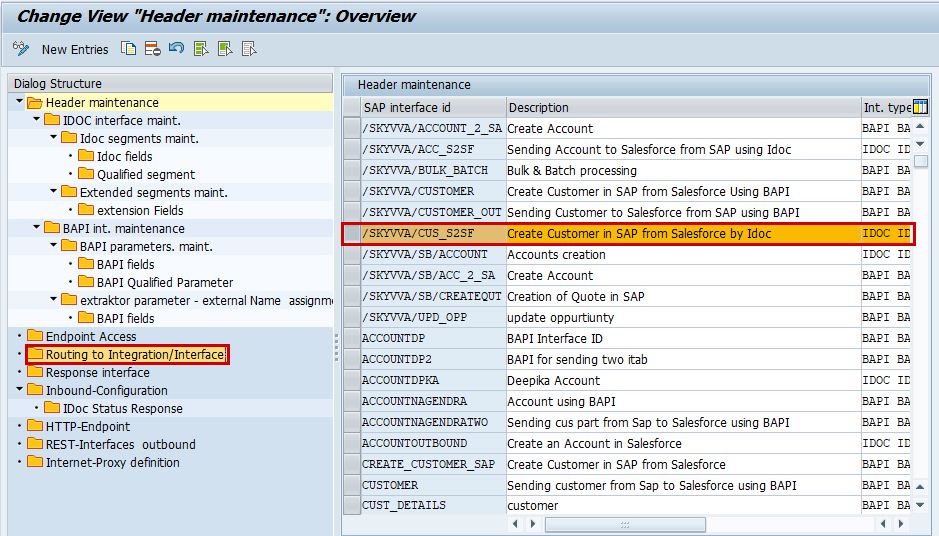
5.7 Define Routing to Integration/Interface in SkyvvaConfig #
5.7.1 Define routing for IDoc type Interface #
Open the transaction /n/skyvva/config and select the tree branch “Routing to Integration/Interface”. Click on the button to create a new routing entry for an interface.
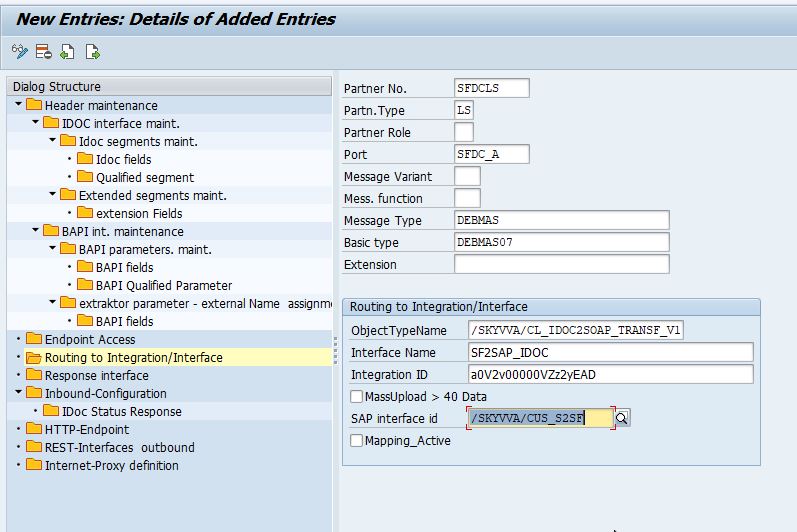
You will get this screen below after clicking on the button “New Entries”. Now fill in the fields. The first field to fill in is the field Partner No. This is the partner profile you have created beforehand with the transaction code we21. You get the value from the drop-down list.
Here you see the value list and select the one that is the right one for your case.
You can see that the field Partner No. and Partn. The type is filled from the value list. If your ALE/IDoc customizing need the Partner Role you have to fill it accordingly. In this example we don’t need this and therefore leave it empty.
Now fill the field Port. The port has to be created before like described in our website: Create Enterprise Service to carry out this task.
It is Endpoint Access created in the Skyvvaconfig tool.
Here click on the button to get the value list for the IDoc port.
Select for example the port ACC_SF_V2.
Note that this port was created with the Skyvvaconfig tool. It is the Endpoint access.
Optionally you can enter a value for field Message Variant and Mess. function if the ALE/IDoc customizing need it. In this example, we don’t need this.
Now you have to enter the value for Message Type and Basic Type. Here again, you can choose from the value list by clicking on the appropriate field on the button. The screen below just shows the result of the selection for Message Type and Basic Type since the way how to do it is the same as described above.
The field Extension is only needed if you have enhanced the IDoc with the customer segment. In this example, we don’t and therefore the field is left empty.
Now fill in the fields in the section “Routing to Integration/Interface”. The first field to enter is the field Object TypeName. Here please enter this string for the current release /SKYVVA/CL_IDOC2SOAP_TRANSF_V1
The next fields are Interface Name and Integration ID. These fields are information you get from Salesforce. The field interface name is the name of the interface you created in step 4. The field integration ID is the Id of an integration that you have created in Salesforce for the first time. Instead of Integration Id, you can also use the name of the integration. ( supported since Version 2.22 of IntegrationSuite) .
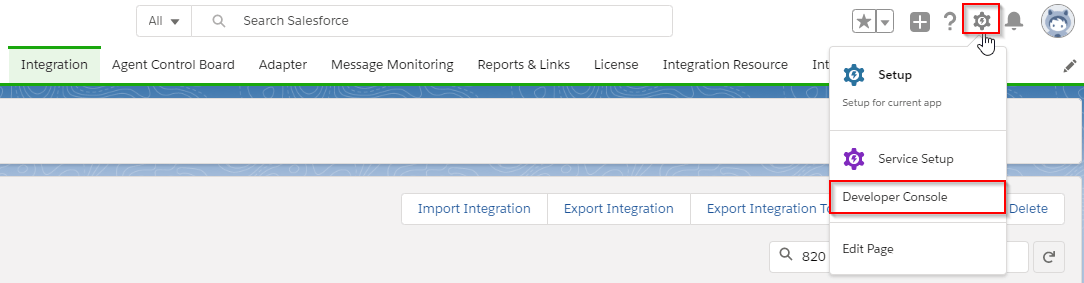
Now. Run the apex code from Developer Console.
Open Console by going to set at the top corner and the Developer Console.
New Window will appear and press ctrl+E to open Apex editor.
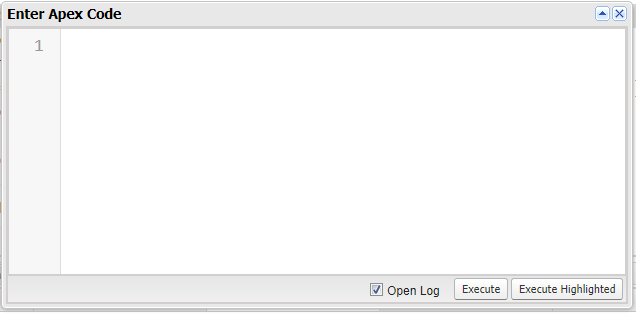
Sample Apex Code.
skyvvasolutions.CallOutControl c=new skyvvasolutions.CallOutControl();
c.returnXml=true;
c.returnListRecord=true;
c.isCreateMessage=true;
c.actionDoIntegrate=false;
String[] id1=new String[]{‘Data Record-Id’};
skyvvasolutions.CallOutResponse r=skyvvasolutions.Iservices.invokeCallout2(‘Integration Name’,’Interface Name’,id1,’SYNC’, c);
Data Record Id : Each database table in salesforce have Id field, which is unique identification of particular records.
And then Execute, Data will be saved in save.
6. Testing and Monitoring message #
To check the created Idoc in SAP goto T-code we05.
And execute.

Here in this screen, you can find all the generated Idoc (outbound or inbound).
To open double click on Idoc number.

A new screen with Idoc detail will appear.
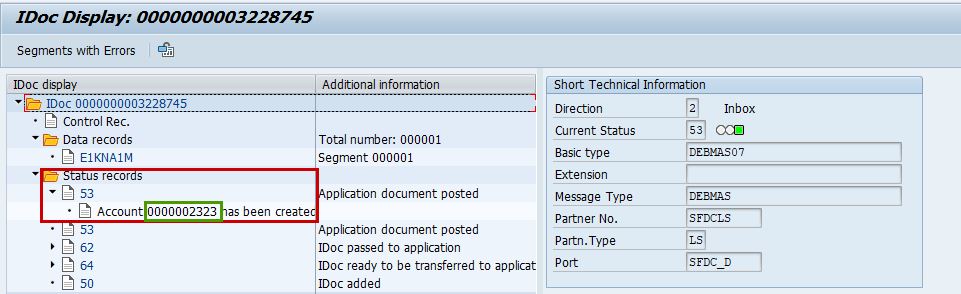
Now, in T-code XD03, where we can check the customer.


