In this tutorial, you will learn how to do Manual Process to export a JSON file via an AWS S3 adapter.
Pre-requisite
- Create Integration and outbound interface with operation query
- Create a message type
- Link a message type for the inbound interface
- Mapping
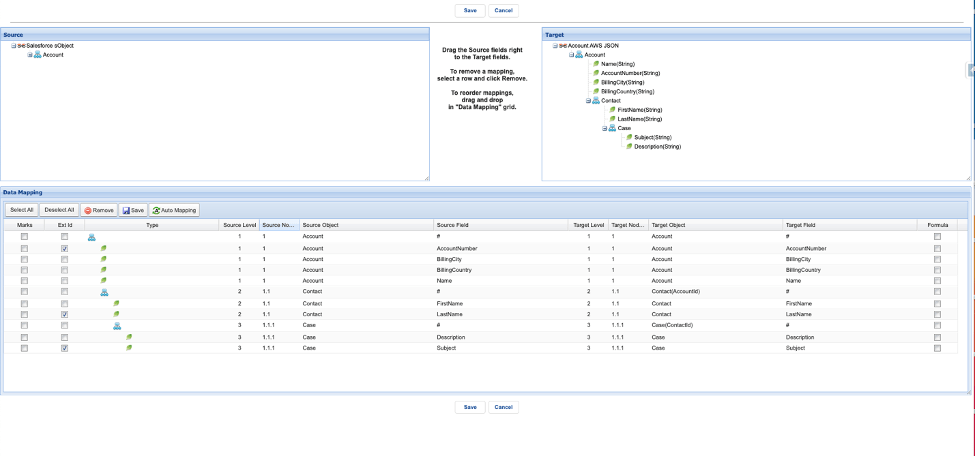
- Click save mapping
- Enter to integration detail page
- Click the link Amazon Control Board on the Custom Link section
- You will arrive at the Amazon Control Board
- Click Adapter tab
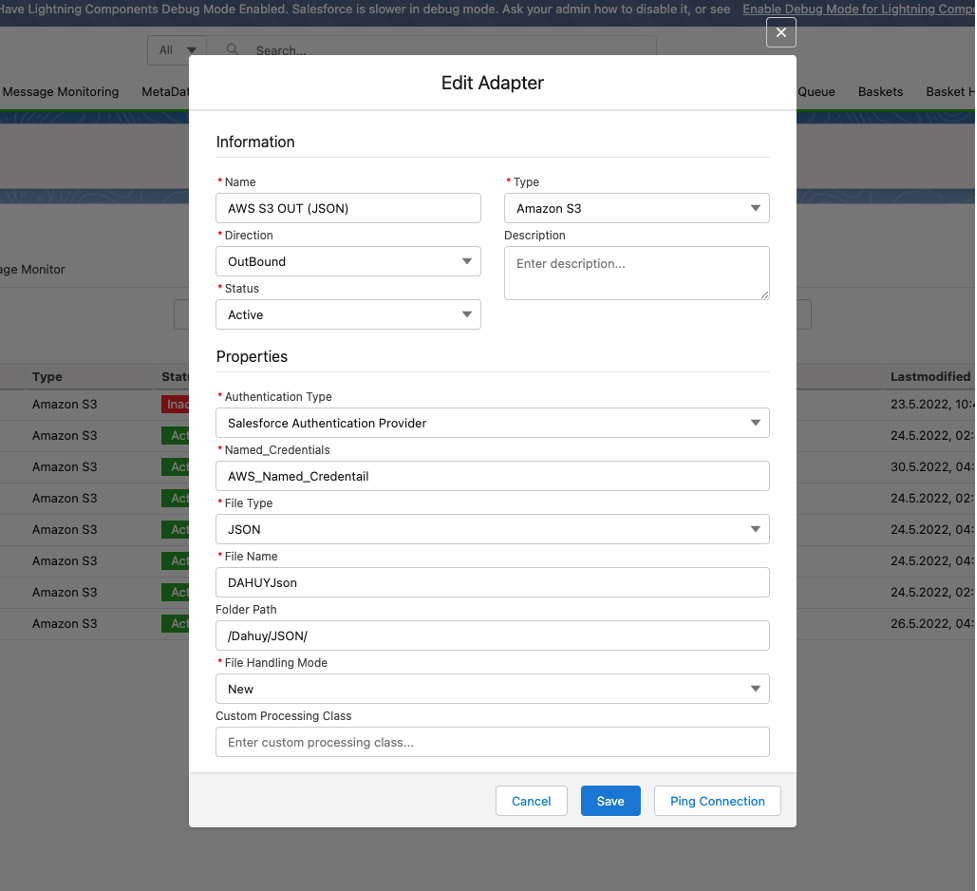
- Click the New button to create the adapter
- Fill Name adapter
- Choose Amazon S3 on Type
- Choose Outbound as the direction
- Choose Status
- Choose Salesforce Type as a Salesforce Authentication Provider
- Fill Named_Credentials (Note: Please follow the link to create the Named_Credentials https://docs.skyvva-dev.com/docs/2-named-credentials-to-access-the-aws-s3/)
- Select JSON on File Type
- Fill Folder Path
- Fill File Name
- Choose File Handling Mode (It means that you want to create a new file on AWS s3 or you want to override the existing file)
-
- Click Save Button
- Link this adapter to the interface
- Click the interface Tab on Amazon Control Board
- Select an interface
- Click the Manual Process Button
- It will display the Manual Execute Option pop-up screen
- Check Use the SOQL statement on the interface to select the sObject? (if you wish to select sObject based SOQL statement on the interface setting)
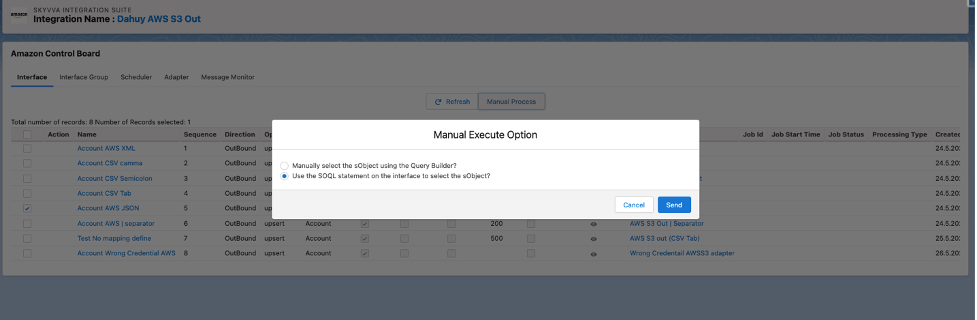
- Click Read button
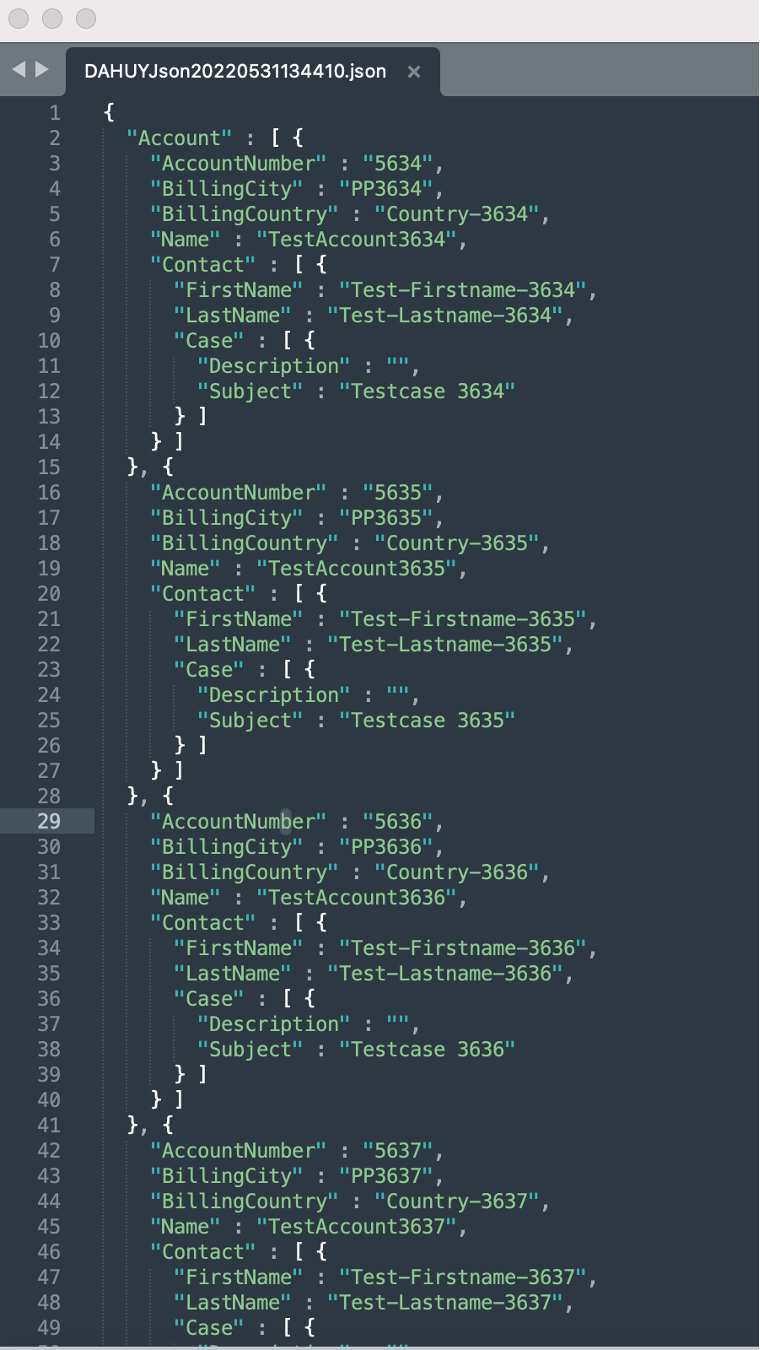
It creates the completed message as screenshot below
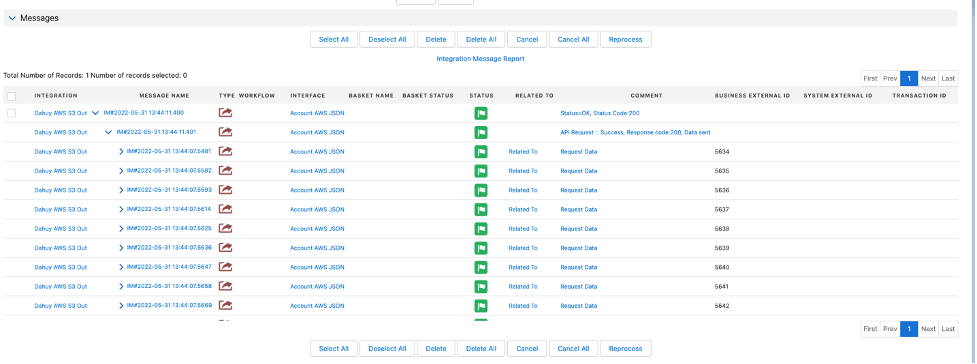
The records are saved into an XML file and it will export to the AWS S3 service on the/Dahuy/XML/ path folder. The file name will be File Name value + Date + Time + .xml
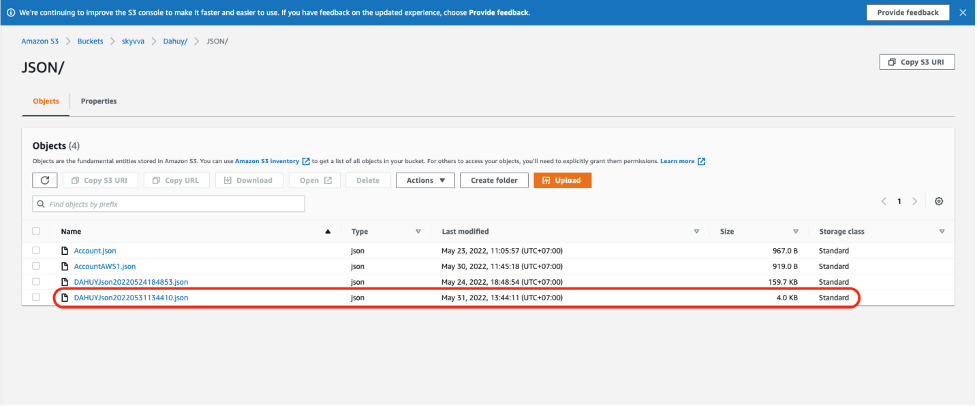
Here are the records that have been exported