What is “What to do with the failed message”? #
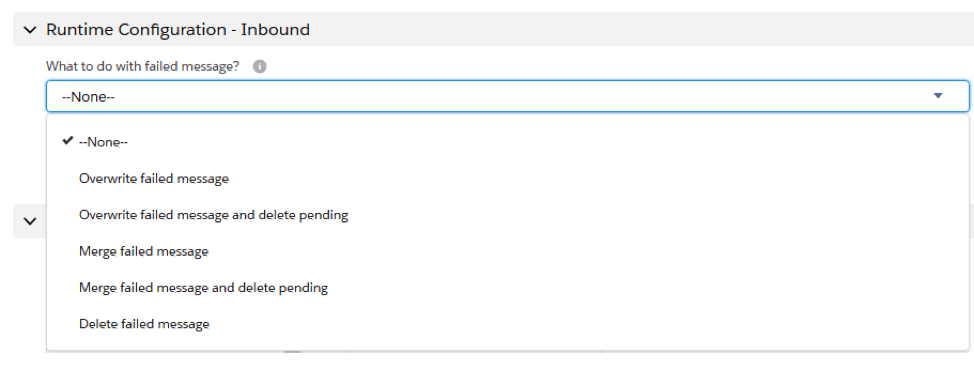
“What to do with failed message” is a picklist field in Runtime configuration- Inbound section which gives an option to do with the fail message. Previously there are four picklist values provide as an option. However, to enhance this feature we have added two more picklist value to this field.
There is six picklists value available for this field now:
| Picklist value type | Description |
| 1. None: | If set this field to -None- new red message will be created. |
| 2. Overwrite failed message: Existing | If set this field to “Overwrite failed message” the existing red message will be overwritten and post again. |
| 3. Merge failed message: | If set this field to “Merge failed message” it will merge the old and new payload and before it processes again. |
| 4. Delete failed message: | If set this field to “Delete failed message” all failed messages will be deleted. However, you must check the field “Don’t persist message” along to be able to delete all failed messages. |
| 5. Overwrite failed message and delete pending: | If set this field to “Overwrite fail message and delete pending” the existing red message will be overwritten and post again but the pending message will be deleted. |
| 6. Merge failed message and delete pending: | If set this field to “Merge failed message and delete pending” it will merge the old and new payload before it processes again then the pending message will be deleted. |
For “Merge failed message” old and new payload must have the same external ID.
How do these two new options works? #
- Overwrite failed message and delete pending- The old failed and pending message with the same external value will be deleted when you post another new message which has the same external value of the old failed message. The new one is in the monitoring.
- Merge failed message and delete pending- The old failed and pending message with the same external value will be merged and save into a new posting message and then those old messages (failed and pending) will be deleted and the new one is in the monitoring.
Before setup the picklist value #
Before you begin to set up the picklist value, create integration, and interface. Then do the mapping on the interface.
Setup or configure the picklist value #
To activate these fields you need to configure the steps below:
- Open interface page detail which you have created.
- Scroll down the page to Runtime Configuration – Inbound to find the picklists value field you want to configure.
- Click the field to drop the picklist value.
- Choose the option you want to activate.
Adding the picklist value #
As mention above in the warning, the picklist value has to add manually when you try to upgrade the SKYVVA App. In general, each type of picklist requires to set up in Fields & Relationships of the interface. It’s a custom field.
- You can click “Setup” on the top of the interface page.
- In the “Quick Find” box type the word “Object Manager”.
- Click on Object Manager then scroll down the page to find the “Interface” object, click it.
- On the left side of the page, you will the panel select “Field & Relationship” field.
- You can search the “What to do with the failed message” field in the “Quick Find” box or scroll down the page to find it.
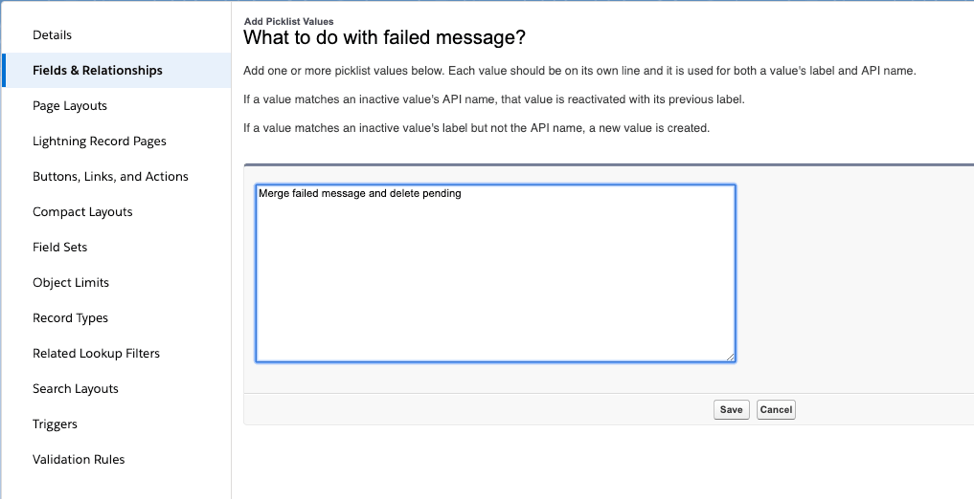
- Select the field and scroll the page down to find the value section. You will find some values are already there, so to add the new picklist just click the “New” button.

- You will land on the “Add Picklist Values” page, just write the value in the text box area and the label name must be the same as API Name. You can add one or more picklist values here.