
Learning Objective:
After completing this unit, you’ll be able to:
- Describe What is apex trigger and platform event.
- Comfortably use the apex trigger to consume the platform event?
Introduction #
To subscribe platform event we can use the apex trigger. We use generic method to execute the interface either it is an inbound or outbound interface. Execution of interface using apex trigger is is a Salesforce solution. But with Skyvva we can enrich the event data with mapping and process the data after we have mapped the event/message. Here It is the same way as we process an incoming message through the skyvva processing pipeline e.g. workflow, mapping, processing.
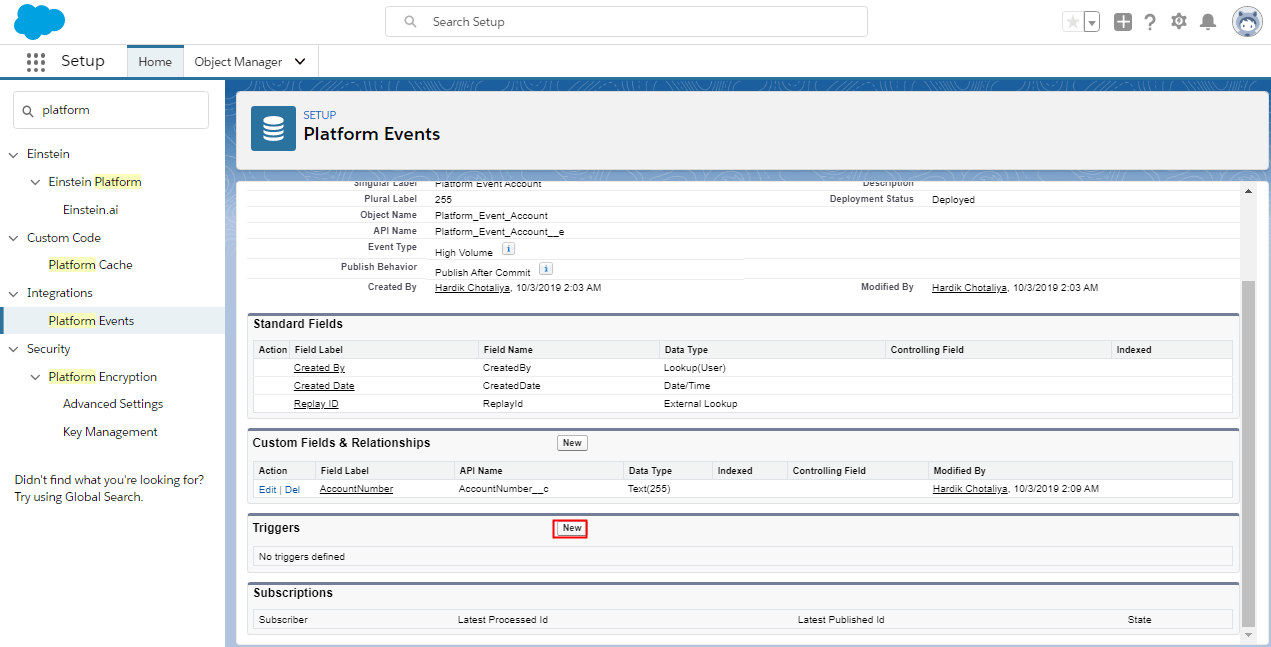
Platform event #
Platform events enable developers to deliver secure, scalable, and customizable event notifications within the Salesforce platform or from external sources. Platform events are based on a publish-subscribe architecture.
How Platform event work with inbound processing? #
- we create a platform event with our inbound interface with the new version.
- We used API to execute inbound interface. With this API we can execute an inbound or outbound interface in a synchronous or asynchronous way. We have to provide this API in two versions e.g. REST API and internal apex method. The REST API is used by external REST client and the internal API is used by apex class, Flow or Process. With this API or method, we should be able to execute both inbound and outbound interface unlike our existing method ‘invokeCalloutX()’ where we can use only wit outbound interface.
How to create the platform event SKYVVA feature? #
We can create a platform event without programming with SKYVVA feature. Creating an event can be done using the inbound or outbound interface. With the inbound interface, we get data from the outside and with this data, we can create an event either into the Salesforce bus.
Follow the given steps to create platform event with SKYVVA:
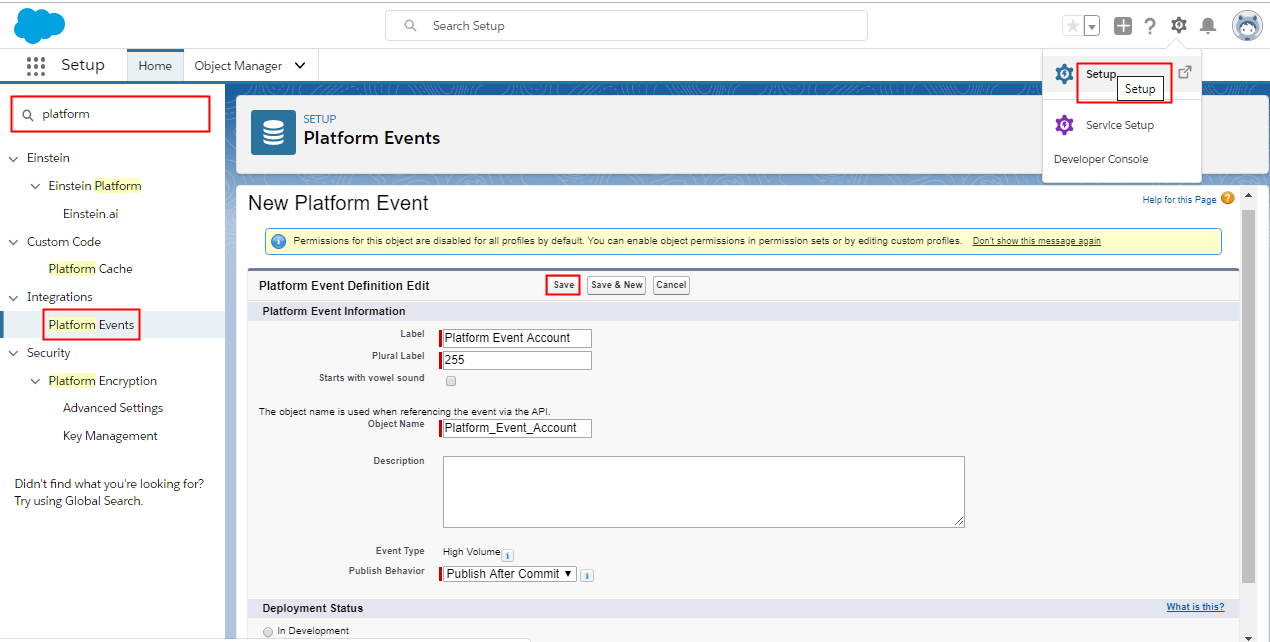
Step1: Create platform Event:
- Go to Set Up.
- Search for Platform Event in quick find box.
- Click on new button.
- Fill the required fields.
- And click on the Save button.
Step2: Create custom Fields
- Go to Custom fields and Relationship section.
- Click on new button.
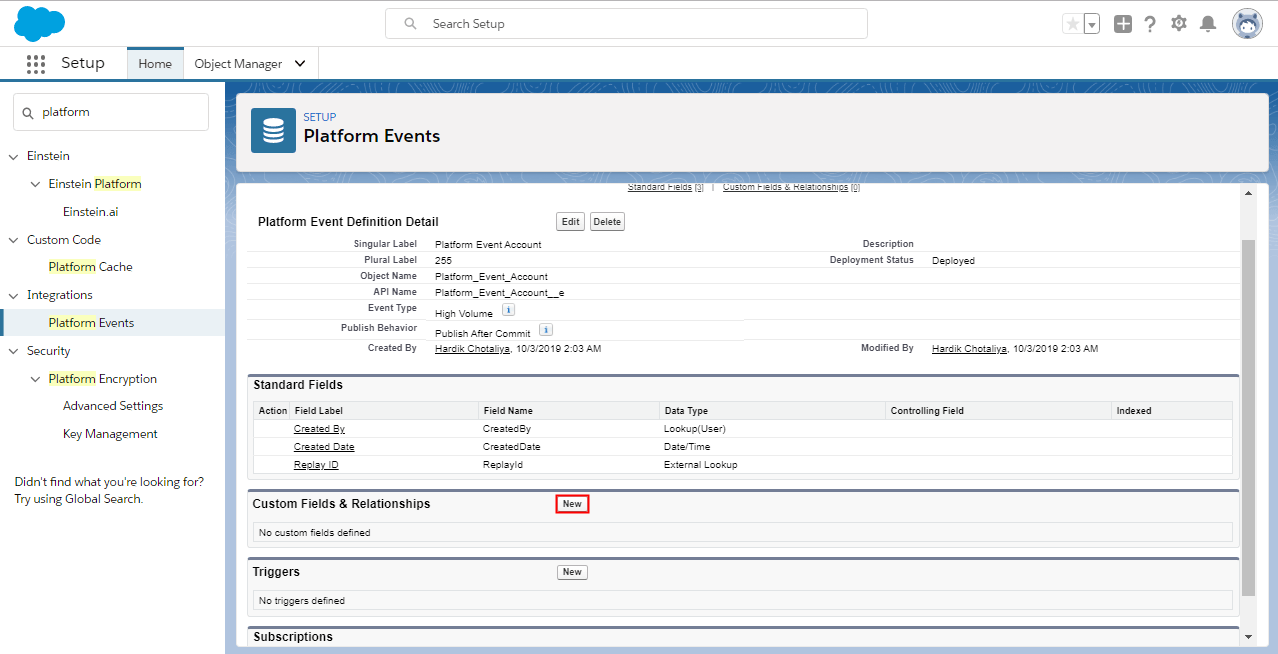
- New button navigate to:
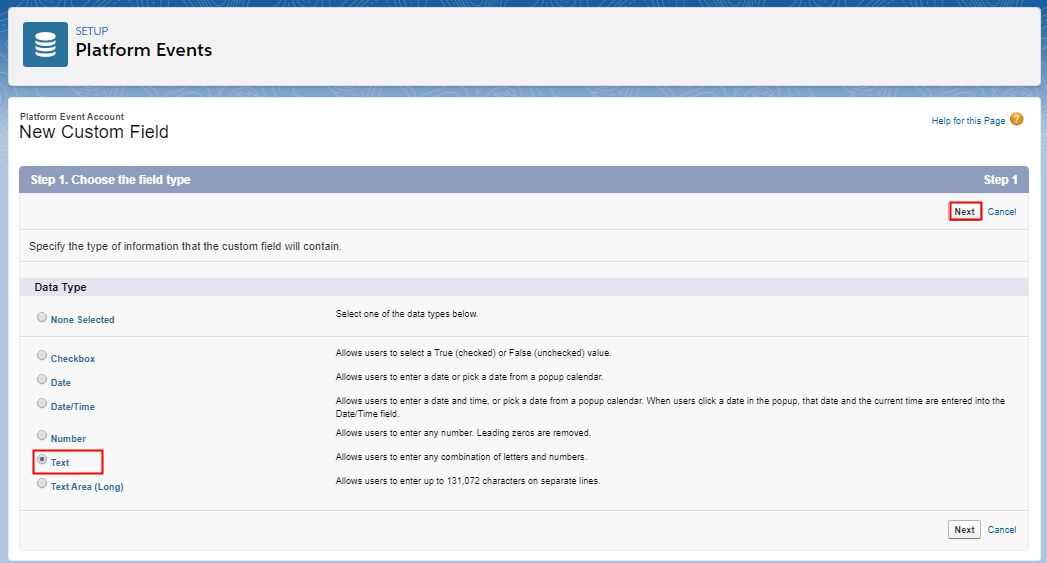
- Click on next button.
- Create two custom fields. AccountNumber and Name.
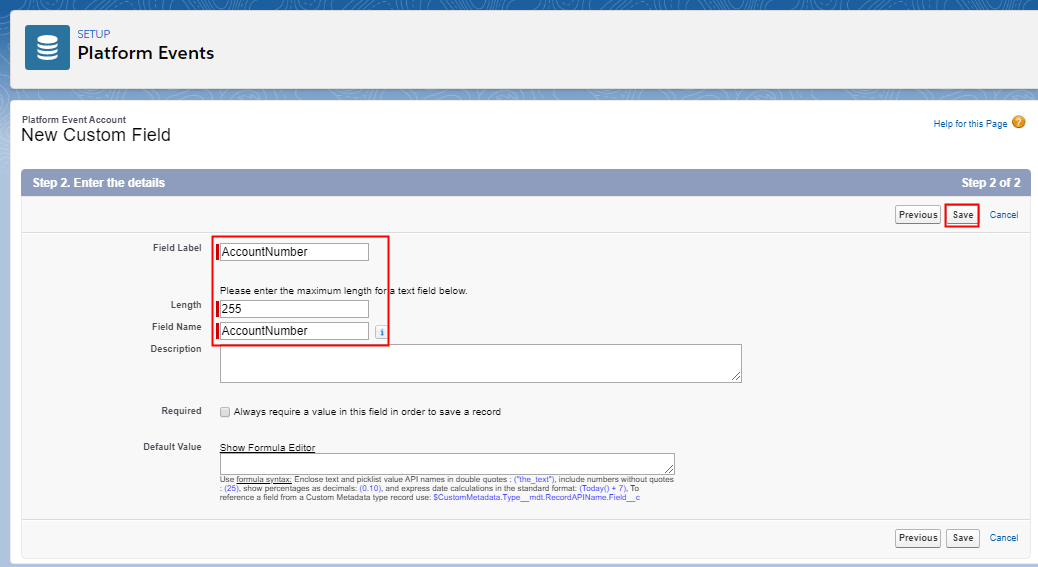
Repeat same process to create Name field.
Step3: Create Integration
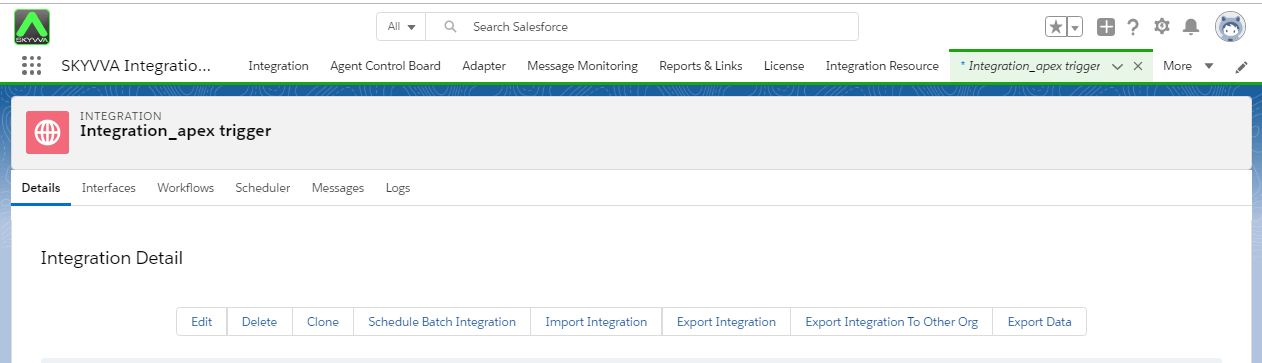
Step4: Create interface.
We can execute inbound interface with our new API i,e Event Interface.
- source/target name: select Platform Event name. here platform event name is Platform_Event_Account_e.
- Operation Type: It should be Public salesforce Event.
- Interface Type: Event Interface

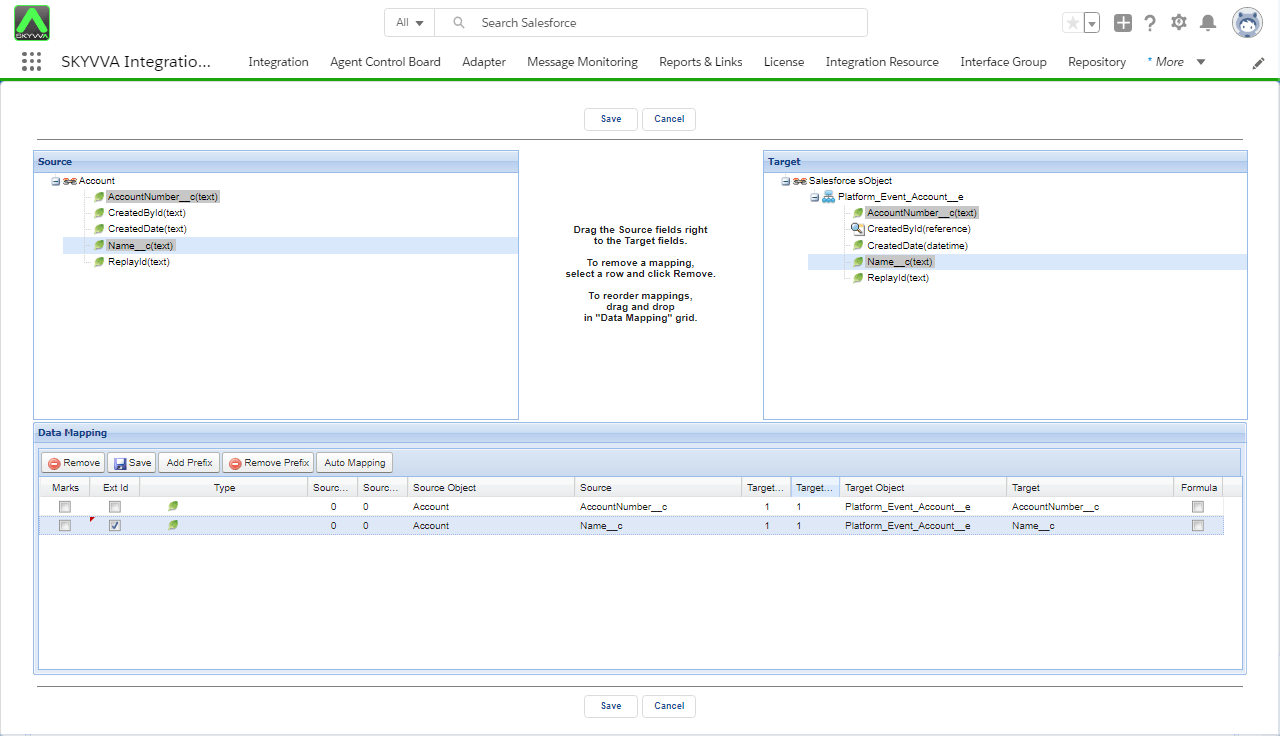
Step5: Do mapping
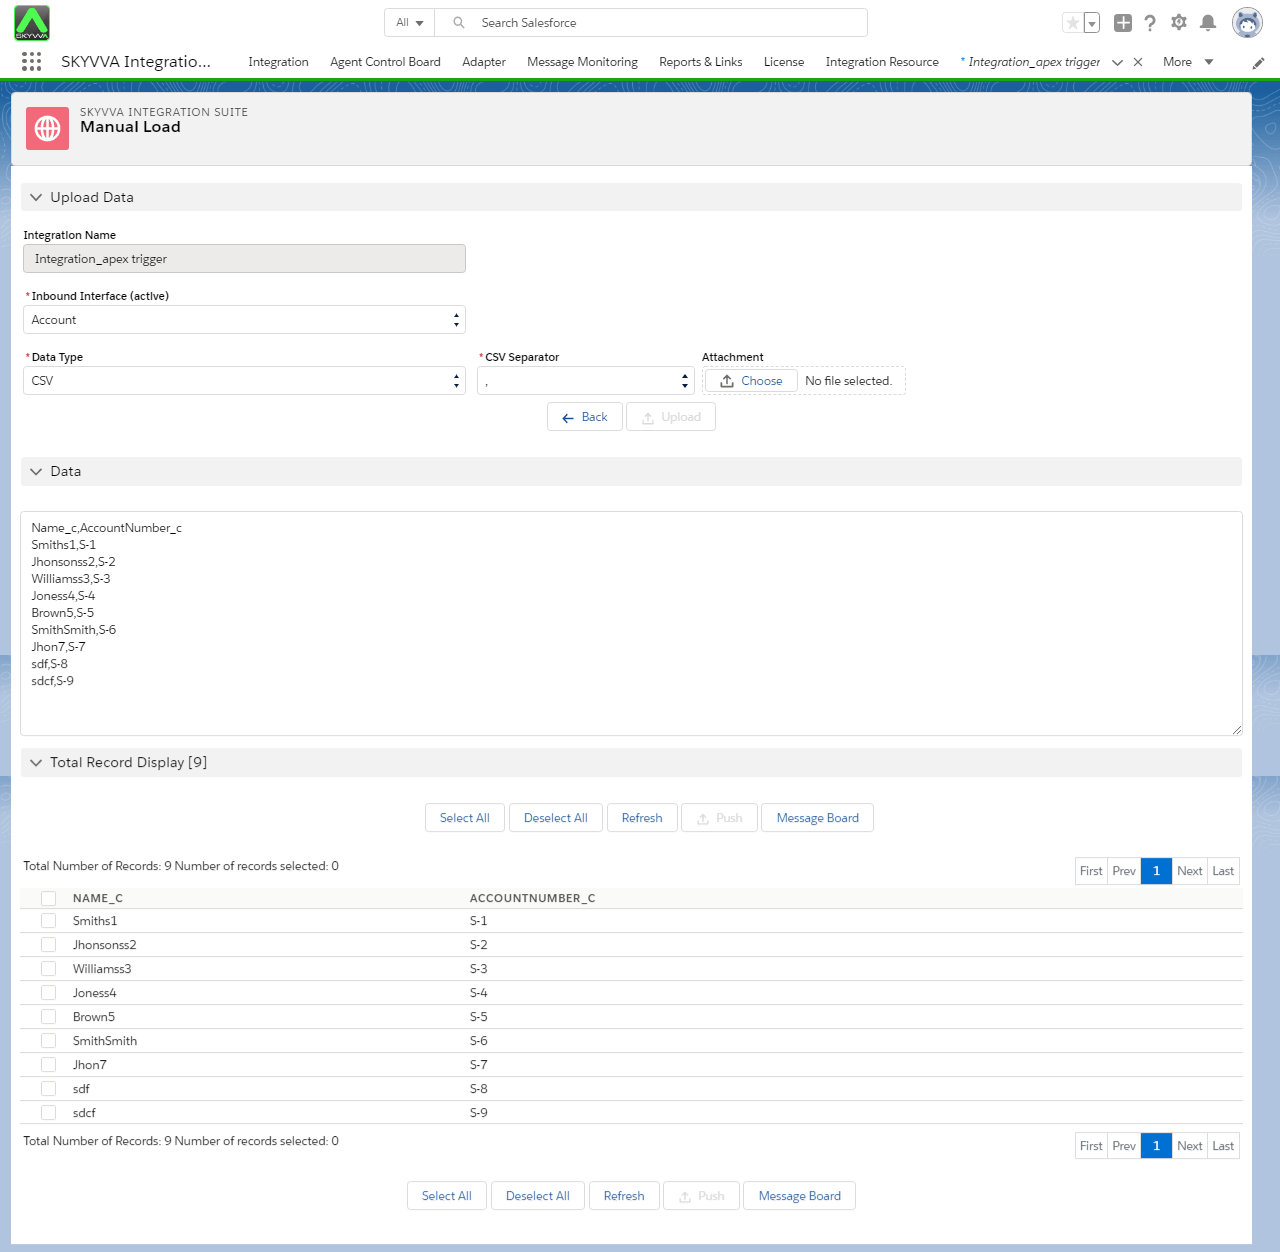
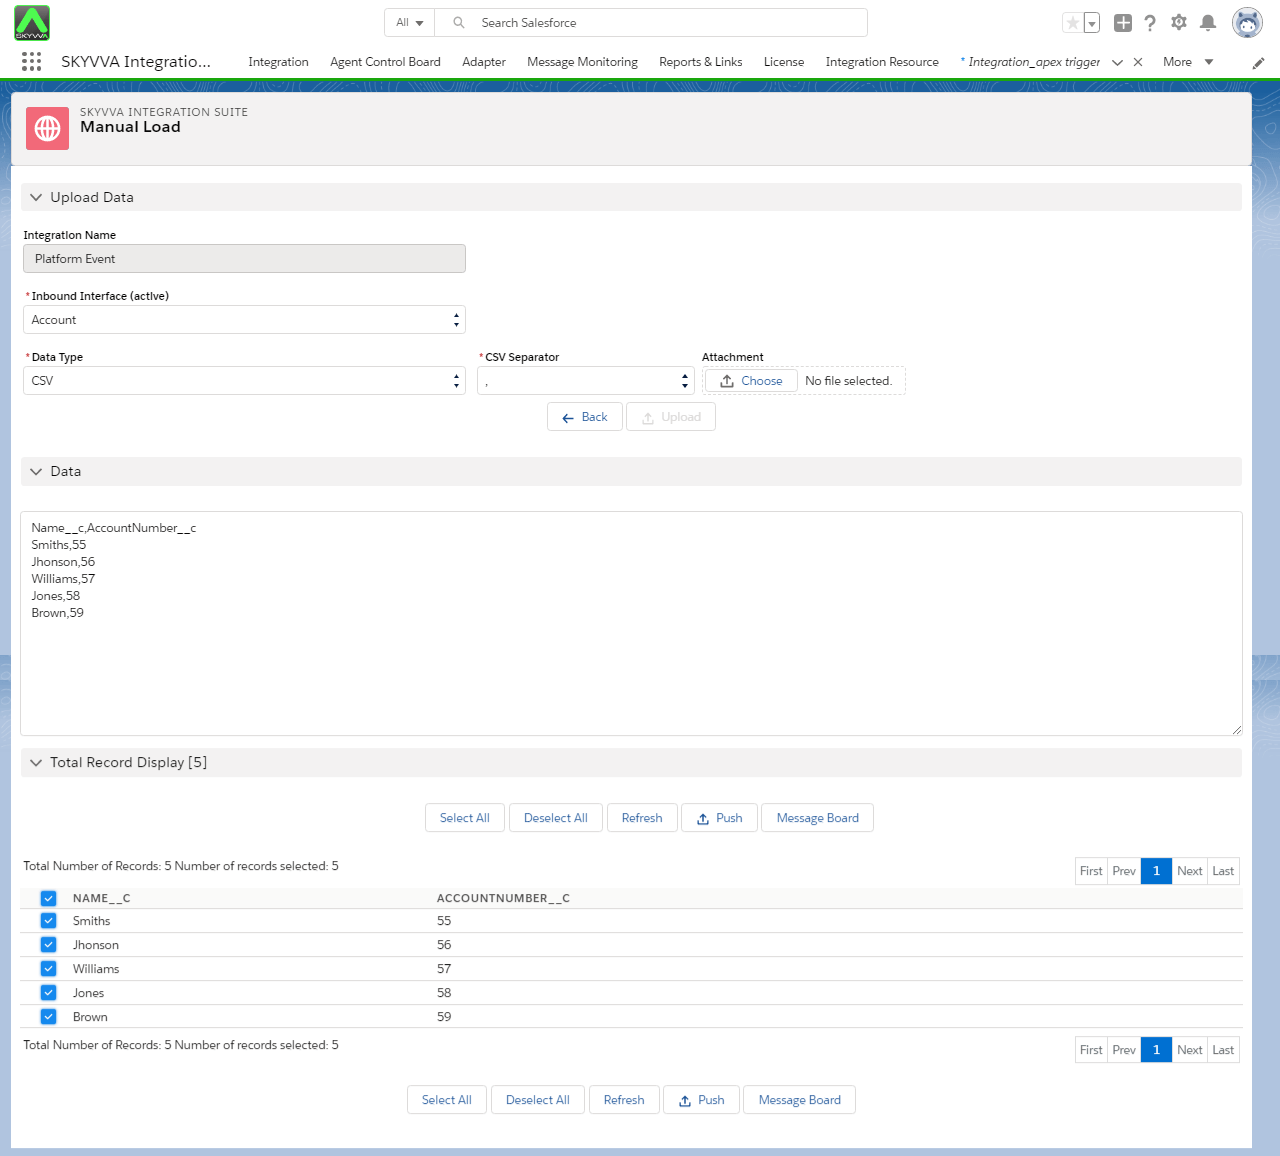
Step6: Upload data manually.
- Go to Integration detail page.
- Upload CSV file.
- Push data to message board.
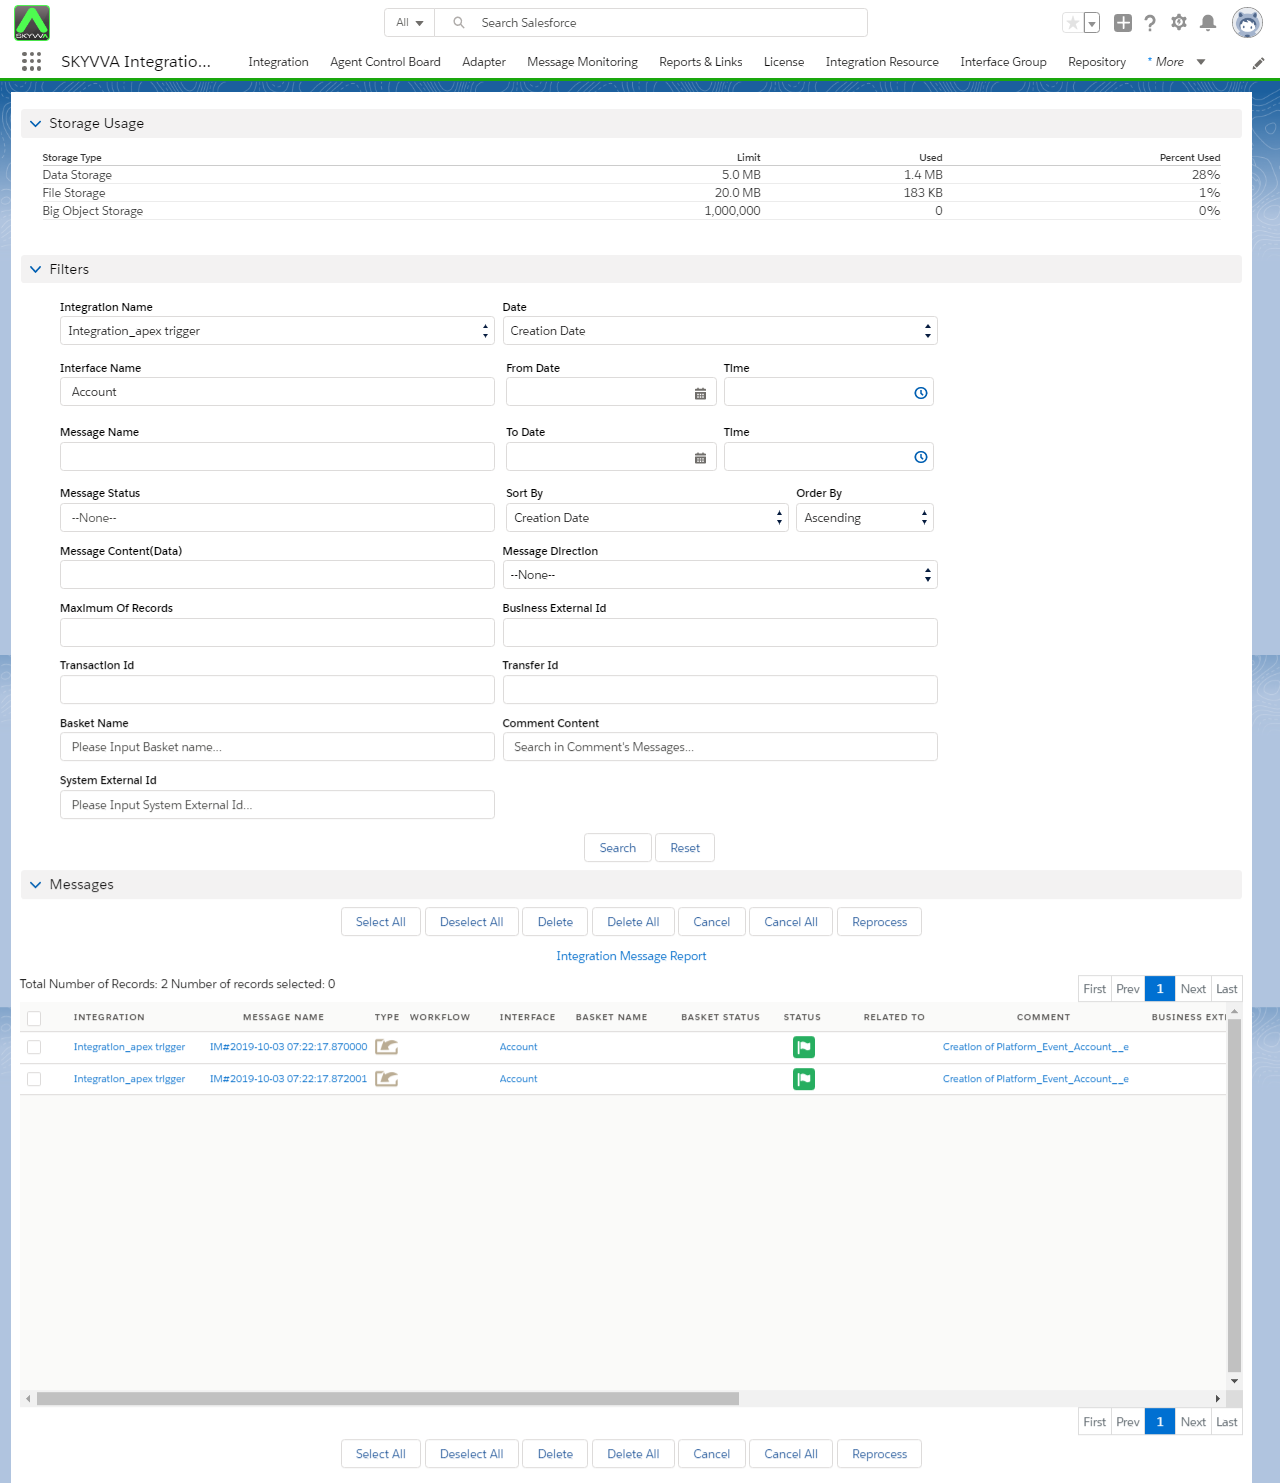
Step7: Search result on message Monitoring:
- Go to Message Board
- Select Interface and search
How to consume the platform event created through Skyvva? #
We can to consume the event by using :
- apex trigger
- process builder process
- Salesforce flow
- External Client using CometD protocol
External Client using CometD protocol #
User can write themselves a cometD. They can use any supported programming language from Salesforce.
Apex Trigger: #
A trigger is an Apex script that executes before or after specific data manipulation language (DML) events occur, such as before object records are inserted into the database, or after records have been deleted. Triggers enable to perform custom actions before or after changes to Salesforce records.
How to create Trigger:
- Go to created platform event
- Go to trigger section
- Click on New button.
Use the given Code to apex trigger:
[aux_code language=”javascript” theme=”tomorrow” title=”” extra_classes=””]
trigger trgPlatformAccountEvent on Platform_Event_Account__e (after insert) {
List<Account> lst = new List<Account>();
for(Platform_Event_Account__e evt: Trigger.New) {
Account acc = new Account();
acc.Name = evt.Name__c + ‘evt’ ;
acc.AccountNumber = evt.AccountNumber__c + ‘evt’ ;
lst.add(acc);
}
insert lst;
}[/aux_code]
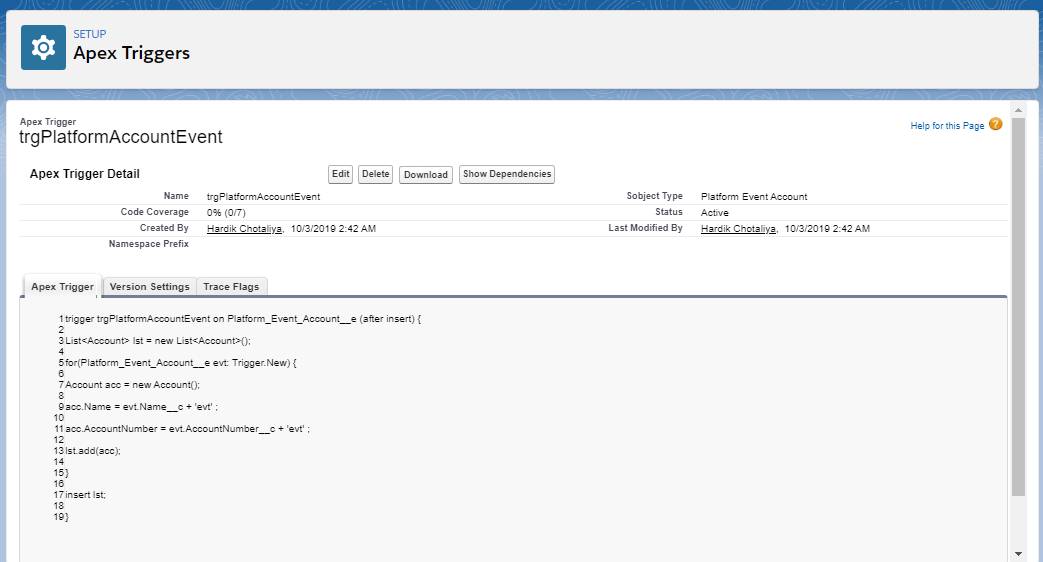
Make sure Apex Identifier should be correct. For example ‘evt’. if you copy code from browser then it will take char in HTML .
when the apex trigger is used to consume the platform event we can check created record and its data. All the custom fields which we added in platform event are shows with ‘evt’. For example AccountNumber+evt, name+evt.
Follow the steps to show How to use the apex trigger to consume the platform event?
Step1: Go to created integration-> Open your Interface -> go to manual Load -> Uplaod data
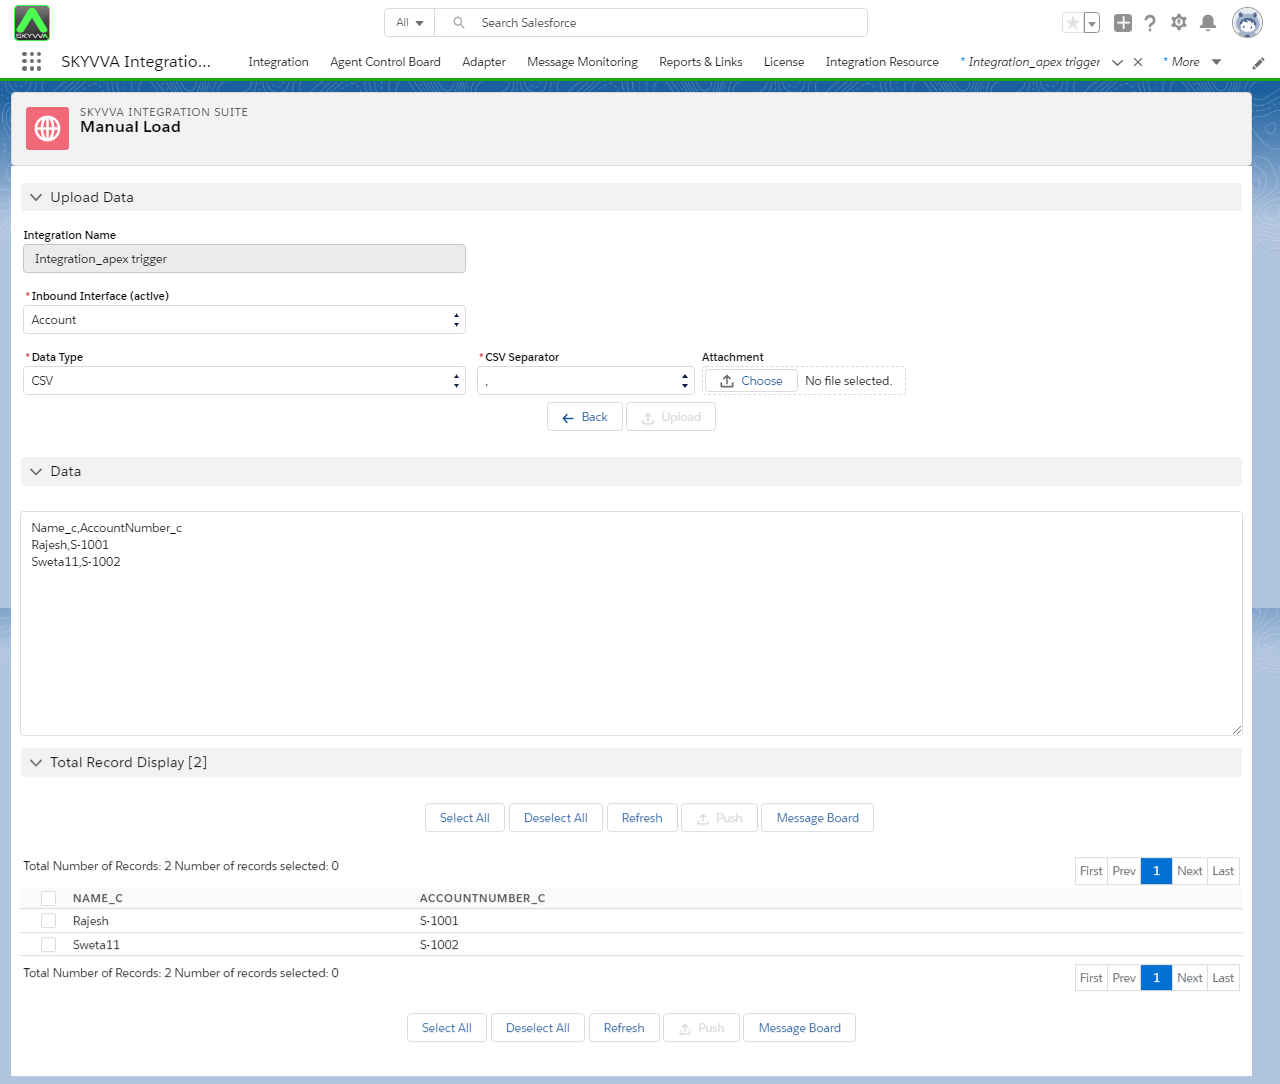
Go to message board -> Search for result;

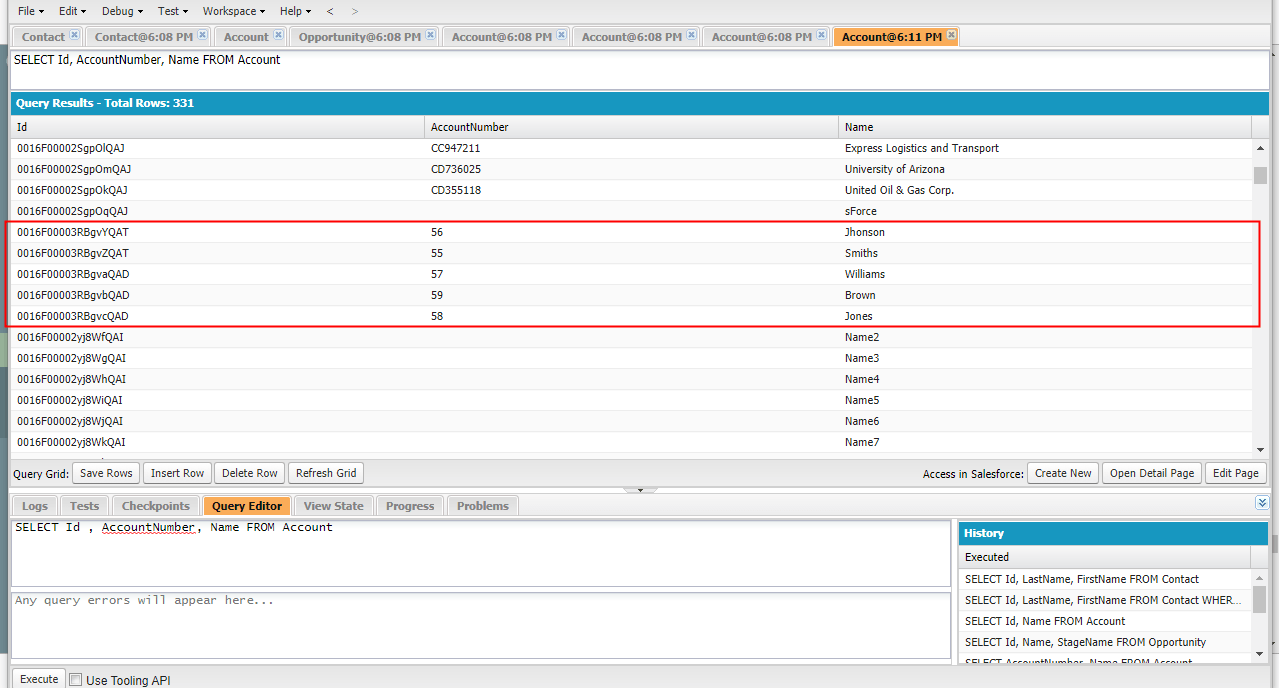
step 3: Search created record in developer console:
- Go to set up
- Open developer Console
- Apply query on Account Object
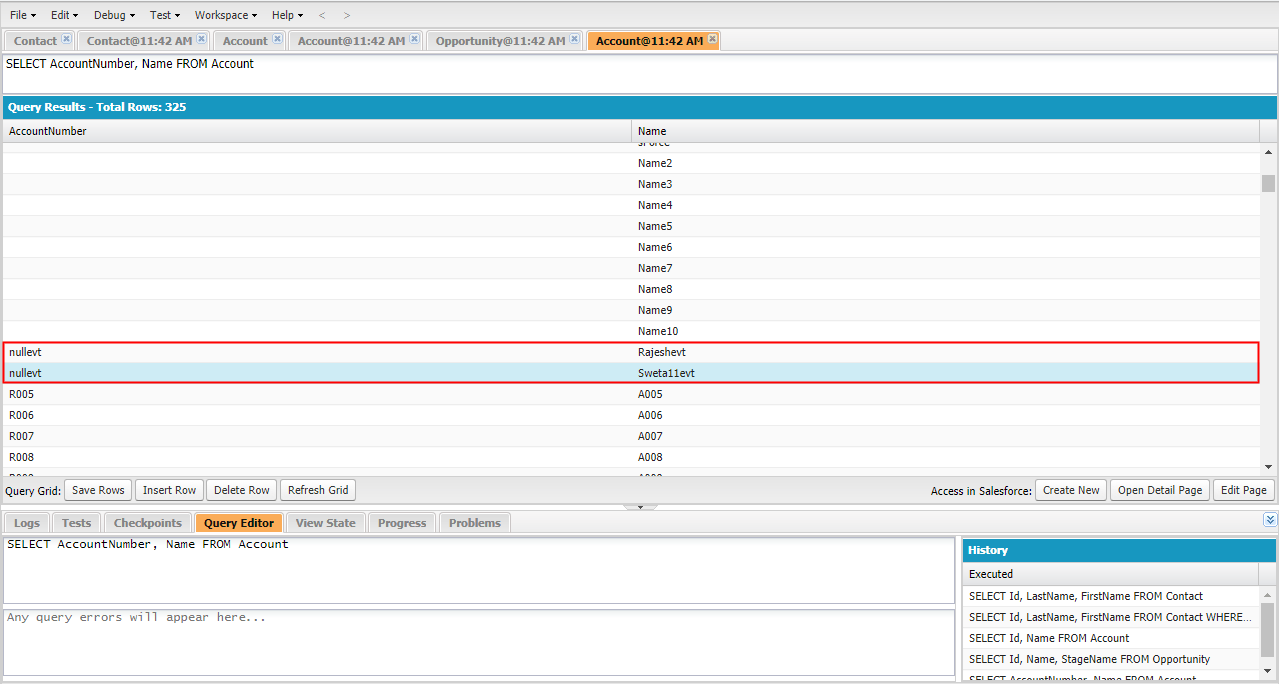
You can see the data with evt.
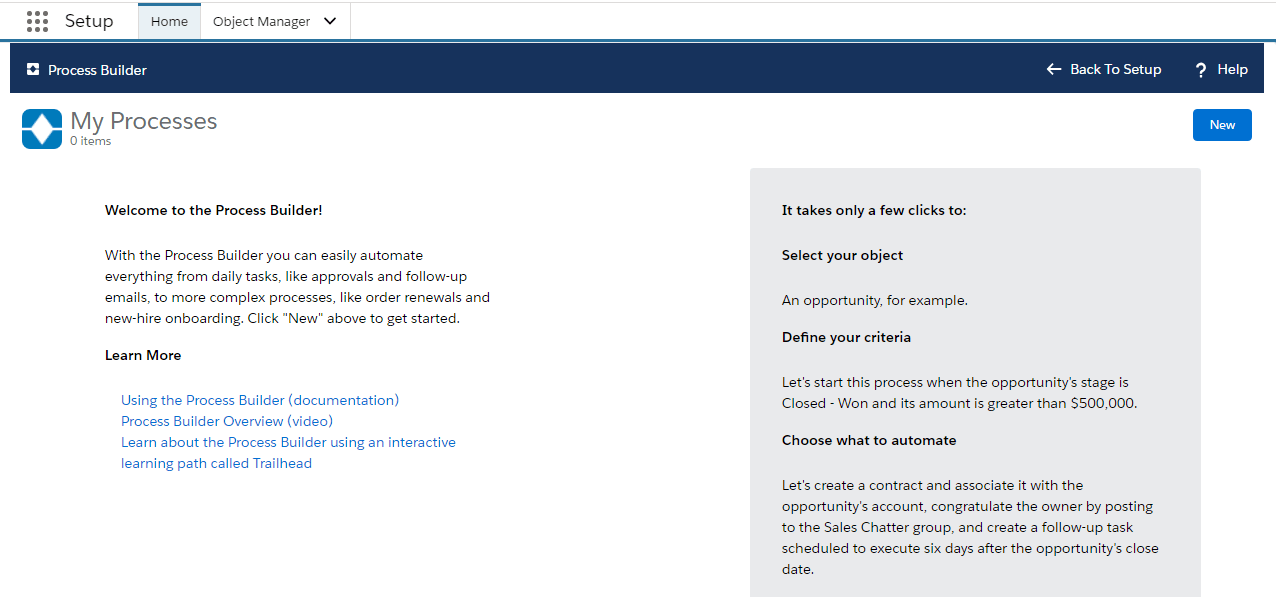
Process builder: #
Process Builder is a Salesforce’s point-and-click tool that lets you easily automate if/then business processes and see a graphical representation of your process as you build. Every process consists of a trigger, at least one criteria node, and at least one action. You can configure immediate actions or schedule actions to be executed at a specific time.
Here we are using process builder to consume platform event.
Follow the given steps to show how process builder to consume platform event.
Here we are using same Integration and interface. we have to deactivate apex trigger.
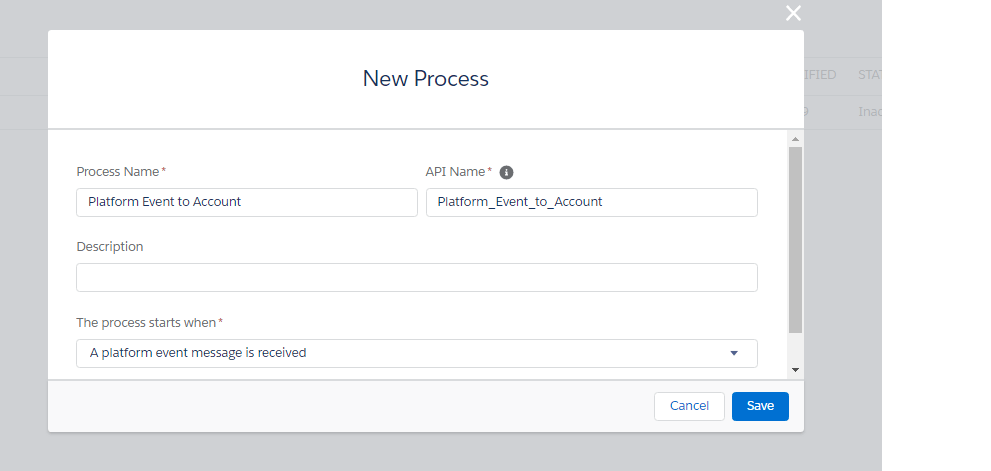
Step 1: Create process using process builder.
- Go to set up.
- search for Process Builder in quick search box.
- Go to process Builder.
- Click On new button.
- Enter process name which can recognise your process.
- Select Process status as : A platform Event message is received.
- Click on save button.
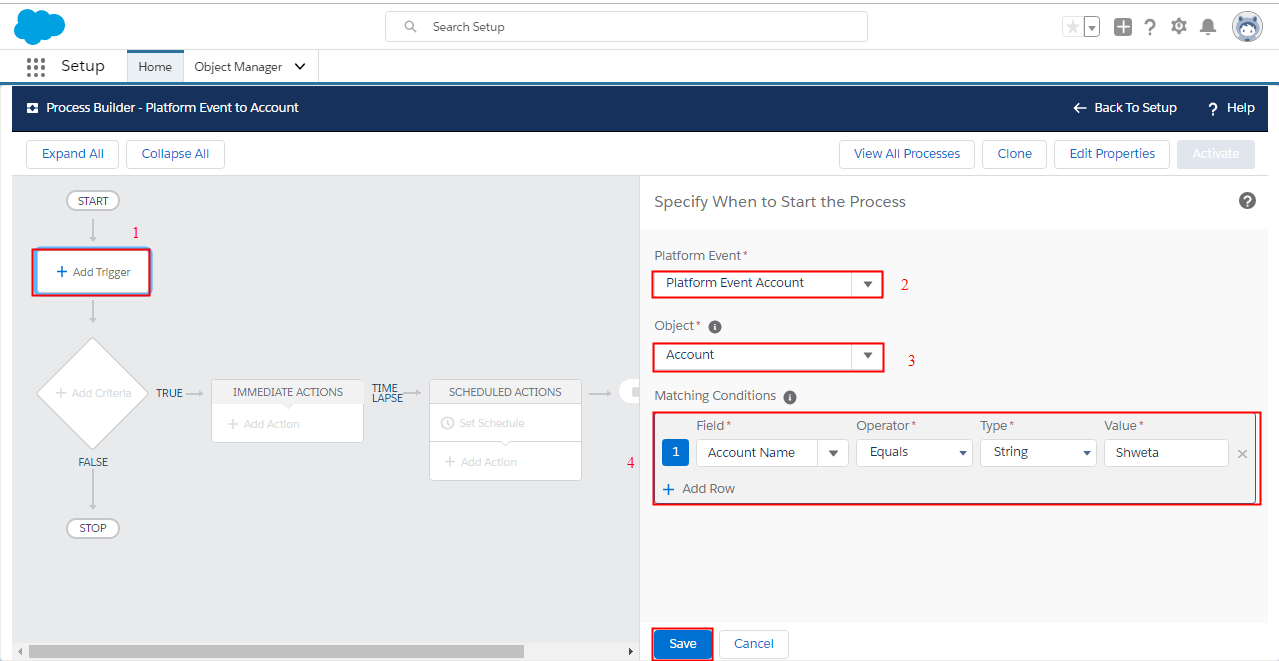
- Add the Object and Specify when to start the Process.
1. Select Platform Event
2. Choose object as Account
3. Add Matching condition where I put this condition on Account name field.;-
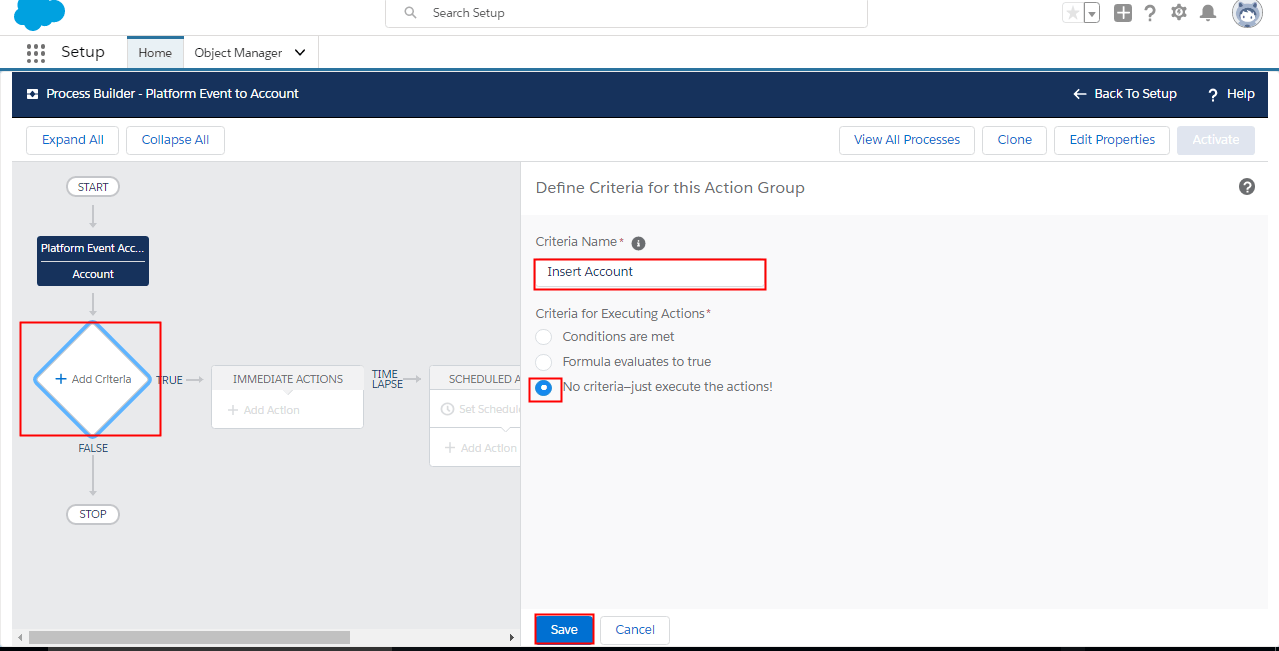
- Add the Criteria to define it for Action Group:
1. Name the Criteria
2. Choose No Criteria option
3. click on Save button .
- Add the actions to execute when the criteria are met by:
1. Select the Action Type: Create Record
2. Give the Action Name: Account Creation
3. Select Record type: Account - Set Field Values as per data and platform event reference
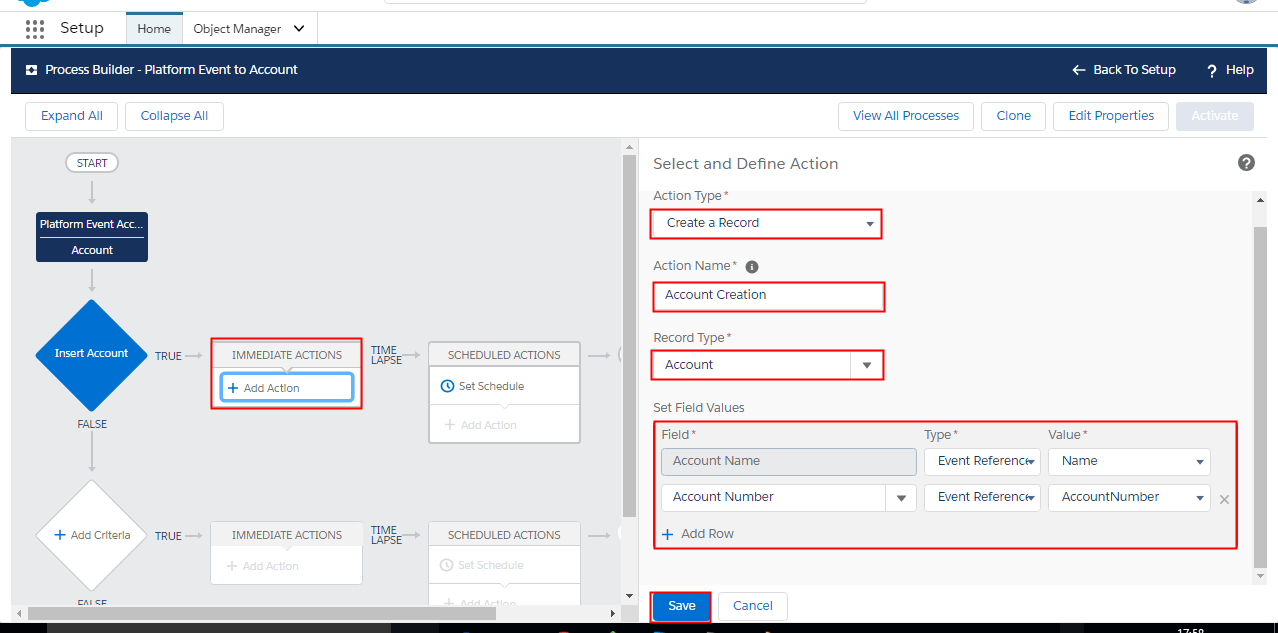
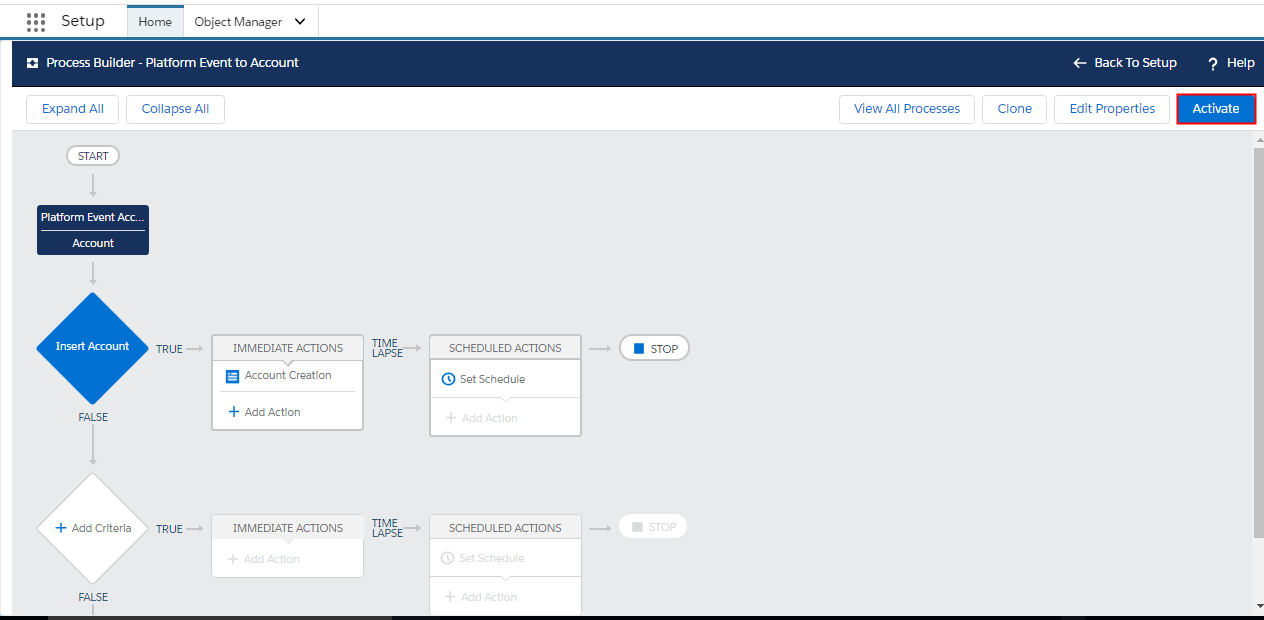
To be able to execute process builder, just click on Activate button.
step2: manually Load data
- Go to Integration -> details.
- click on Manual Load.
- Upload data Manually.
- select uploaded record records and push to message board.
Step 3: Monitor the result on message board

As this record are created by process builder consuming platform event we can’t see details of created record. we can’t get Related to” link here. we can check data in dev console.
Step 4: Search created record in developer console:
- Go to set up
- Open developer Console
- Apply query on Account Object
Note: The process runs asynchronously under the Automated Process entity. As a result, there can be a delay between when an event message is published and when the process evaluates the event message


